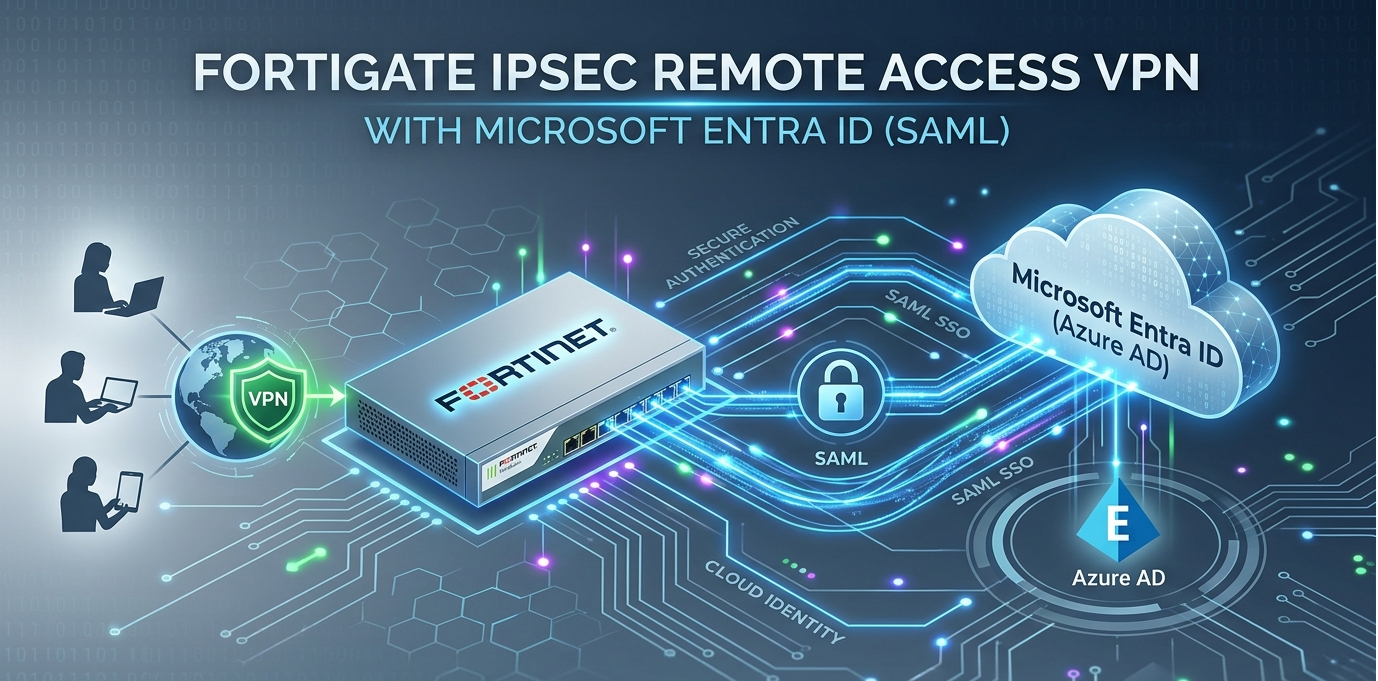
Microsoft Entra is a comprehensive product family from Microsoft that centralizes identity and network access management under a single Zero Trust security framework. Launched in 2022 and famously including the rebranded Azure Active Directory (now Microsoft Entra ID), it serves as the foundational “trust fabric” for modern organizations.
The suite is designed to verify every identity—human or machine—and secure their access to any resource, whether on-premises, in the cloud, or across hybrid environments. Key products within the family include:
Microsoft Entra ID: The core cloud-based identity service for authentication and single sign-on (SSO).
Identity Governance: Automates the identity lifecycle to ensure the right people have the right access at the right time.
Permissions Management: A CIEM solution that provides visibility and control over “over-privileged” identities across multi-cloud infrastructures like AWS and Google Cloud.
Verified ID: A decentralized identity service based on open standards for secure, private credential sharing.
By integrating identity with network security (such as Internet Access and Private Access), Entra eliminates the need for traditional VPNs and legacy security silos. It empowers IT teams to protect against sophisticated credential-based attacks while providing a seamless, passwordless login experience for users.
REQUIRED
One of the first steps here is, not mandatory, but highly recommended, is to create an A record for your FortiGate (e.g. remote.yourdomain.com), additionally, you should get a trusted certificate; I use ssls.com as they are reasonably priced. I normally do a wildcard certificate which does not require a CSR generated off of the FortiGate, as it is done on the portal when purchasing the cert. This is the certificate that is presented to the user when they get prompted for their credentials. You DO NOT want them getting used to accepting untrusted certificates. We should also create a VPN users or another security group we will use to assign access to the Enterprise App.
Another point to remember, as of the writing of this article IKEv1 has been deprecated in all versions of FortiClient; free (VPN only) and FortiClient EMS versions as well.
Lets get started.
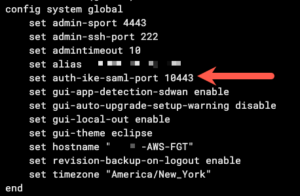
You want to choose a port on which your FortiGate will handle SAML authentication. Do not use an existing port like 443 unless you have changed the other references of that port to something else.
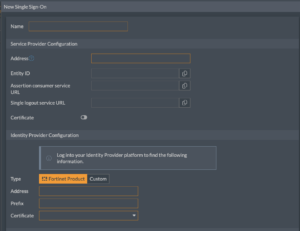
Heading over to the GUI on the FortiGate and choosing User & Authentication then Single Sign-On then Create New you will be asked to give the SSO a name. Give it a name and the address field, enter the A-Record name from the requirements (e.g. remote.yourdomain.com ) do not forget to add the :10443 or whatever port you chose at the end. DO NOT ADD THE https to the beginning of it. See below:
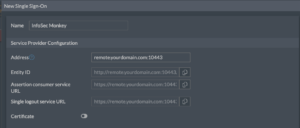
You will notice that as you are typing the name and port number, the FortiGate is auto-populating the Entity ID, Assertion consumer service URL etc. These are essential fields for the SAML configuration. You can hit OK and save that for now.
Lets move over to Microsoft Entra. Once you login, you will need to search or choose Enterprise app. It will not show up on the left side panel if you have not created one yet.
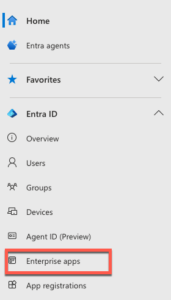
There are some templates already in Entra for the FortiGate. In the search bar, type FortiGate and Choose (at the time of this writing as I assume it will be removed since SSL VPN has been depreciated as well) FortiGate SSL VPN
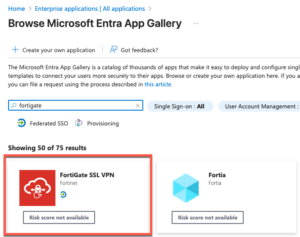
Name this Enterprise App and choose Create on the bottom left.
Once you have created the app, choose the Single sign-on under the manage of the app itself.
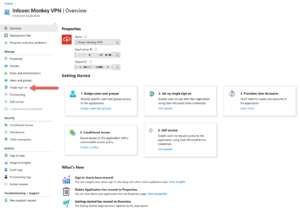
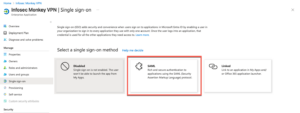
Choose SAML In the center of the page
Under Basic SAML Configuration you will click the Edit with the pencil.
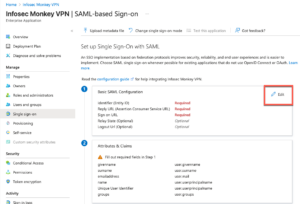
Once you do this, you will have a pop-up window on the right side of your screen. Open another tab if you don’t still have it open to the FortiGate and go to the Single sign-on portion on the FortiGate.
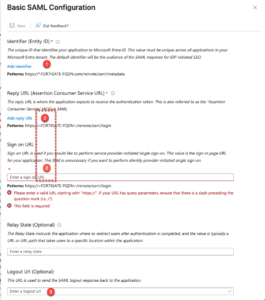
Here we can see the pop-up window. I have numbered the sections accordingly to the FortiGate. Tab back and forth and match the numbers on the FortiGate to the numbers on the pop-up.
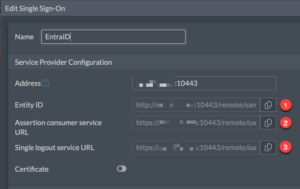
Entity IDon FortiGate toIdentifieron EntraAssertion consumer service URLon FortiGate toReply URLas well asSign on URLon Entra.Single logout service URLon FortiGate toLogout URLon Entra
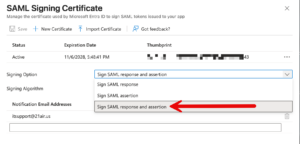
One thing that changed in FortiClient is the need to have the response and assertion signed by Entra. (See this article). To fix this, you will need to go to the SAML Certificate portion of the Entra and choose Sign SAML response and assertion and save.
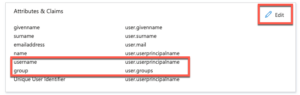
Underneath the Basic SAML Configuration you will have an Attributes & Claims section. Ensure that you have a user.userprincipalname and user.group claim. If not create them.
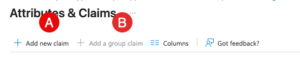
Obviously, you have (A) New Claim for the username and (B) a Group Claim for the group
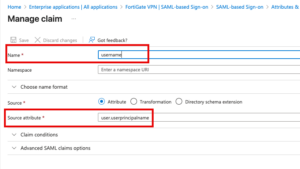
For the username give it username as the name. And under Source attribute choose user.userprincipalname and save it.
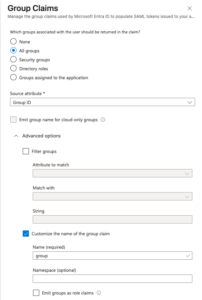
For the Group Claim, the name is on the bottom section but we will use group as the name. Choose Group ID In the Source Attribute section and All groups from the association section.
You should see both of your claims in the Attributes and Claims section.
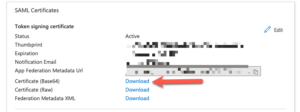
Now you will need to go to the SAML Certificates section on the Enrta side and download the Certificate in Base 64 format.
Next, we will gather the information needed to configure the FortiGate side from the Set up FortiGate VPN section.
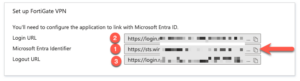
Again we will match the numbers on Entra with the numbers on FortiGate side
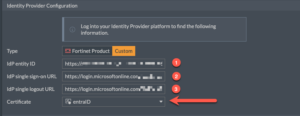
Microsoft Entra Identifieron Entra toIdP entity IDon the FortiGate.Login URLon Entra toIdP single sign-on URLon the FortiGateLogout URLon Entra toIdP single logout URLon the FortiGate.
Then you want to upload the certificate you downloaded in the previous section. Make note of the name. We will rename it since FortiGate gives it a random name.
Go ahead and save that.
Next we will go out to the CLI on the FortiGate

And we will rename the certificate
config vpn certificate remote
  rename %old-name% to %new-name%
end
Replace %old-name% with the name FortiGate gave it, and %new-name% with the one you want (e.g. entraID)
now type end and close the CLI.
This certificate rename method works for local certificates such as trusted certificates (like the wildcard we added), CA certificates such as the ones use for Deep Packet Inspection.
Now we need to ensure that the Entra Enterprise App has users that are authorized to use the app. Lets go back to Entra and lets choose Users and groups under the Enterprise App we created. There should not be any users or groups in the list. Choose + Add user/group . Add you group that we created in the required section
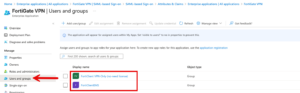
In my example, I have two groups because I am also using FortiClient EMS that is using its SAML auth as well. You will want to choose your group and copy the Object ID from the group.
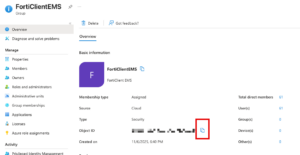
Now we will create a user group on the FortiGate that points to a specific group in Entra.
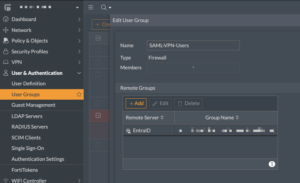
Go to User & Authentication then User Groups then Create new. Give it a name
PRO TIP– With local, LDAP, SAML, RADIUS, etc I like to precede the group name with a descriptor such as AD-FWAdmins, or RAD-VPN-Users, etc.
Under Remote Group you can choose your remote server SAML SSO Server section, you should see the Entra object you created.
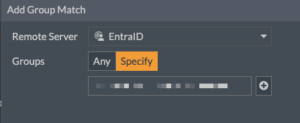
Change the Groups from Any to Specify and there, paste the Object ID of the group in your Entra.
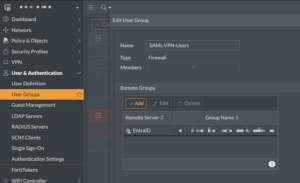
It should look like this. Save it.
Lets create a firewall policy for the remote access VPN
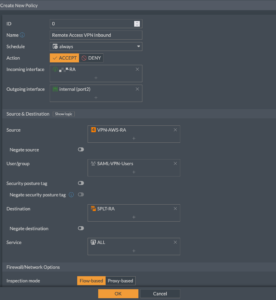
You will notice that in the User/Group section of the policy, I have added my SAML-VPN-Users group.
In my example, Source Is an address object that defines my IP addresses assigned to remote access VPN users. and the Destination Is a split-tunnel address object I created defining what routes will be pushed down to the VPN client to force them through the VPN (assuming you have split-tunnel turned on).
Lastly, we are going to configure the FortiGate to use the wildcard certificate we configured in the REQUIRED section.
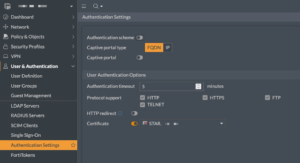
Under User & Authentication then Authentication Settings you will need to go to the Certificate section and choose the trusted certificate you purchased.
Under your remote access VPN, you want to make sure you are using IKEv2 and enable EAP identity request and Inherit from policy
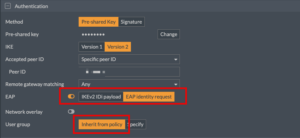
On the VPN client side, you will need to make some changes. These are the two sections you need to have filled out. Select the Enable Single Sign On (SSO) for VPN Tunnel and then enter the port you entered in the beginning of this article under the SSO port (e.g. 10443).
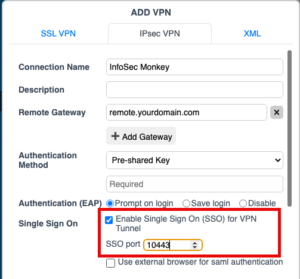
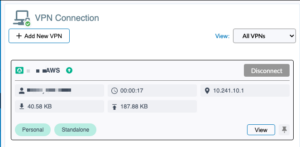
When you connect to the VPN, you should be prompted via a pop up window with a Microsoft username prompt
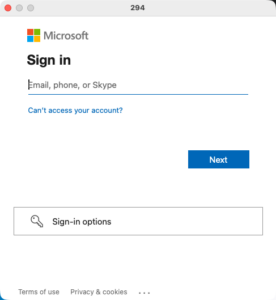
Enter your username with the email (e.g. manny@yourdomain.com) and hit Next.
You will then be prompted for your password….
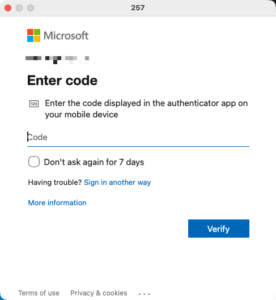
Then you will either be able to choose a third-party multi-factor app or your Microsoft Authenticator
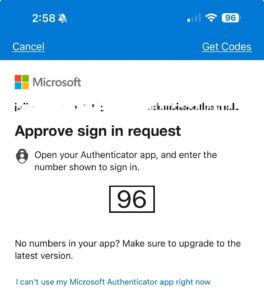
If you entered the correct info, you should now have ….