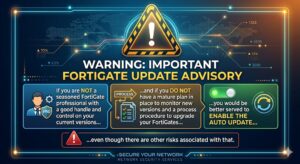
Let me start by saying, if you do not have a mature patching mechanism where you are subscribed to the emails from Fortinet when new releases are available, and you do not have someone reviewing the release notes to validate “Known Issues” which are bugs introduced with this new version you are going to install, you should keep the auto-upgrade enabled. Yes there are some drawbacks but if you are not going to do it, might as well be patched so holes get filled for you.
On FortiOS 7.6 (including version 7.6.7), automatic firmware upgrades can be triggered by two separate mechanisms: the local FortiGuard engine and the FortiGate Cloud central management tunnel (which enforces a latest-patch policy on free/unlicensed accounts).
To ensure your firewall does not auto-upgrade, you should disable both.
Step 1: Disable Local FortiGuard Auto-Upgrades (CLI)
This stops the local FortiGuard engine and local Fabric upgrade schedules.
Open your CLI and run the following commands:
To Check if your device has the auto-firmware upgrade enabled type this command
show full-configuration | grep auto-firmware-upgrade
config system fortiguard
set auto-firmware-upgrade disable
end
config system federated-upgrade
set status disabled
end
Step 2: Disable FortiGate Cloud Managed Auto-Upgrades
If your FortiGate is connected to FortiGate Cloud and you do not have a paid FortiGate Cloud management license, Fortinet enforces an automatic “latest-patch” upgrade by default.
You have two choices to stop this:
Option A: Disconnect from FortiGate Cloud entirely (Recommended if you don’t use it)
If you only use local management, removing the cloud management tunnel completely blocks Fortinet from pushing automated upgrades.
config system central-management
set type none
end
(Note: If you have a local FortiManager, leaving this as none is fine, as FortiManager will handle its own orchestration and automatically blocks unauthorized auto-upgrades).
Option B: Set a Custom Firmware Profile (Requires Paid Subscription)
If you actively use and pay for FortiGate Cloud premium features, you do not need to disconnect. Instead, log into your FortiGate Cloud Portal, navigate to Management > Firmware Profile, and change your update policy to Disabled.
Step 3: Verify the Status
To ensure that all auto-upgrades are completely disabled, run the following diagnostic command in your CLI:
diagnose test application forticldd 13
Look for the line stating Automatic image upgrade: disabled to confirm your changes have successfully taken effect.
Federated Upgrades
The command config system federated-upgrade controls how firmware upgrades are handled across a Security Fabric (a group of Fortinet devices working together, like multiple FortiGates, FortiSwitches, and FortiAPs).
When you run set status disabled, it specifically prevents the FortiGate from participating in or executing automated, coordinated Fabric-wide firmware upgrades.
Here is exactly what disabling it does for you:
1. It Blocks “Cascading” Upgrades
By default, the Security Fabric allows a central root FortiGate to orchestrate upgrades down the line to downstream firewalls, switches, or access points so they all update in a specific, safe order. Disabling this status ensures this FortiGate will ignore any automated upgrade commands sent from a central Fabric root device.
2. It Prevents Scheduled Fabric Upgrades
If a Fabric-wide upgrade schedule was configured on a root device (e.g., “Upgrade all downstream devices to the latest patch next Sunday at 2 AM”), setting this to disabled ensures your specific FortiGate will skip that schedule entirely.
Why it matters alongside the FortiGuard command
While config system fortiguard -> set auto-firmware-upgrade disable stops the FortiGate from reaching out to Fortinet’s servers to pull down a patch on its own, config system federated-upgrade -> set status disabled stops other devices on your local network from pushing an upgrade down to it.
Disabling both gives you total control over exactly when that specific firewall changes its firmware.
From the GUI
From the GUI, you can go to System -> Firmware & Registration
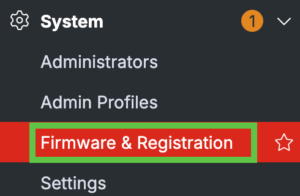
Then on the right-hand side, you will see Automatic patches: status and next to it the gear. Click the gear and choose Automatic patch upgrade setting
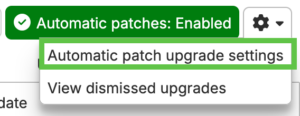
Once inside, you can toggle it enabled or disabled.