No fluff. Just the config that works.
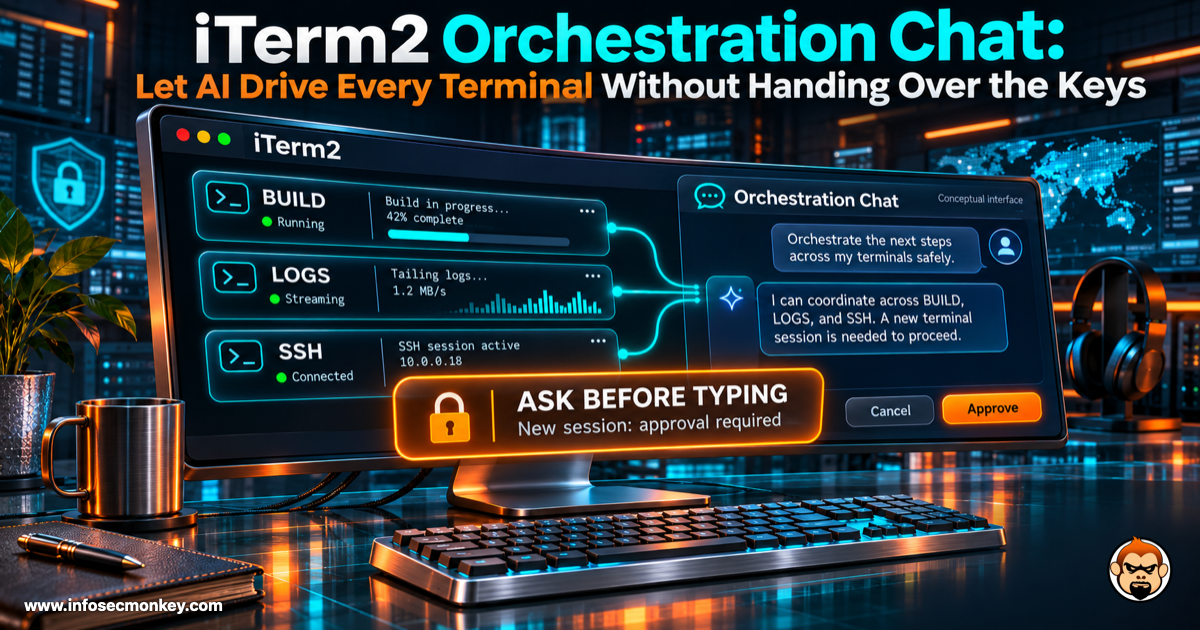
iTerm2 3.7 added a new kind of AI chat that does not live inside one tab. An iTerm2 orchestration chat can see all of your sessions and workgroups and operate iTerm2 on your behalf. That is powerful when you have a FortiGate console, two jump hosts, and a packet capture open at once. It is also every security engineer’s least favorite sentence: an AI that can read every terminal you have open. This post breaks down the permission model, how to grant control one session at a time, and how to run the whole thing on a local model so screen contents stay on your LAN.
Executive Summary
| Item | Detail |
|---|---|
| Objective | Understand and lock down iTerm2 orchestration chat permissions, grant scoped control with @-mentions, and back the chat with a local Ollama model reachable only from your Mac. |
| Target audience | Security and network engineers who keep production SSH sessions open in iTerm2 and want AI help without uncontrolled access. |
| Time to complete | About 30 minutes, including the Ollama host. |
| Outcome | An orchestration chat that can read and summarize, asks before it types, and only talks to a model you control. |
The Three Kinds of iTerm2 AI Chat
The iTerm2 AI Chat documentation defines three chat kinds. You choose one when you create the chat, and you can change it later from the info button menu in the chat toolbar.
| Chat kind | What it can see | Typical use |
|---|---|---|
| Unlinked | Nothing. A private conversation with no access to your sessions. | General questions, writing a one-liner |
| Linked | One terminal session, one browser session, or one of each. | Explain this output, watch this job |
| Orchestration | All sessions and workgroups. Can operate iTerm2 for you. | “Which of my sessions has a failed command?” |
Linked chats are where watches live. If that is what you are after, start with our companion post on iTerm2 AI Watches and iPhone alerts.
How iTerm2 Orchestration Chat Permissions Work
Two layers control what the AI can do: per-chat permission categories, and the approval rules that apply to orchestration chats.
Layer 1: permission states
Open the info button menu in the chat toolbar. A check mark means granted, a dash means ask before using, and no mark means always denied. Selecting an item rotates it: Never, Ask, Always, Never. The important detail is what Never does: the AI is not even offered the related functions, so it cannot try and fail, it simply does not know the tool exists.
| Permission | What it exposes | Risk | Recommended baseline |
|---|---|---|---|
| Check Terminal State | Current directory, shell, current or last command and exit status, window size, SSH host, username | Low to medium | Ask |
| View Contents | Command history, earlier output, the partially typed command line, the visible screen. Always attaches the screen to every message. | High on sessions that show secrets | Ask |
| Run Commands | Executes commands for you | High | Ask |
| Control Terminal | Sends keystrokes, erases the command line, restarts the session | High | Never |
| View Manpages | Local manpages, and remote ones over SSH integration | Low | Always |
| Write to the Clipboard | Writes to the clipboard | Low to medium | Ask |
| Write to the File System | Writes files | High | Never |
| Act in Web Browser | Views the current page in iTerm2 browser profiles | Medium | Never unless you use browser profiles |
Layer 2: orchestration approval rules
- By default an orchestration chat may read the contents of any session, but it must ask permission before typing into one.
- To pre-approve, @-mention a session or workgroup in your message. That grants standing control of that target.
- Each grant shows a Revoke button that puts the target back to asking.
- Opening a new session always requires your approval, with or without grants.
Figure 1: Orchestration chat approval model with a local Ollama model on the LAN
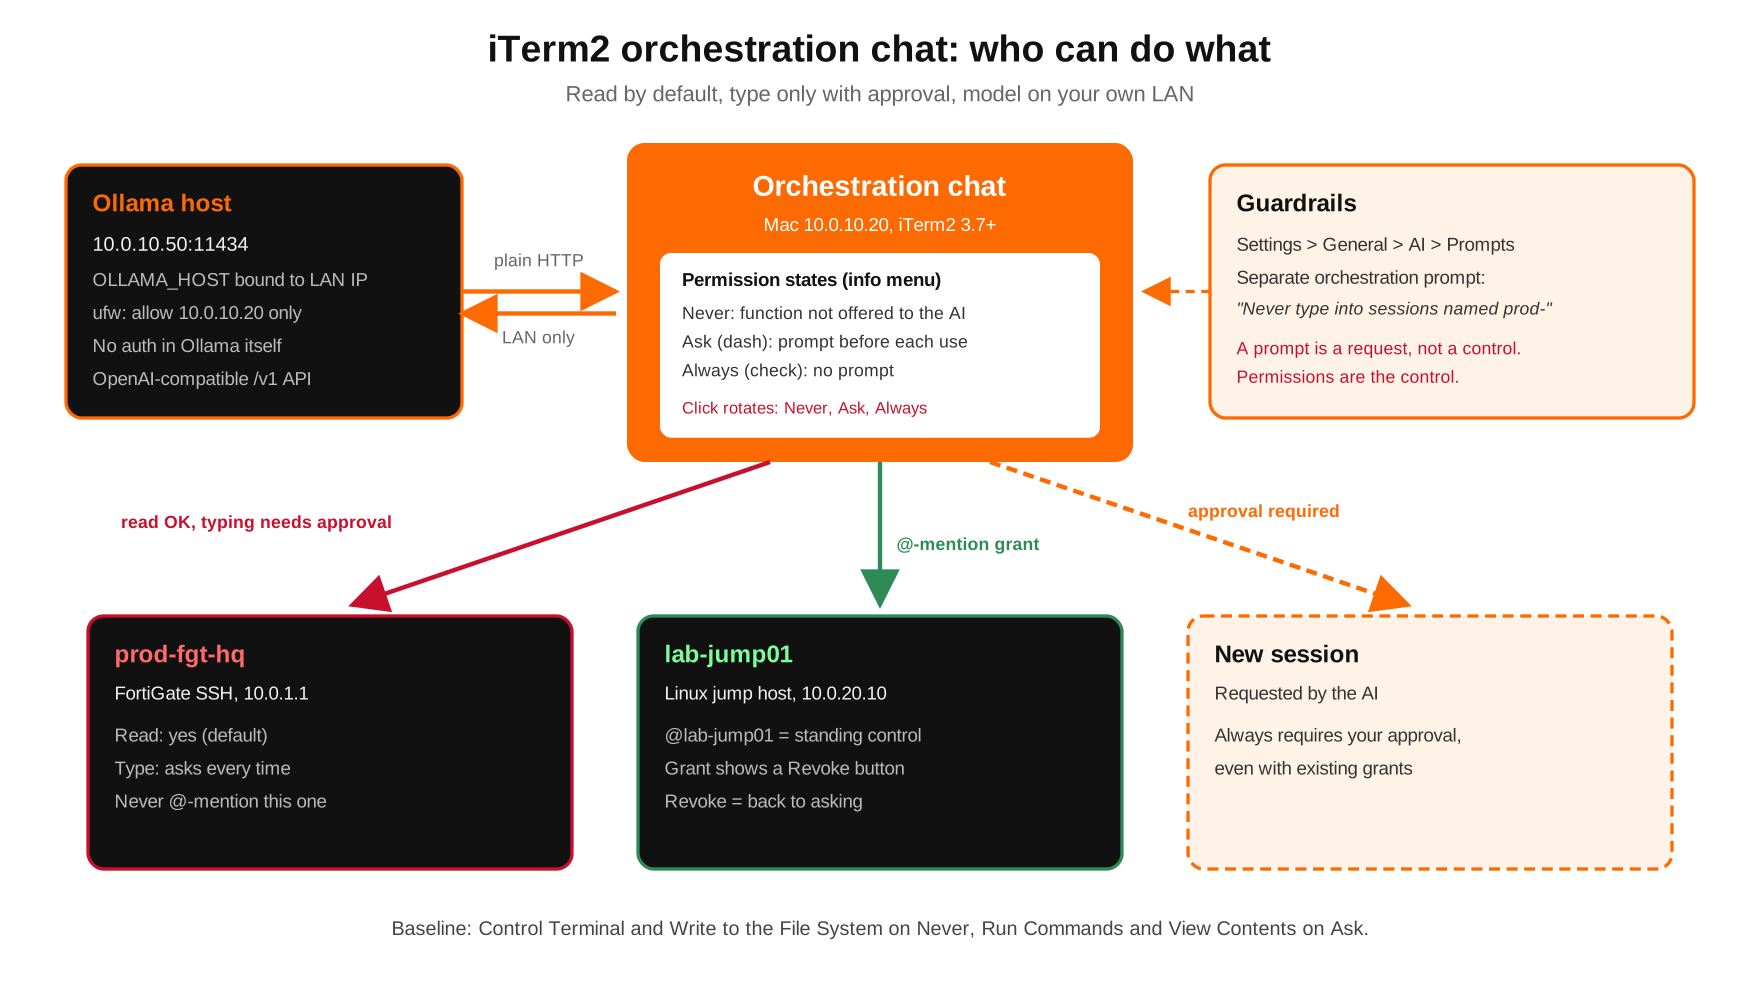
iTerm2 orchestration chat approval model showing read access by default, typing behind approval, @-mention grants and Revoke
Prerequisites and Architecture
Assumed knowledge
- iTerm2 basics on macOS, plus SSH to network gear and Linux hosts.
- Basic Linux service management (systemd, ufw).
Lab requirements
- iTerm2 3.7 or later with the iTerm2 AI Plugin installed (
brew install --cask itermai). - An Ubuntu host with a GPU running Ollama at 10.0.10.50.
- The Mac running iTerm2 at 10.0.10.20 on the same LAN.
- Sessions to orchestrate: FortiGate CLI at 10.0.1.1, a Linux jump host at 10.0.20.10, and a local shell.
| Component | Address | Role |
|---|---|---|
| Mac with iTerm2 3.7+ | 10.0.10.20 | Runs the orchestration chat and all sessions |
| Ollama host (Ubuntu) | 10.0.10.50:11434 | Serves the model over the OpenAI-compatible API, LAN only |
| FortiGate | 10.0.1.1 | SSH session the chat may read but never type into |
| Linux jump host | 10.0.20.10 | SSH session you grant control of with an @-mention |
Step-by-Step Implementation
Step 1: Expose Ollama to the Mac, and only the Mac
Goal: Keep inference on hardware you own, reachable by one client.
Action: The Ollama FAQ notes that Ollama binds 127.0.0.1 port 11434 by default and that you change the bind address with the OLLAMA_HOST environment variable, set through a systemd override on Linux. Bind to the host’s LAN address rather than 0.0.0.0, then allow port 11434 from the Mac only. Ollama has no authentication of its own, so the host firewall is your access control. Allow SSH before you enable ufw or you will lock yourself out.
sudo systemctl edit ollama.service

# Add in the editor:
[Service]
Environment="OLLAMA_HOST=10.0.10.50:11434"

sudo systemctl daemon-reload
sudo systemctl restart ollama

# Keep SSH open first, allow only the Mac, then enable the firewall
sudo ufw allow OpenSSH
sudo ufw allow from 10.0.10.20 to any port 11434 proto tcp
sudo ufw deny 11434/tcp
sudo ufw enable

# Pull a model that supports tool calling
ollama pull <model-name>
GUI Verification: From the Mac, the model list comes back. From any other host, the connection is refused.
# On the Ollama host
ss -ltnp | grep 11434

# From the Mac (10.0.10.20)
curl -s http://10.0.10.50:11434/api/tags
Step 2: Add the local model in iTerm2
Goal: Make the local model the default for new chats.
Action: Open Settings > General > AI. The AI Chat docs say the manual model editor has presets for OpenAI-compatible providers, including Ollama, plus a Test Connection button, and that AI chat can connect to models on your LAN over plain HTTP. Add the model, test it, and mark it as the economy model too if you want background jobs (command-safety checks, screen-idle detection) to stay local.
Preset:    Ollama
URL:       http://10.0.10.50:11434/v1/chat/completions
Model:     <model-name>
API key:   <any placeholder, Ollama ignores it>
Economy:   leaf icon ON (optional)
Test: Test Connection -> successGUI Verification: Test Connection succeeds, and a new chat shows the local model in the toolbar picker.
Step 3: Create the orchestration chat
Goal: One chat that can see your whole workspace.
Action: Choose Session > Open AI Chat. When iTerm2 offers Link or Enable Orchestration, choose Enable Orchestration. On an existing chat, use the info button menu and select Enable Orchestration (and Disable Orchestration to drop back).
GUI Verification: The info menu shows Disable Orchestration, which means orchestration is on.
Step 4: Apply the permission baseline
Goal: Read and summarize freely, change nothing without a human click.
Action: In the info button menu, set each permission from the baseline table above. The short version: Control Terminal and Write to the File System on Never, Run Commands and View Contents on Ask, View Manpages on Always. Watch for the prompt iTerm2 shows when you set Check Terminal State or View Contents to Always: it offers to send that data with every message. Decline it on production sessions.
GUI Verification: Control Terminal and Write to the File System show no mark, Run Commands and View Contents show a dash.
Step 5: Grant control one session at a time with @-mentions
Goal: Let the AI act on the jump host, never on the FortiGate.
Action: Read-only questions need no grant. When you do want action, @-mention only the target. Give your sessions clear names (for example prod-fgt-hq and lab-jump01) so a stray mention is obvious.
Look across all my sessions and list any command that exited non-zero
in the last 15 minutes. Do not type anything.

@lab-jump01 check disk usage on / and list files in /tmp older than
7 days. Show me the delete command before running it.
GUI Verification: The grant for lab-jump01 appears with a Revoke button. Click it when the task is done.
Step 6: Put guardrails in the prompt, and know their limits
Goal: Steer the model away from production, on top of the hard controls.
Action: Edit Settings > General > AI > Prompts. iTerm2 keeps separate prompts for unlinked chats, read-only and read-write terminals, linked browsers, and orchestration chats, so you can add rules to the orchestration prompt only.
Never type into or run commands in any session whose name starts
with "prod-". For those sessions, describe what you would do and stop.
Never print secrets, keys, or passwords back into the chat.Step 7: Use Explain Output during triage
Goal: Get a second opinion on dense output without granting anything new.
Action: Select output and choose Edit > Explain Output with AI. iTerm2 creates a new chat with the session linked and may annotate the terminal contents with explanations. Pair it with something verbose:
FGT # diagnose debug flow filter addr 198.18.0.10
FGT # diagnose debug flow trace start 20
FGT # diagnose debug enable
Verification and Validation
Test 1, typing requires approval. In the orchestration chat, without an @-mention, ask: “Run uptime on the jump host.” Expected: iTerm2 asks for permission before typing into the session.
Test 2, grant and revoke. Repeat with @lab-jump01 run uptime. Expected: it runs without a per-command prompt. Click Revoke, ask again, and the approval prompt is back.
Test 3, traffic stays on the LAN. Send a chat message while capturing on the Ollama host:
# On the Ollama host: expect only 10.0.10.20 as the client
sudo tcpdump -ni any tcp port 11434

# On the Mac: confirm the connection target
lsof -nP -iTCP:11434
Expected: connections between 10.0.10.20 and 10.0.10.50 only. A second machine trying curl -s http://10.0.10.50:11434/api/tags times out or is refused.
Troubleshooting and Gotchas
1. Test Connection fails against Ollama
Likely cause: Ollama is still on loopback, the override was saved without the [Service] header, or ufw is blocking the Mac.
ss -ltnp | grep 11434
systemctl show ollama.service -p Environment
sudo ufw status numbered
Fix: ss should show 10.0.10.50:11434, not 127.0.0.1:11434. Re-run systemctl edit, then daemon-reload and restart. Make sure the allow rule for 10.0.10.20 sits above the deny rule.
2. The chat talks but never acts
Likely cause: the model does not support tool calling well, or the relevant permission is on Never so the function was never offered. Fix: confirm the permission is on Ask, then try a model that supports tool or function calling. Small local models often answer in prose instead of calling tools.
3. You enabled orchestration on a cloud model with production sessions open
Likely cause: read access is the default, so screens may already have been sent. Fix: disable orchestration from the info menu, close or rename production sessions, move the chat to a local model (new chat, since chats are pinned to a provider), and for OpenAI organizations with Zero Data Retention enabled, turn on Settings > General > AI > Enable “zero data retention”. Note that with it on, iTerm2 resends the full conversation with each message. While you are cleaning up, keep secrets out of your shell history too.
Sources
- iTerm2 AI Chat documentation (chat kinds, permissions, orchestration, prompts)
- iTerm2 AI Plugin
- Ollama FAQ: exposing Ollama on your network
InfoSecMonkey | No fluff. Just the config that works.