Have you ever ordered a bunch of Fortinet gear... Full Story
By Manny Fernandez
November 9, 2019

Creating a VIP on Fortigate using a Dynamic IP address
When you have a dynamic IP address assigned by your carrier, you are normally only assigned one IP address to use. If you had a Fortigate that is attached to a Cable Modem as an example and the modem and the Fortigate are using RFC 1918 addresses, then your VIP would use the RFC 1918 address that is assigned to your Fortigate as the External IP Address/Range using the port mapping section, however if your Fortigate gets a public IP (non-RFC1918) address from the carrier directly on the Fortigate, how are you going to know what public IP address to assign to the VIP? Thanks to a friend of mine Brian Modlin, that called me because he was dealing with this problem; here is what you can do. In this article, I am using Central NAT.
For those not familiar with RFC 1918, it is the block of IPv4 addresses that are reserved for internal use and are NOT publicly routable. These are your 10.0.0.0/8, 192.168.0.0/16 and 172.16.0.0/12.
Dynamic DNS Configuration
Lets start with the Dynamic DNS configuration on the Fortigate firewall.

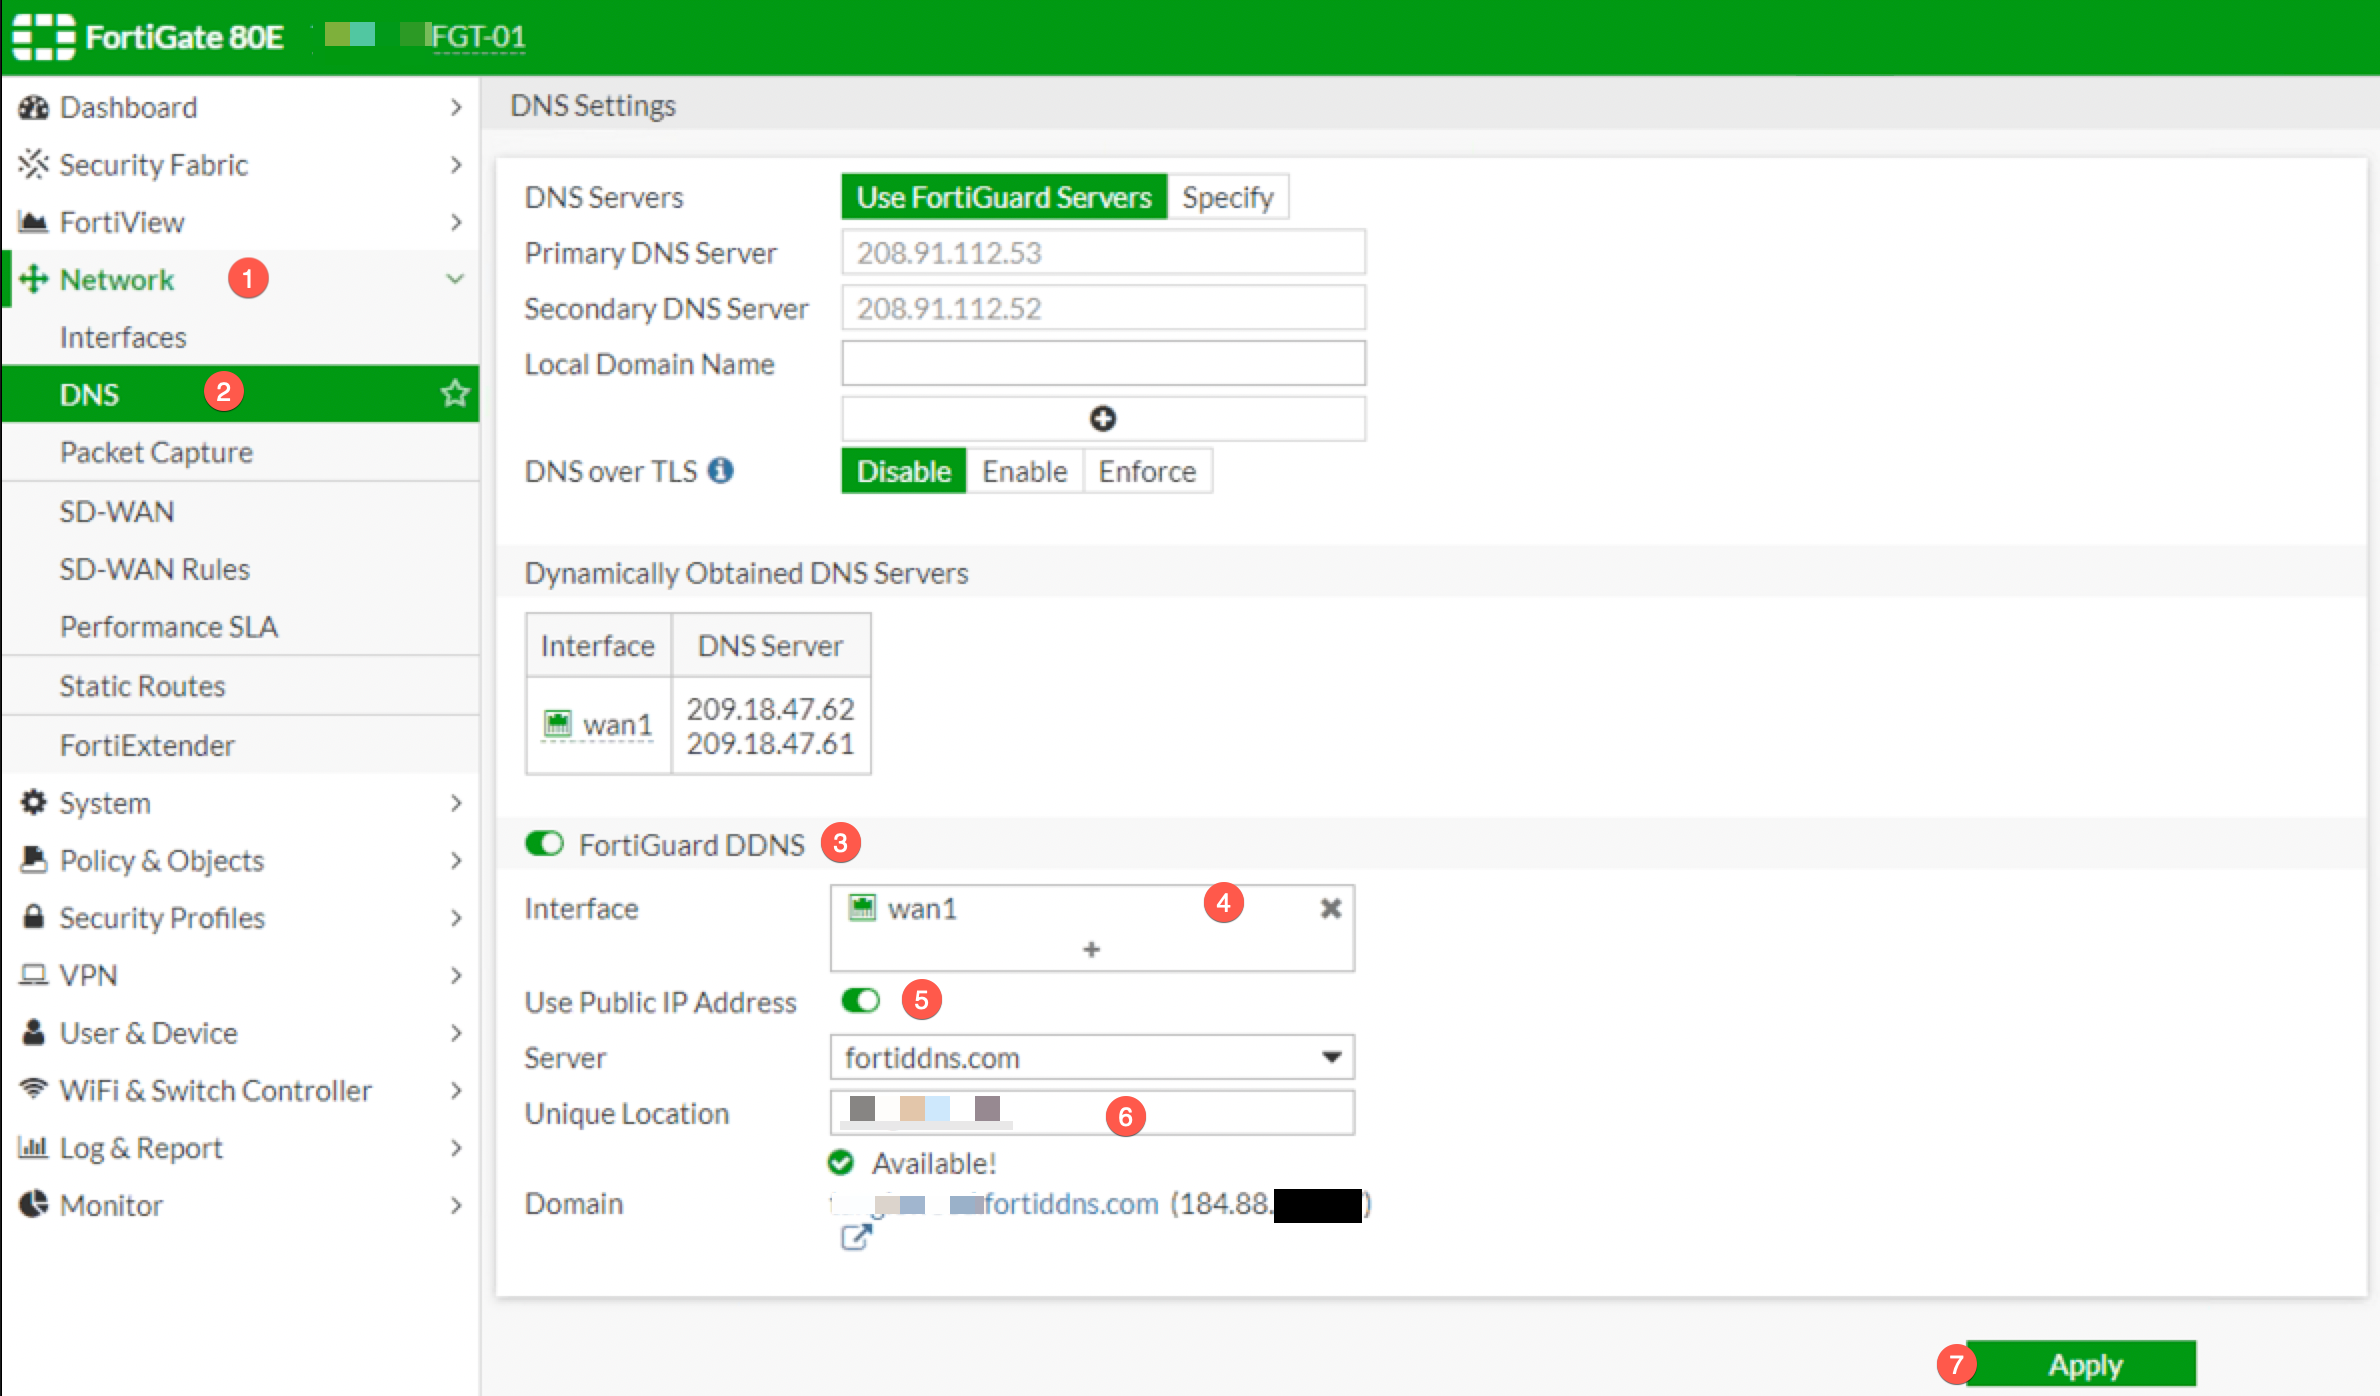
Here we have a Fortigate 80E configured with a DHCP as its WAN1 configuration. To configure the Dynamic DNS configuration:
- Go to
Network - Then choose
DNS - Enabled the
FortiGuard DDNS - Choose the interface facing the carrier, in my case
WAN1 - Click the
Use Public IP Address - Assign a
Unique Locationor a host name you are going to use. - And finally, click
Apply
Configuring the VIP

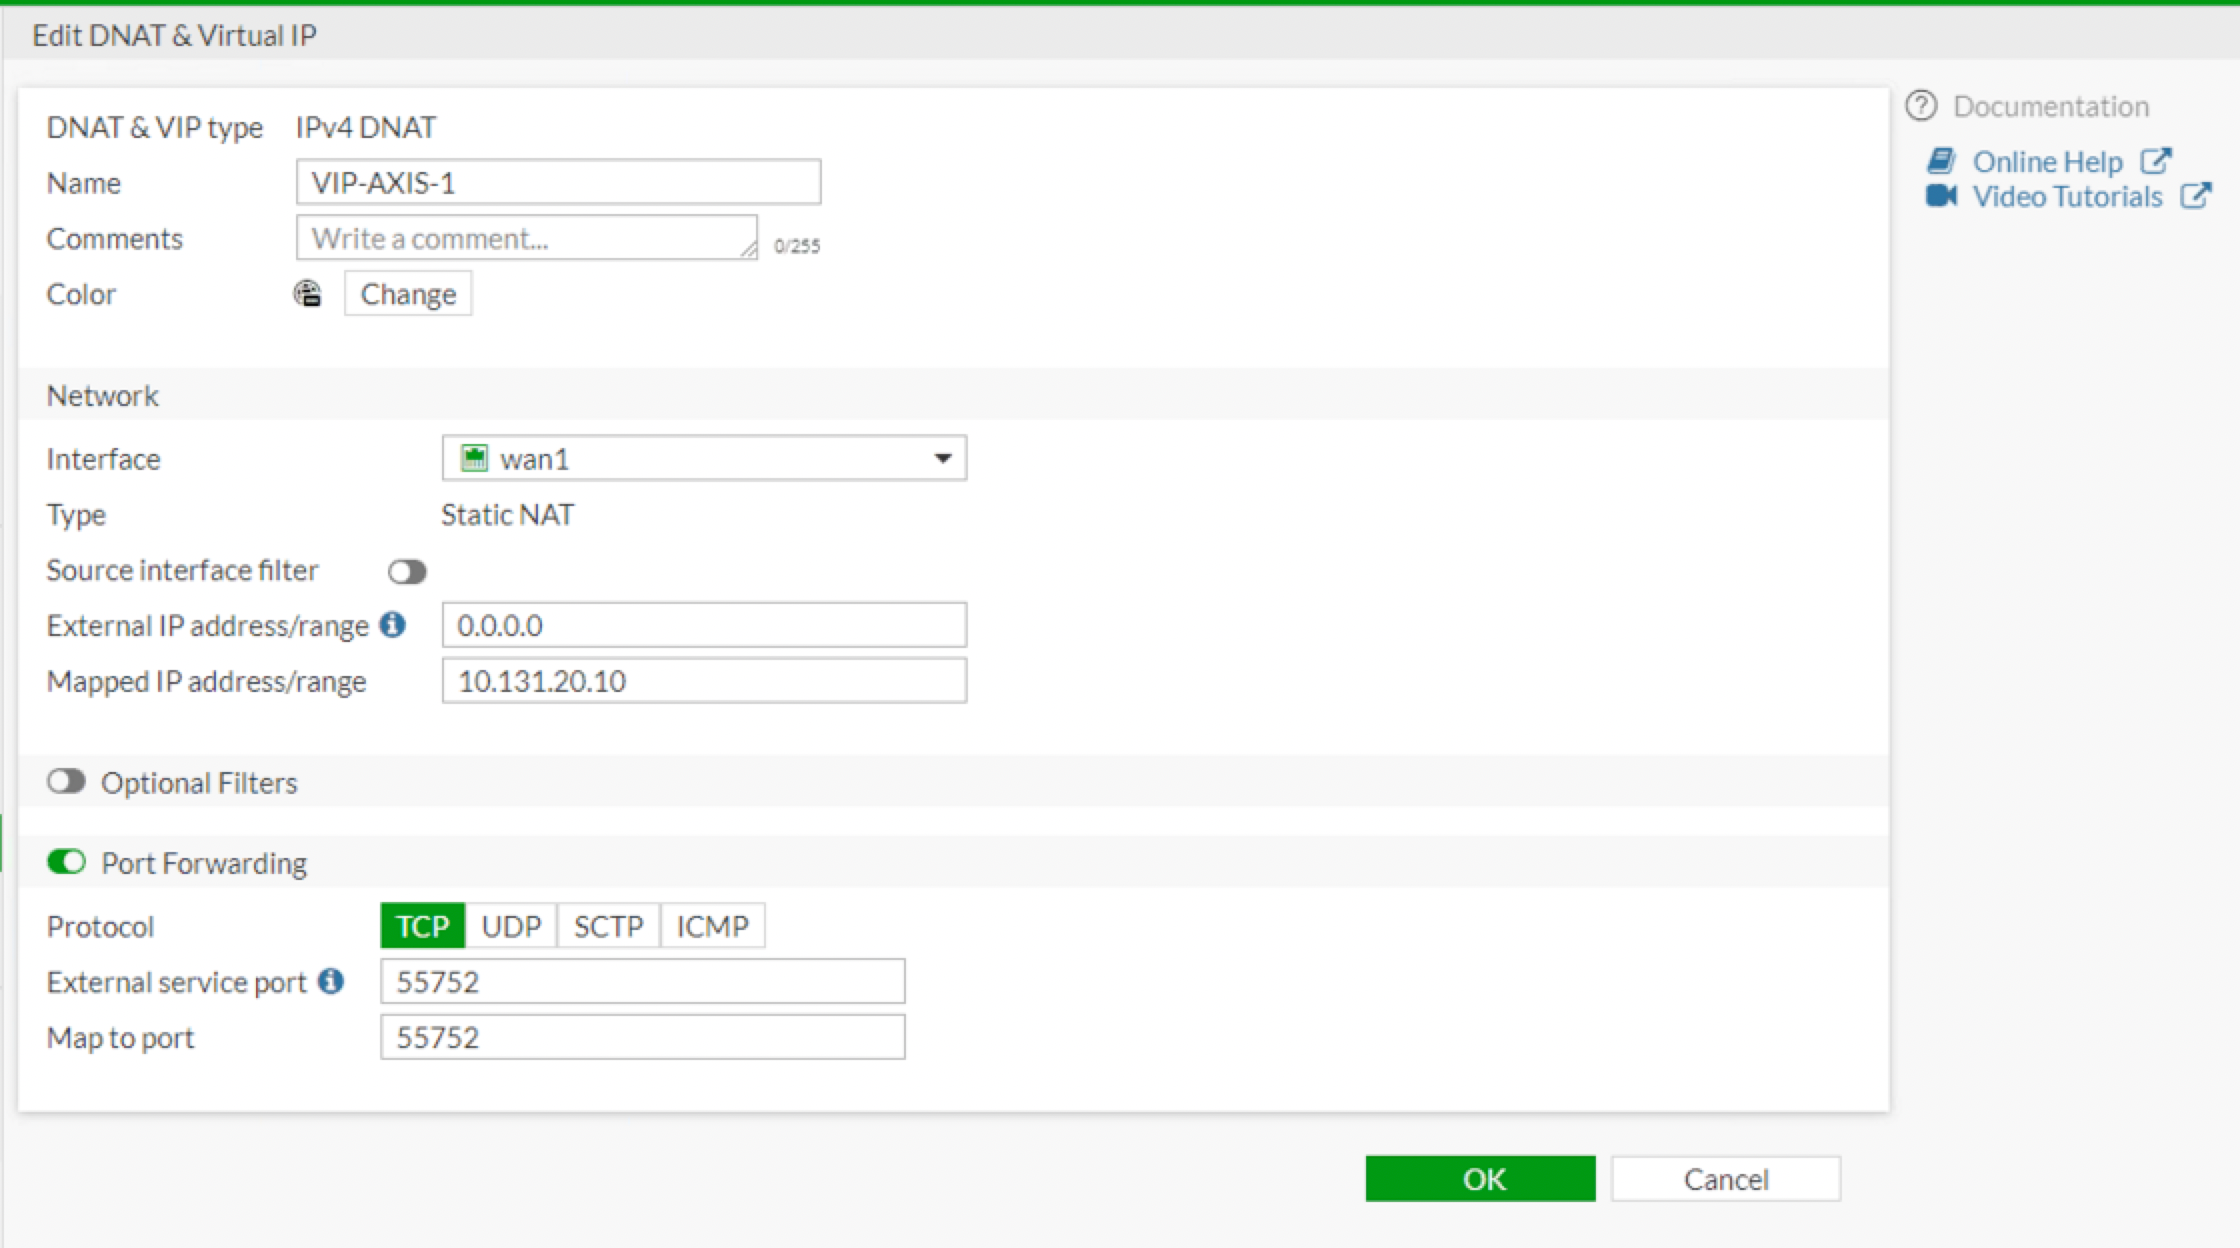
Here we can see the VIP that has already been created. I will describe the config. First things first, you need to assign a name. Choose the interface, again for me, it was WAN1. Next on the External IP address/range section, you will use 0.0.0.0 since we do not know the IP the carrier will assign to us. Next choose the internal IP address for the device you are trying to NAT to. Enable Port Forwarding since you are going to be sharing it with the Fortigate’s dynamically assigned IP address.
Creating the Policy
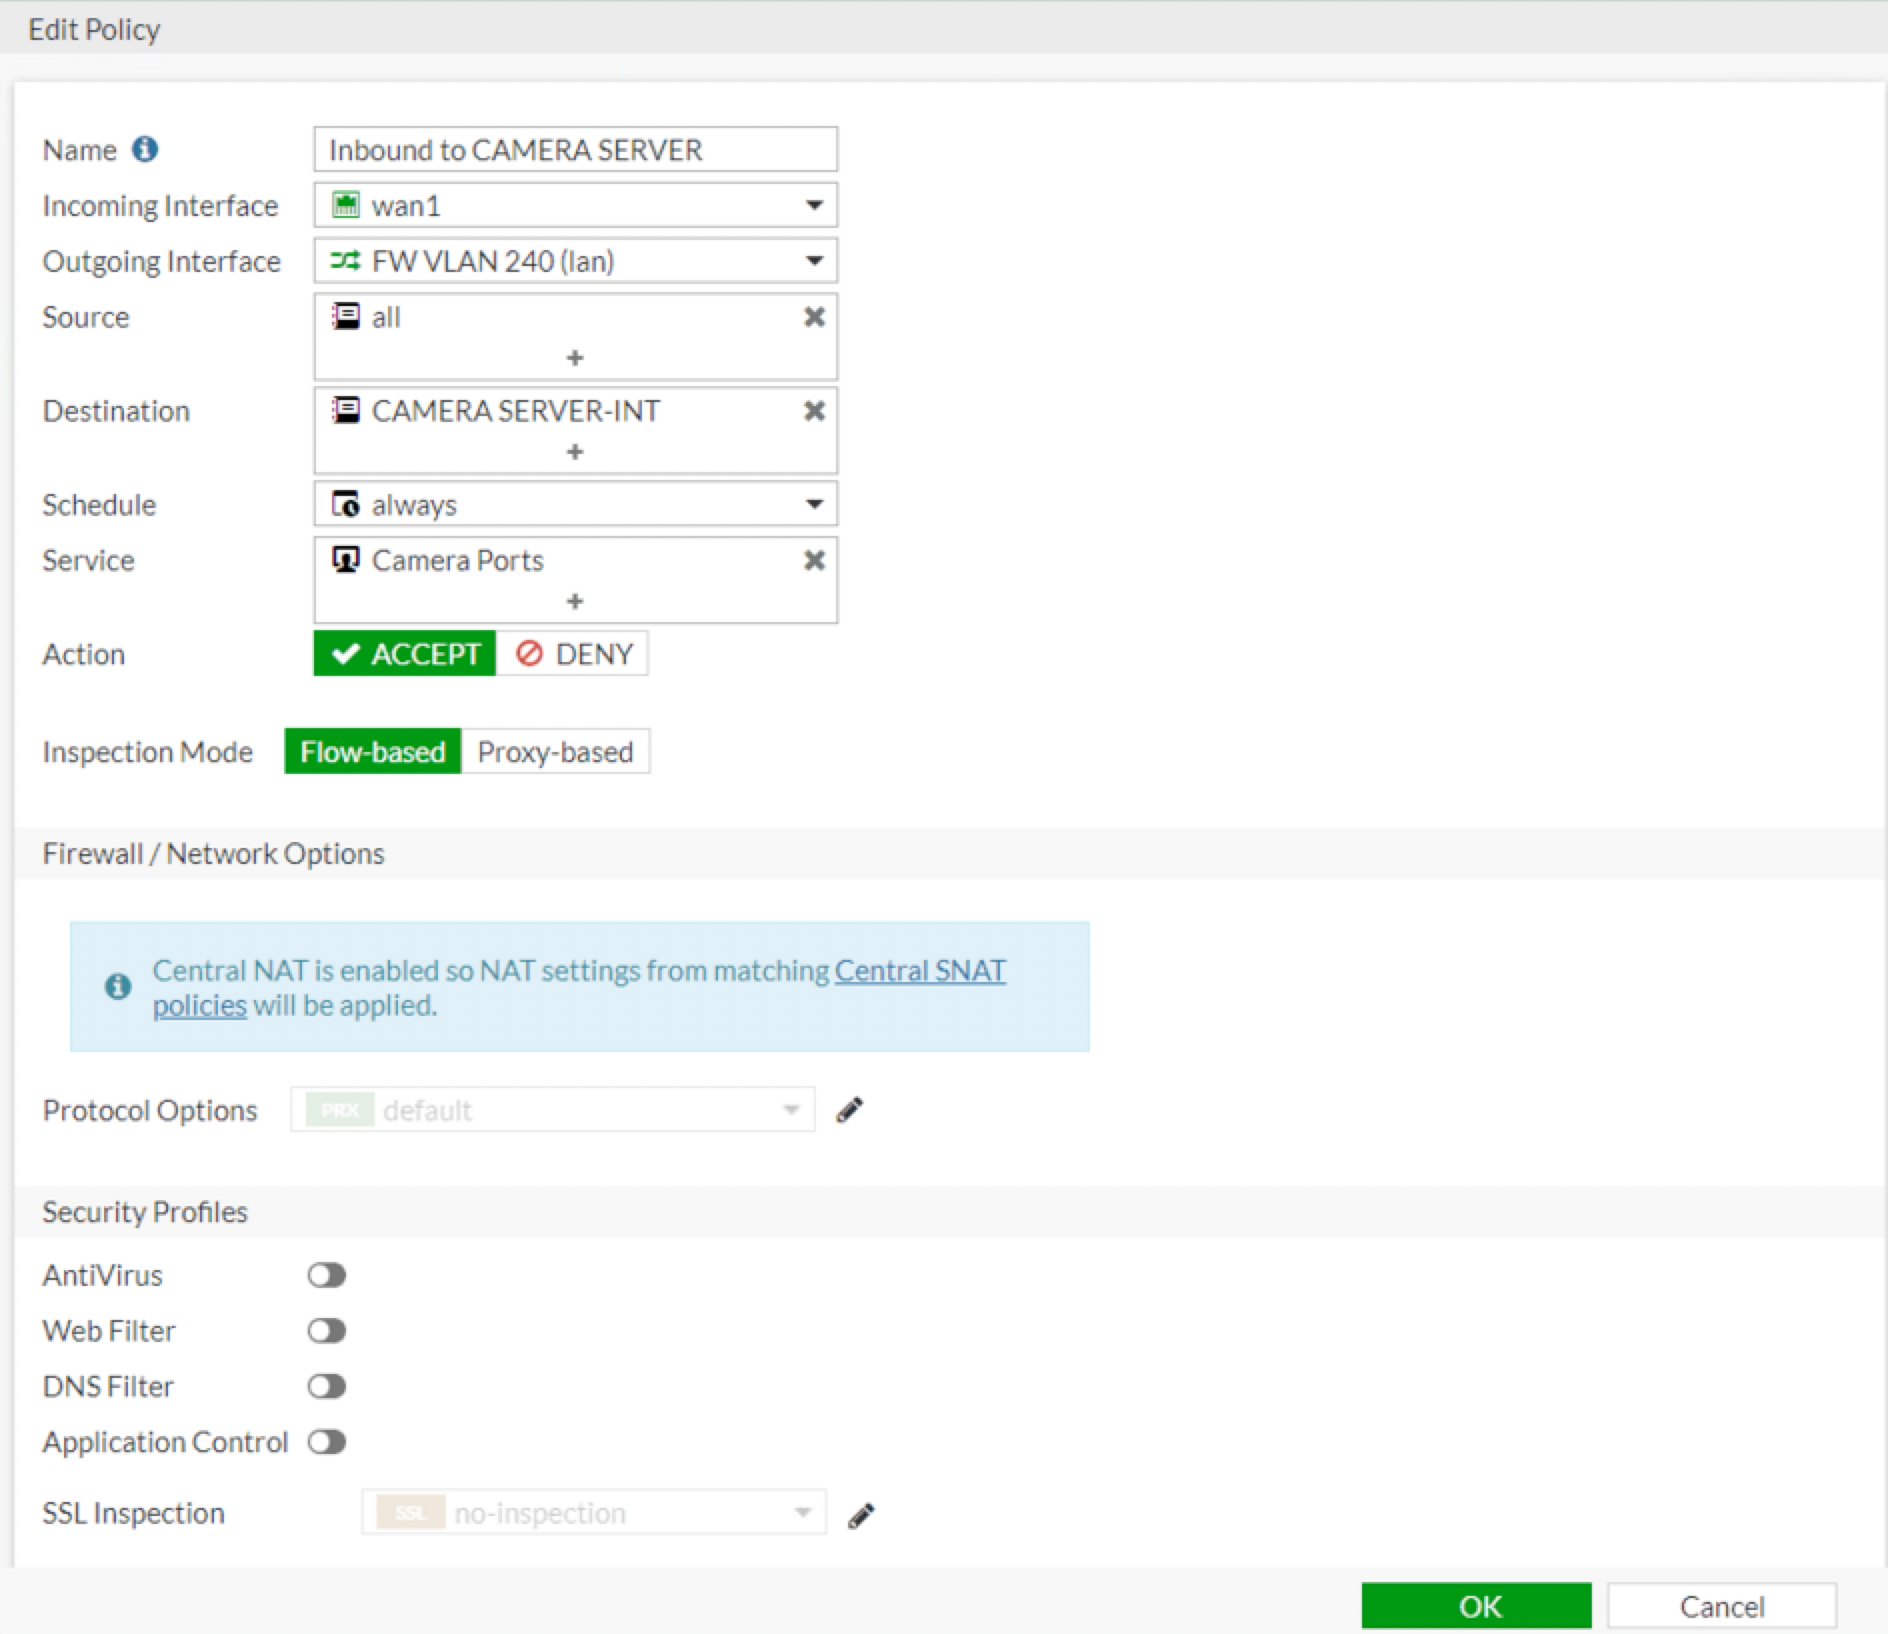
Finally, we will add a policy. Again, in my case, I am using Central NAT (take a look at the Central NAT blog post)

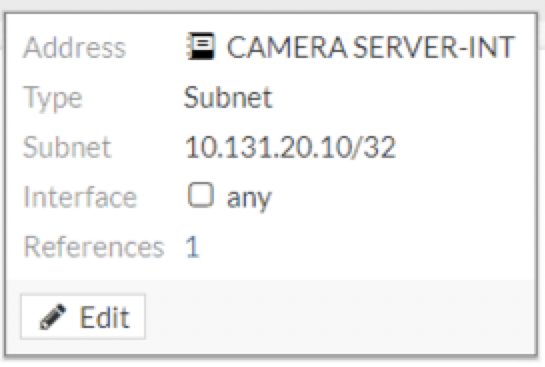
As you can see in the above screenshot, this is a Camera Server and we can see that we are matching Incoming Interface to WAN1 and the Outgoing Interface is FW VLAN 240 (lan) . We are also matching all sources and the Destination is the Firewall Address Object of CAMERA SERVER-INT which equates to the 10.131.20.10 address (see below)

You will need to repeat the VIP creation for every port you need to map to.
Hope this helps.
Recent posts
-

-

Had a customer with over 200 static routes on... Full Story
-

This is a work in progress, I will be... Full Story
