At its core, IEEE 802.1X is a network layer... Full Story
By Manny Fernandez
January 20, 2026
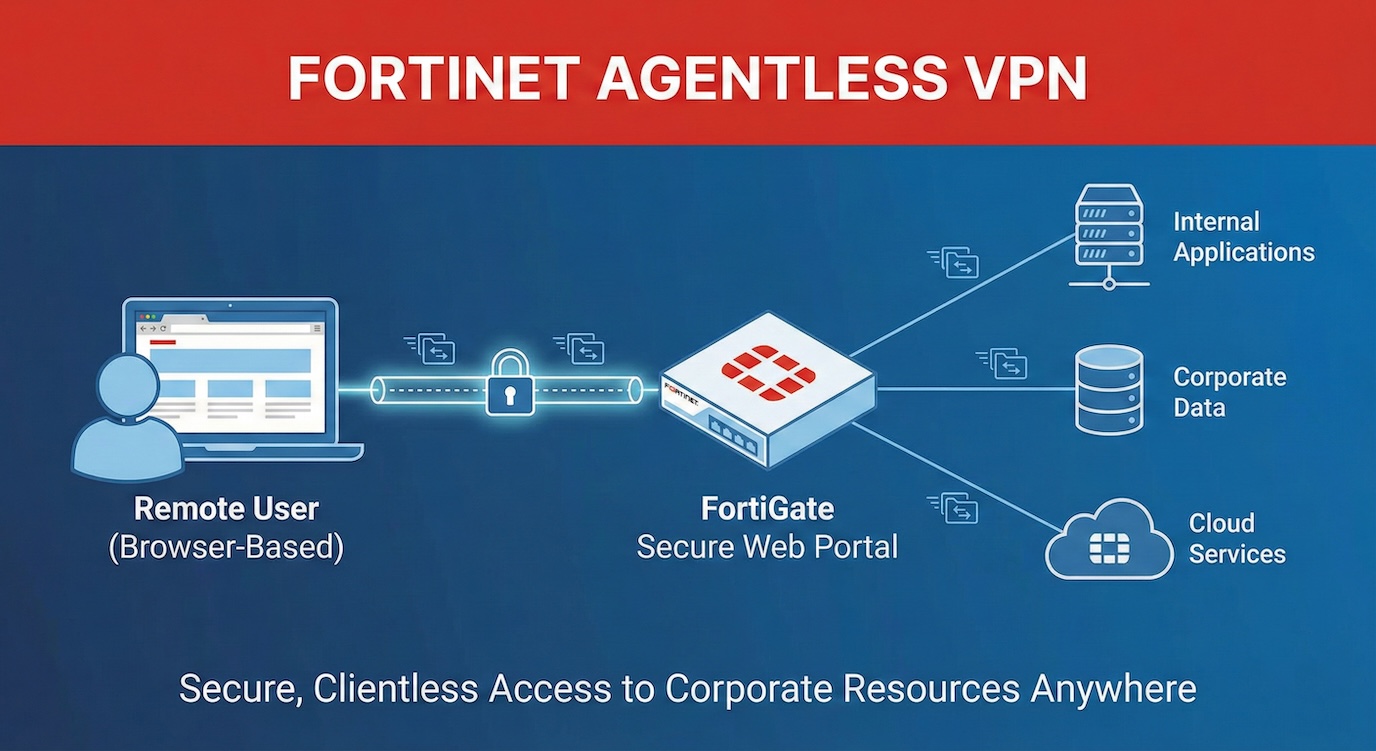
FortiGate Agentless VPN
Starting from FortiOS 7.6.3, SSL VPN web mode is now referred to as Agentless VPN. This updated terminology reflects FortiGate’s ability to provide secure remote access without requiring a VPN client or agent on the user’s device.
For the record, lets clarify the naming convention and the changes.
Prior to 7.6.3 – SSL VPN Web Mode Post 7.6.3 – Agentless VPN
Prior to 7.6.3 – SSL VPN Tunnel Mode – Post 7.6.3 – This has been depreciated and you need to run IPsec.
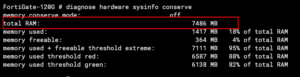
NOTE: FortiGate devices with less than 4GB can not run Agentless VPN. Therefore, as of this writing, the smallest NEW FortiGate that will run Agentless is 120G. Also, you must be running 7.6.x
If you want to check the memory your device has, type the following command diagnose hardware sysinfo conserve . The output should look something like this.
I am going to make this a series. So we are going to do an article that will build off of this one and we will use certificates to validate devices (e.g. Company Owned Laptop).
My scenario:
I have a company and want to set up a portal so that my employees can access resources in our office and I have some contractors that I want to give access to certain devices. I do not want to provide a client.
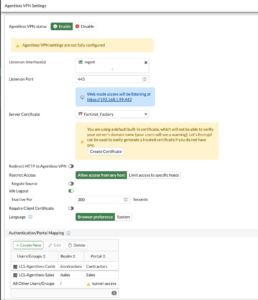
Enabling Agentless VPN
Once you have your FortiGate running 7.6.3 or >, you will need to go to System then Feature Visibility . You will see Agentless VPN however you will notice you cannot select it. You need to enable it from the CLI. The commands are right there if you choose the + .
Head to the CLI either via the GUI Terminal, SSH or Console.
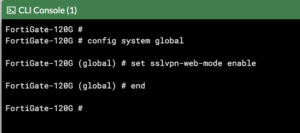
You will need to type config system global then set sslvpn-web-mode enable and finally, end .
Now when you go back into the GUI, (you will need to refresh) you will be able to select Agentless VPN from the Feature Visibility page.
Refresh the page one more time, and you will notice that you have two new options that are available to you; Agentless VPN Personal Bookmark and Agentless VPN Realms
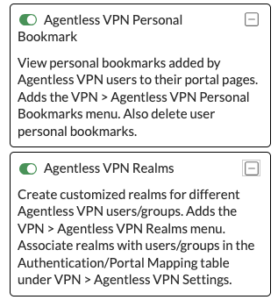
Each has an explanation and you can enable or leave them disabled. I use the hell out of realms so I enable them. (I have an example later in the article).
Authentication
In this article, I am going to use local firewall users and groups. However, you CAN use SAML, RADIUS, Local, AD, etc.
Lets create the first user group
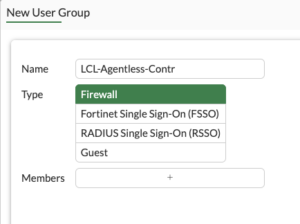
Head over to User & Authentication then User Groups then Create new. Don’t worry about members unless you already have them defined.
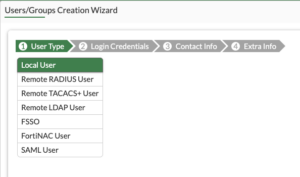
Now lets create a user
Go to User & Authentication then User Definition then Create new. We are going to select Local User and then Next on the bottom.
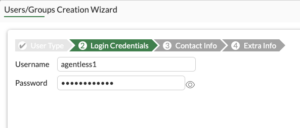
Fill in the Username and the Password and hit Next
I will skip over to section 4, Ensure that the status is Enabled and in the User Group select the proper group. In my configuration username agentless1 Is a contractor and agentless2 Is part of the sales team.
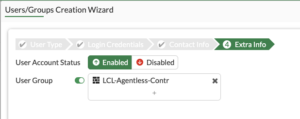
Once you have the User Group selected, click on the Submit on the bottom.
I will not document the other user but follow the same steps.

Now we can see that I have 2 Groups and each group has a user.
Now lets configure the Agentless VPN Portal
We will Create new and name it Contractors . You can give it a Portal Message which will be displayed at the top of your Agentless portal. For now, lets keep the defaults and hit OK.
Create additional Portals as needed.
Realms
In my case I am going to use realms. Let’s look at the default when you create a realm
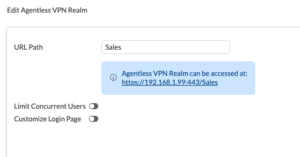
As you can see, the user would need to type some FQDN with a /sales at the end. That is a recipe for disaster in my experience. The better way to do this is using a Virtual Host. However as you saw above, it is not available….. Until you head back to the CLI.
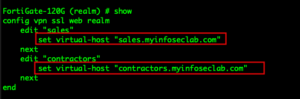
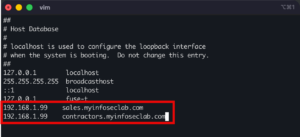
You will need to go to config vpn ssl web realm then edit your realm . In my case edit sales and enter set virtual-host "sales.myinfoseclab.com" and edit contractors and set virtual-host "contractors.myinfoseclab.com" .
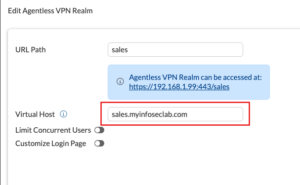
Now in the GUI, you can see the Virtual Host
Since I am in a lab environment and did not want to add a CNAME. However, if you are using realms you will need to go to your public facing DNS servers and add a CNAME for ever realm you intend to use. You will need to create an A record with the IP the FortiGate is using for the Agentless VPN, then point to CNAMES to that A.
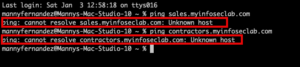
To access the lab from my MacBook, I needed to mimic an FQDN on my domain. Below, you can see that I am unable to resolve the “fqdn”.
By editing the hosts file located in /etc on your machine on your macOS or Linux distro you can mimic the CNAME. On Windows 11, you can find it at c:\Windows\System32\drivers\etc\hosts
I use vi to edit it, but use whatever you like. I need to launch it with the sudo command since I need to have read/write access to the file.
In my case, I added the IP address of the test FortiGate, then I hit tab and enter the FQDN I want to mimic.
In vi I hit esc then :x and it saves the file.
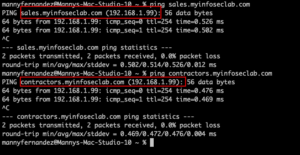
Now testing ping, you can see that I am resolving the FQDN.
Portals
We need to create multiple portals, one for each of the realms we created.
Give them a name, in my case it would be Sales and Contractors. The Portal Message will show on the top of the Agentless portal. For now, save it and we will go back to this.
Bookmarks
Now lets set up the bookmarks in the portals.
In each portal, you can create bookmarks for each one.
Lets create one of the bookmarks under the Contractors portal.
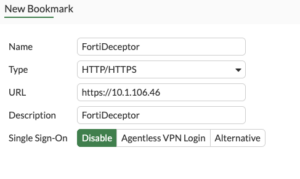
As you can see, HTTP/HTTPS Is the type however you can choose any of the following:
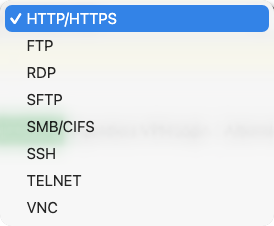
Portal Mapping
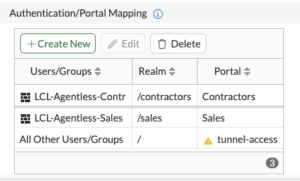
Now we need to set up how each portal and their corresponding realm will use the groups.
You can see on the bottom under Authentication/Portal Mapping that we have linked LCL-Agentless-Contractors with the /contractors realm and the corresponding Portal of Contractors.
To add a new portal mapping, click the Create New button.
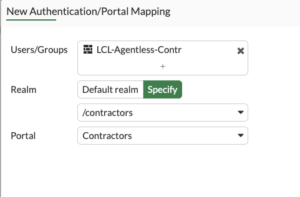
You will choose the group by selecting it in the Users/Groups section. Under Realm you need to change to Specify then choose the realm. Next we choose the corresponding portal (in our case Contractors).
We repeat the same for the /sales realm and its corresponding Sales portal.
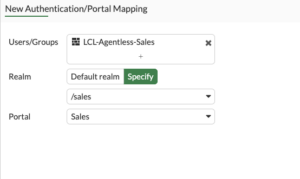
You will choose the group by selecting it in the Users/Groups section. Under Realm you need to change to Specify then choose the realm. Next we choose the corresponding portal (in our case Sales).
Firewall Policy
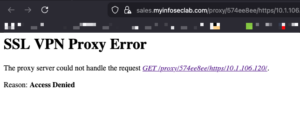
Now we need to create the firewall policy.

If you fail to create the policy, once you log in to the portal, you will see a similar message as below
Testing the login
Lets open our browser to the sales FQDN
![]()
You should see a long prompt like below.
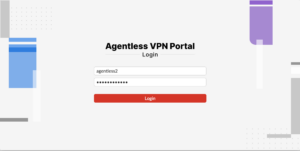
We will enter the agentless2 username with the password.
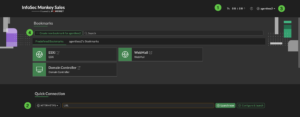
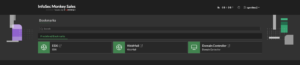
Once authenticated, we will see the portal with our bookmarks,
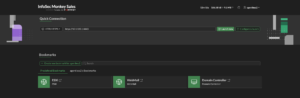
We can see I have an https to an ESXi host, another https to a squirrel mail server and an RDP connection to a domain controller.
Additionally, you will notice that we have a Quick Connect and a Create new bookmarks for agentless2. These are configurable and can be removed to lock down the user. The Quick Connect will allow the user an adhoc connection where they may do an RDP quick connect to a server or workstation as an example. The Create new bookmark..... section allows for users to create their own bookmarks. It can be their person desktop via RDP or VNC as an example. Most of the time, these are not wanted.
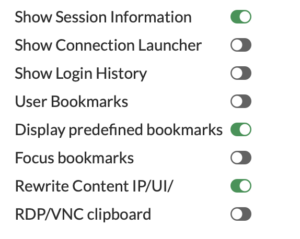
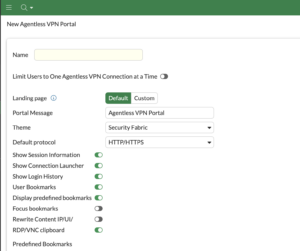
Inside each portal, you will be able to choose what the users sees when they connect. Above you can see the screenshot. This is my standard set up.
- Show session information – This will show how long they are connected and tx vs rx.
- Connection Launcher – Allows for adhoc connections.
- Login History – This is stored under the user at the top right.
- User Bookmarks – This is where the user can create persistent bookmarks for them only.
- Focus Bookmarks – controls the layout of the web portal, specifically telling the system to display the bookmarks section prominently (focused) above the Quick Connection tool, giving users immediate access to pre-defined or personal application links rather than the quick-access bar. If you are removing all the other options, this is moot.
- Rewrite Content IP/UI – Enables the FortiGate to actively rewrite URIs within web traffic that contain explicit IP addresses when using internal links.
- RDP/VNC clipboard – As it states.
This is how I normally run the Agentless Portals.
Lets connect to the sales portal
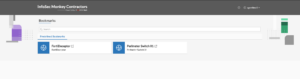
Remember that you can use LDAP, RADIUS, SAML, Local, 3rd Part MFA for authentication with the agentless portal. Additionally, you can define external bookmarks to SaaS providers.
Recent posts
-

-

In case you did not see the previous FortiNAC... Full Story
-

This is our 5th session where we are going... Full Story
-

Now that we have Wireshark installed and somewhat configured,... Full Story
-

The Philosophy of Packet Analysis Troubleshooting isn't about looking... Full Story