Have you ever ordered a bunch of Fortinet gear... Full Story
By Manny Fernandez
May 26, 2020
Multi-Factor Authentication with FortiToken, FortiAuthenticator and FortiGate
Today, a customer asked me about selectively assigning FortiTokens to AD users using FortiAuthenticator. In this use case, I am going to use an AD group Token-Users to auto-assign FortiTokens to and another group, Non-Tokens which will be used to authenticate users to FortiGate remote access VPN without tokens; only AD credentials. We are going to be using Electronic FortiTokens.
Assumptions: You have a licensed implementation of FortiAuthenticator.
Adding Tokens
Before you can add the FortiTokens, you will of course need to purchase the electronic tokens.
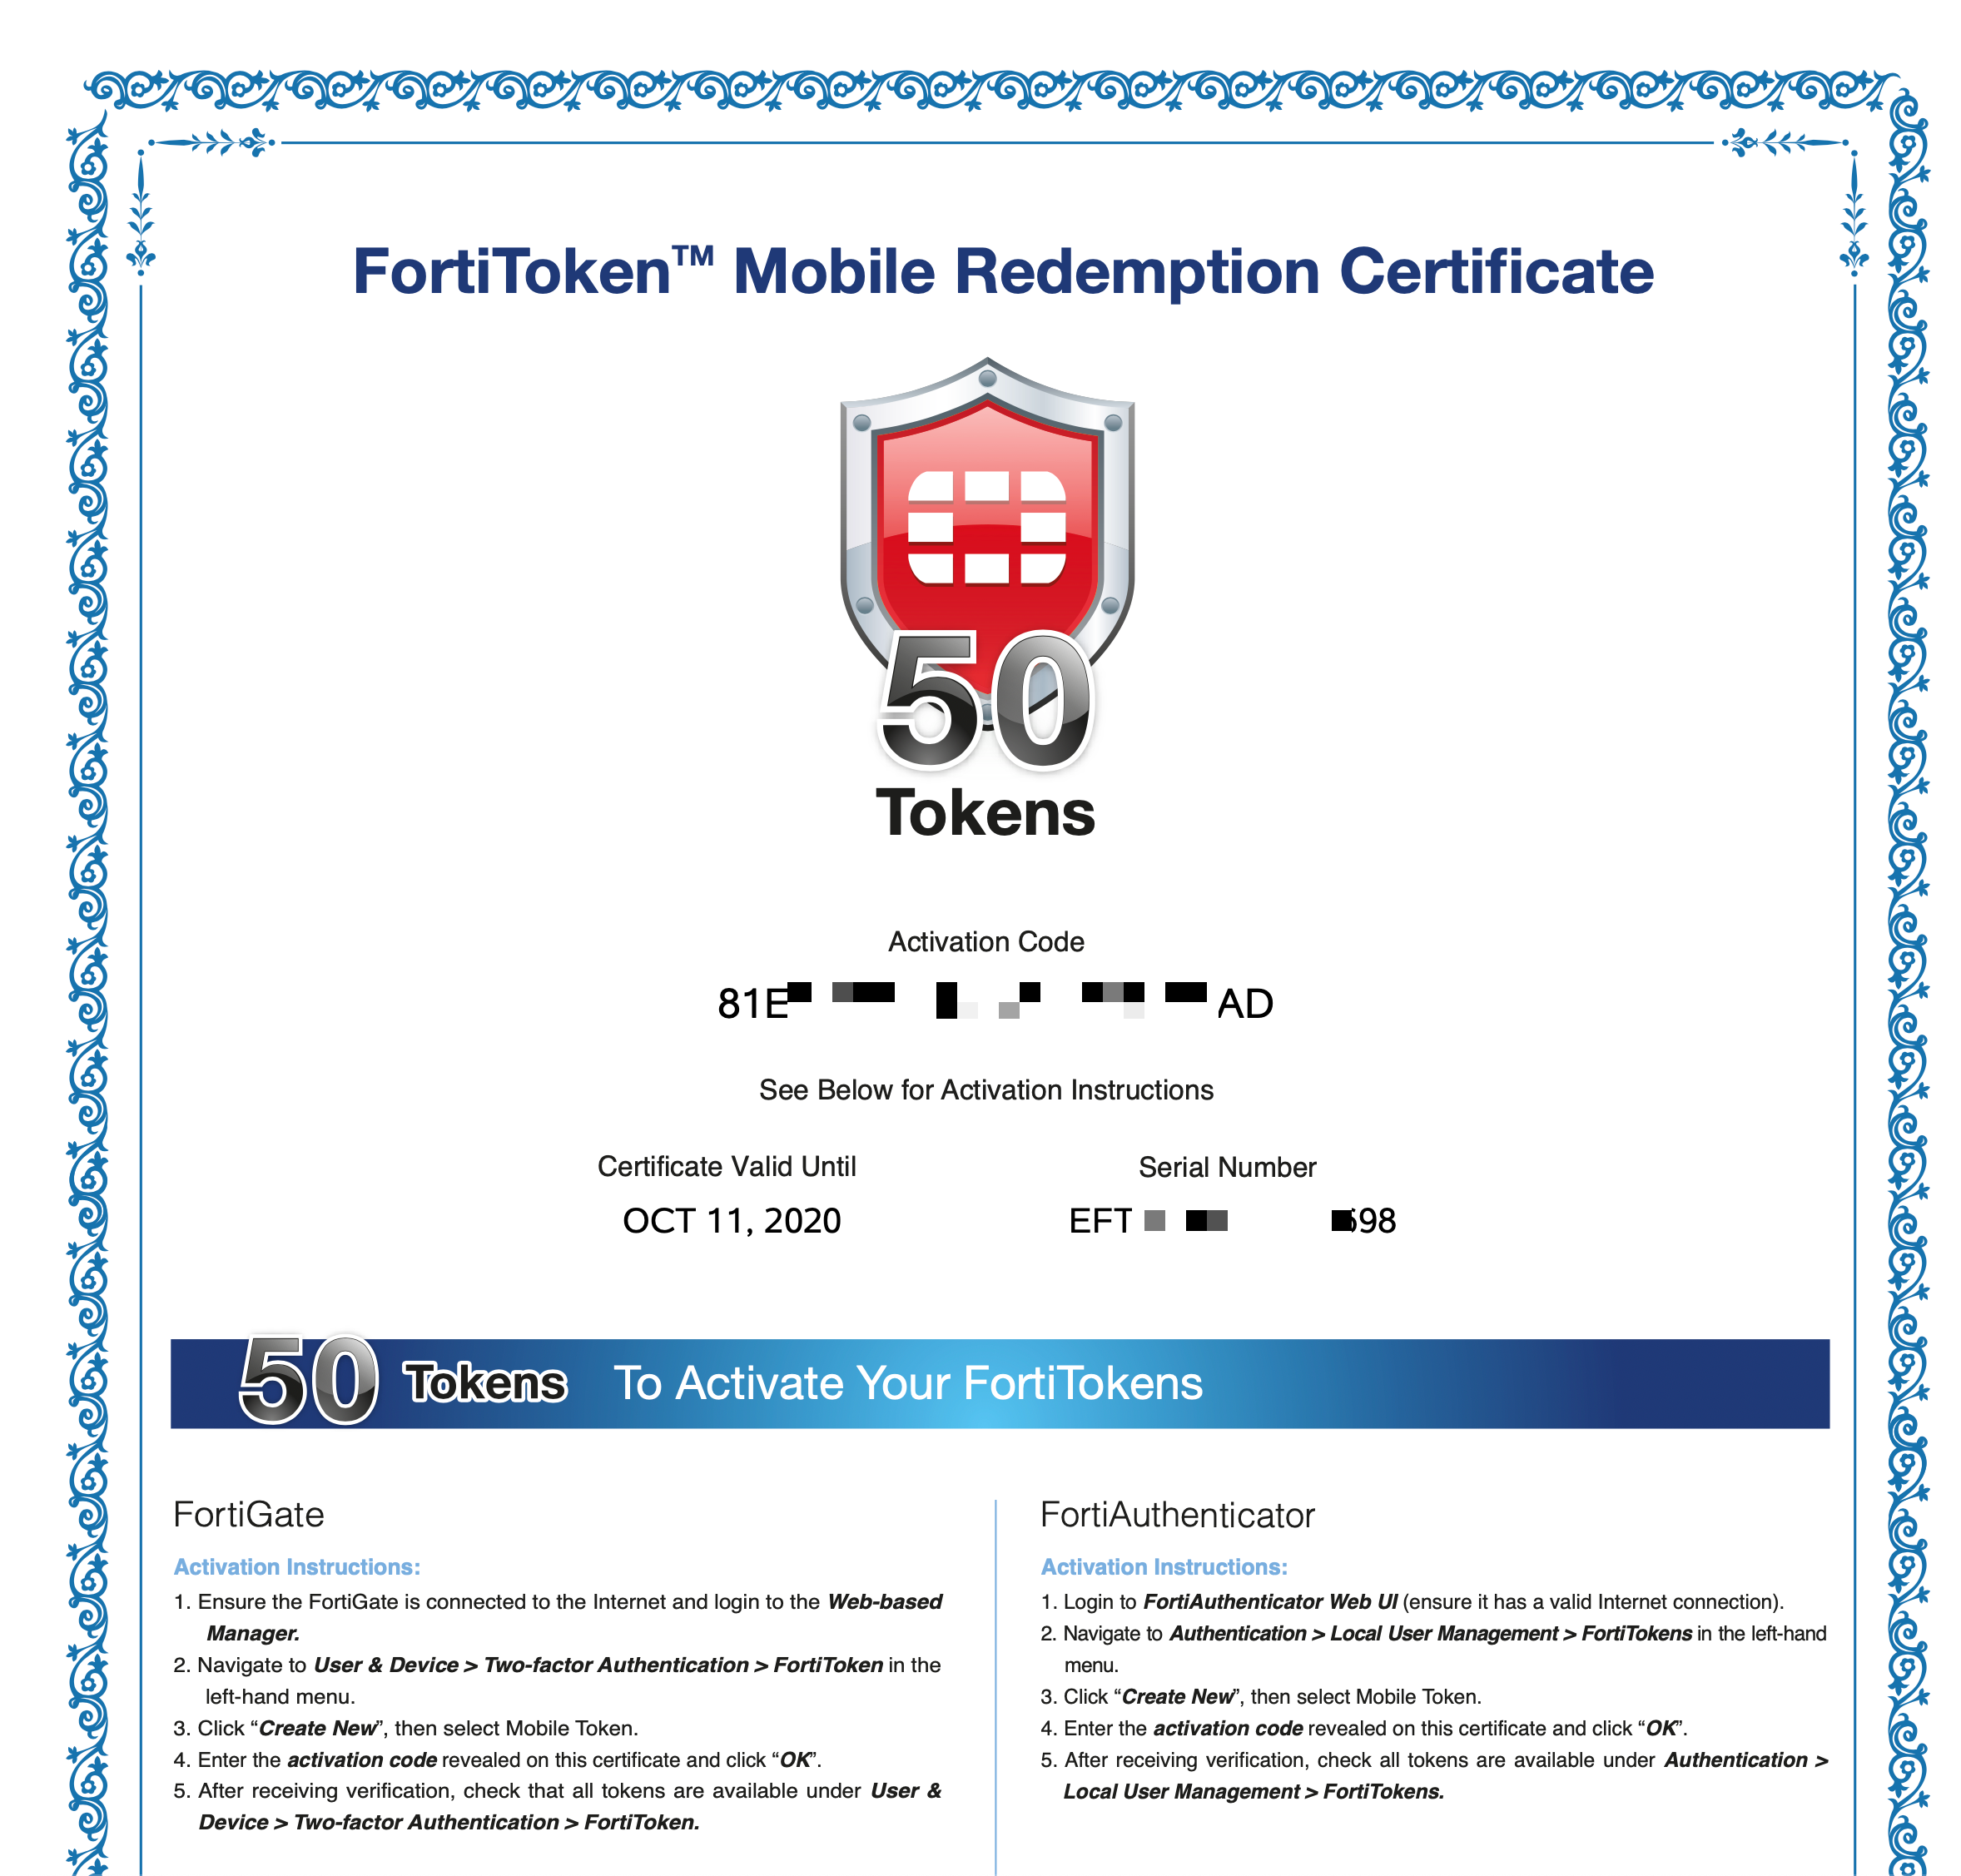
Once you receive the PDF you will notice the Activation Code in the PDF file.
On the FortiAuthenticator (FAC), you will need to go to:
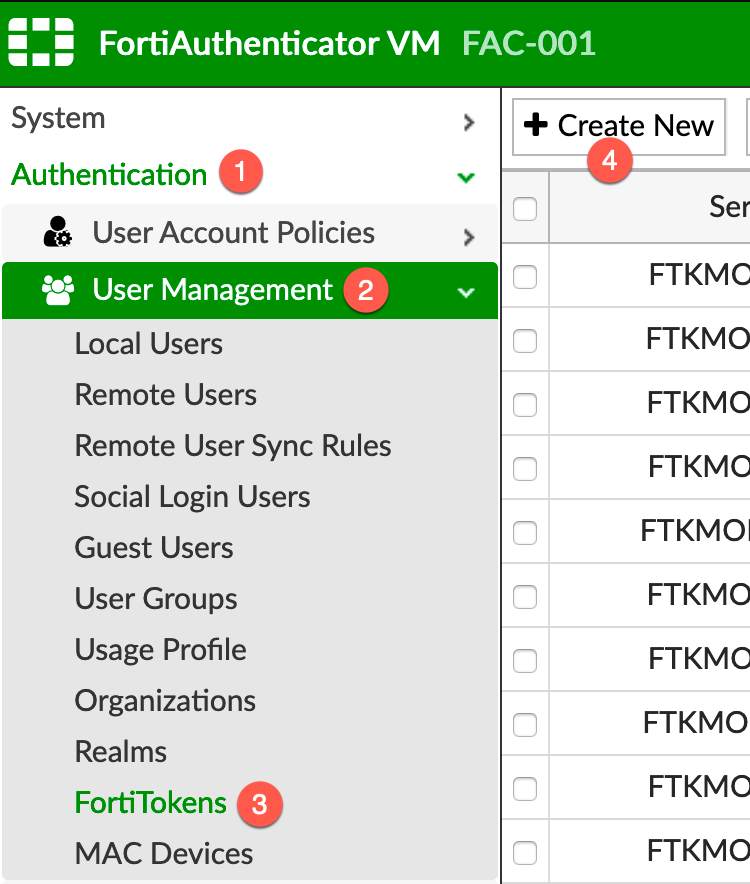
- Authentication
- User Management
- FortiTokens
- Create New

Since we are using electronic tokens, you will need to:
- Choose
FortiToken Mobile - Enter the
Activation Code
then click OK
Once you activate them, you will see the tokens populated

Configuring Active Directory
To connect your FAC to AD, go to Authentication then Remote Auth Server and finally, LDAP

Create a new entry by choosing Create New
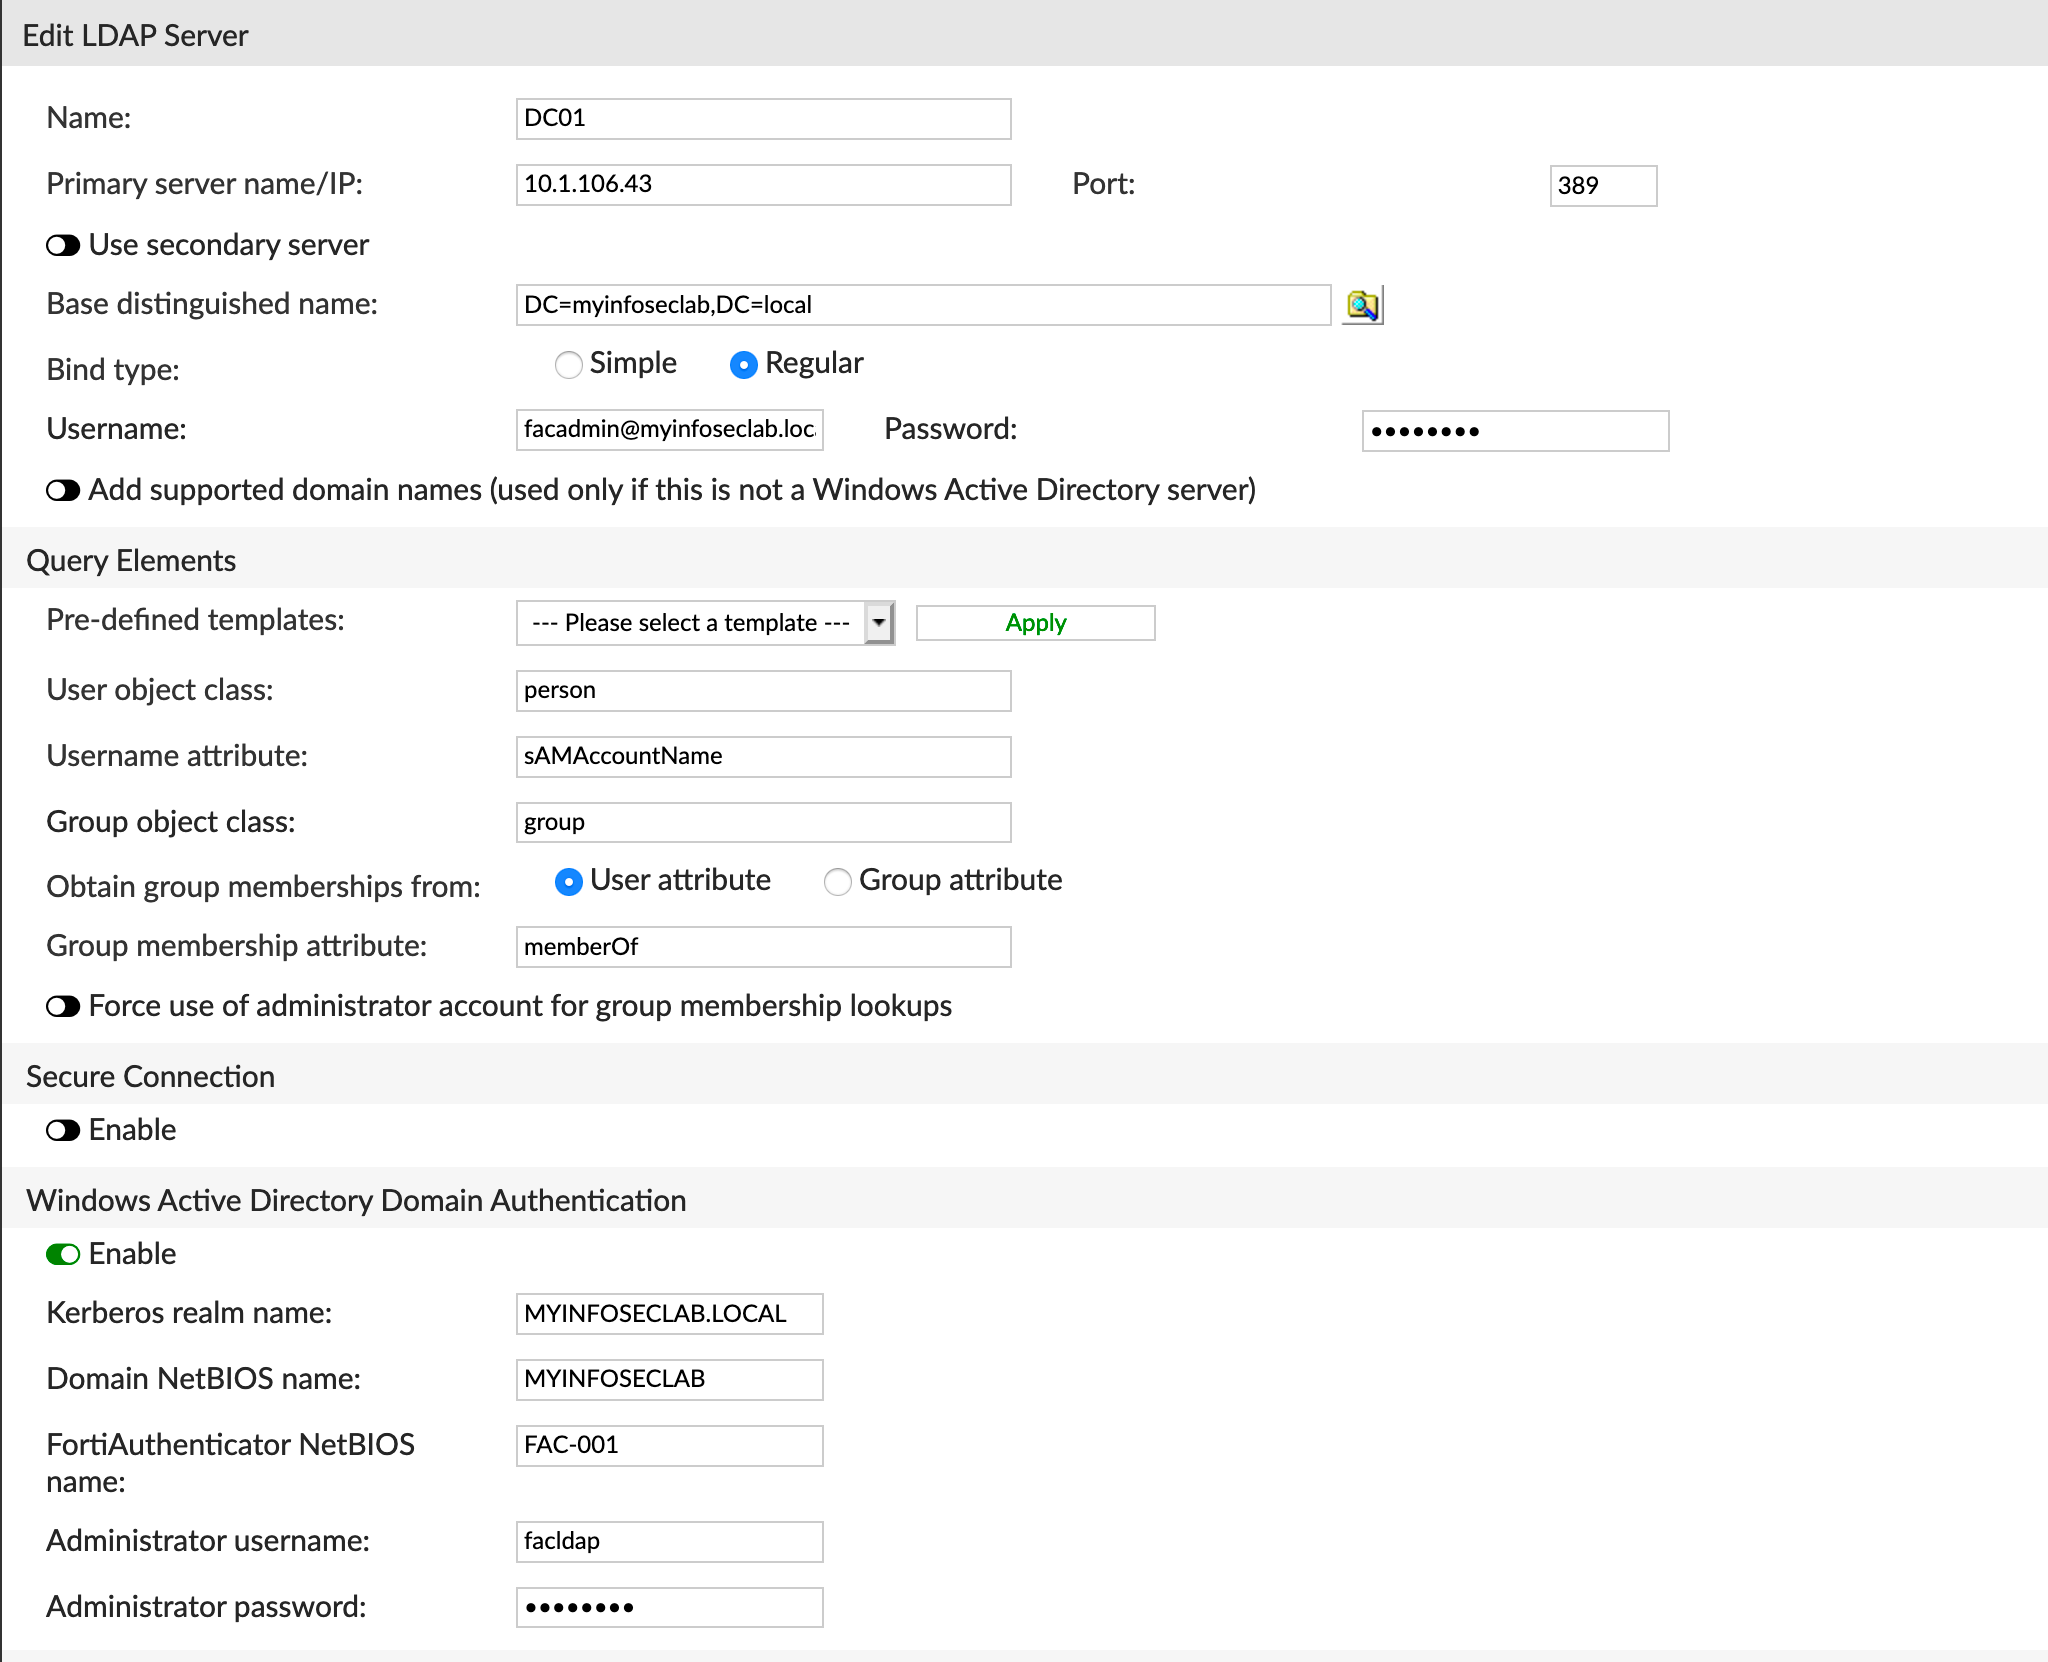
You will need to fill out the Name, Primary Server name/IP, Port,Username, Password . Once the credentials are in place, you can choose the search icon and choose the Base DN.
Under the Windows Active Directory Domain Authentication choose Enable. Enter the Kerberos realm name . It is in All CAPS.
FAC Group
We need to create a group on the FAC to place the users we sync from Active Directory.
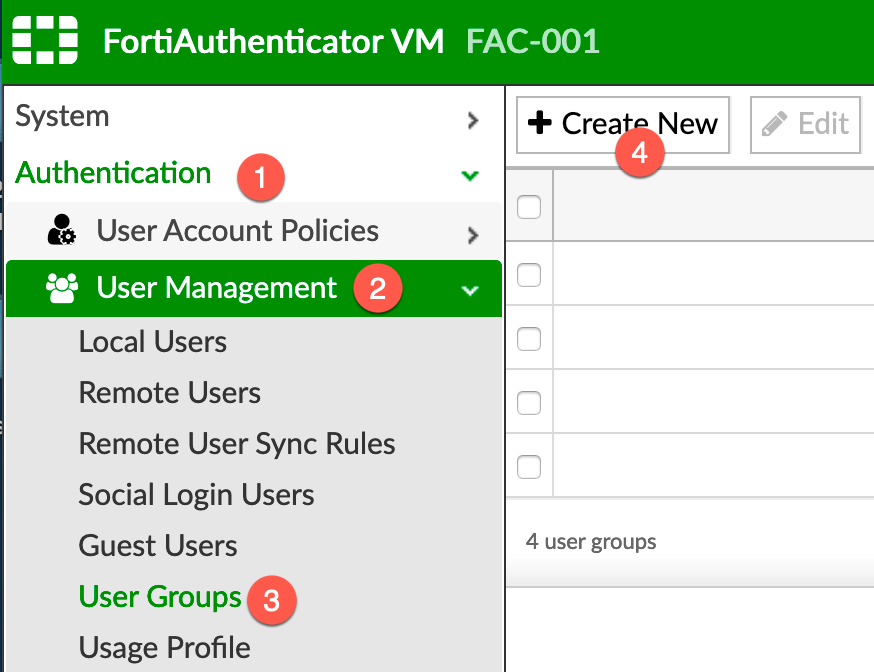
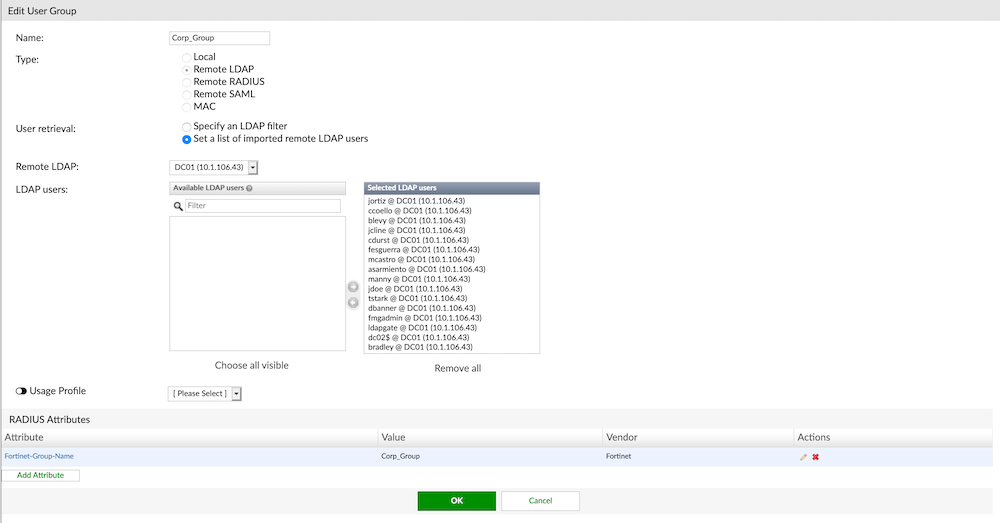
Here we can see the Corp_Group and the type is Remote LDAP. We need to create a RADIUS Attribute

Creating a Realm on FAC
The realm on FAC is different than the SSL-VPN Realms on the FortiGate.
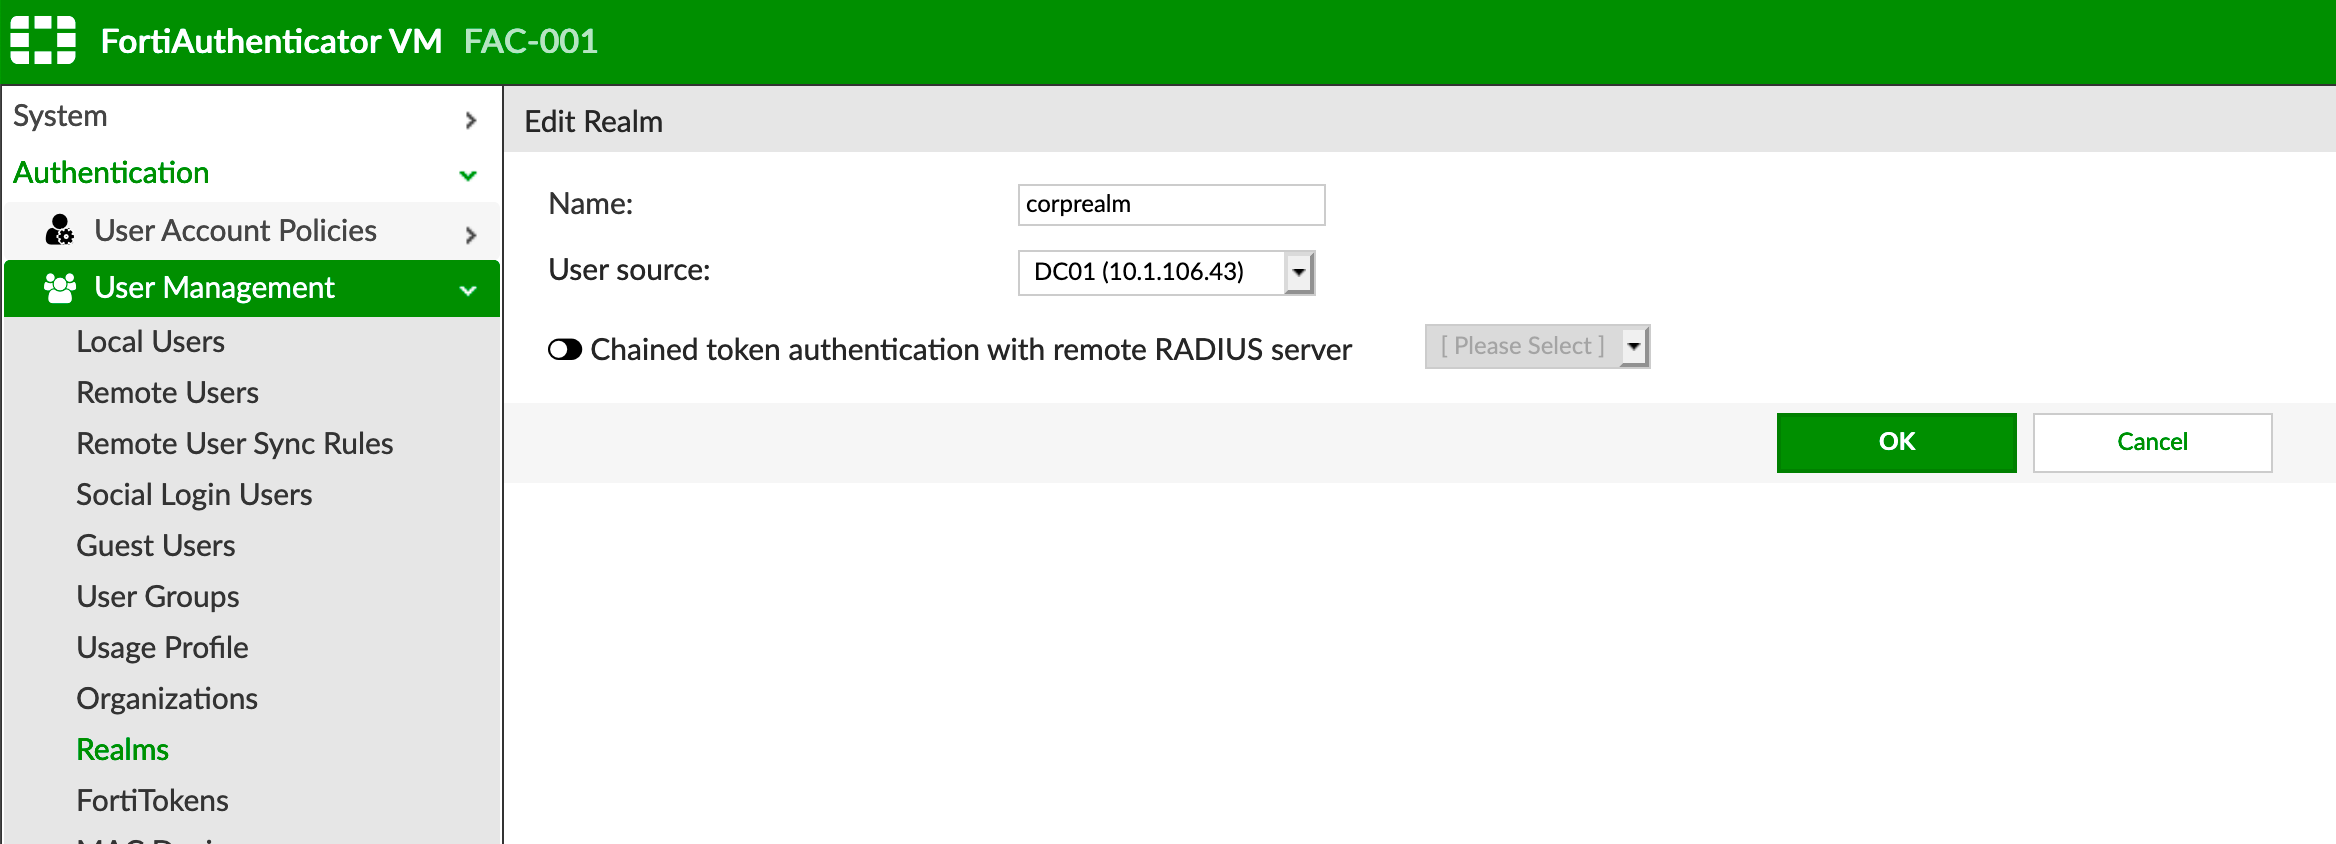
By choosing Authentication, User Management, Realms you need to create a Realm. Under the User source choose the LDAP server you created above.
Active Directory Users / Groups
Here we see the test users and groups created on the Domain Controller.
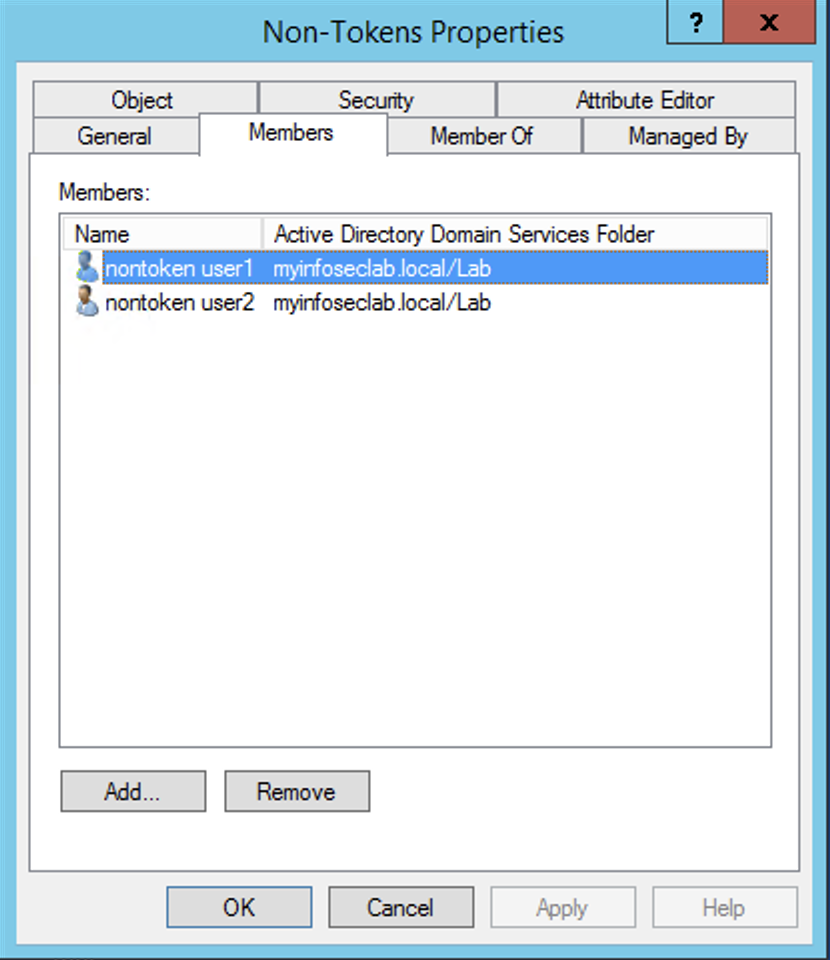
Here we can see the Non-Token user group with two members.
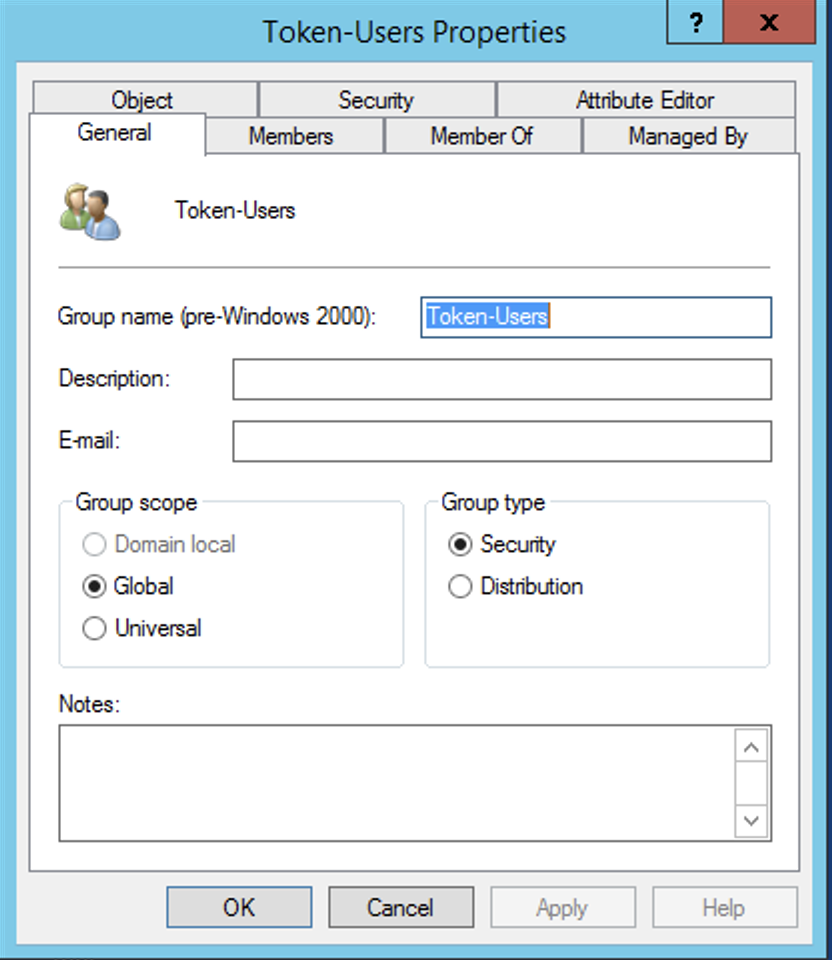
And here we have the Token-Group which has two member as well.
Sync Rule
Now here is where we can get the tokens assigned to the users based on user group. And have another Remote User Sync Rules where no tokens are assigned. Lets first get the LDIF location for the groups. The LDAP Data Interchange Format (LDIF) is a standard plain text data interchange format for representing LDAP (Lightweight Directory Access Protocol) directory content and update requests. LDIF conveys directory content as a set of records, one record for each object (or entry).
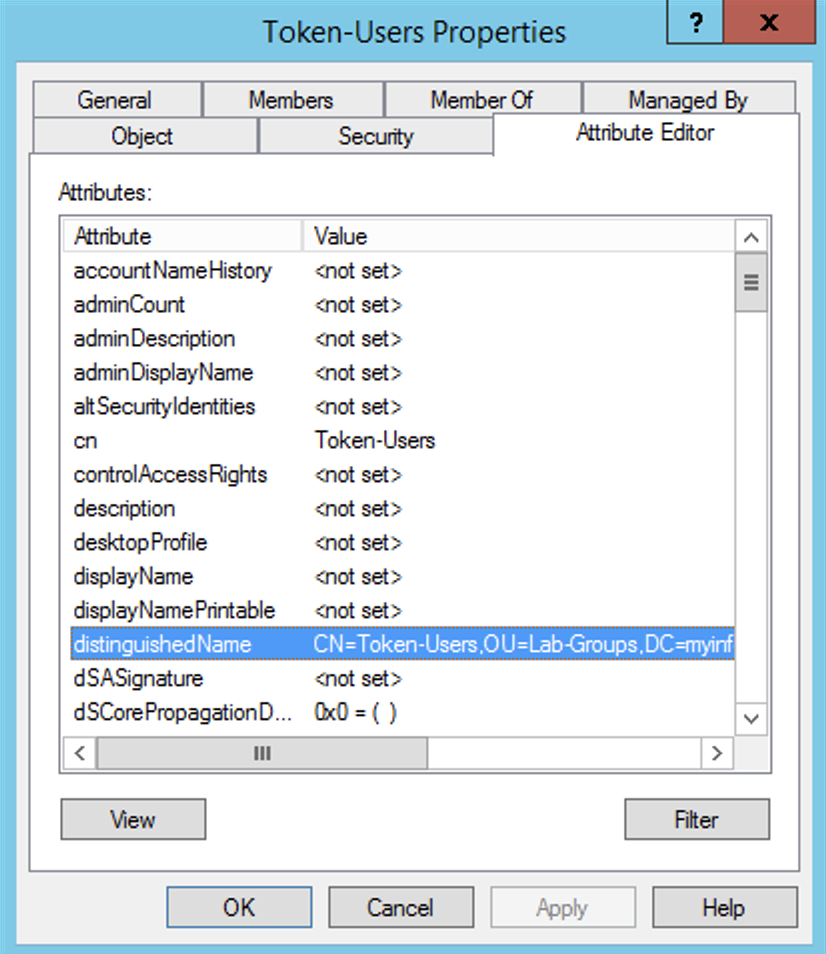
By looking at the Attribute Editor of the group, you can double click on the distinguishedName and you can easily copy it to the clipboard.
In my case: CN-Token-Users,OU=Lab-Groups,DC=myinfoseclab,DC=local
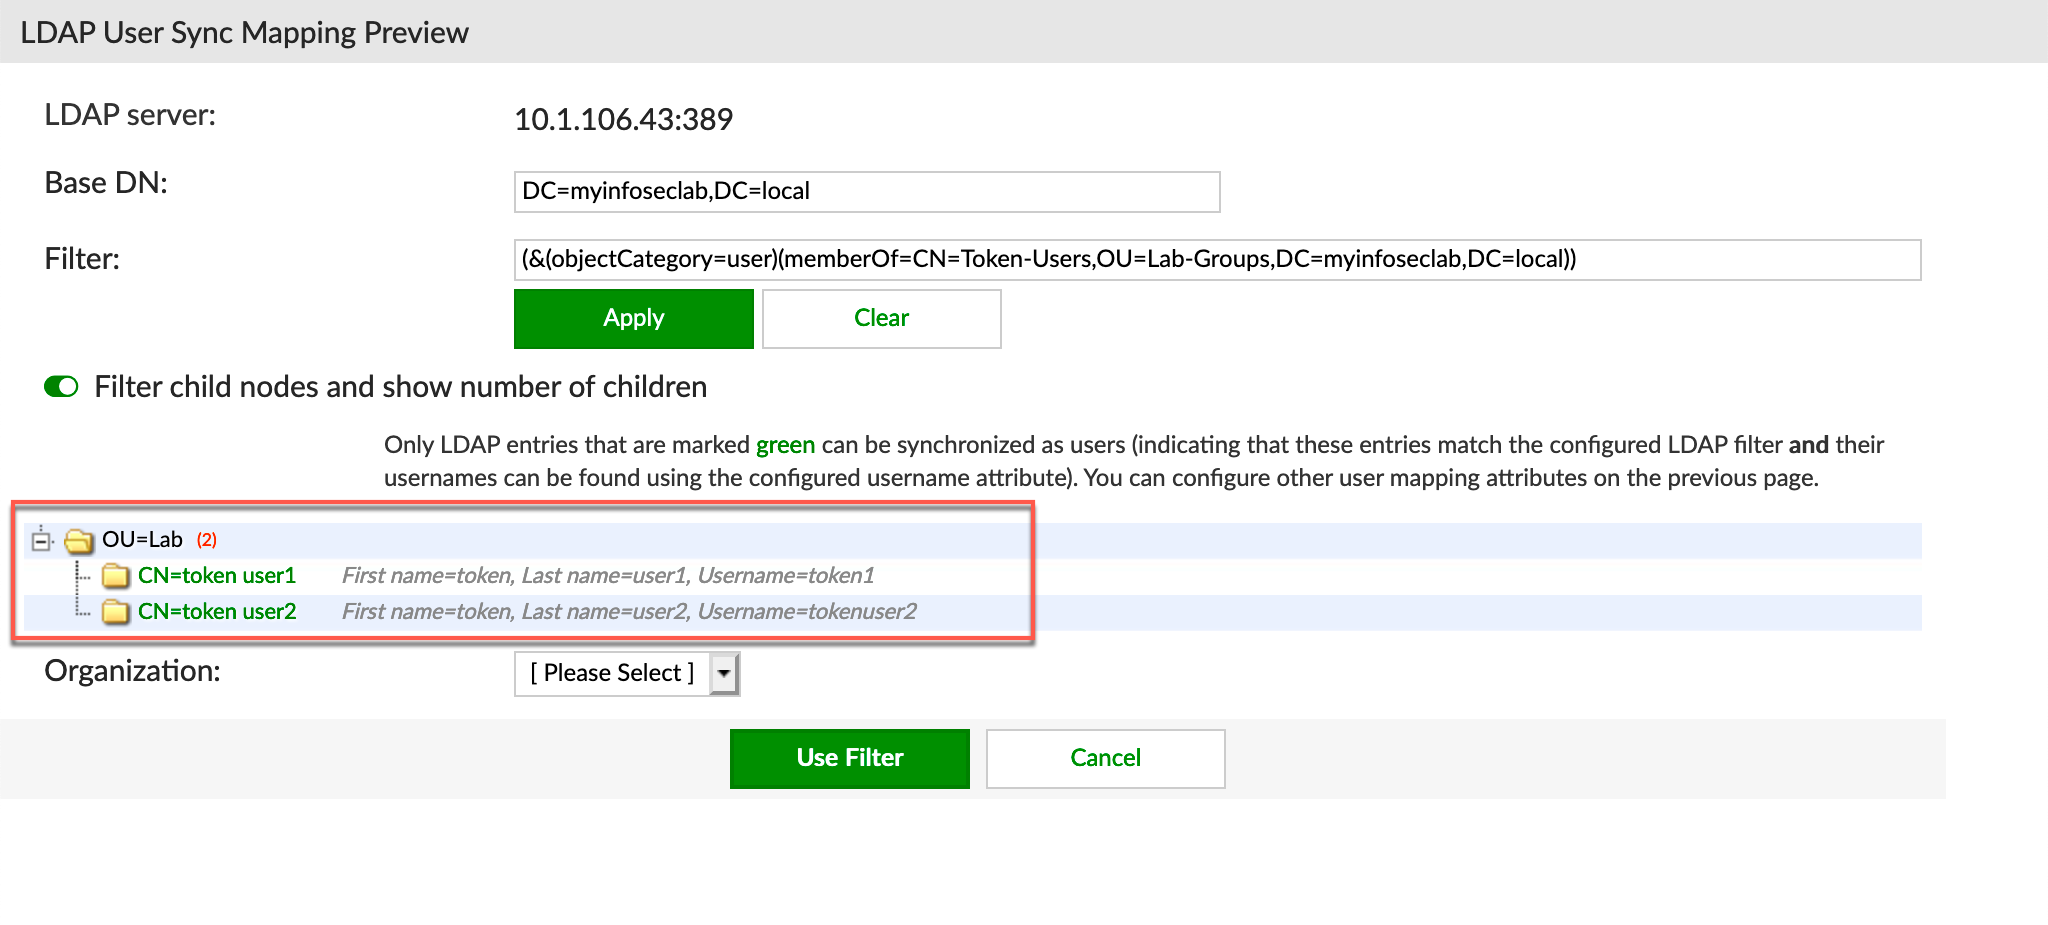
What we are doing here is that we are creating a Filter to match a particular AD group. Once the user group is matched, we can choose what to do with the users.
The filter built using some of the information received from then Attribute Editor
(&(objectCategory=user)(memberOf=CN=Token-Users,OU=Lab-Groups,DC=myinfoseclab,DC=local))
Here is a link to the Fortinet Docs regarding how to format these filters.
We can see that we can do a Test Filter . As you can see, the results shows token user1 and token user2 .
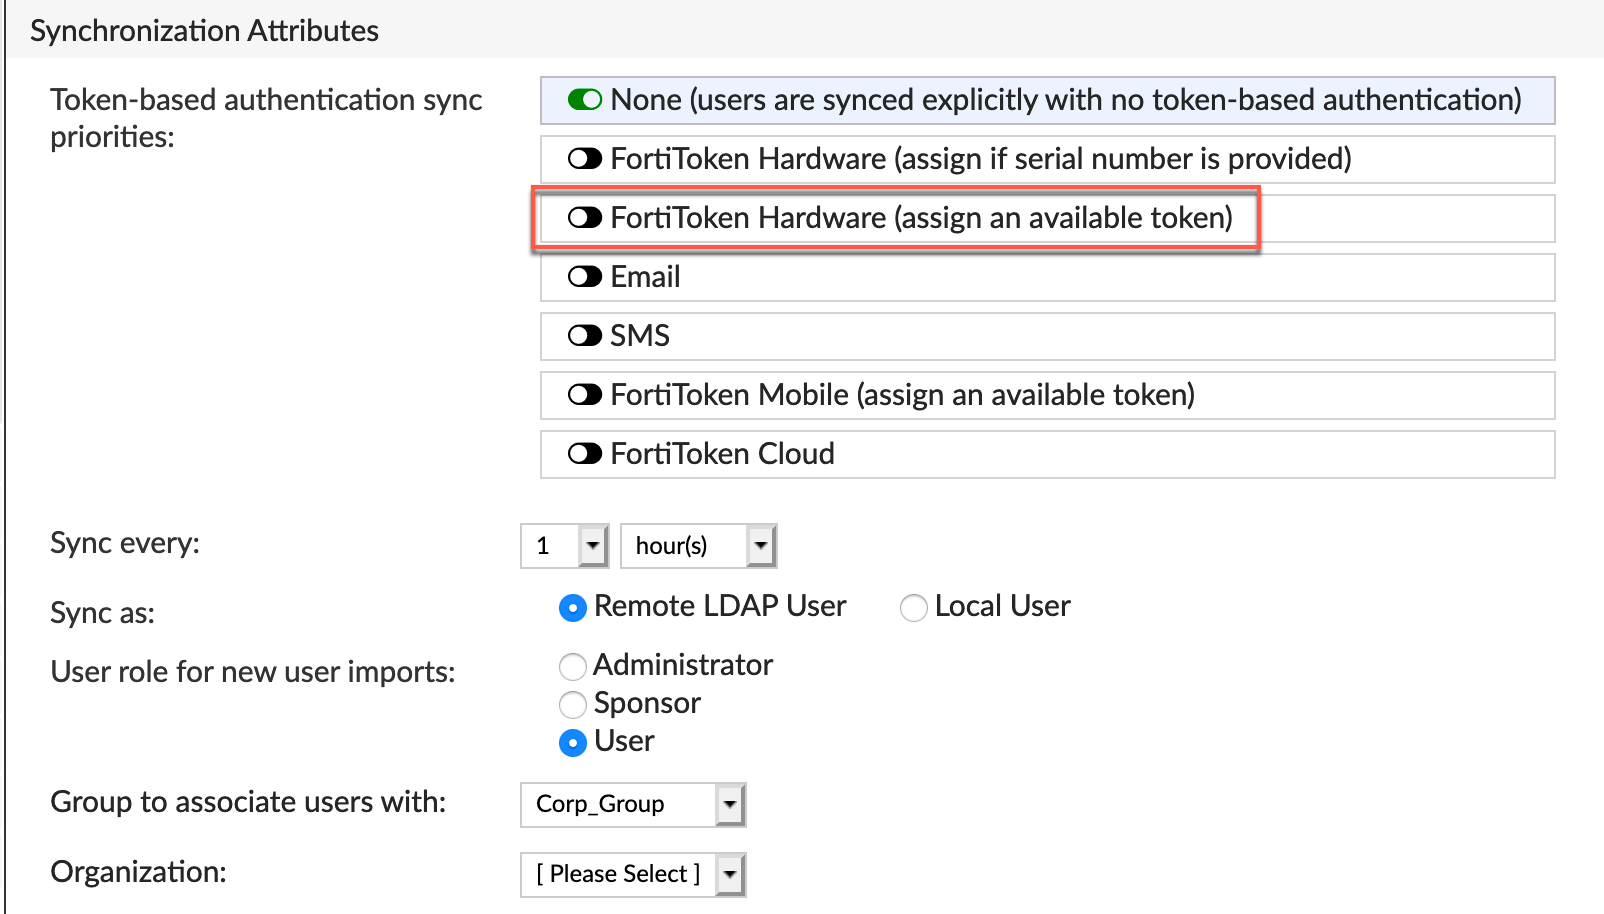
Here we are showing the disposition of the matching of the sync rule. For the Token-Users we could auto assign the available token,
Create another sync group to the other group that will NOT get tokens. This would simply do nothing regarding tokens.
However, we WILL assign these users to the group we created above.

RADIUS Configuration
We will now configure the RADIUS client (FortiGate) on the FAC
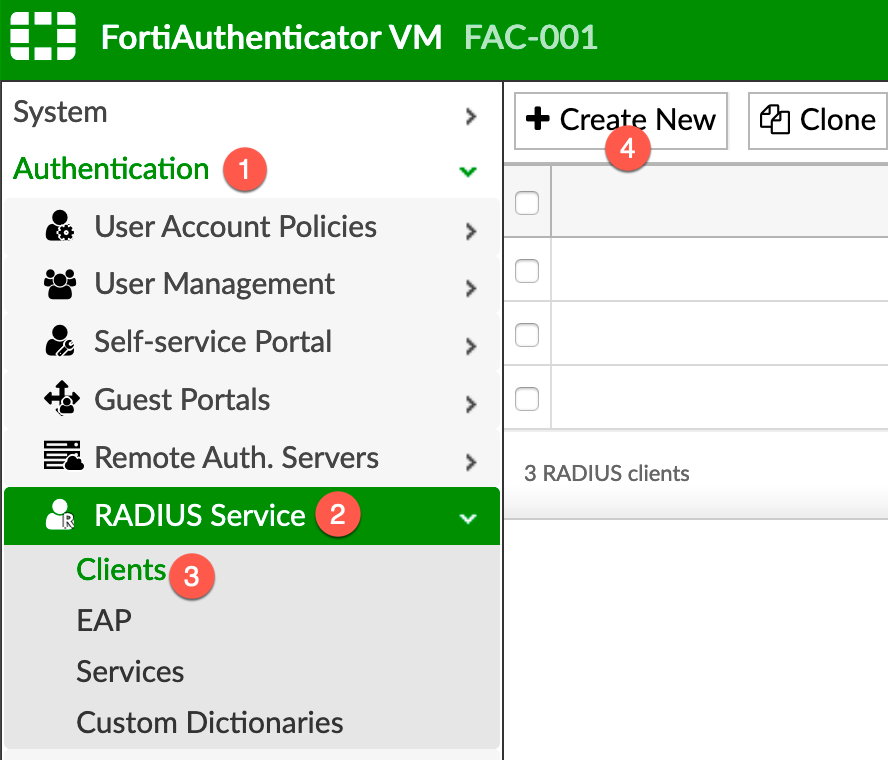
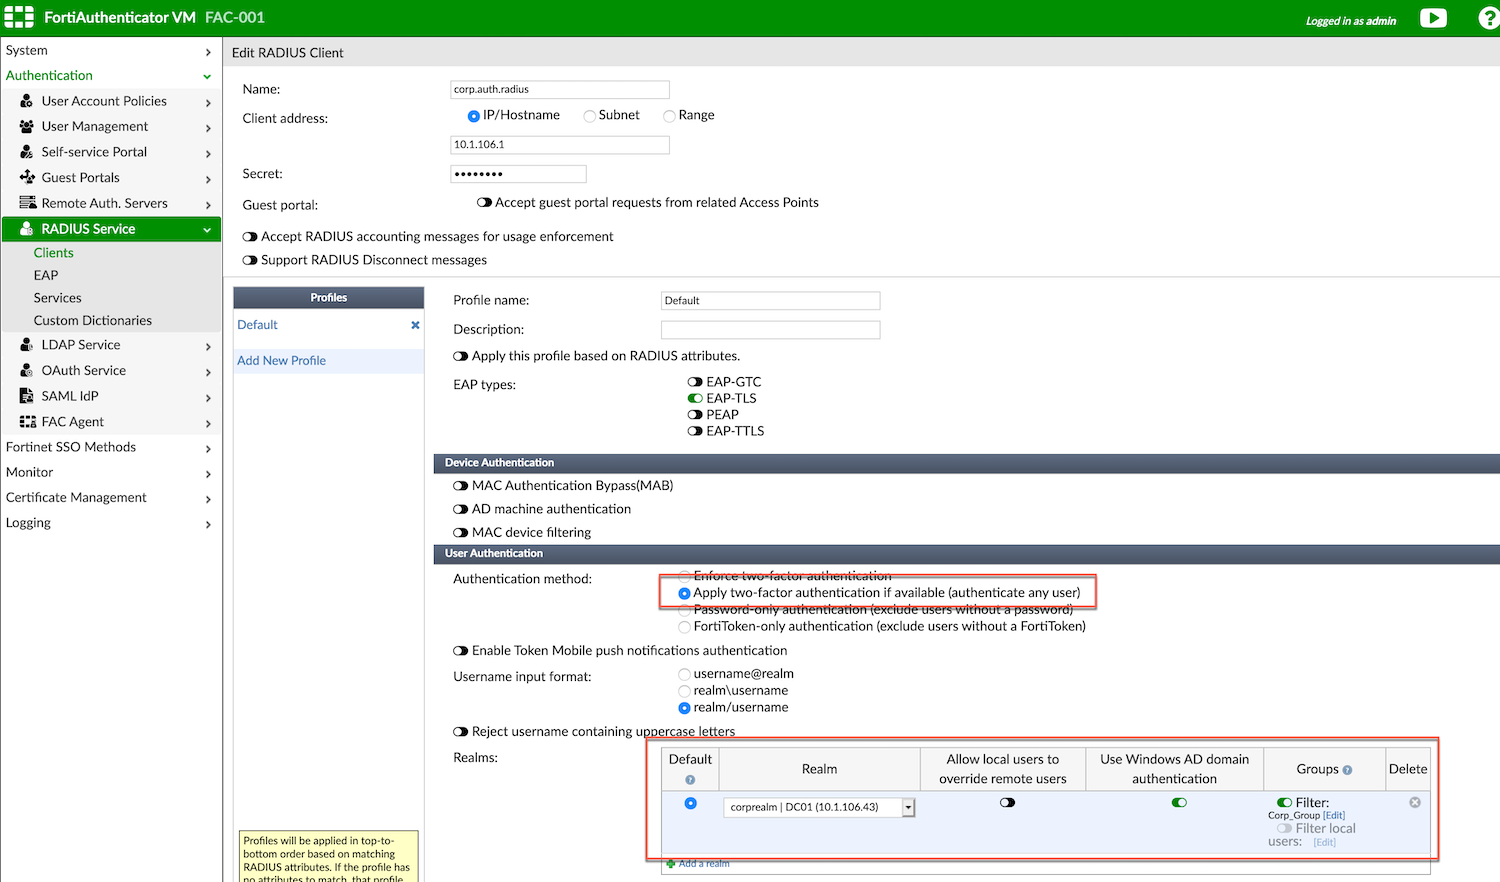
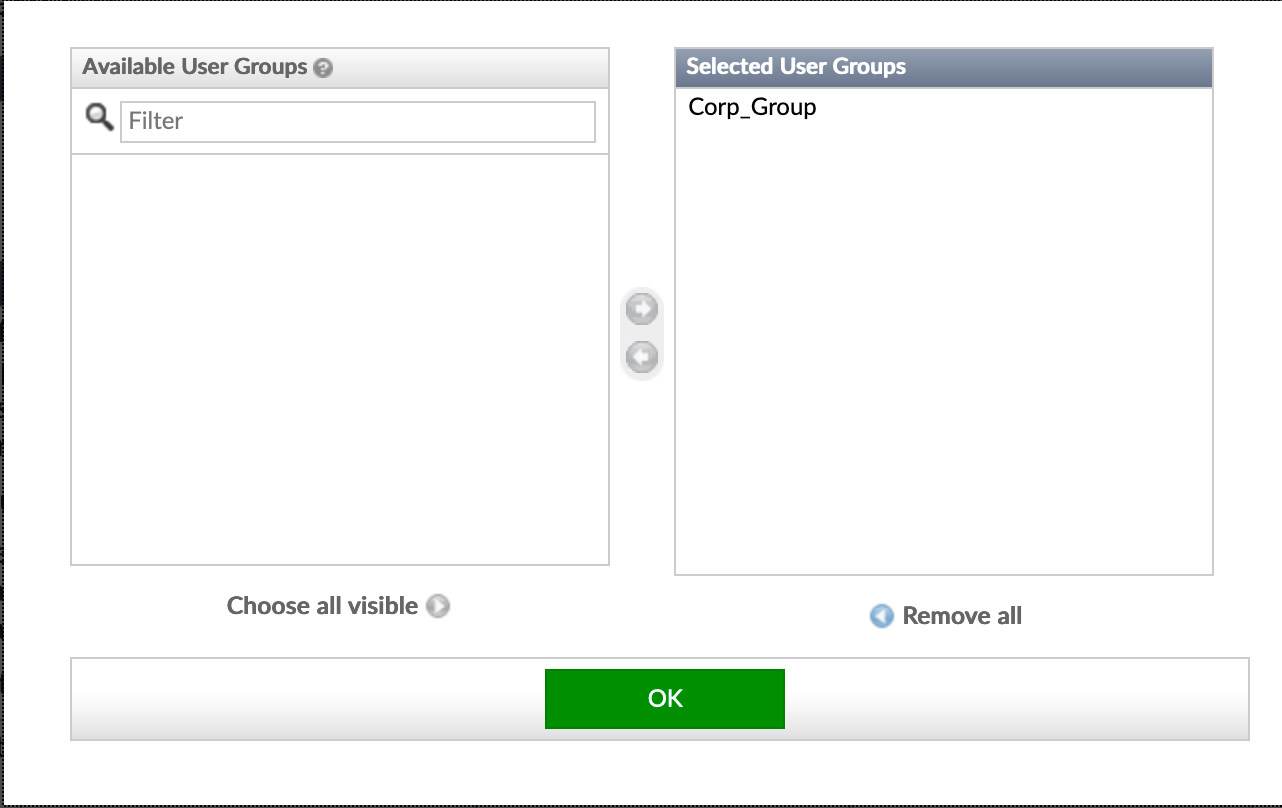
Here we see the IP address of the FortiGate. The most important thing here is to have the Realm you created above, The AD authentication and the Group and the Secret Key.
Configuring RADIUS Server on FortiGate
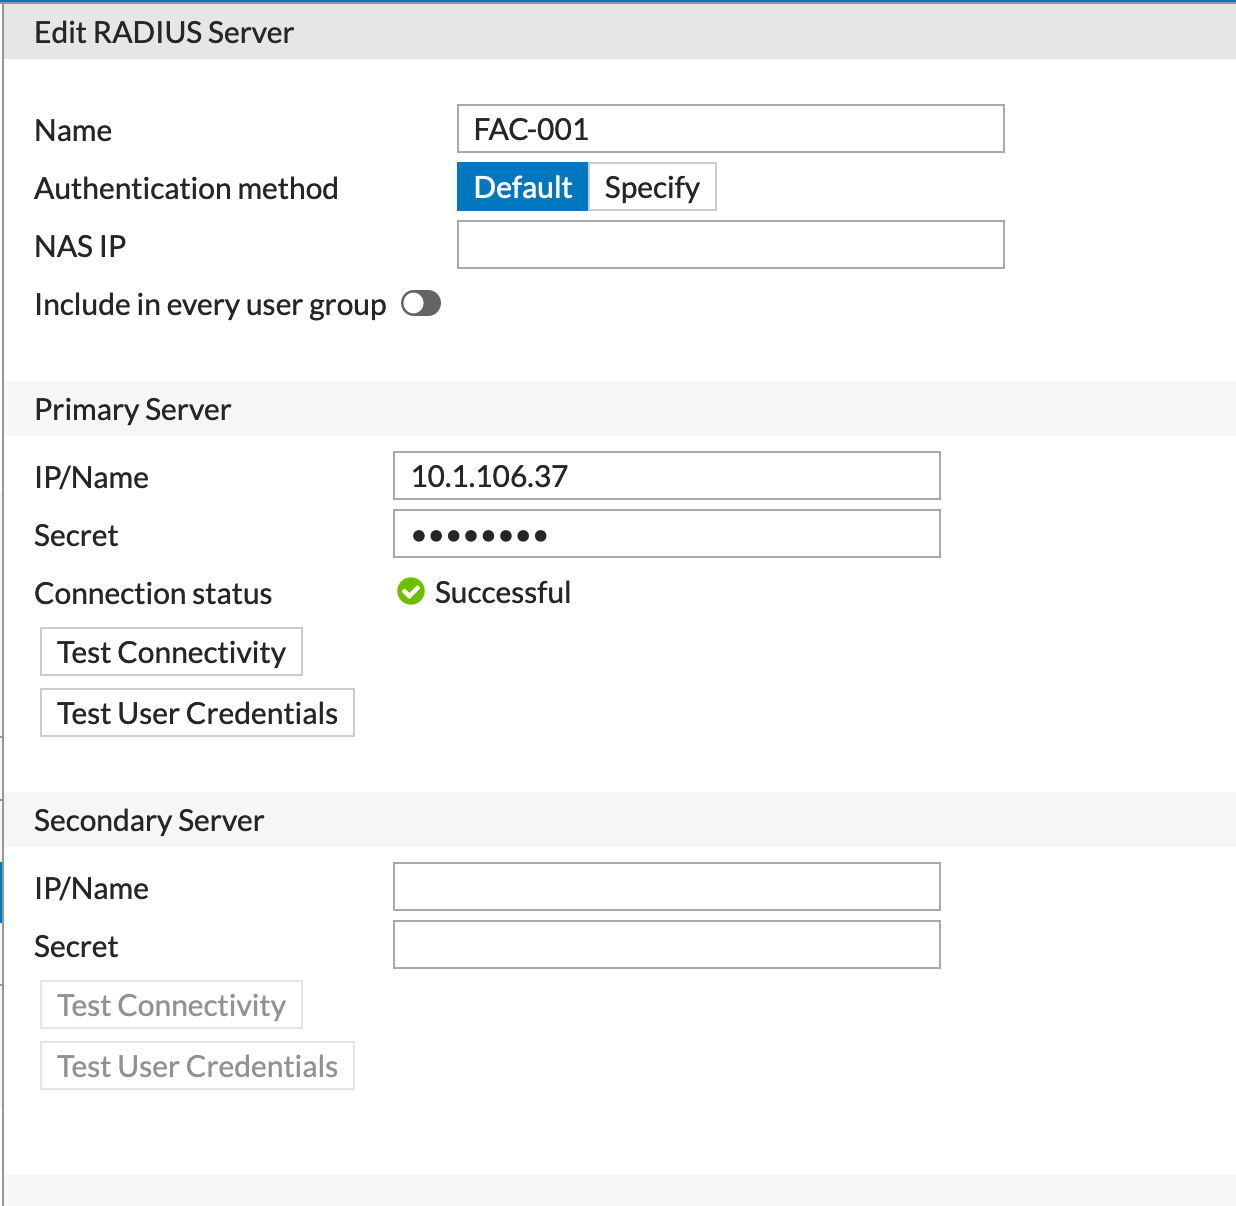
Now we will go to User & Device then RADIUS Servers (On FortiOS 6.4, it is User & Authentication) then Create New
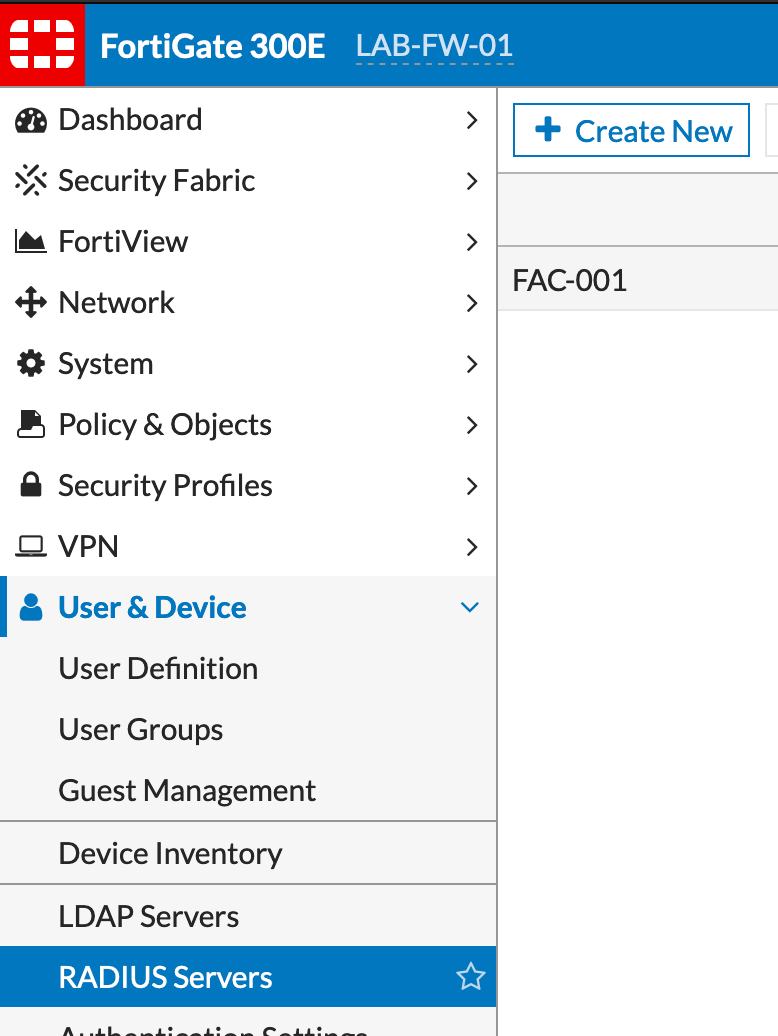
Here you can see the simple config. We see a name, IP address and secret key.
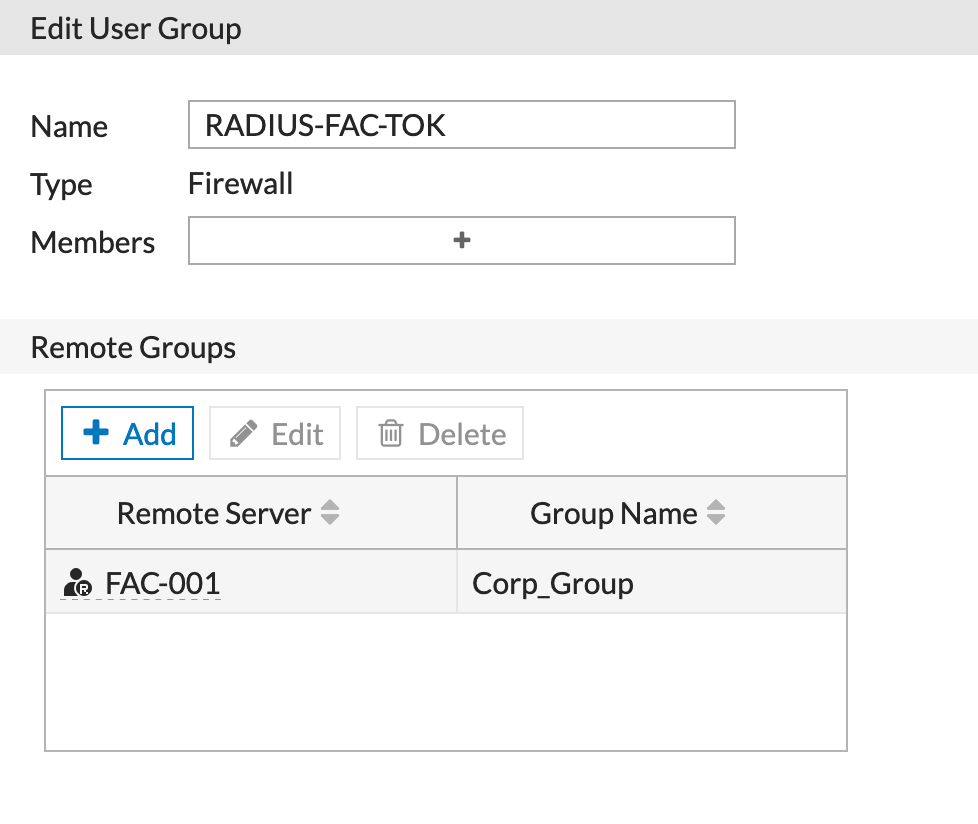
FortiGate User Group
We can create a new user group choosing Remote Group and choosing the RADIUS server we created above.
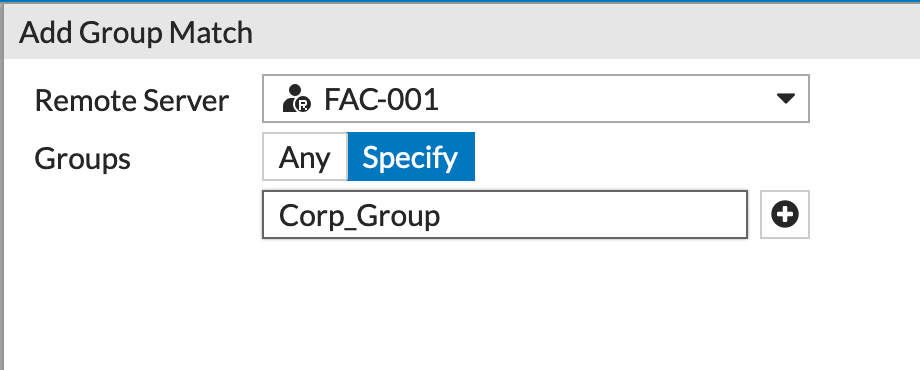
Here are the particulars of the Remote Group where we entered the Corp_Group.
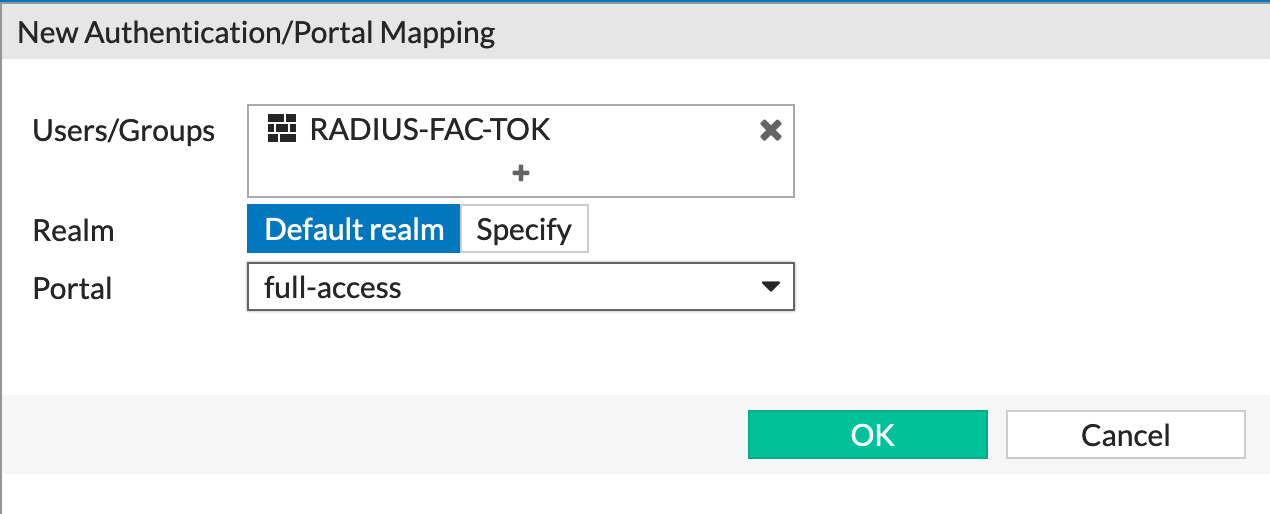
VPN Settings
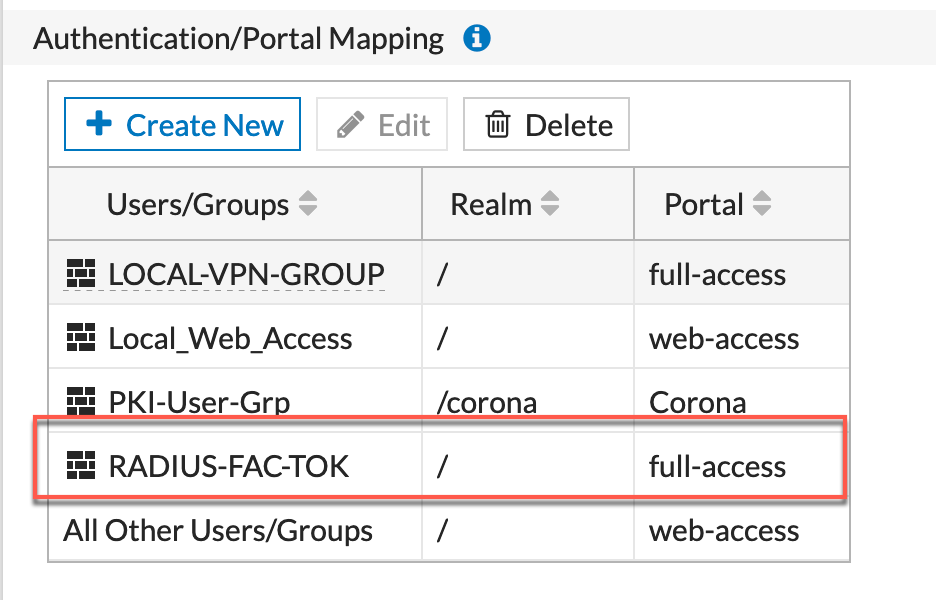
You can see the RADIUS-FAC-TOK above and below we can see the specifics about the configuration.
Firewall Policies
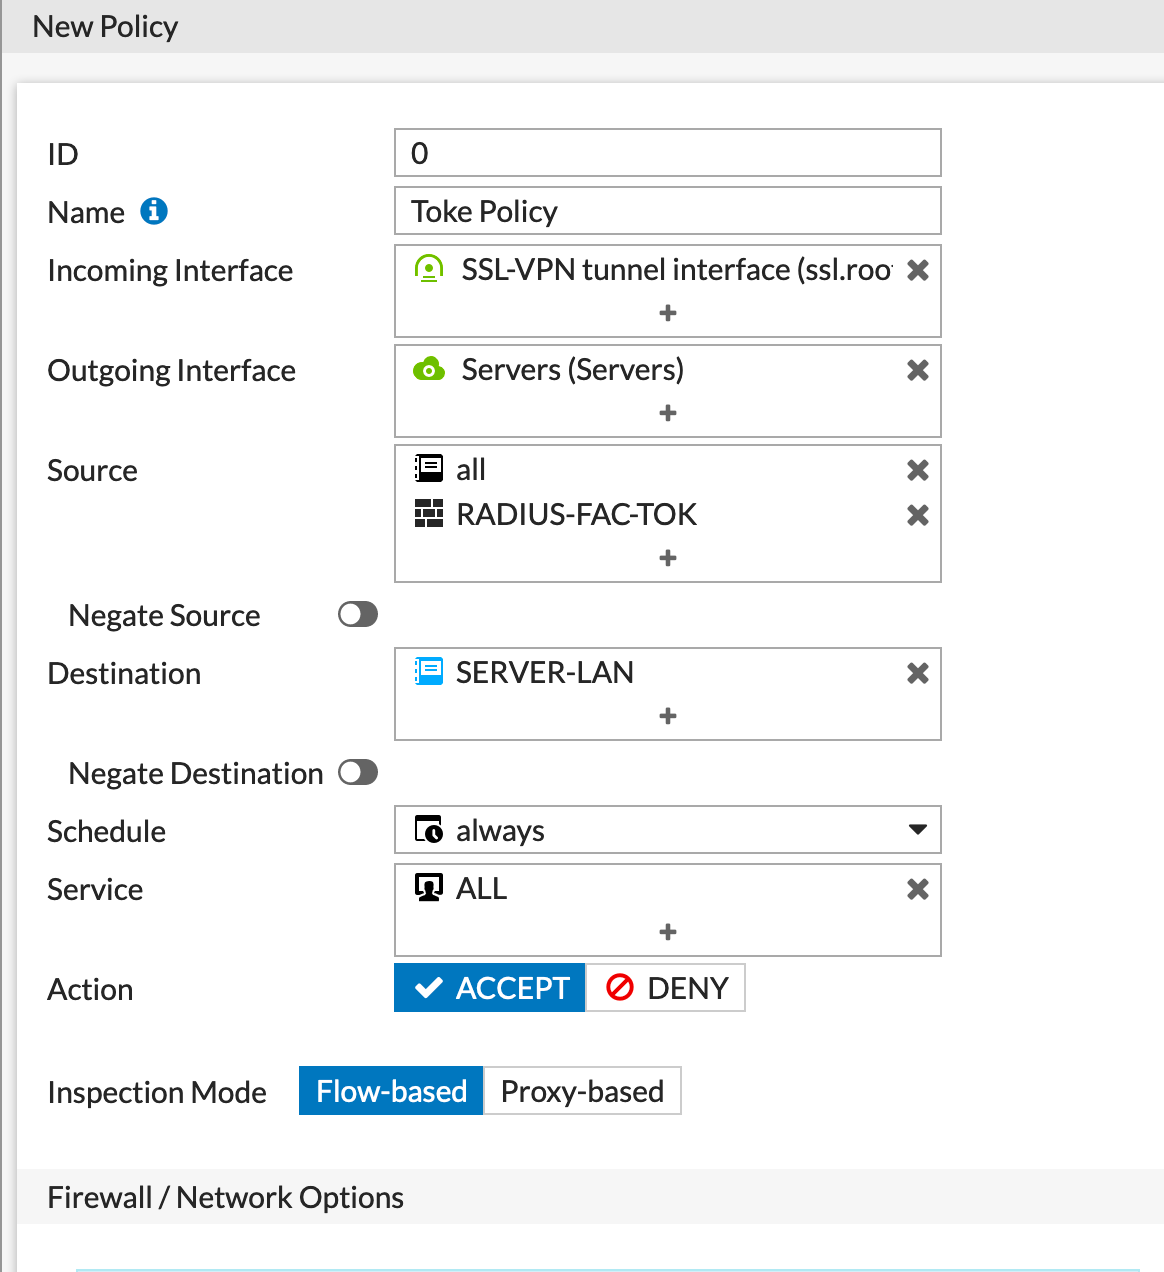
Finally we have the Firewall Policy for the VPN referencing the RADIUS group.
Recent posts
-

-

Had a customer with over 200 static routes on... Full Story
-

This is a work in progress, I will be... Full Story
