Have you ever ordered a bunch of Fortinet gear... Full Story
By Manny Fernandez
July 23, 2020

Setting up Alerts in Observium Community Edition
In this article, I am going to show you how I set up Observium to send me an email alert when an interface goes down. Observium is amazing and integrates with many solutions out there. When I had a SOC, I used Slack to receive the alerts. This was great because when the SOC Analysts were off shift, whoever else was manning the consoles, would see the alerts. Obviously, Observium is more about up/down and historical performance, but if the SOC Analyst had some alert, we could easily correlate the status of the device (e.g. did the device go down, reboot, etc).
Lets get started.
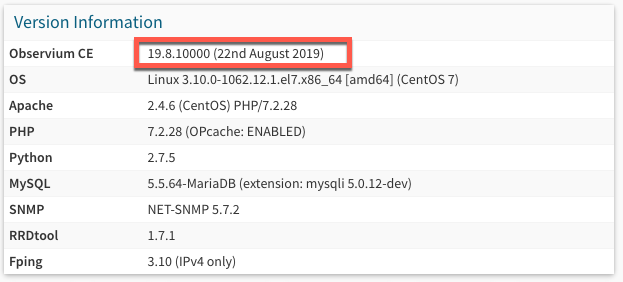
First of all, I am running the Community Edition (Free) v19.8.10000 on CentOS 7.
Creating the Checker
Next we will log into the Observium web portal
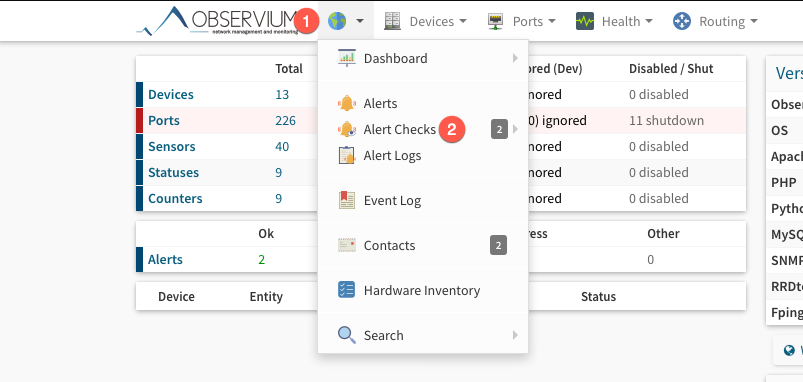
Once logged in, you will choose the globe icon and then choose Alert Checks

On the top right corner, you will see Add Checker . Click that and you will have options to choose such as: BGP or Device or Memory etc.
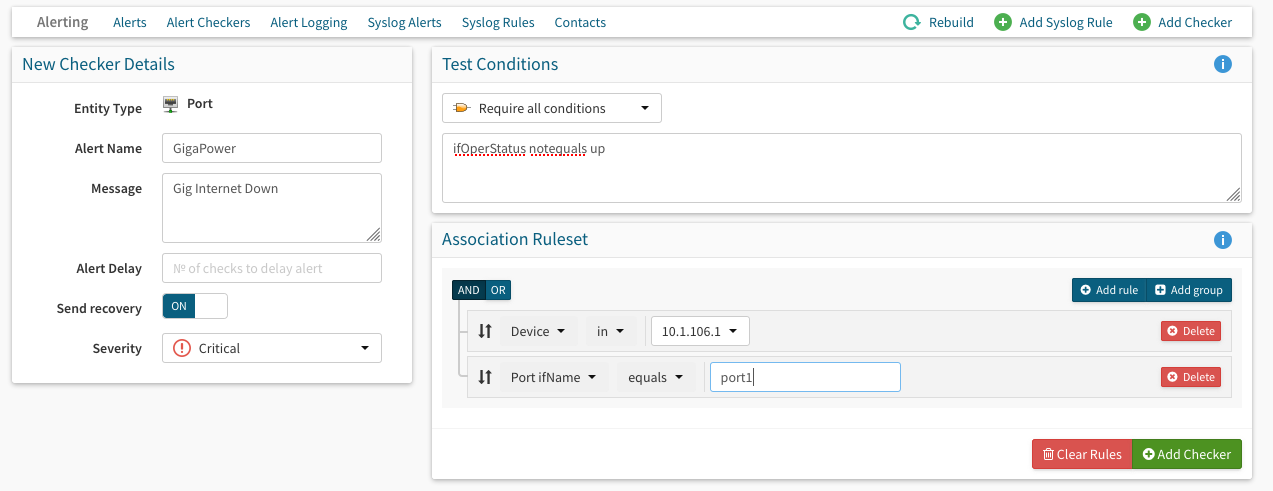
In my case, I wanted to monitor the Operational Status of my interface. Observium has a pretty good list of different Check Conditions on their site.
On the left you will see New Checker Details
- Entity Type – This is the port, memory, etc you want to monitor
- Alert Name – This can be anything you want to describe the checker but must be unique to the Observium install.
- Message – is a meaningful text message that will be sent along with any alerts generated by this checker. It should be used to direct the recipient to the cause and importance of the problem.
- Alert Delay – You can use this to limit the amount of alerts you receive. Lets say you want to wait for a high memory alert to fire 3 times before it notifies you.
- Send Recovery – Up/Down would be two different alerts.
- Severity – Locked on Critical
Then on the right side, you will see the Test Condition
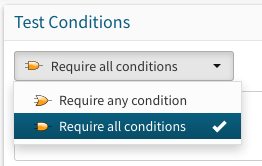
- Test Conditions – You have two options
Require any conditionandRequire all conditions
- Association Requests – Here you can specify a particular device, interface, etc. You can also do any device in your inventory if you want, but that COULD get noisy.
In my example, I am looking for condition that is notequal to up from ifOperStatus (essentially a Up/Down in the Cisco world).
Now you will need to Add Checker on the bottom.
Setting up the Contact
This is the email address that will receive these particular alerts. You can have network related alerts go to your networking teams but you may be monitoring a server and when the space is getting close to maxing out, maybe send those to your server or storage team.

On the top bar, you should see the Contacts button.
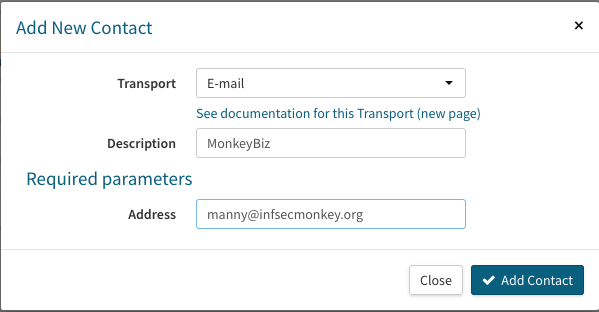
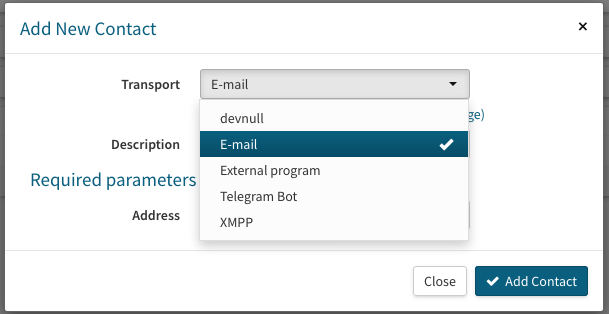
I chose E-Mail since this is the medium I want to receive this particular notification on, however there are more options via the drop-down.
Associating the Contact
Now that we have the checker and the contact, we need to associate the two. Although you could absolutely create the contact first and then the checker in one step, I just happened to do it this way because I was writing this article and did not want to use my real contact that I use to receive emails and did not think about it until after….. but I digress.

Going back into the Alert Checkers section and choosing your Alert Checker you will see the Associations button.

Once there, choose the Contact that you created in the previous section. You CAN choose to Add All but this could cause a lot of noise and in a group environment you could have a waste of time with multiple people checking the alerts.
Finally you will need to hit the rebuild button. It does not take you down and will take a few seconds. Click the Rebuild now button.

Hope this helps.
Recent posts
-

-

Had a customer with over 200 static routes on... Full Story
-

This is a work in progress, I will be... Full Story
