Have you ever ordered a bunch of Fortinet gear... Full Story
By Manny Fernandez
May 3, 2019
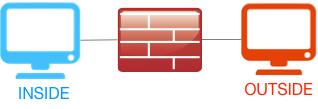
Troubleshooting NAT on Fortigate Firewall
When you want to validate that the Fortigate is doing NAT properly, there are a few things you can do. If you want to see the IP address you are coming from and you are on a device that has a web browser, you can open the browser and browse to www.ipchicken.com or any host of sites that will give you the IP address you are coming from.
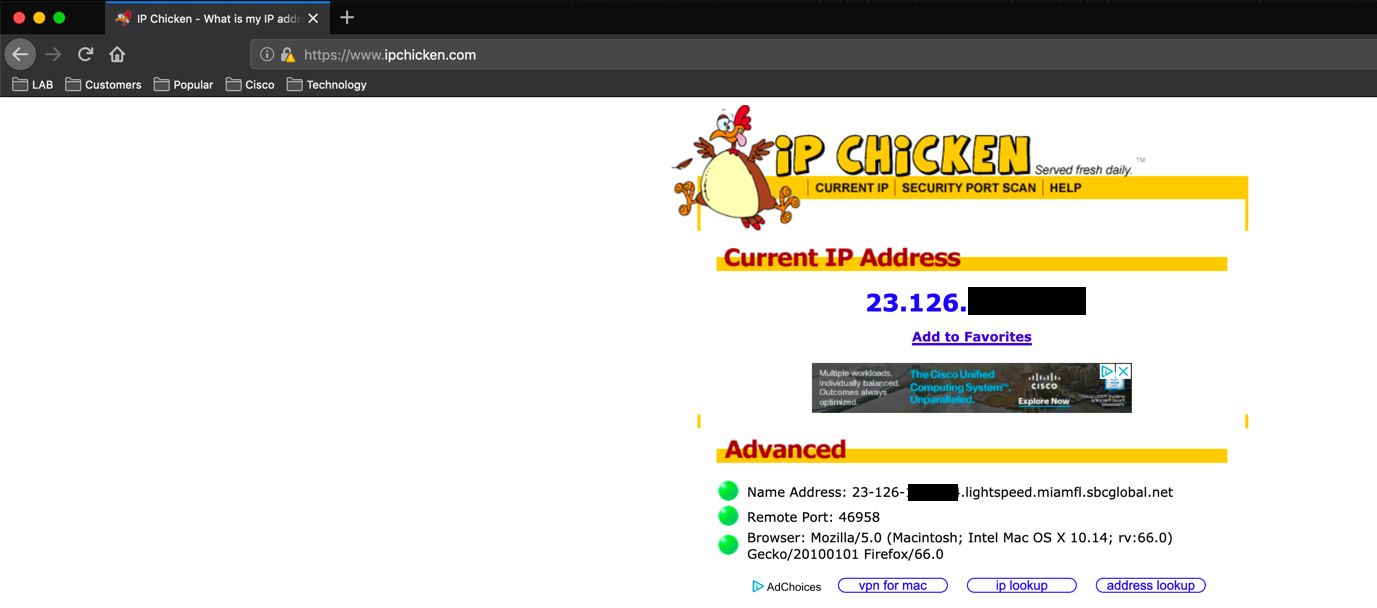
If you are running Linux on a GUI-less device, you can perform run the following command:
wget -q -O - http://whatismyip.akamai.com
And the results will show you in the CLI the IP address you are getting source NAT’d to:

If you do not have a GUI, or access to the CLI (or wget installed), you can use the firewall to identify the IP address if any is being used.
There are a few ways of looking at this. One is to look at a flow trace and the other way is a PCAP; and for this you can do CLI or GUI (depending on version).
Flow Trace
Lets start with the flow trace:
diagnose debug disable
diagnose debug flow trace stop
diagnose debug flow filter clear
diagnose debug reset

diagnose debug flow filter dadd 8.8.8.8
diagnose debug flow show function-name enable
diagnose debug console timestamp enable
diagnose debug flow trace start 999
diagnose debug enable
First you are going to clear any lingering traces or filters. I like to create a filter to so I do not have to sift through hundreds or thousands of lines of output.

In the output, we can see some useful information:
- We can see that my source IP address sent a packet through the firewall destined to 8.8.8.8 from the ‘FDZ-OFF’ interface of my firewall.
- Next the firewall will look to see if there is an active flow and if not, like in my case, create one.
- In my case, I had a lingering ‘policy based route’ (shown below) that it was trying to match.
- In item 4, the firewall find the route it is going to use which is my ‘port1’ or my Gigapower interface.
- Now we can see the SNAT function and that the packet is being NAT’d.
Packet Capture
From the Command Line
Now we will look at the packet capture function.
diag sniffer packet FDZ-OFF 'host 8.8.8.8'
I will normally (first try) attempt to be specific about the interface I want to capture from. Sometimes it is necessary to use the ‘any’ instead of my example of ‘FDZ-OFF’.
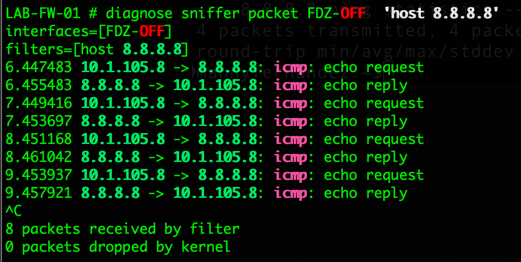
Here we can see that I was specific about the destination as well as the source interface to capture. We will repeat the operation on ‘port1’.
NOTE: If you try to filter by source IP and the NAT is working, you will not see the traffic on the egress because it will not match.
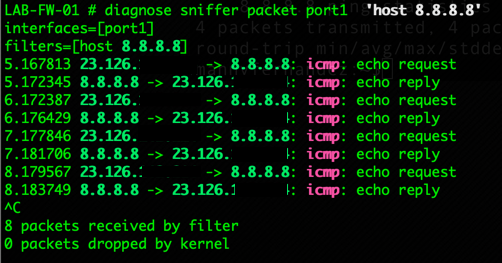
Here we can see the output from the ‘port1’ interface pcap. As you can see, the source IP is being NAT’d to a 23.126 address.
From the GUI
In older versions of Fortigates with HDDs and/or newer 6x code, you can capture packets from the GUI and download the .pcap to be opened with Wireshark.
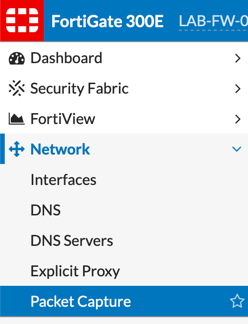
Go to ‘Network’ then ‘Packet Capture’

Now ‘Create New’
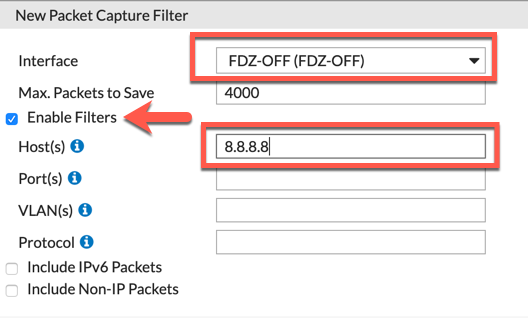
Here we choose the Incoming ‘Interface’. I will enable the ‘Enable Filters’ and choose ‘8.8.8.8’
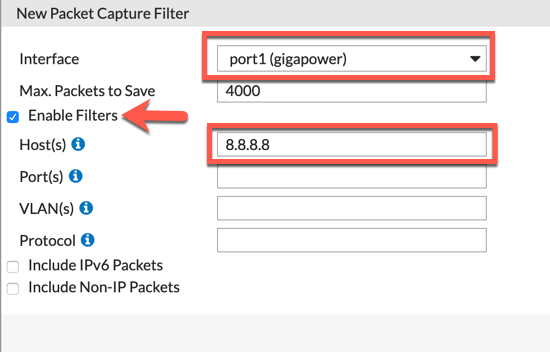
Now the same with ‘port1’ (the outside interface)

Hit the symbol for play…
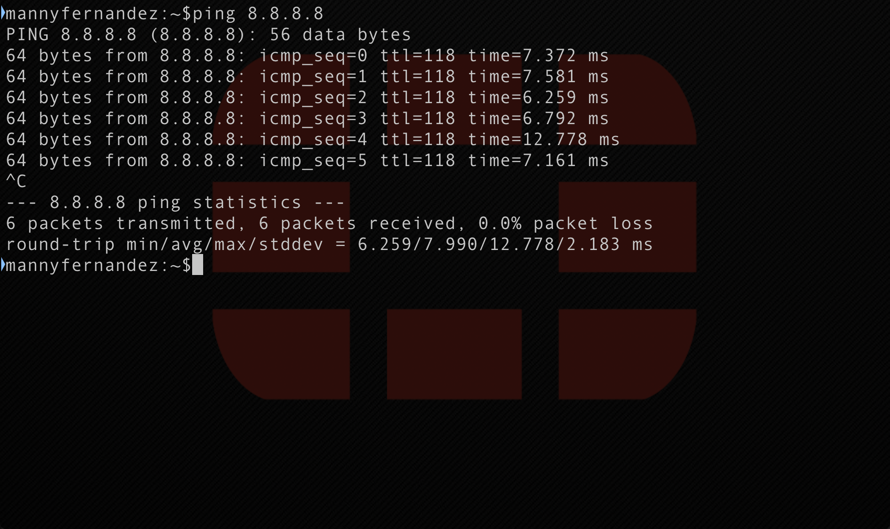
In my case, I generated traffic to the filters IP of 8.8.8.8

Once you have received packet ( “# Packets” column), you can hit the download button. You do not need to stop the capture.
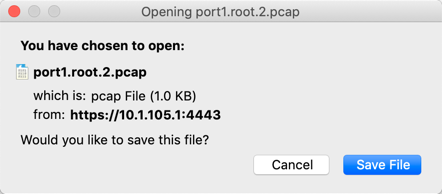
Download the PCAP file

Once you open the files, you can see that my source IP is 10.1.105.8 with an ICMP packet to 8.8.8.8. This is from the incoming inteface.

Here is the egress interface. As you can see the NAT is functioning correctly.
Configuring SNAT
Fortigates have two NAT modes; Central (separate NAT table) and Policy NAT (integrated into the policy). Here are examples of both.
Central NAT
This is my recommendation for Fortigate moving forward.
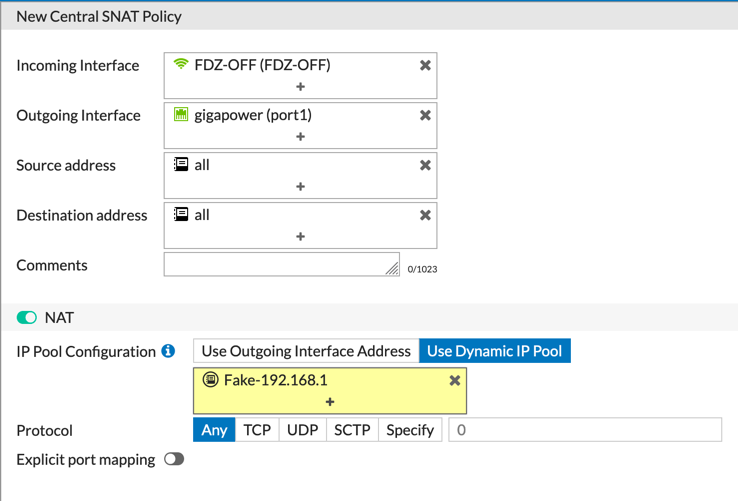
If you have configured ‘Central NAT’ Under ‘Policy & Objects’ you will see ‘Central SNAT’ if not, you need to enable it via the CLI
config system settings
set central-nat enable
end
Here you define Incoming Interface, Outgoing interface, source and destination and they choose the SNAT option (Use Outgoing Interface Address (The IP assigned to the ‘gigapower’ interface) or ‘Use Dyamic IP Pool’ (In wich case you assign a different IP for it to use at it egresses).
NOTE: This is a very granular way of doing SNAT and it works very much like the policies. It is top down, first match.
Policy Based
When not using Central NAT, you obviously will not have that option in the GUI, however this has similar functionality but via the policy.
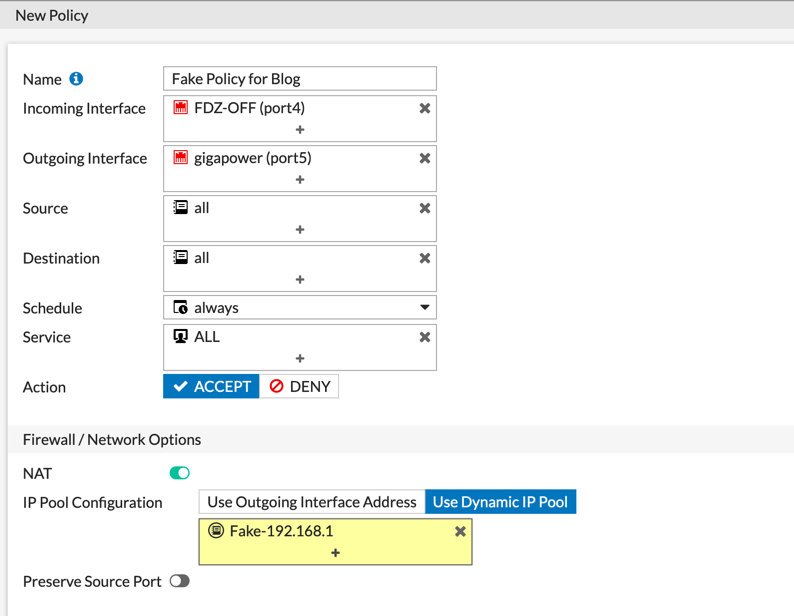
Here we see a standard policy. We choose the Incoming/Outgoing interfaces as well as Soure/Destination. Then there is a ‘NAT’ section and you can choose the same options.
VIP and Destination NAT
When you define a VIP, it will not necessarily be bidirectional. The VIP is for the inbound connections. If that same server initiates an outbound connection, it will use what PAT or overload type SNAT policy you have in place. To get the VIP to be bi-directional…
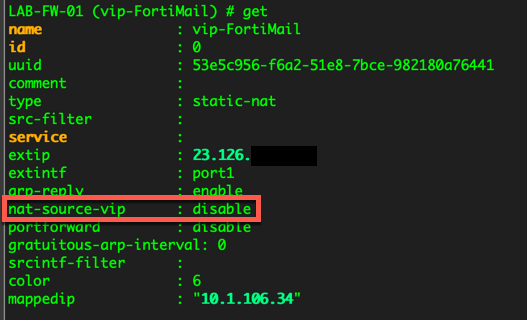
You can see in the screenshot above, you need to set the ‘nat-source-vip’ to ‘enable’
Hope this helps
Recent posts
-

-

Had a customer with over 200 static routes on... Full Story
-

This is a work in progress, I will be... Full Story
