Have you ever ordered a bunch of Fortinet gear... Full Story
By Manny Fernandez
October 2, 2019

Upgrading Ubuntu 18.0.4 LTS to 19.0.4
If you are running Ubuntu 18.0.4 LTS you CAN upgrade to 19.0.4. LTS is long-term support while the non-LTS is more of the bleeding-edge
LTS is an abbreviation for “Long Term Support”.
We produce a new Ubuntu Desktop and Ubuntu Server release every six months. That means you’ll always have the latest and greatest applications that the open source world has to offer. Ubuntu is designed with security in mind. You get free security updates for at least 9 months on the desktop and server.
A new LTS version is released every two years. In previous releases, a Long Term Support (LTS) version had three years support on Ubuntu (Desktop) and five years on Ubuntu Server. Starting with Ubuntu 12.04 LTS, both versions received five years support. There is no extra fee for the LTS version; we make our very best work available to everyone on the same free terms. Upgrades to new versions of Ubuntu are and always will be free of charge.
The LTS designation applies only to specific subsets of the Ubuntu archive. The LTS may not apply to all flavours and remixes of Ubuntu. For example, for 8.04 LTS, Kubuntu chose to move to KDE 4.0 and didn’t issue an LTS release. In 10.04, the Netbook Edition was not an LTS. The project will decide which flavours will be LTS and the support duration for each, early in the LTS development cycle.
Source: https://wiki.ubuntu.com/LTS
Step 1 – Getting Updates
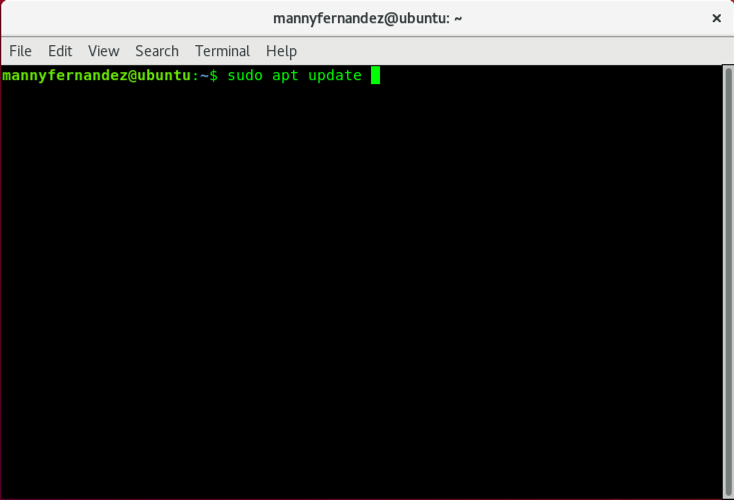
In this step, we are going to ensure that all updates have been done to your 18.0.4 LTS installation. You will do this using the sudo apt update

Step 2 – Upgrade Packages
This command updates the package lists for upgrades and packages that need upgrading, as well as new packages that have just come to the repositories.
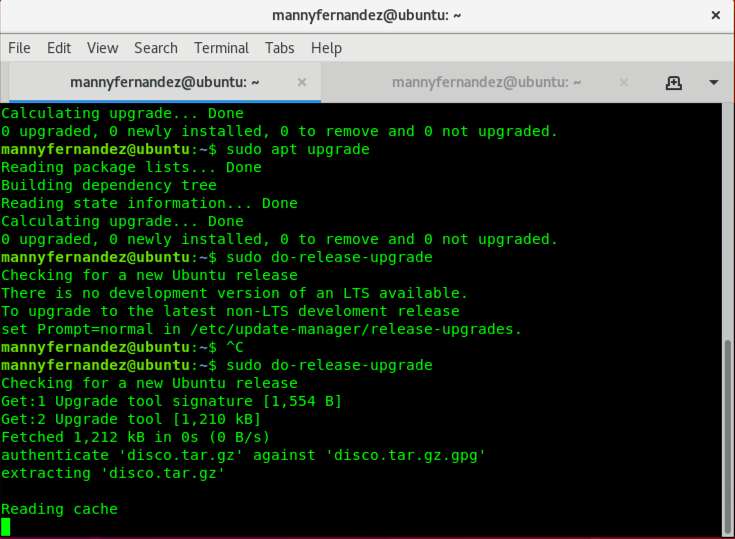
sudo apt upgrade
Step 3 – Modify Release Upgrader
With this option, you can force the Ubuntu LTS installation to ONLY upgrade to subsequent LTS versions. However in this case, I am going from LTS to non-LTS.
use your favorite text editor, in my case I use VI
sudo vi /etc/update-manager/release-upgrades
Then modify the Prompt line to show normal
# Default behavior for the release upgrader.

[DEFAULT]
# Default prompting behavior, valid options:
#
# never - Never check for, or allow upgrading to, a new release.

# normal - Check to see if a new release is available. If more than one new
# release is found, the release upgrader will attempt to upgrade to
# the supported release that immediately succeeds the
# currently-running release.

# lts - Check to see if a new LTS release is available. The upgrader
# will attempt to upgrade to the first LTS release available after
# the currently-running one. Note that if this option is used and
# the currently-running release is not itself an LTS release the
# upgrader will assume prompt was meant to be normal.
# This is the default option when you open the file.
Prompt=normal
~
~
~
~
~
~
~
"/etc/update-manager/release-upgrades" 16L, 810C
Step 4 – Running the upgrade
Now we will run the command that will download and install the update.
sudo do-release-upgrade
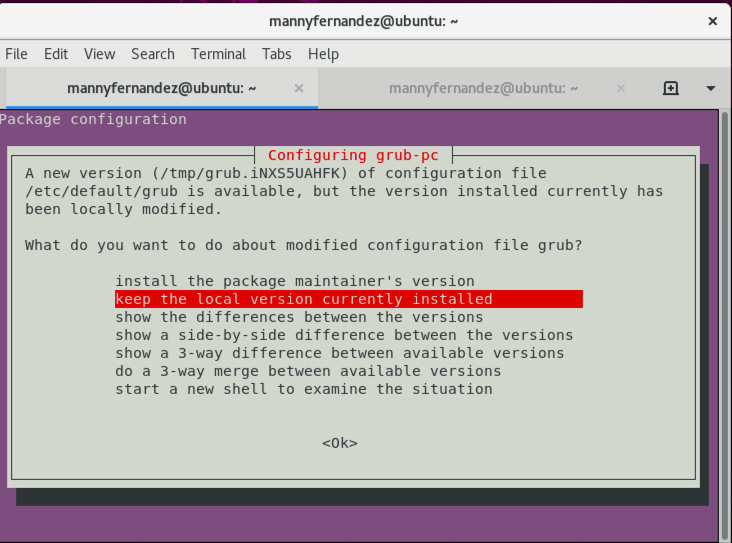
Run through this process.


I chose the Keep the local version currently installed
Let the Ubuntu install reboot and you should be running 19.0.4
Recent posts
-

-

Had a customer with over 200 static routes on... Full Story
-

This is a work in progress, I will be... Full Story
