Have you ever ordered a bunch of Fortinet gear... Full Story
By Manny Fernandez
May 1, 2019

Configuring SNMP v3 on Fortigate
When using SNMP to monitor the devices on your network, more especially your firewall, one should not use SNMP v1 or v2 but rather v3.
SNMP v2c offers ‘GetBulkRequest’ instead of the ‘GetNextRequests’ so it was more efficient, however they did not introduce the necessary security to make it operate securely. Later, they introduced v3 and for me there was no looking back.
Fortigate Configuration

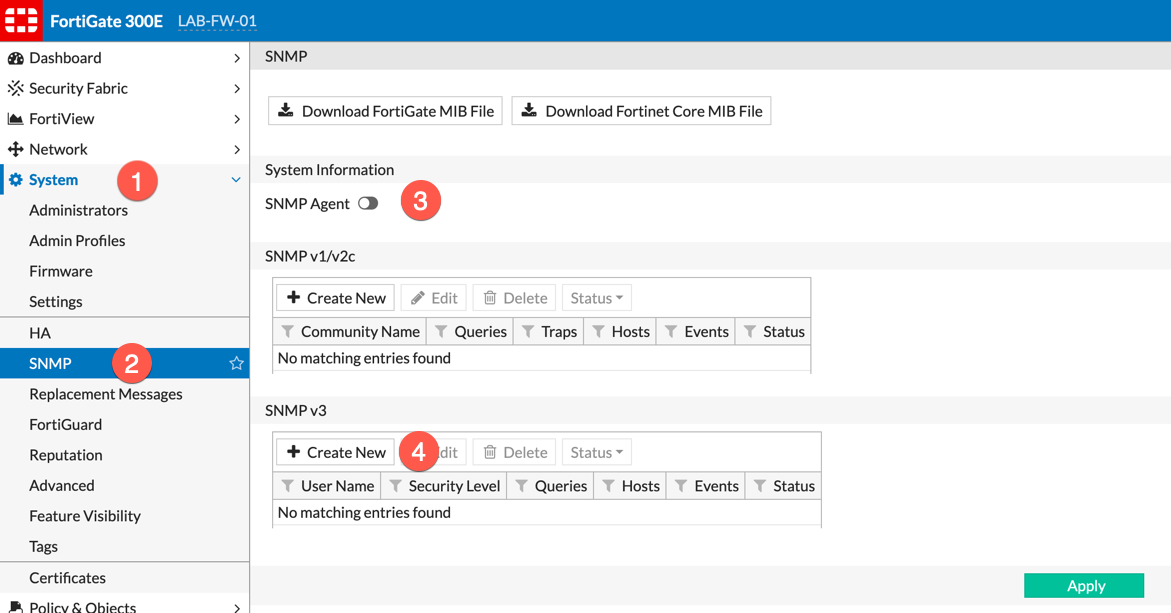
From ‘System’, ‘SNMP’ you will need to turn on the ‘SNMP Agent’ button. On the bottom section, we can see ‘SNMP v3’ and ‘Create New’

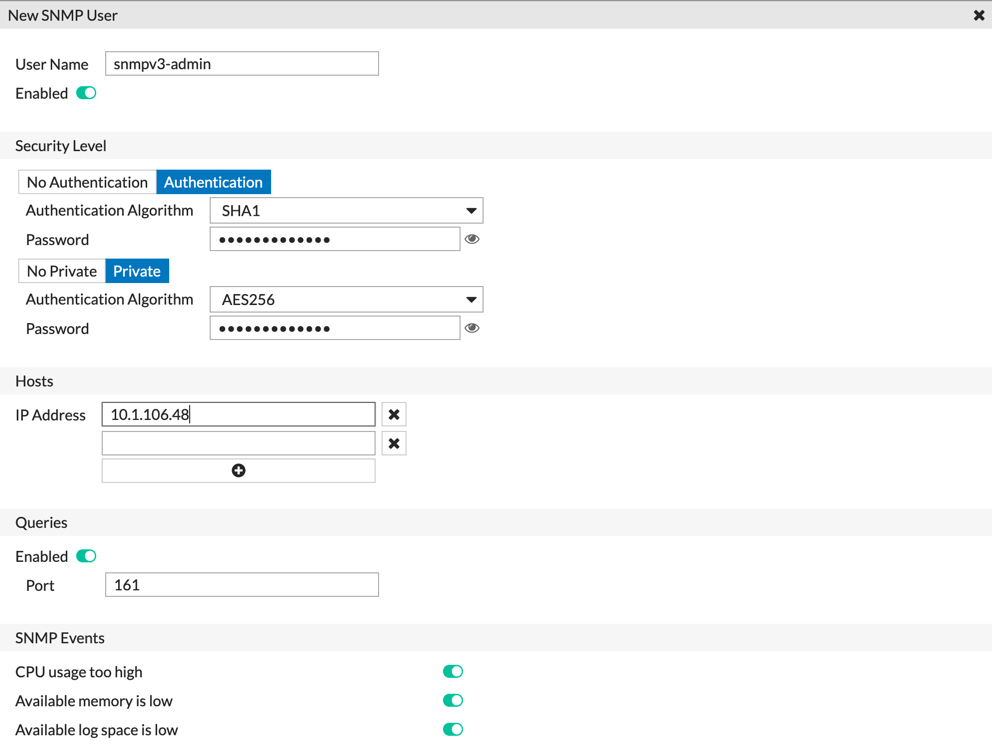
Above, we can see the different options. At the top, you will need to fill in the username. (This can NOT be changed after you apply). Ensure you set it to ‘Enabled’. Next you will need to choose the ‘Security Level’. I like to use ‘SHA1’ and ‘AES256’ as the respective algorithm.
Assign multiple passwords. I use a password generator that generates a random passwords.
Next you will need to add a host(s) that will be doing the polling.

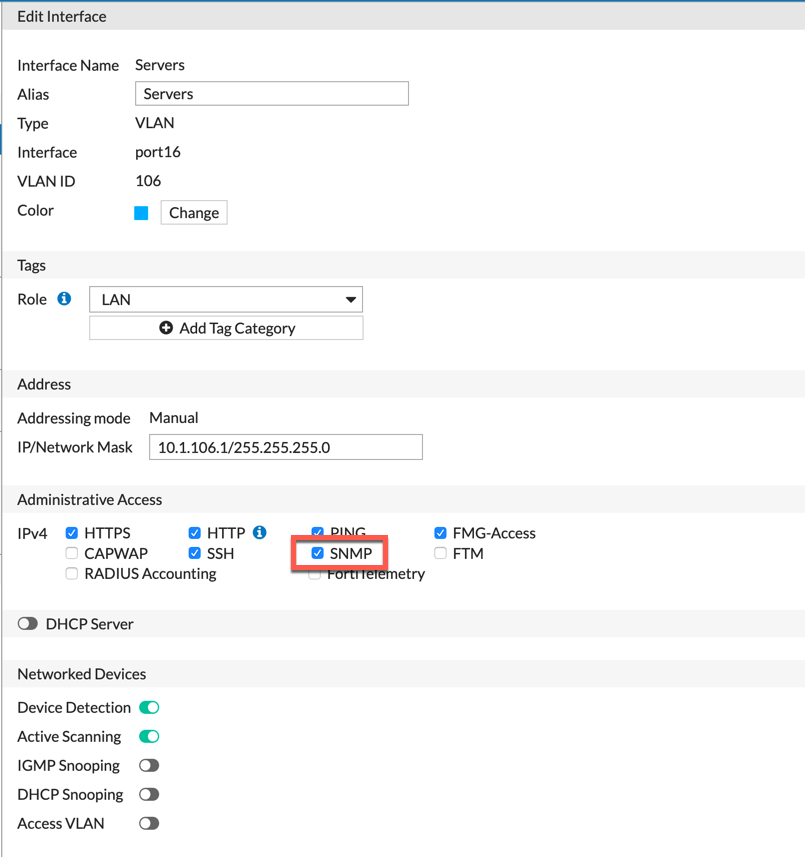
Next, you will need to make sure that ‘SNMP’ is enabled under the ‘Administrative Access’ of the ‘Interface’ that will receive the requests.
Once you have applied the aforementioned, you can test it from the command line of either your macOS or Linux box. Windows has an ‘snmpwalk’ as well but I never have used it.

Here you can see the ‘snmpwalk’ command where we try to ID the host name.
snmpget -v3 -l authPriv -u snmpv3-admin -a SHA -A Fortinet2019! -x AES -X Fortinet2019! 10.1.106.1 sysName.0
and the results…
SNMPv2-MIB::sysName.0 = STRING: LAB-FW-01
Hope this helps
Recent posts
-

-

Had a customer with over 200 static routes on... Full Story
-

This is a work in progress, I will be... Full Story
