This is a work in progress, I will be... Full Story
By Manny Fernandez
January 28, 2020

FortiClient 6.2 Basics Deployment
Earlier this week, I decided I would focus on FortiClient in my lab. I decided to put together a basic overview of deploying FortiClient with EMS 6.2. In this article, I will show how to configure a basic policy, profile, endpoint group, and an install package. Lets get started
FortiClient 6.0
Windows Server 2008R2 - Windows Server 2016+
2.0 GHz 64 Bit, Dual Core (or two virtual CPUs)
4GB or RAM (8+ Recommended)
40 GB Free Disk Space
Gig E Ethernet adapter
Internet Access
FortiClient 6.2+
Windows Server 2012 R2 - Windows Server 2019
2.0 GHz 64 Bit, Dual Core (or two virtual CPUs)
4GB or RAM (8+ Recommended)
40 GB Free Disk Space
Gig E Ethernet adapter
Internet Access
After installing EMS on a supported platform, you will need to license the EMS Server.
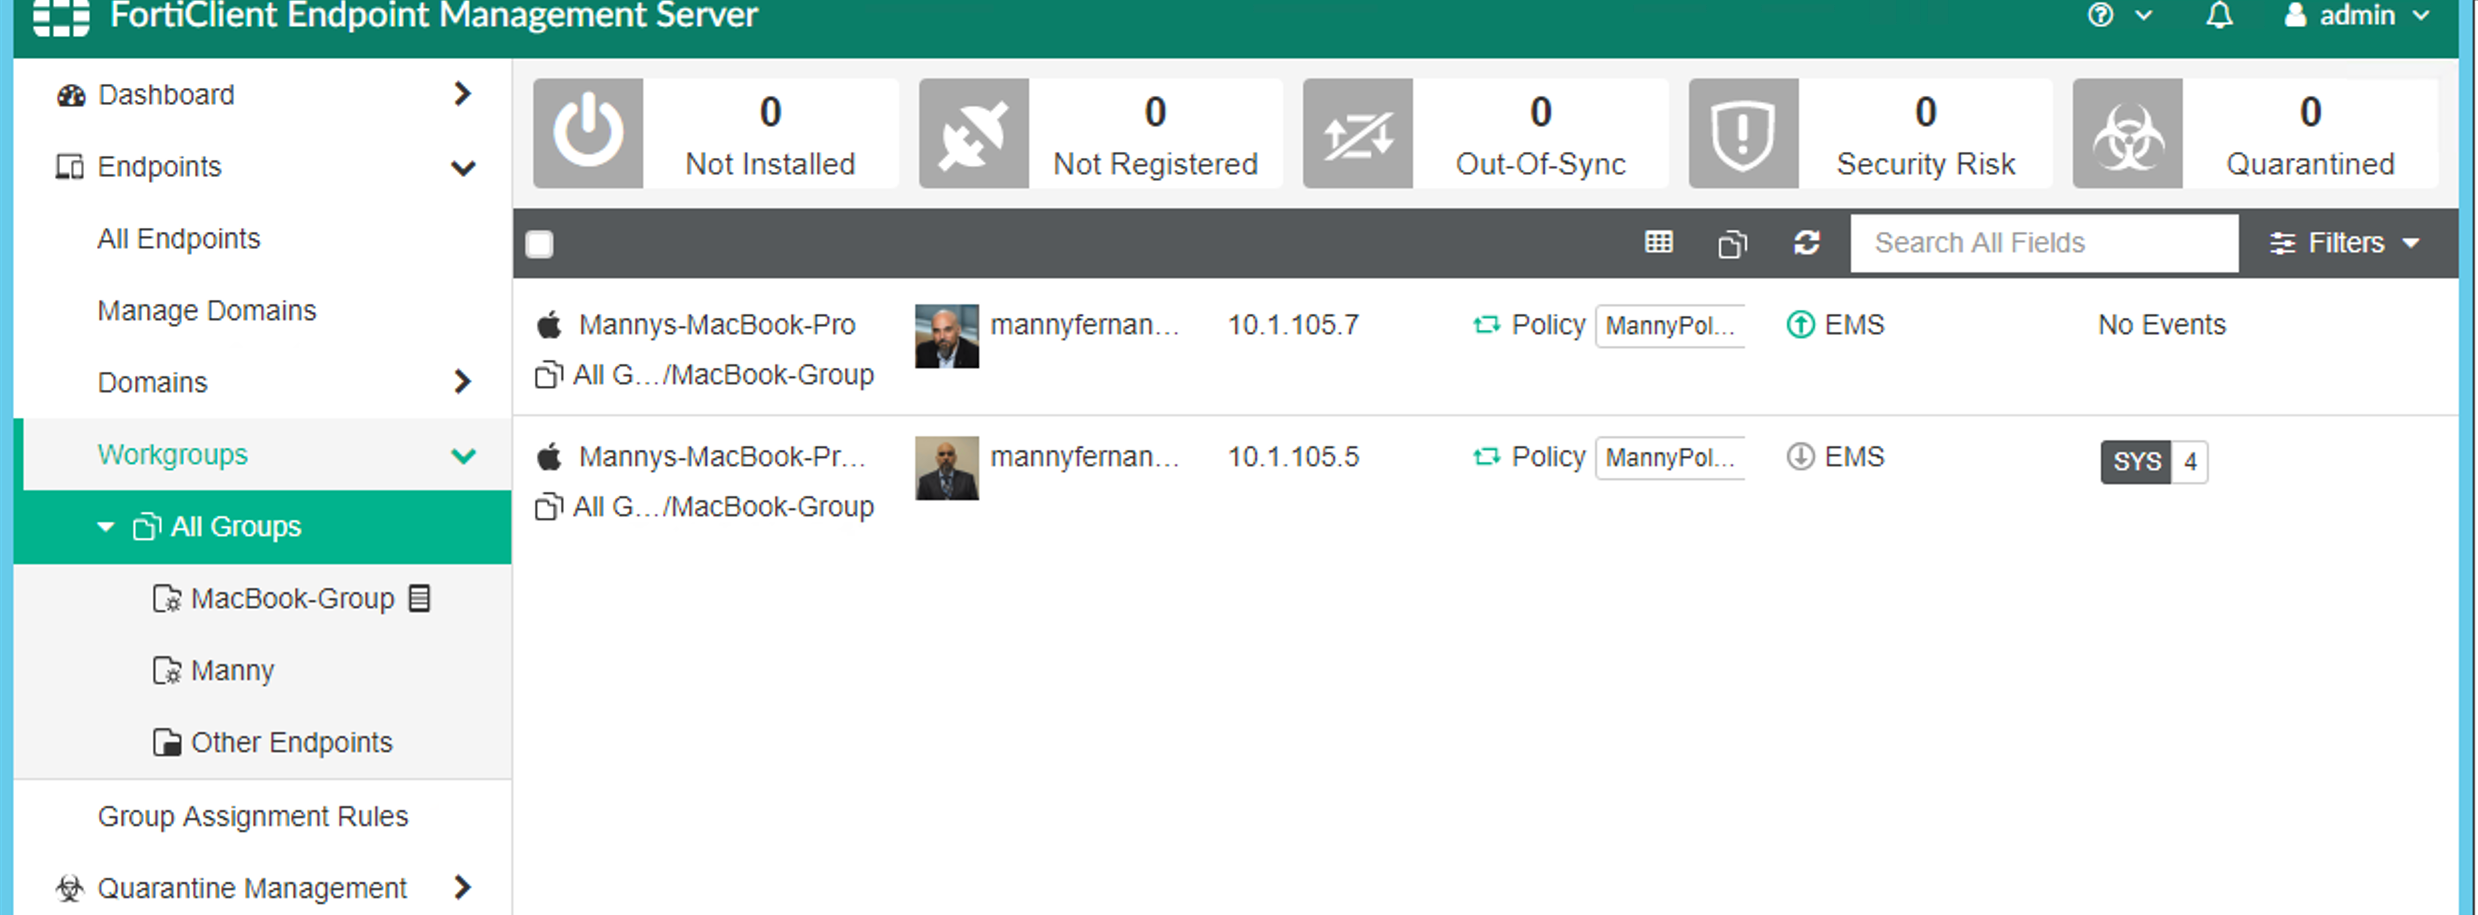
Lets go to Endpoint , Workgroups , All Groups .
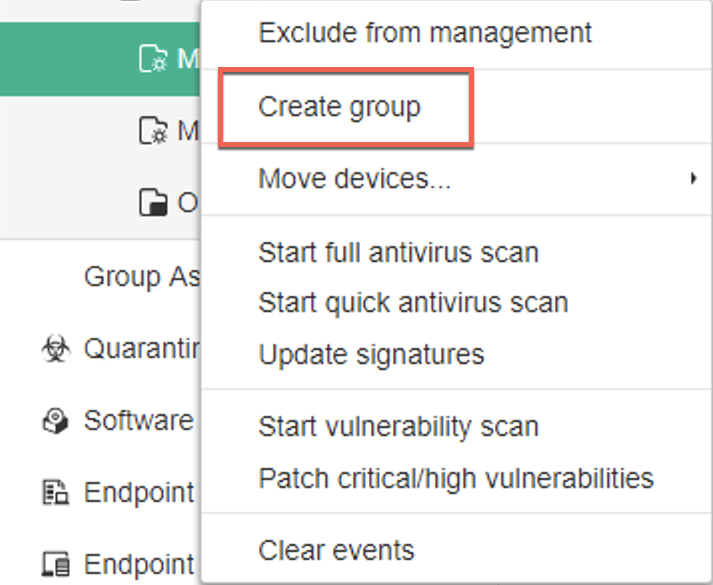
You will want to Right-Click on the All Groups and choose Create group link.
Now lets create an Endpoint Profile

Go to Endpoint , Manage Profiles, then choose + (Add). Create a Profile

Across the top, you will see the different components you can configure such as Malware , Vulnerability Scanner , VPN etc.
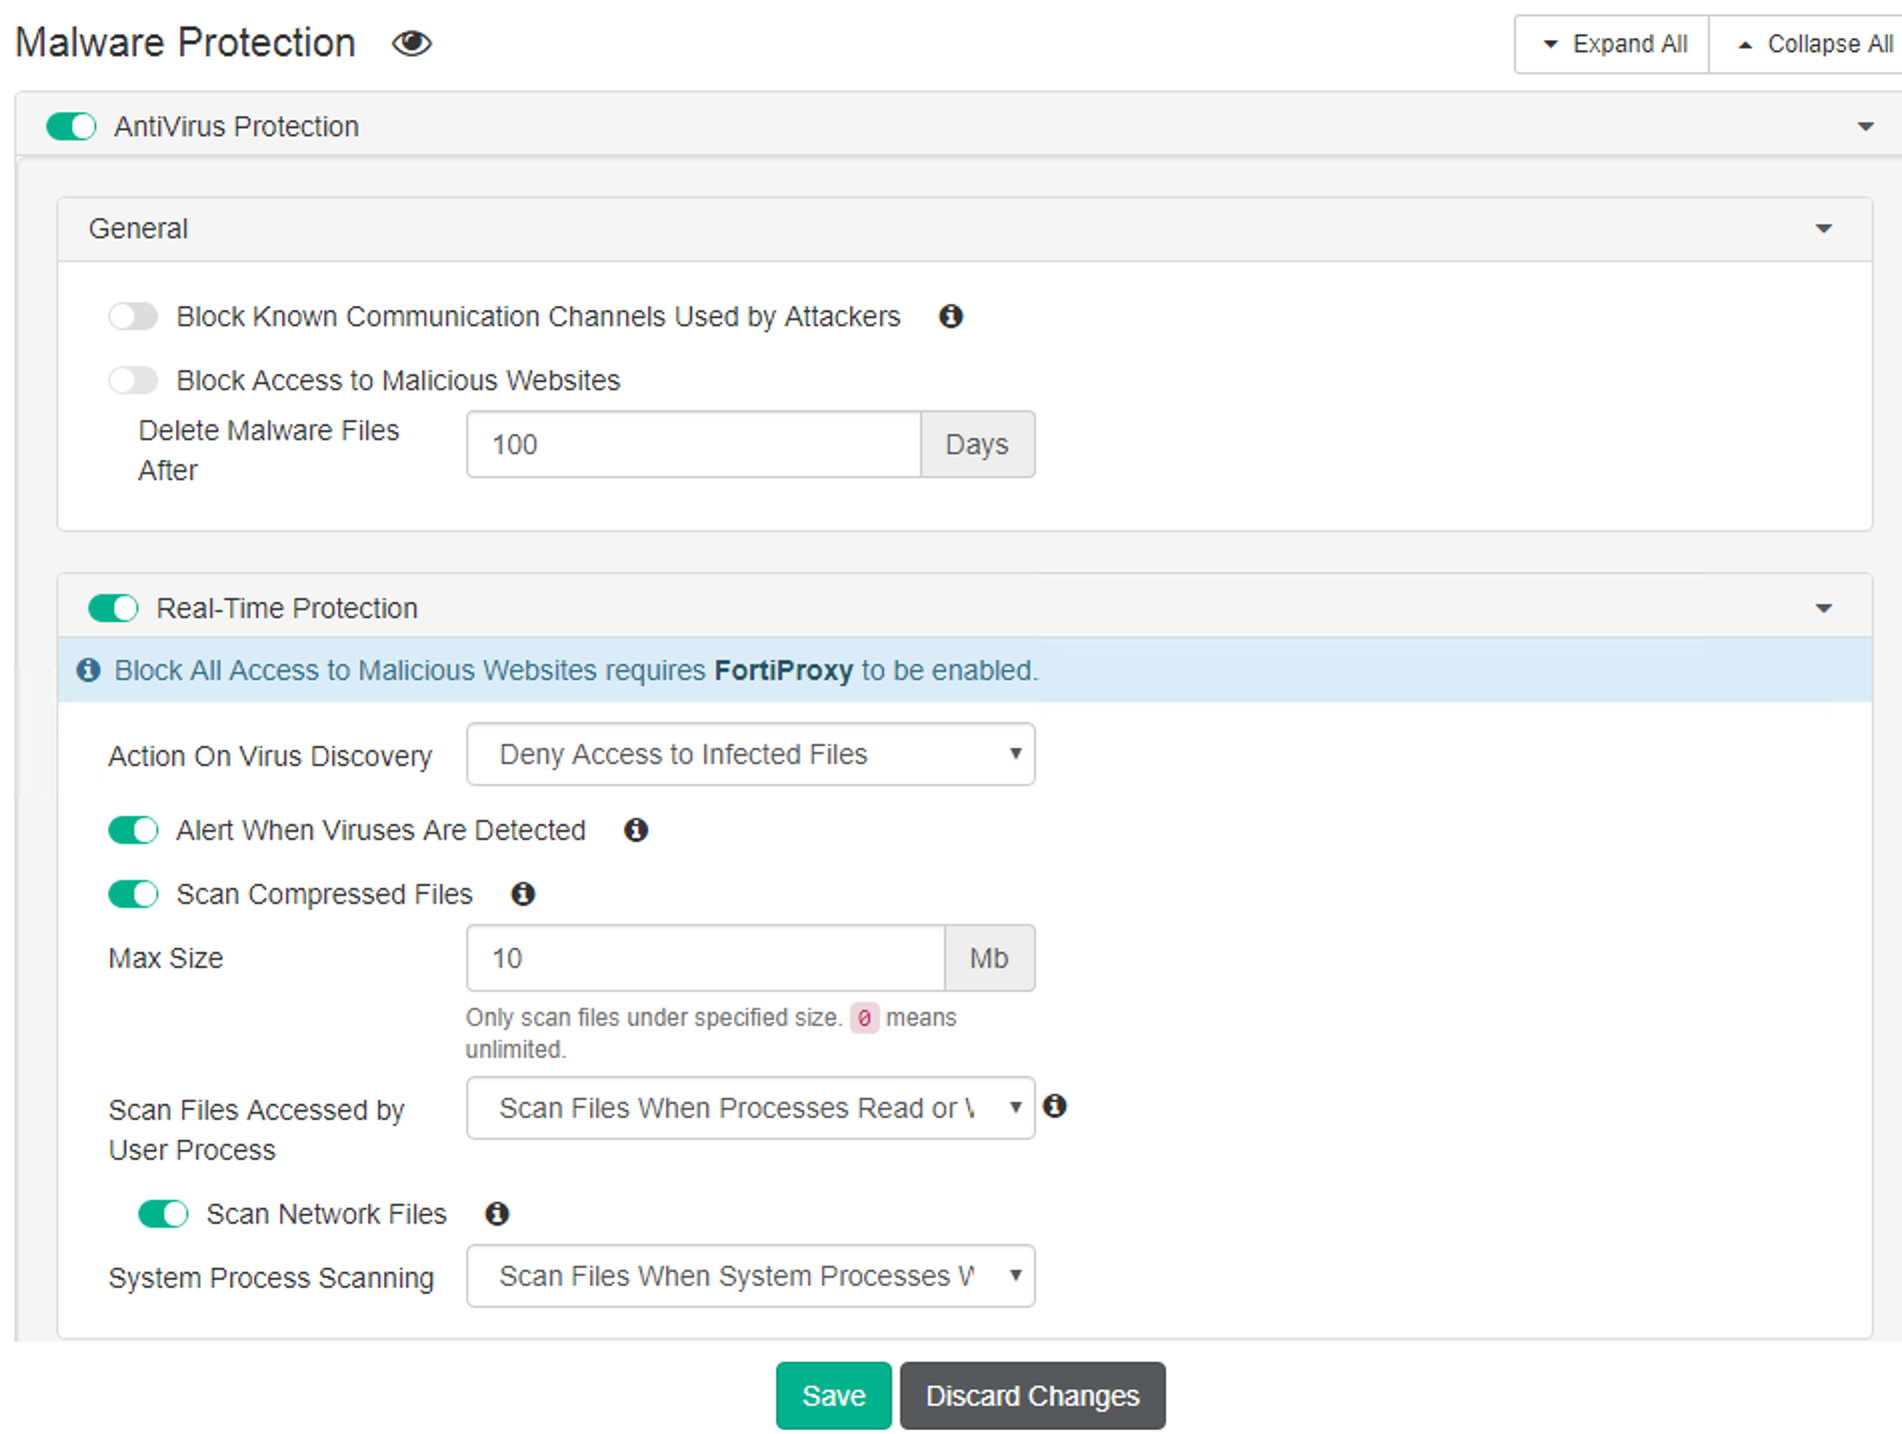
Here you can see the Malware section where you can enable the different features of Malware protection section.
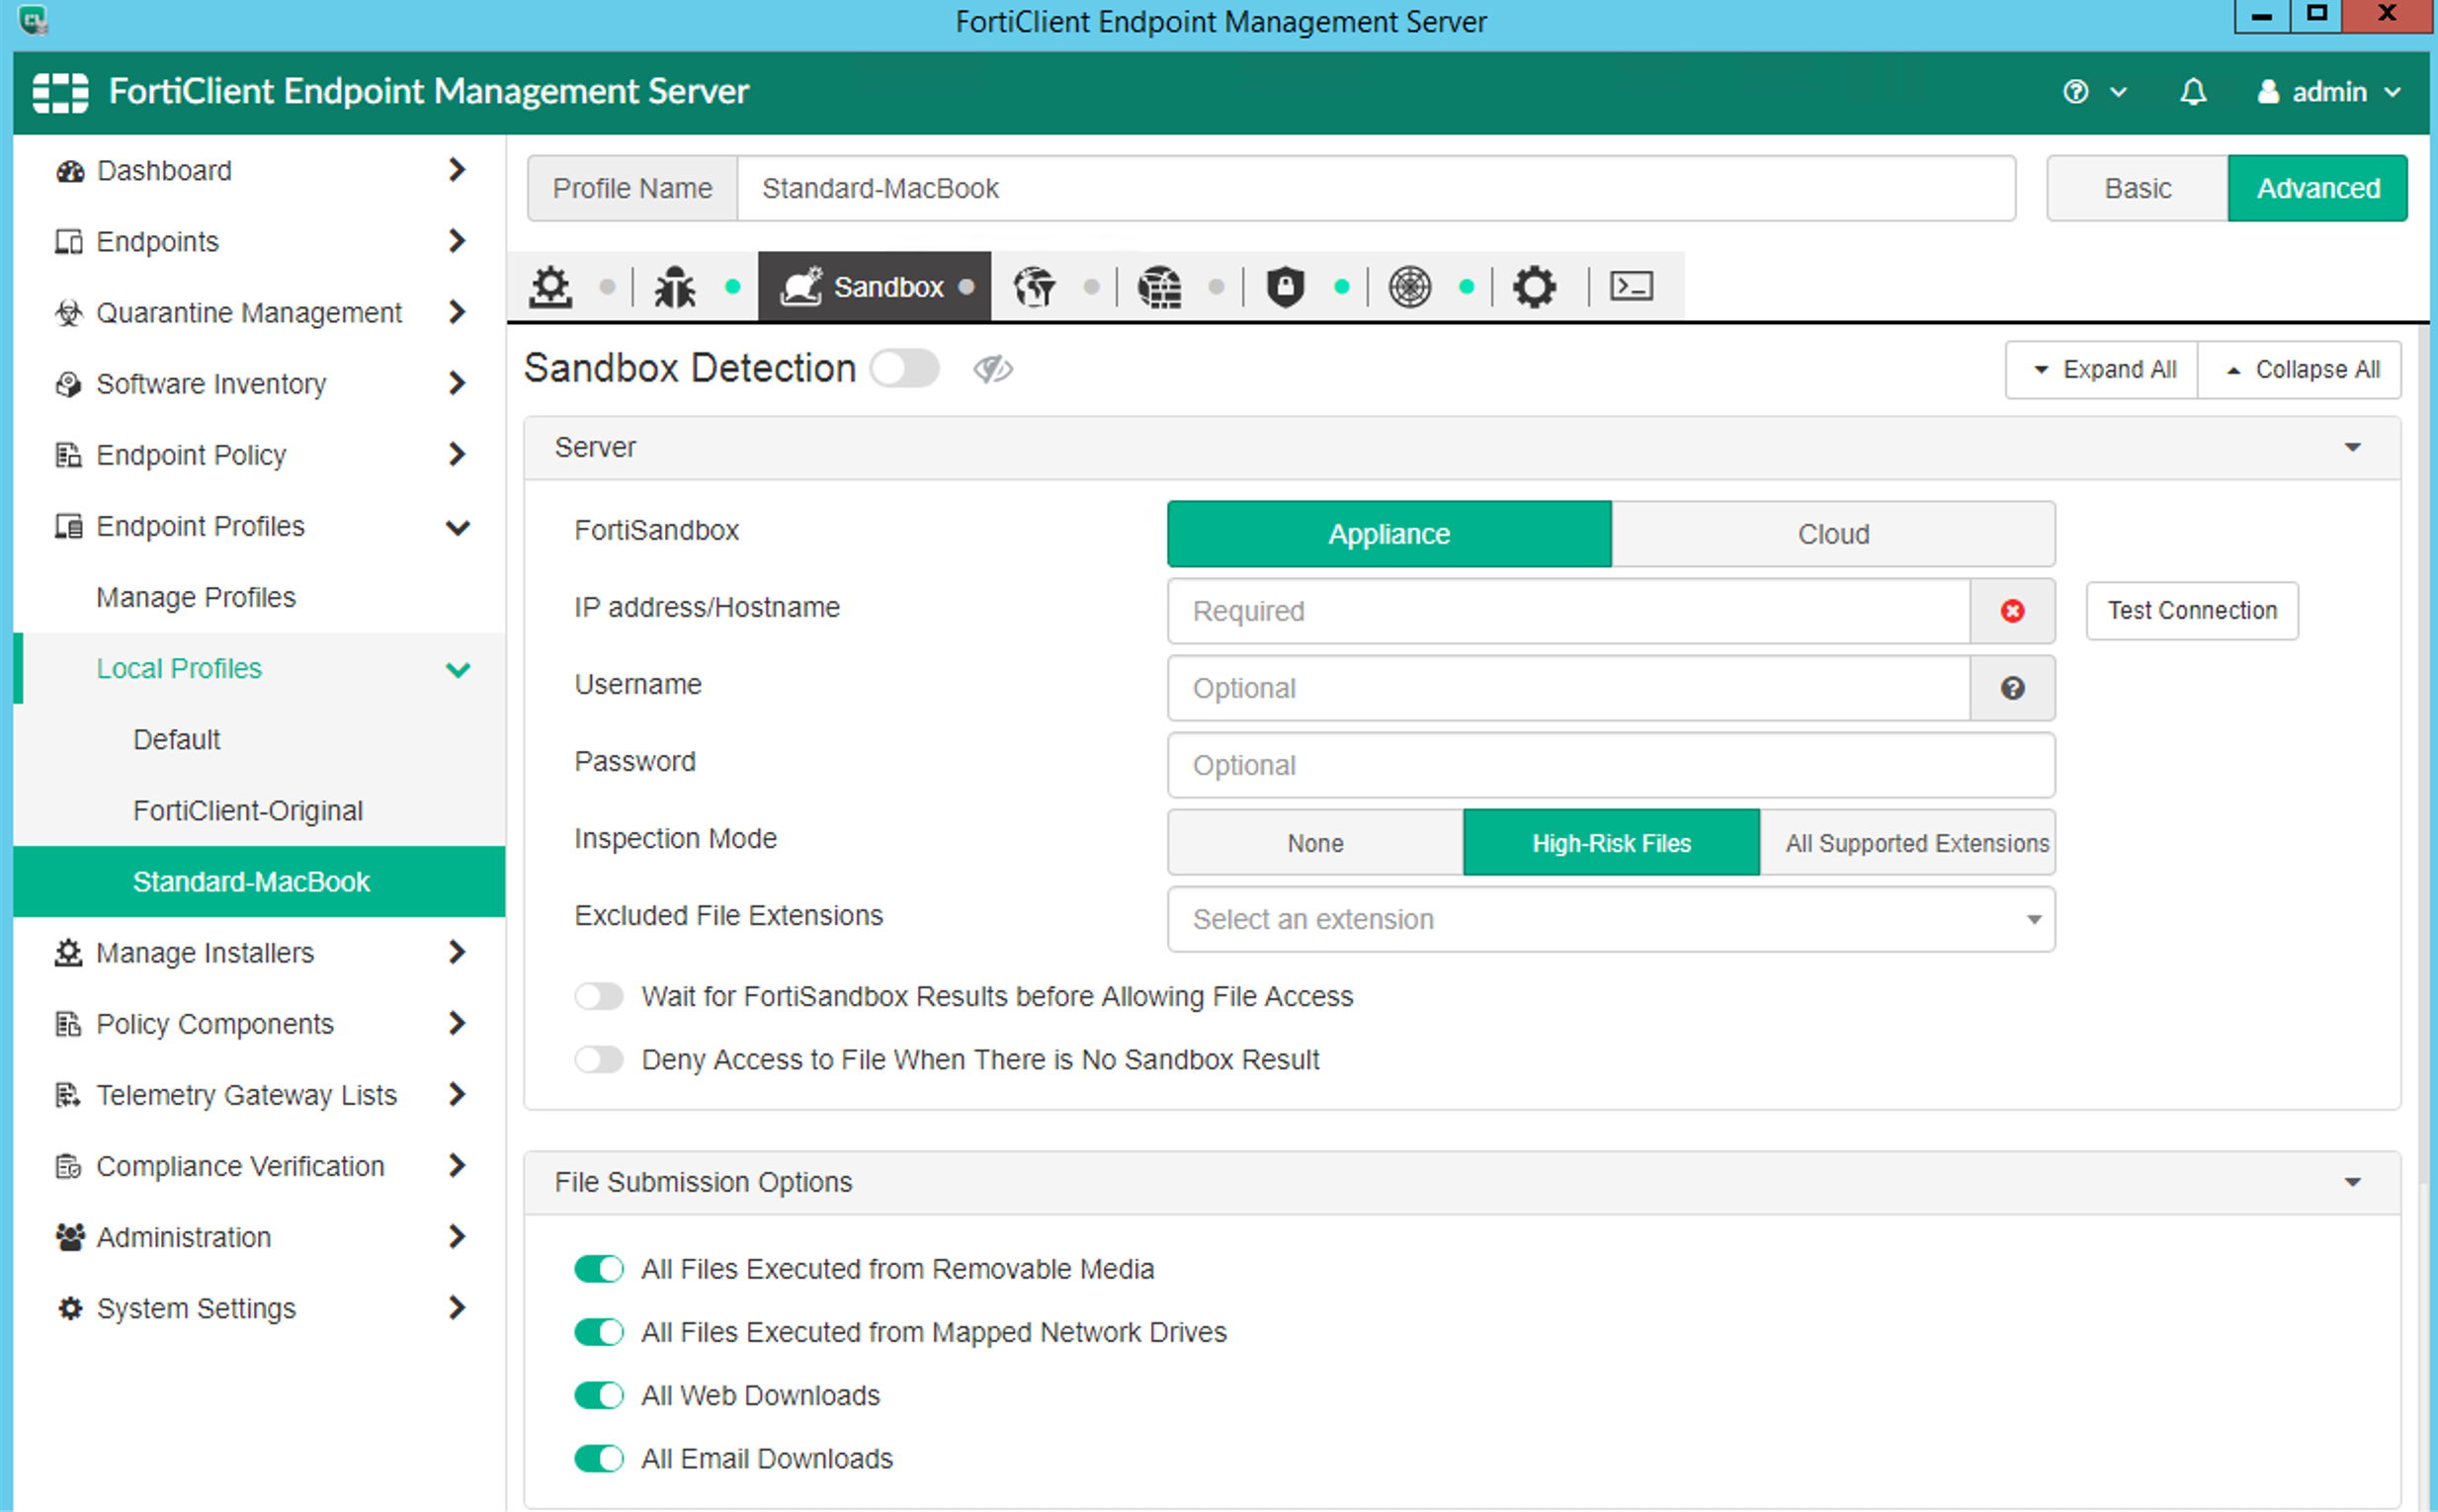
Above, you can see the Sandbox section. I will not go over each of these, but review the options and explore a bit with the options. I will do a in-depth drill down into these different options.
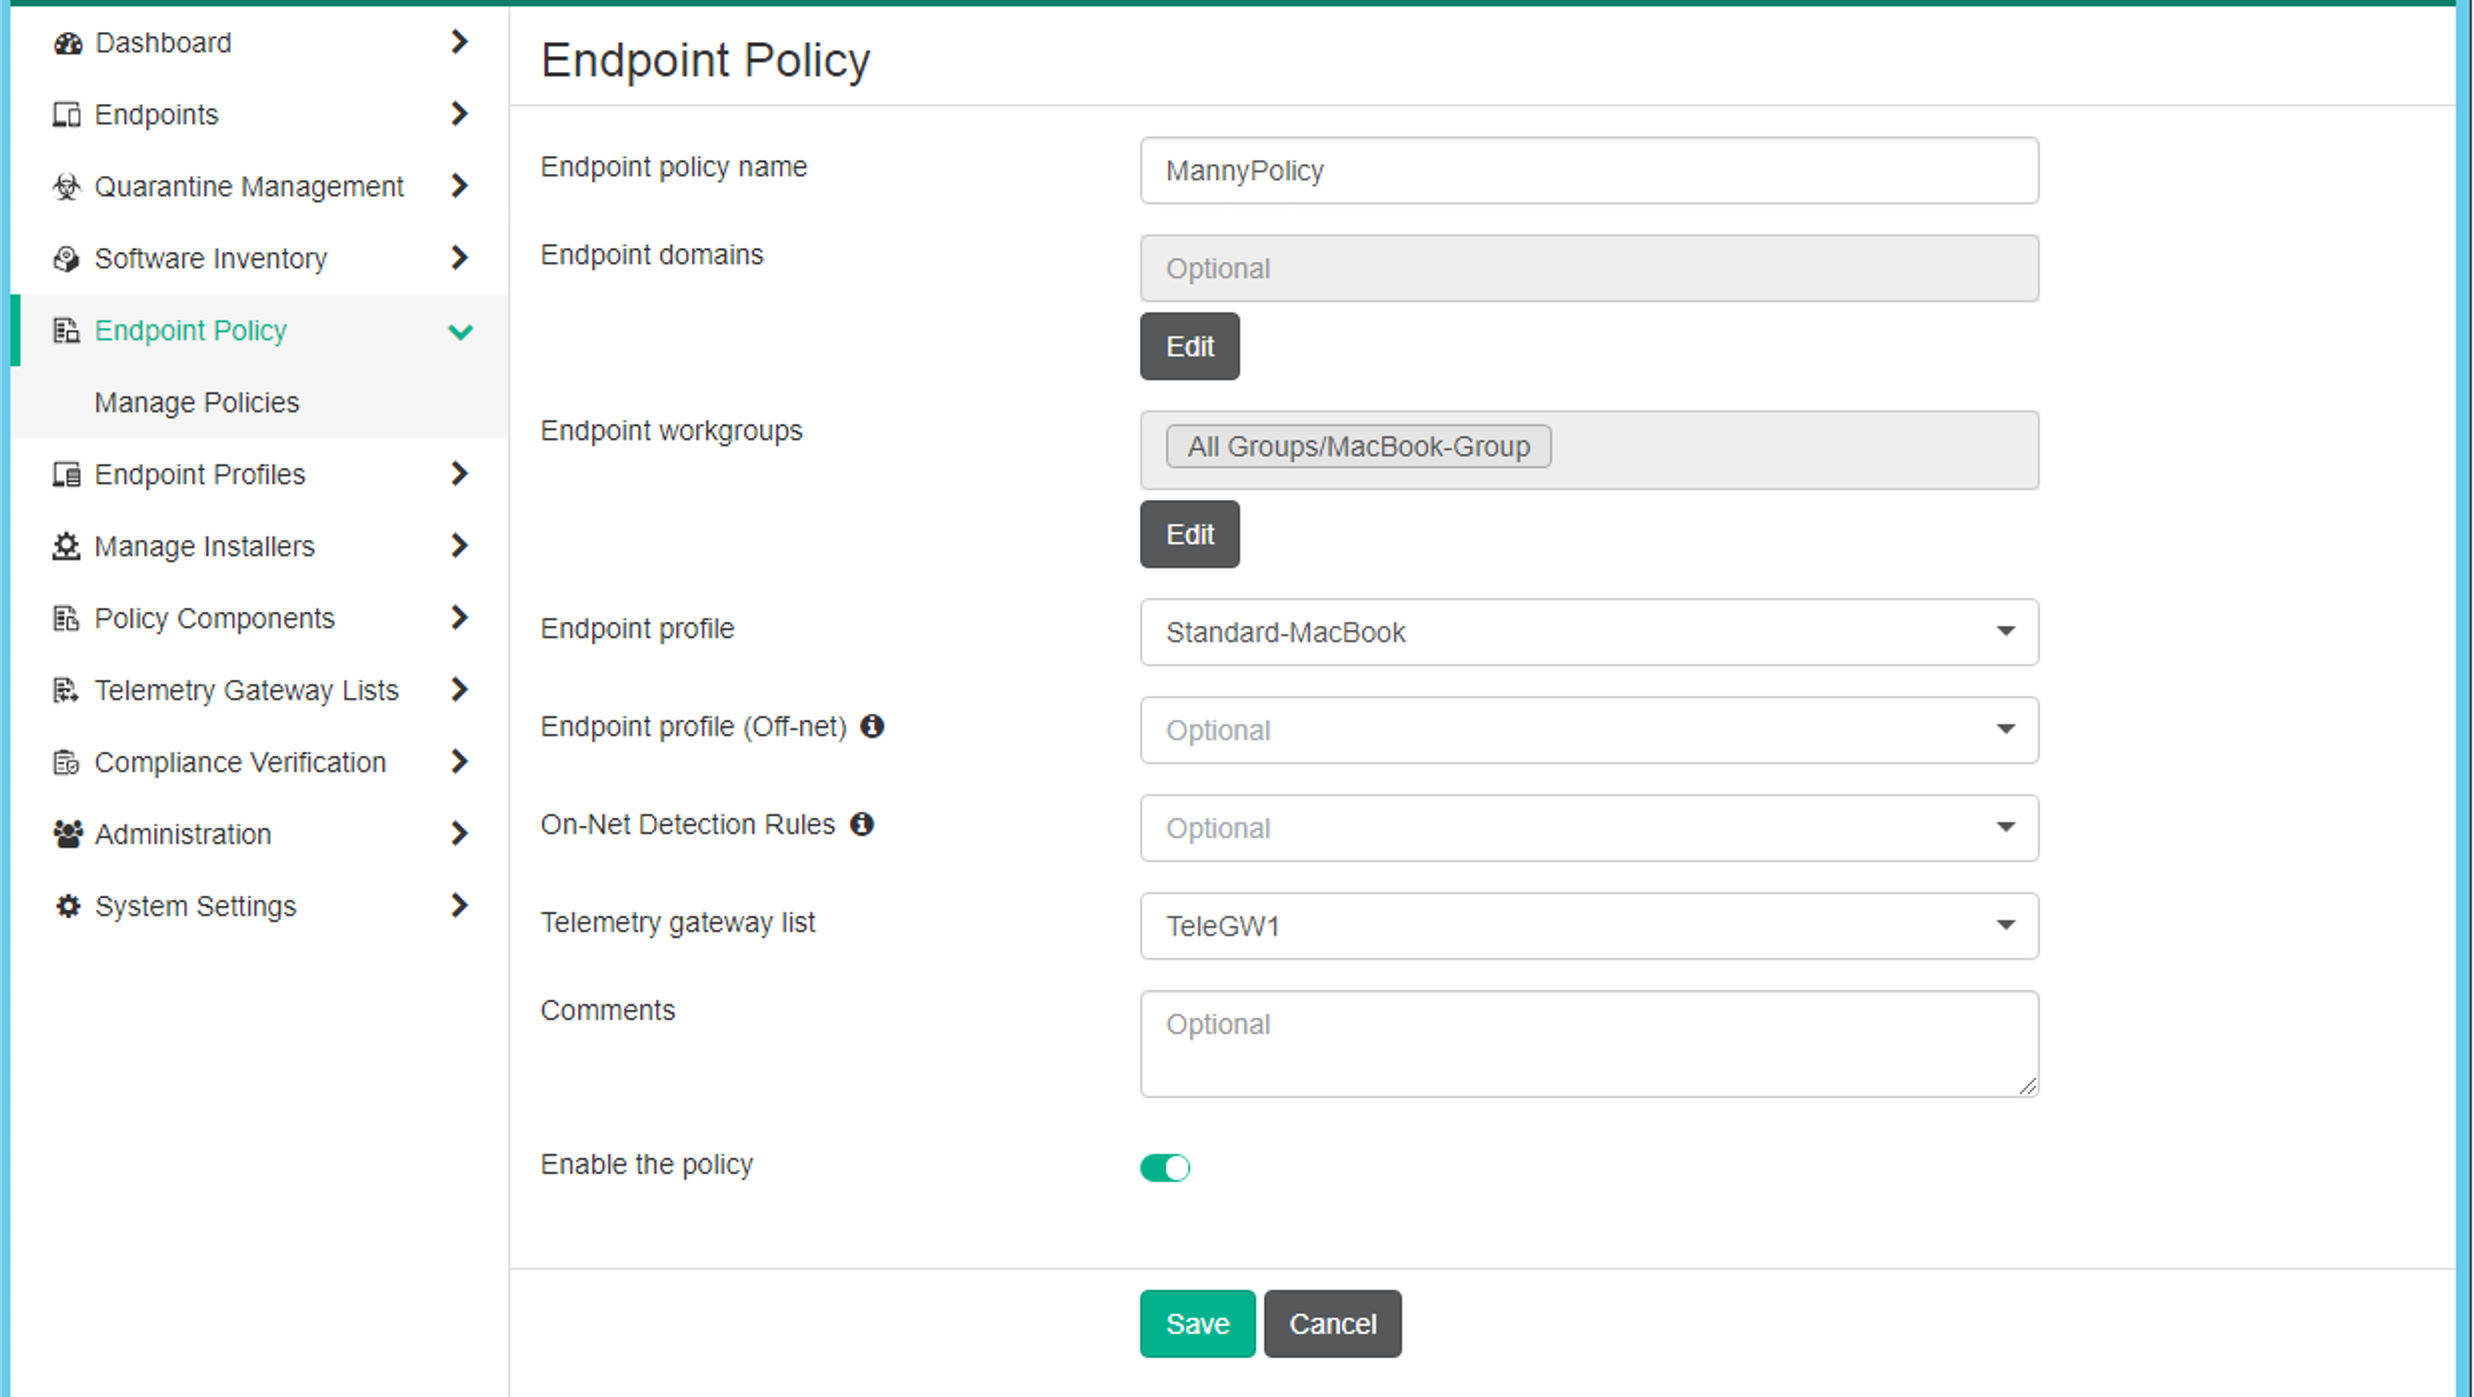
Once you have a profile enabled, you will need to define a Policy. In the Policy you will define what profile you will use On-Net and Off-Net . This is important because when you are sitting behind the Fortigate at the edge.
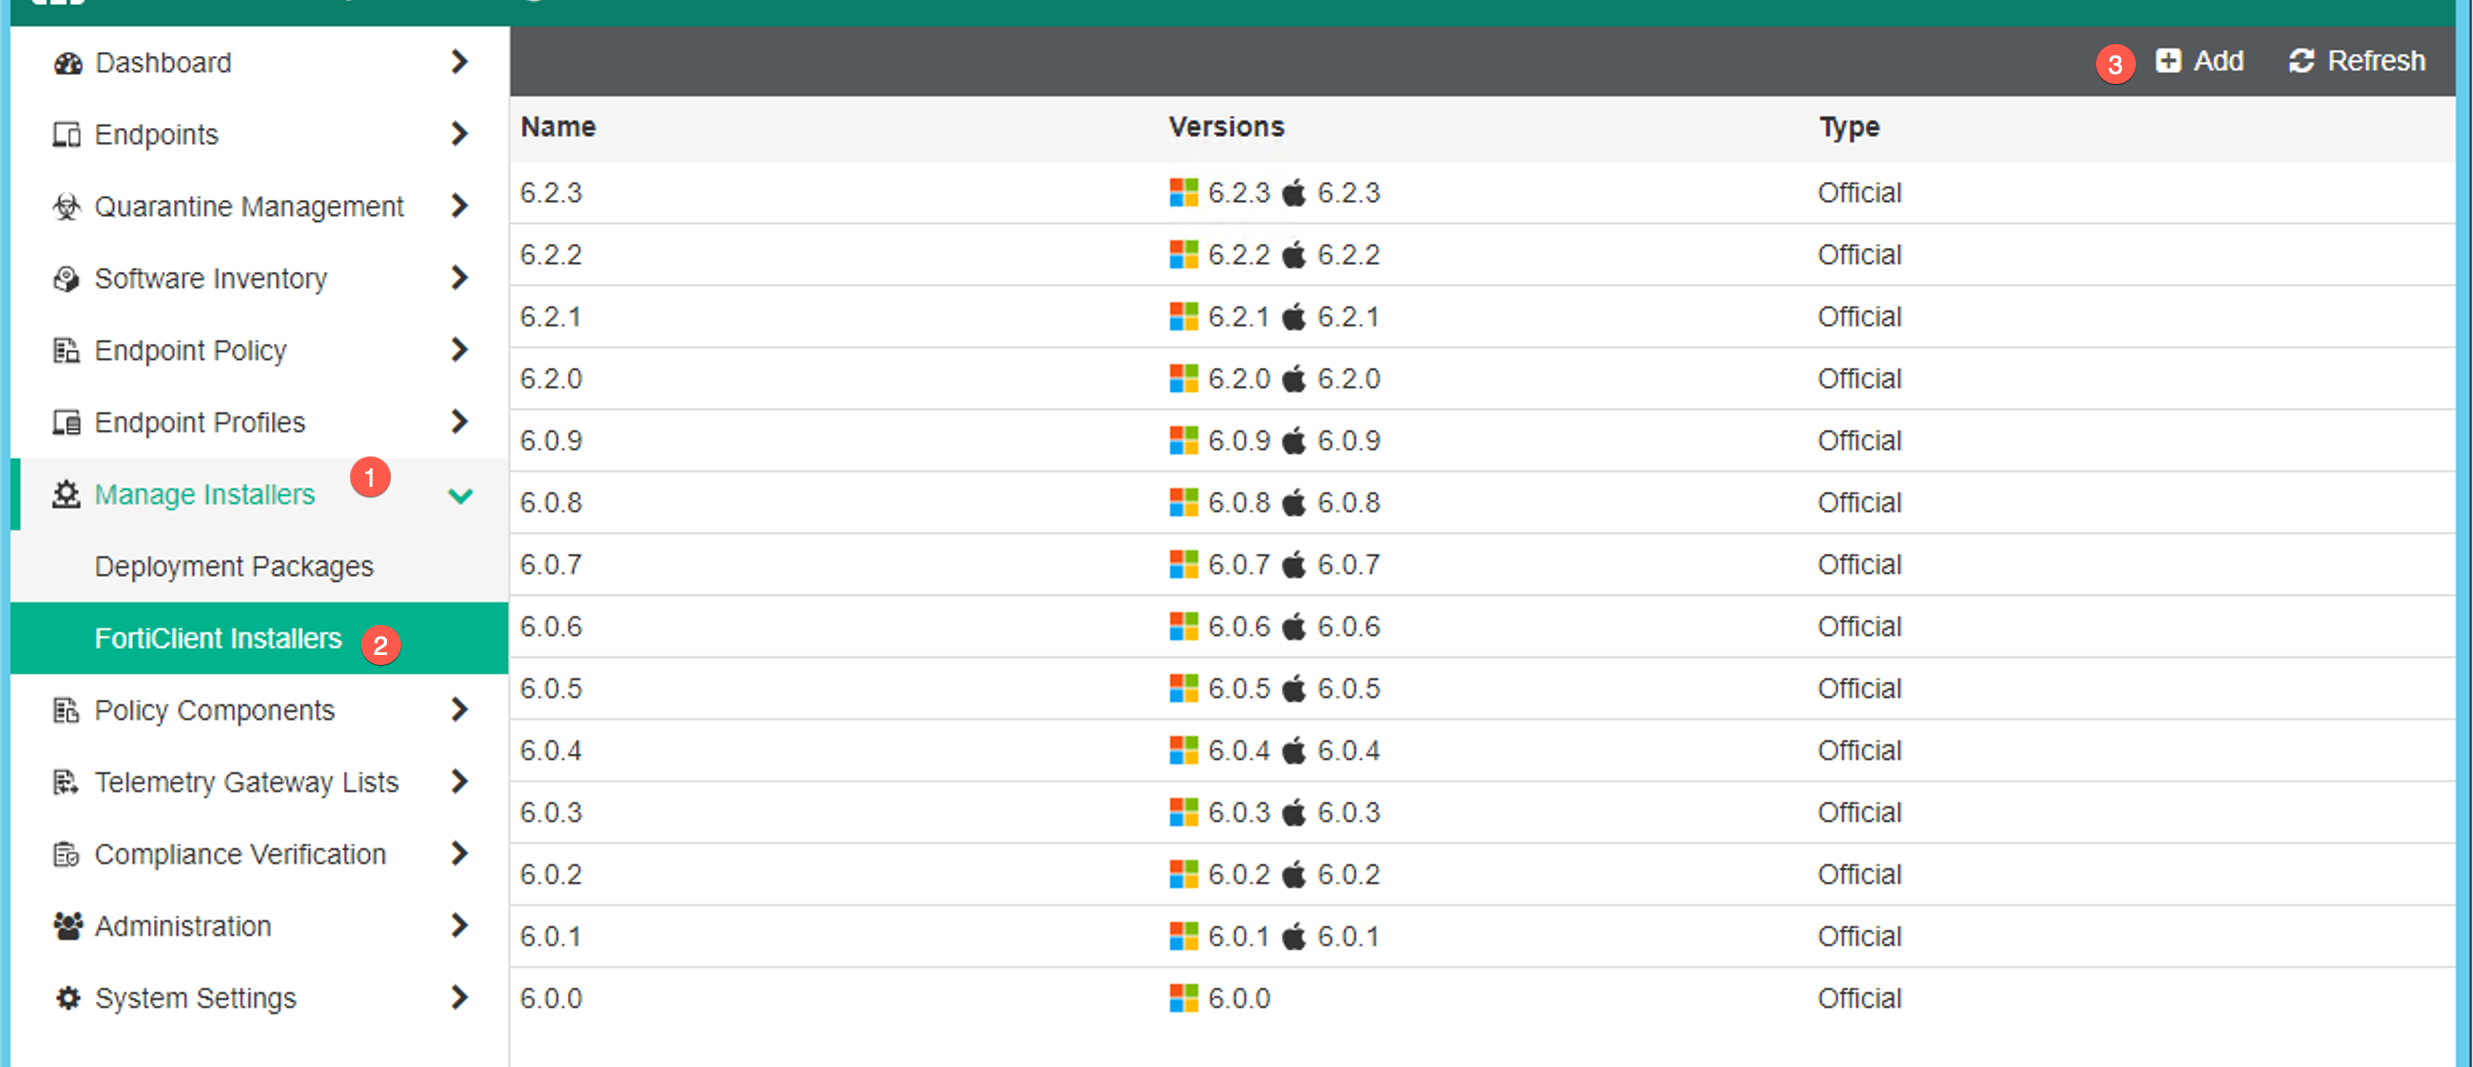
Next we will cover the Installers . Go to Manage Installers then FortiClient Installers, then choose Add.
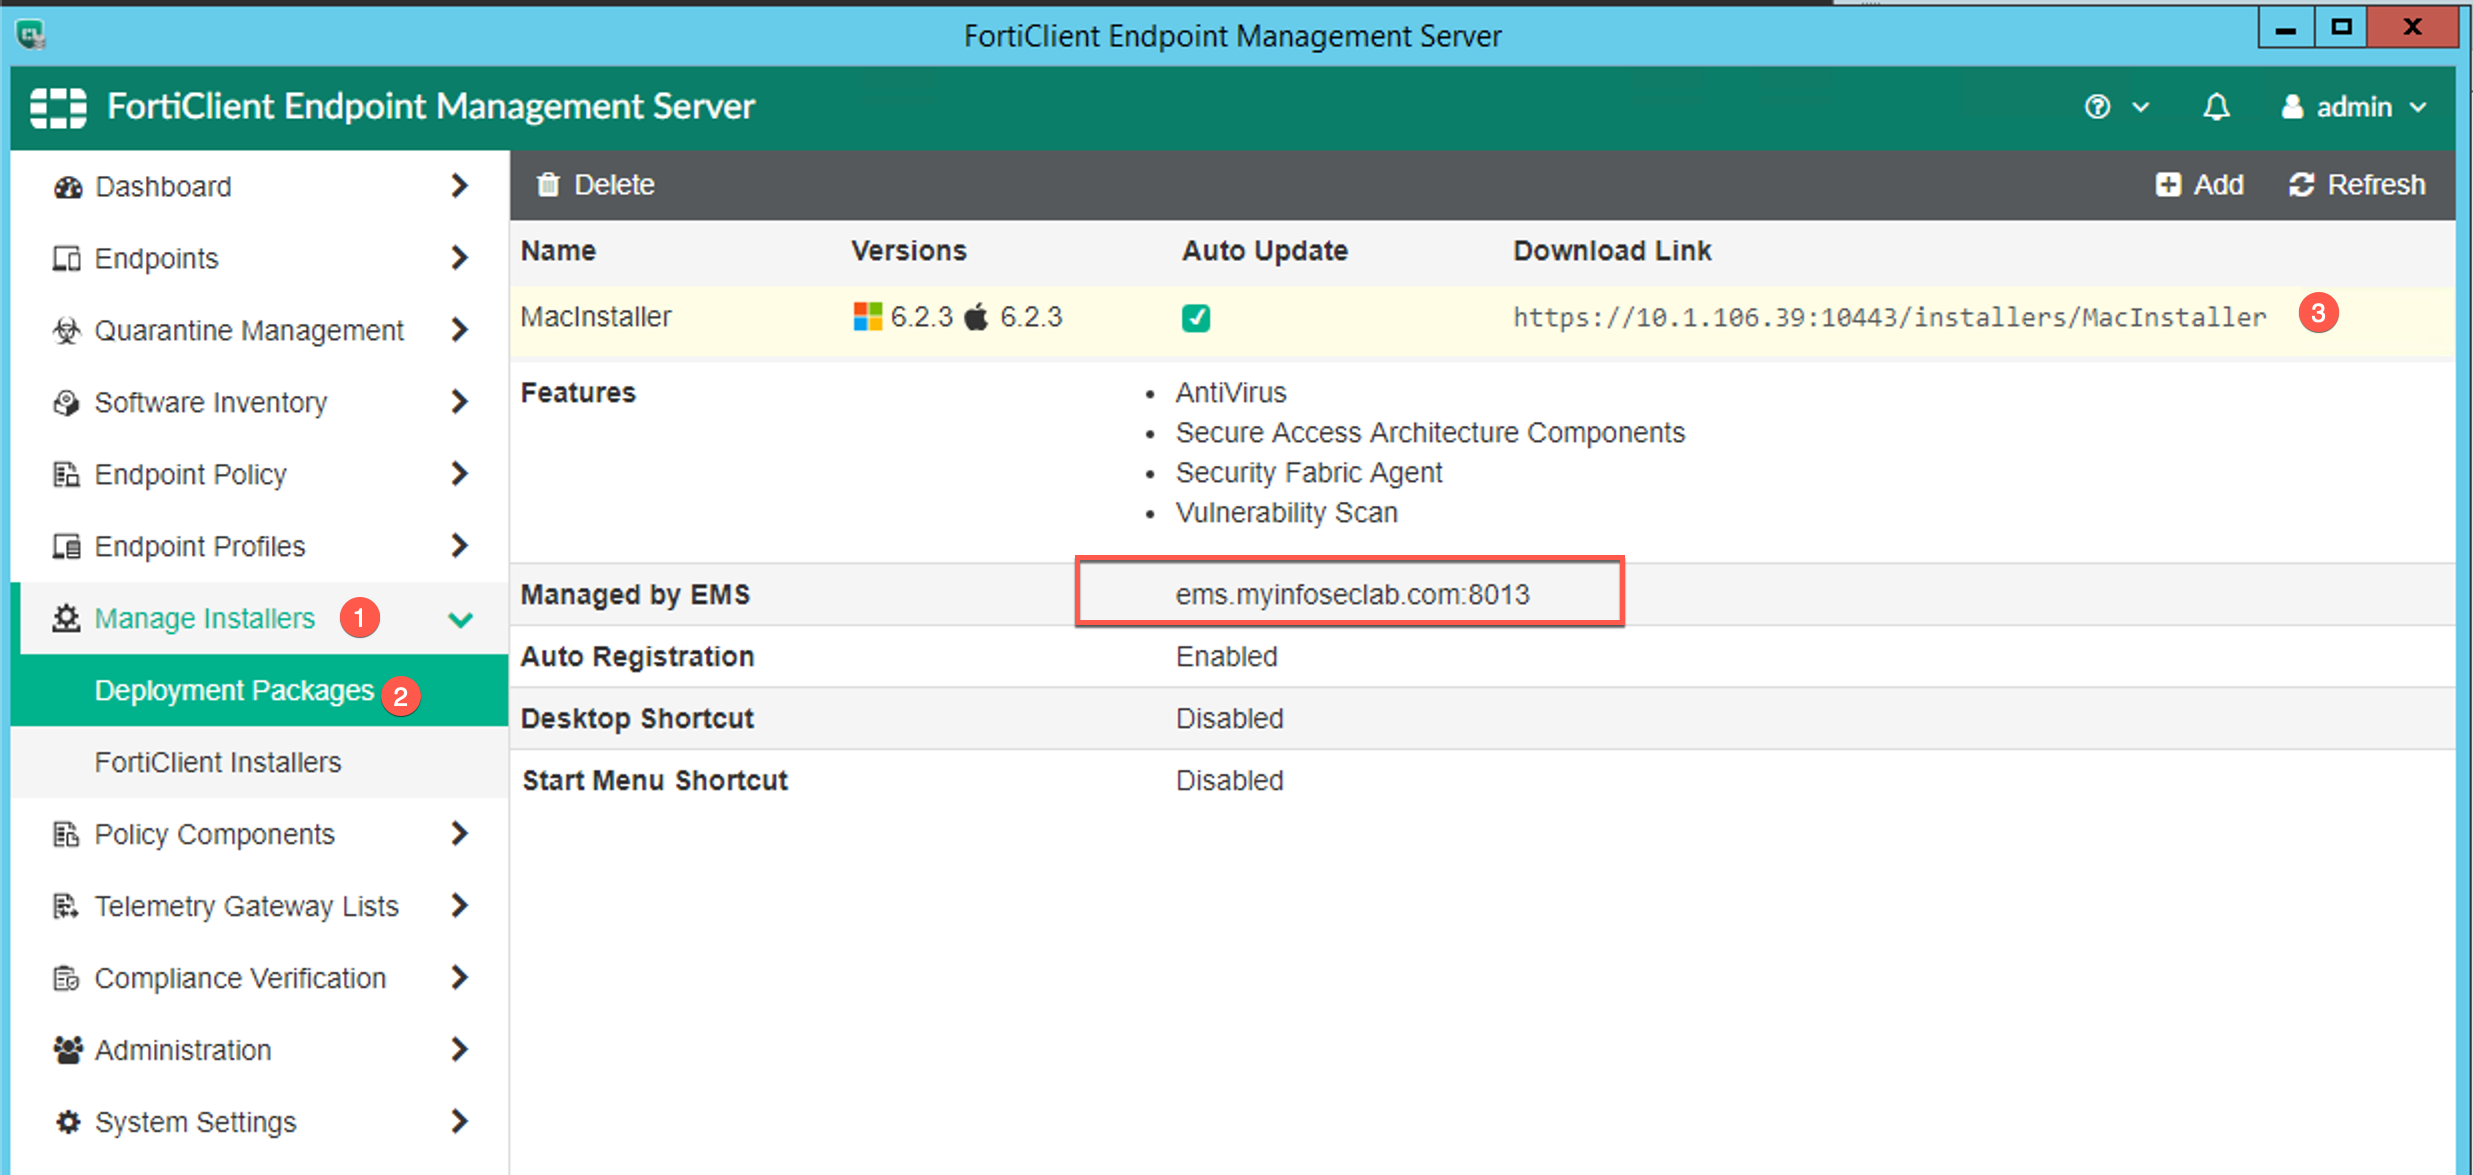
Here you can see what the installer will be configured for. You can see the download link that is available. Note the Managed by EMS section. Make sure you have an external and internal DNS record that matches and resolves correctly.
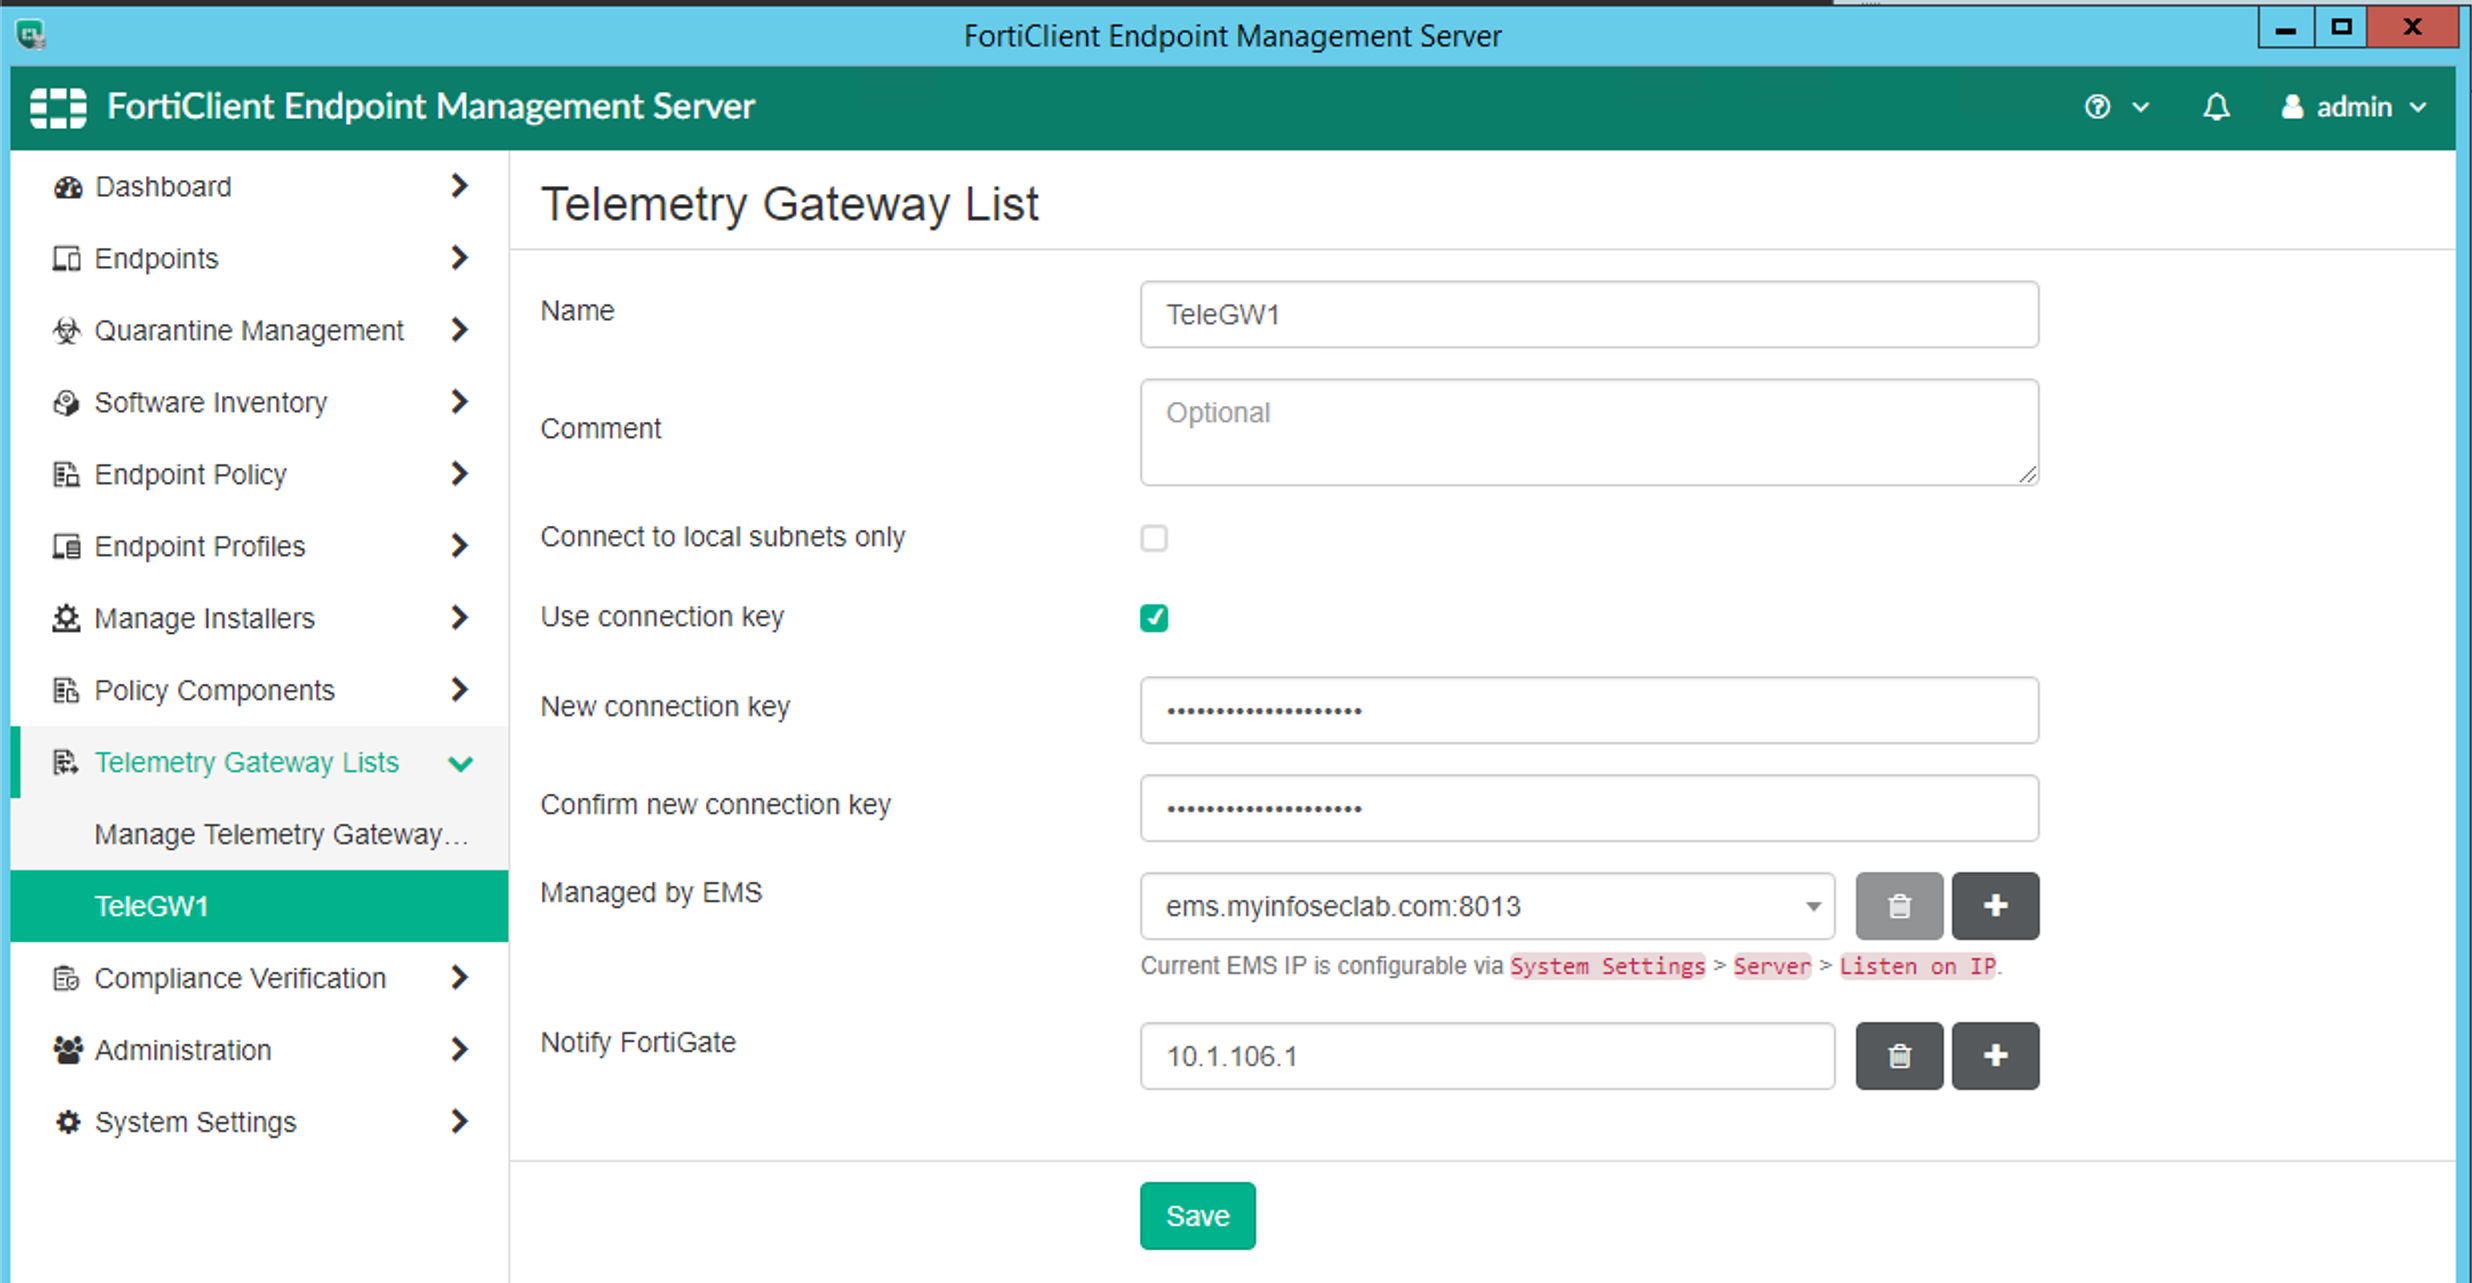
On the Telemetry Gateway section, you can define the FortiGate that will receive the Telemetry information.
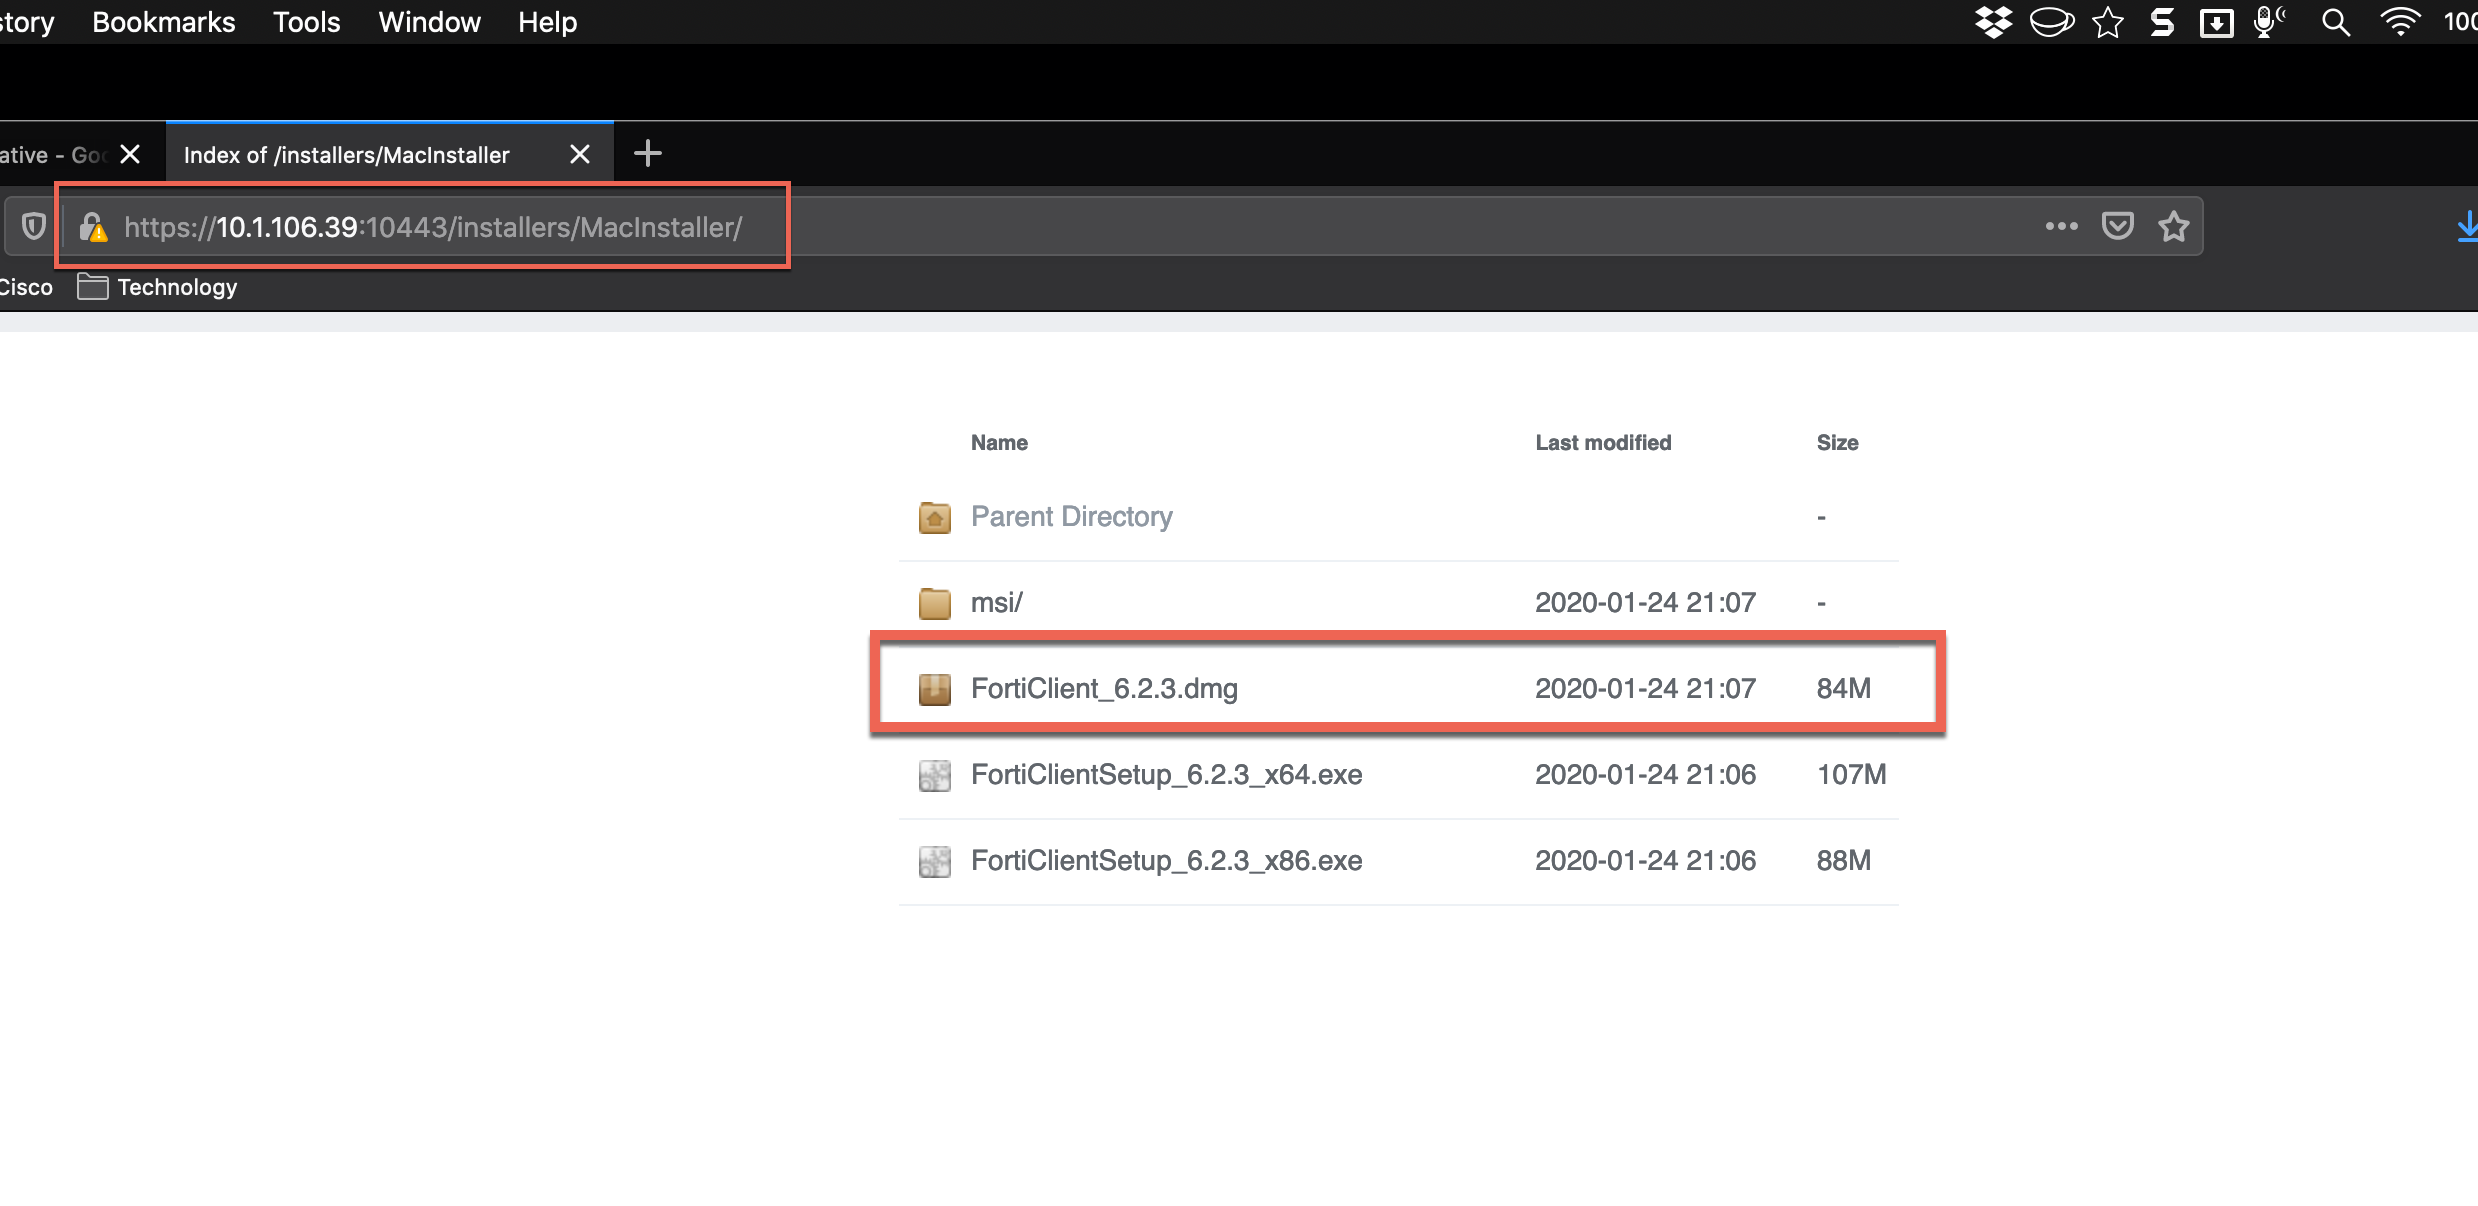
When you follow the link, you will see the different install bundles.
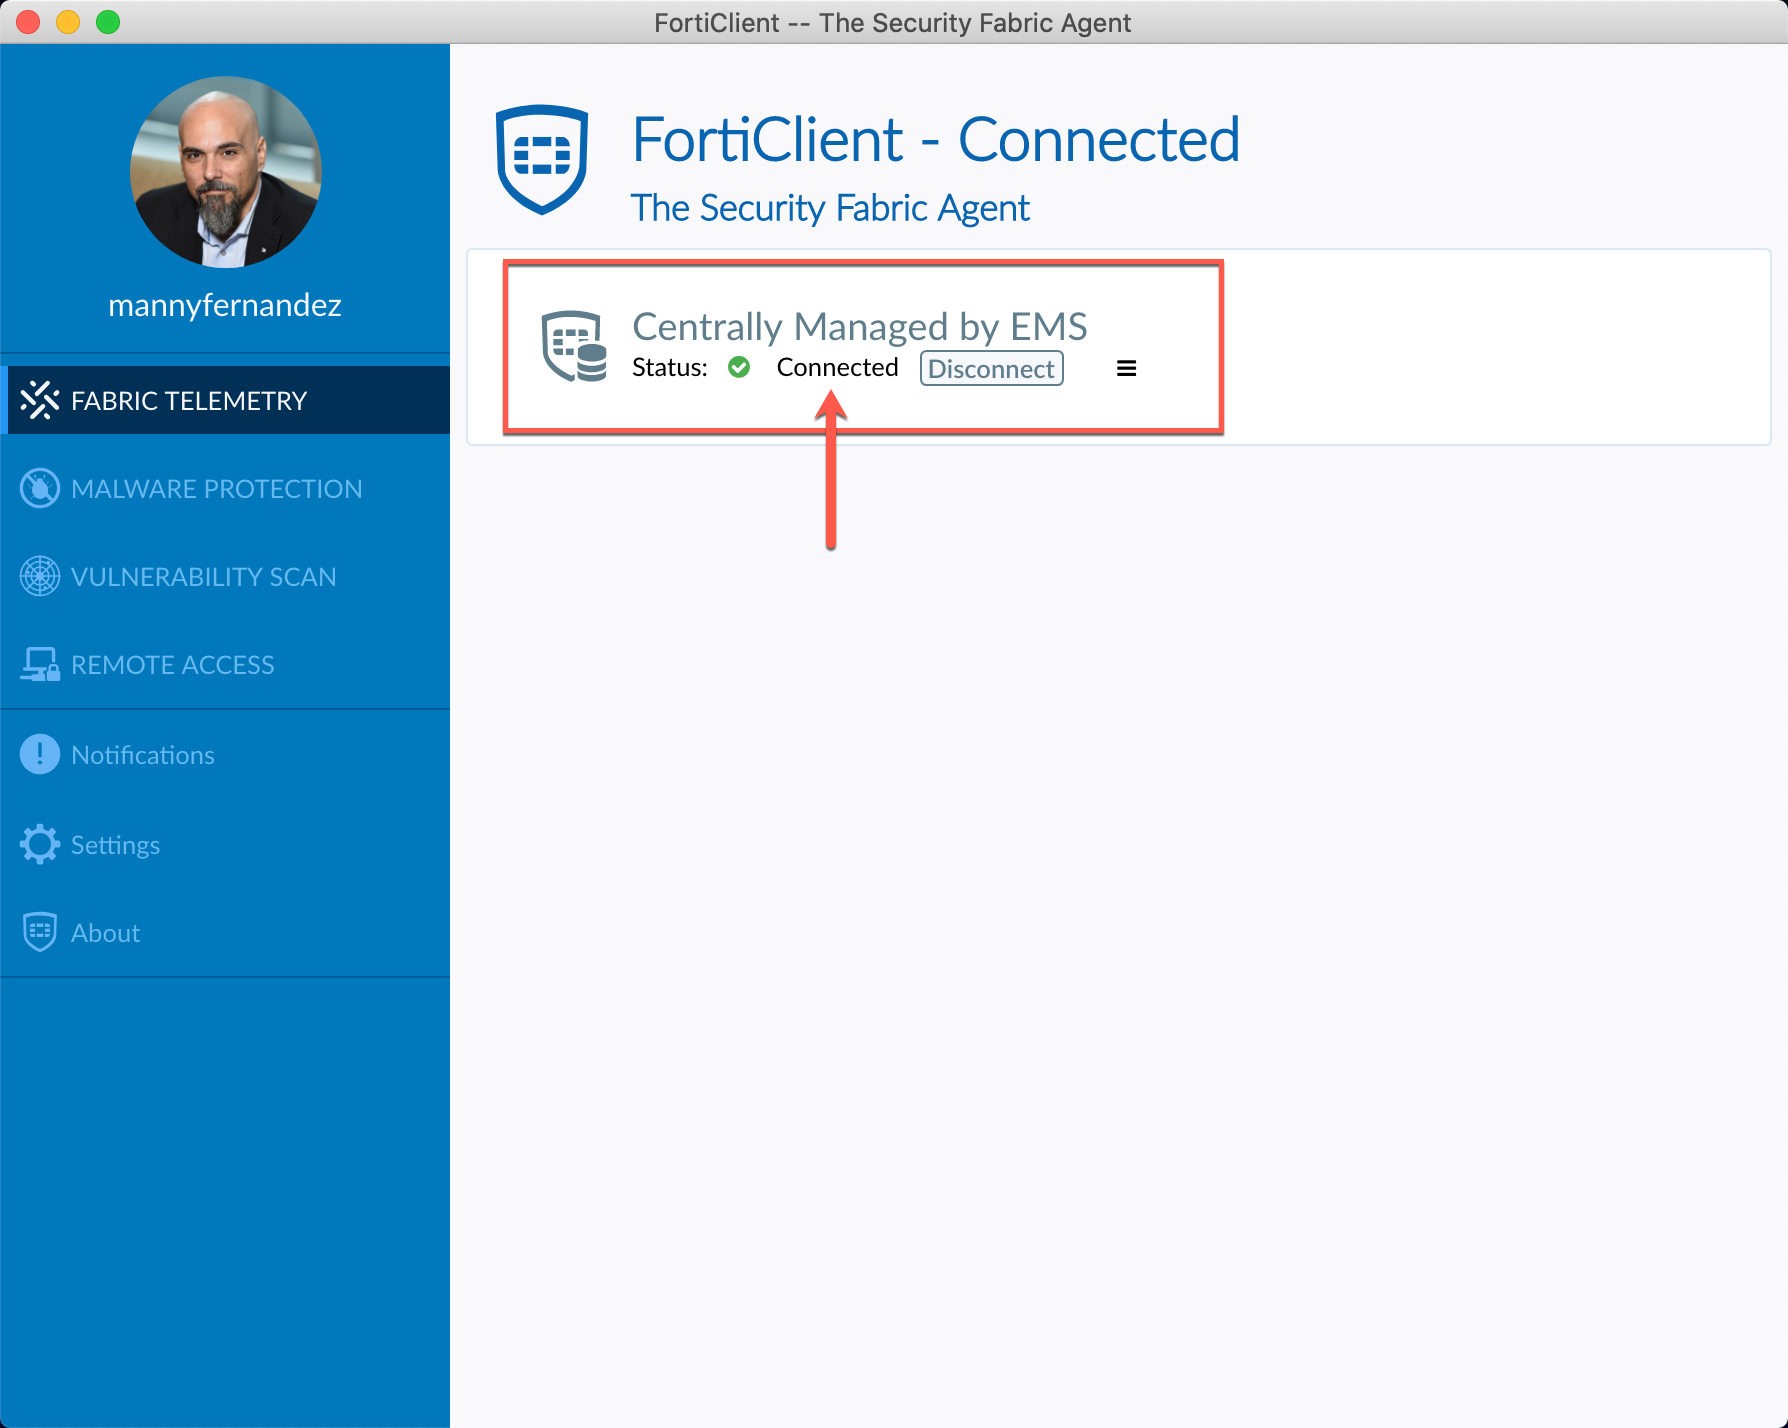
Once you install FortiClient, you will see that it is Connected to the EMS server.
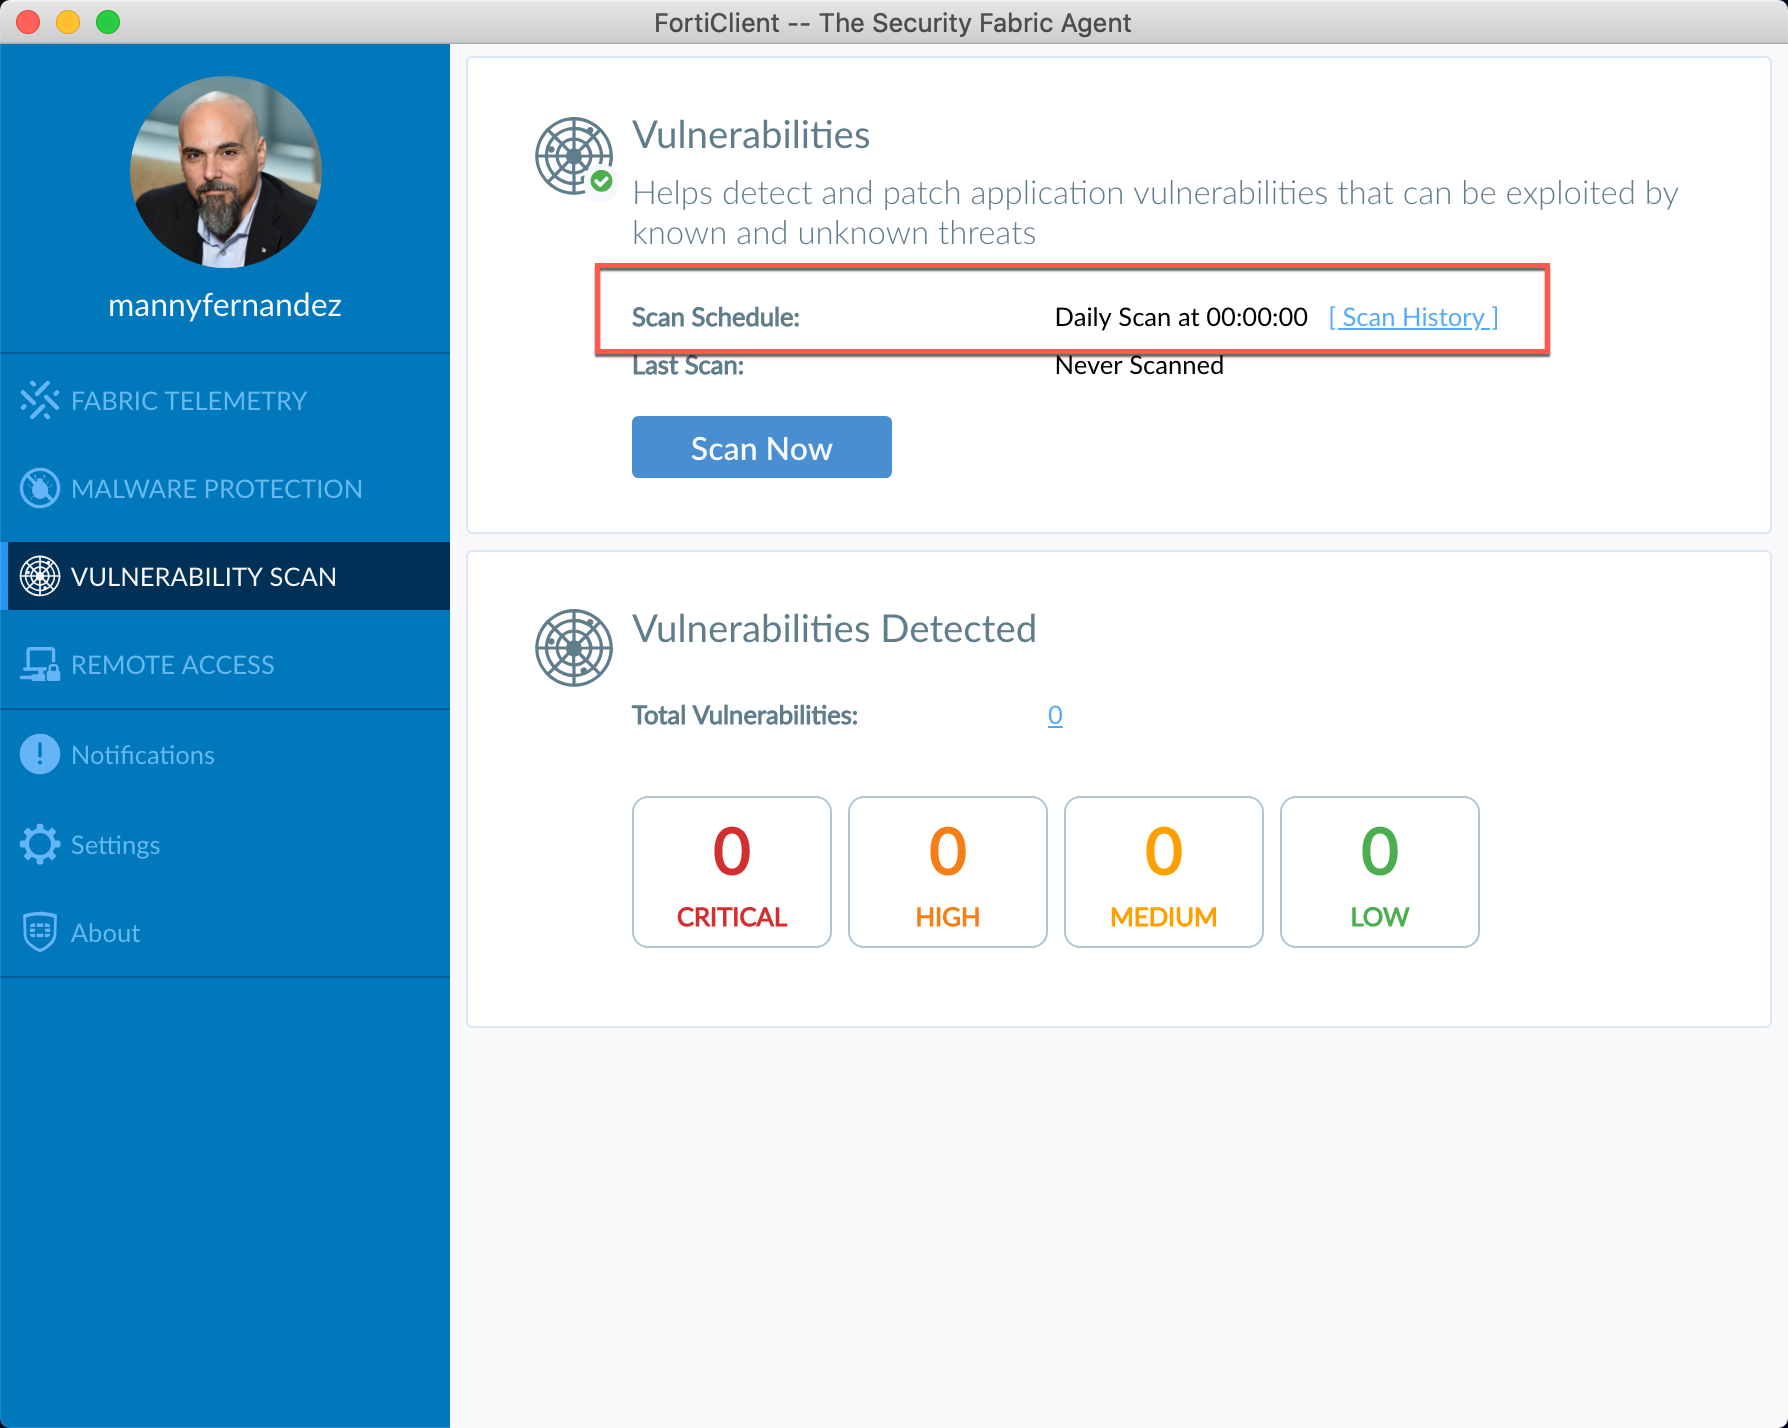
By looking at the different sections, you should see the schedules you set in the Profile
Earlier, I wrote an article regarding the ports that are used for the different Fortinet products. Below we see the 8013 and 8014. If you look at the article I references, you will see that 8013 is the Management Port while the 8014 is the Logging port.

Below, you see the policy we created to permit the FortiClient to communicate with the EMS server from the outside or Off-Net

Remember to create a VIP for the service as well as a public DNS A record.

Hope this helps.
Recent posts
-

-

I have been playing with the free version of... Full Story
-

In my day job, I am on a lot... Full Story
