At its core, IEEE 802.1X is a network layer... Full Story
By Manny Fernandez
February 14, 2026
Deploying FortiAIOps in my ProxMox Lab
Pre-installation Requirements
Ensure that the following requirements are met before proceeding with the installation.
Supported Environments
Supported environments include:
– VMware ESXi- 7.0.3 and above
– Microsoft Hyper-V
– KVM- Ubuntu 20.04 and above, CentOS 9.0 and above
Hardware Requirements
The following table lists the minimum hardware requirements for deploying FortiAIOps.
CPU: 8
Mem: 32GB
Disk1: 8GB
Disk2: 50GB
Note: Disk 1 is used for OS and Disk 2 is used for data. You can extend or modify Disk 2 size based on your requirements.
Uploading the Installation Files to ProxMox
Upload the out.kvm.zip file to your PVE node. In my case, the image file is FAO_VM64_KVM-v3.2.0-build0139-FORTINET.out.kvm.zip
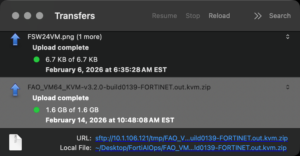
I uploaded it to the /tmp directory on my pve0 node.
Make sure you have unzip installed on your pve node. If not type apt install unzip.
Now run the following
unzip FAO_VM64_KVM-v3.2.0-build0139-FORTINET.out.kvm.zip
NOTE: replace the file name with whatever you have as the file name.
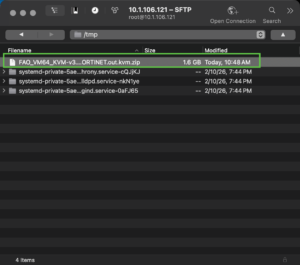
Once it unzips, you should see something similar to this…
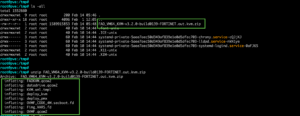
Import the FortiAIOps disk image manually in the Proxmox shell to create the VM
./deploy_pmx -n <name> -v <volume> -b <bridge> [-i <vmid>] [-c <cores>] [-m
<memory>]
–Legend–
<name> is the name of the VM, for example, fortiaiops.
<volume> is the target storage ID, for example, local-lvm.
<bridge> is the network bridge to use, for example, vmbr0.
<vmid> is the ID assigned to the new VM; the default is to use the next available free ID.
<cores> is the number of CPU cores to allocate; the default is 8.
<memory> is the amount of RAM to allocate (in MB); the default is 32768 MB.
For me, I wanted to name it FortiAIOps and install it on my thin-mint volume using my vmbr2 NIC assigning it VMID of 105 with 8 CPUs and 32GB of memory.
./deploy_pmx -n FortiAIOps -v thin-mints -b vmbr2 -i 105 -c 8 -m 32768
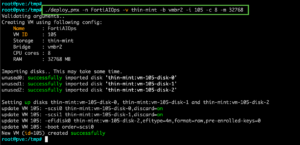
You should see something like the screenshot above.
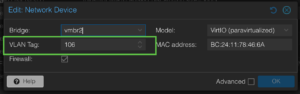
Now when you go into your ProxMox WebUI, you should see the VM not yet started. Since I am tagging this interface with my server VLAN, I modified the net0 device and told it to tag the correct VLAN ID, In my case, 106
Lets go ahead and start the VM.
Configuring Networking
Once the VM is booted you will console in via ProxMox and login as admin no password. It will ask you to change the password. Give it some time or you will get the following error:
Container FortiAlOPS is not running. Please wait!
Once you change the password you will need to configure the IP address, mask and gateway.
Lets configure the IP
config system interface
edit port1
set type physical
set mode static
set ip 10.1.106.203/24
set allowaccess https ping ssh http
config ipv6
end
next
end
Now lets configure the default gateway
config router static
edit 1
set gateway 10.1.106.1
set device port1
next
end
Creating a Super Admin account
FAOKVM (admin) # edit real_admin
FAOKVM (real_admin) # set password <super_secret_password>
FAOKVM (real_admin) # set accprofile super_admin_prof
Editing role from cli is not allowed
Command failed(757). Error string: Permission is denied
This is because the admin user created via the CLI is automatically added to the Super User user group. This provides full permissions, similar to the default admin account.
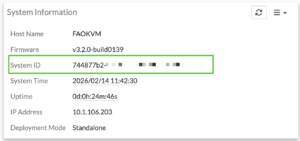
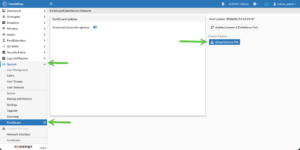
Licensing
To license you FortiAIOps, you will need to go to System, FortiGuard and then Upload License File.
I will be doing additional articles on the deployment of FortiAIOps in the coming weeks.
Hope this helped.
Recent posts
-

-

In case you did not see the previous FortiNAC... Full Story
-

This is our 5th session where we are going... Full Story
-

Now that we have Wireshark installed and somewhat configured,... Full Story
-

The Philosophy of Packet Analysis Troubleshooting isn't about looking... Full Story