Have you ever ordered a bunch of Fortinet gear... Full Story
By Manny Fernandez
December 2, 2017

Forticloud 3.2 for APs
Fortinet’s FortiCloud was introduced to provide customers the ability to manage their device entirely from the cloud. This post will cover the APs specifically and I will follow it up with a Fortigate one and others (e.g. switches) as they become available.
What you need:
1. FortiCloud Key
2. PoE Switch / Power Injector
3. DHCP Server handing out IPs for the AP (since it needs to get out to the Internet)
First step is to locat the FortiCloud Key. This is usually a sticker on the AP itself or inside the box in which it shipped:

Next step is to create a login for Forticloud if you do not already have one.

Go to www.forticloud.com and choose ‘Create New Account’ Follow the steps above to create your free account.
Once you are logged, choose ‘Inventory’. There you will see devices you have deployed. Currently as of this writting, FortiCloud supports FortiGates and FortiAPs. Fortinet is continuing to expand the capability of this solution.

There you will see your curent inventory. On the top right of the portal, you have three options to add new FortiCloud keys; Import FGT Key (used to manage Fortigate firewalls), Import AP key (Obviously, for APs) and Bulk Import.
![]()
Once you have the key(s) imported, you can start the physical connections.
Connect the AP to either a PoE switch port or use the optional Power Injector.
SP-FAP400-PA-US
SP-FAP14C-PA-US
SP-FAP21D-PA-US
Once the AP is connected to the Internet,

Click on the ‘AP Network’ tab on the top of the page.
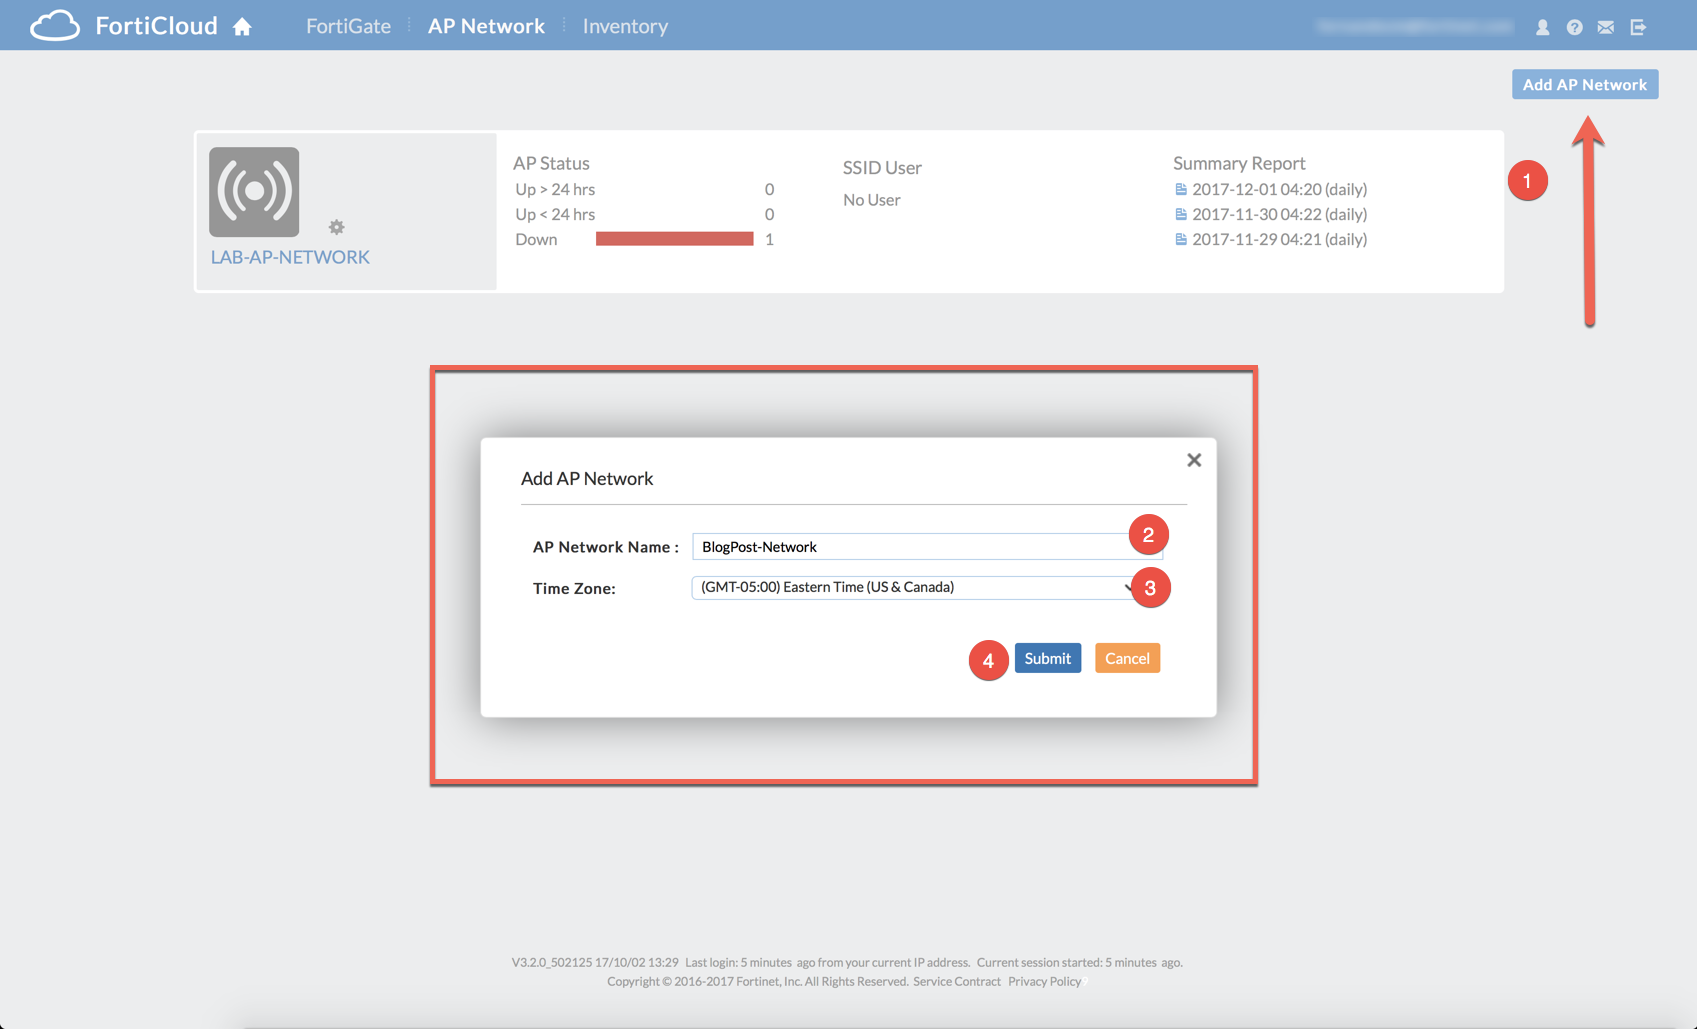
On the top Right of the portal, Click ‘Add AP Network’
The name the Network (e.g. Los Angeles Distribution Center)
Choose the timezone then click ‘Submit’
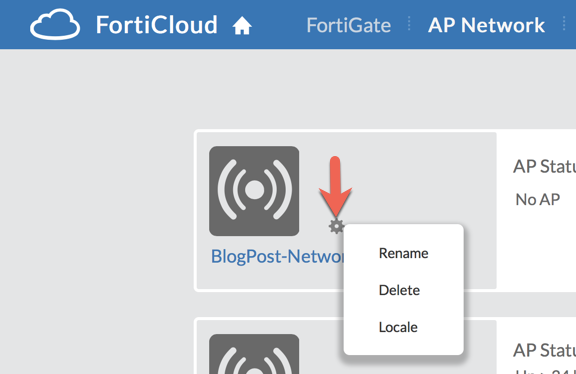
By clicking the small gear (See above) you are able to ‘Rename, Delete and Change the Location of the AP Network.
Once inside the AP Network, the first order will be to create an SSID. Heading will be Accdess Control
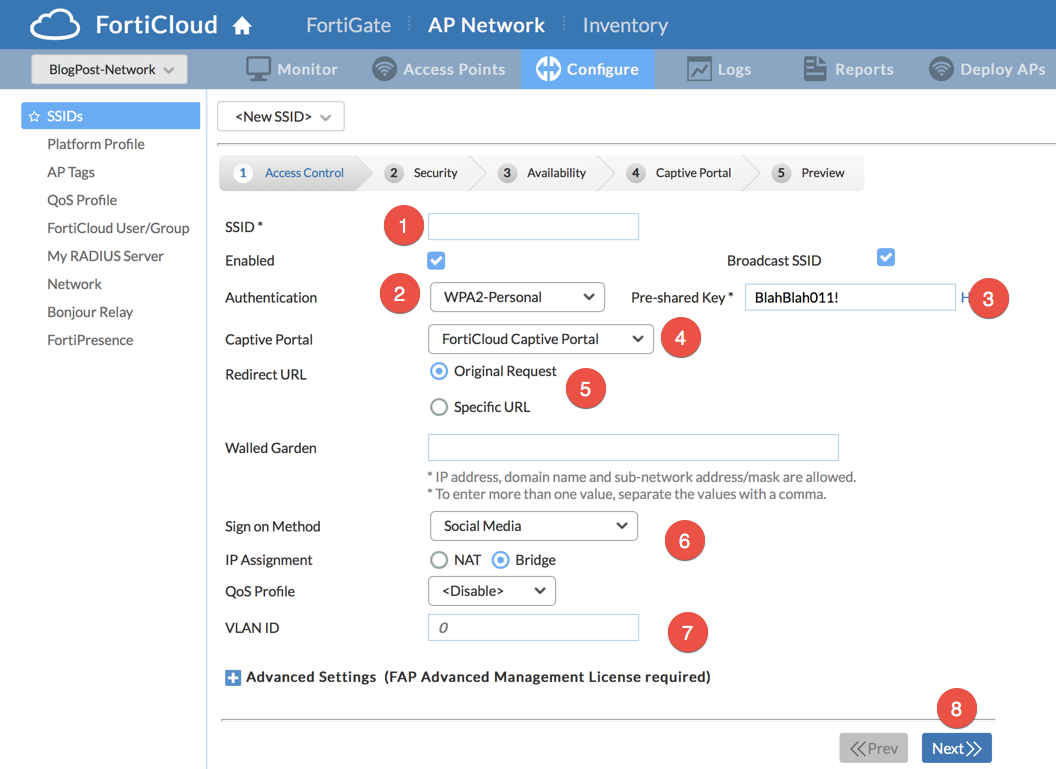
1. The SSID Name (This is what the Users will see so be careful. I have seen all types of funny SSIDs If you have time to burn, check out thislink.
2. Next choose ‘Authentication’. Choice are: Open, WPA-2 Personal, WPA2-Enterprise and
3. The Correseponding PSK (Pre-Shared Key)
4. You can choose to either have a Captive Portal or Not.
5. Once the user is authenticated, do you want to redirect them to their original page or another page such as a Menu, etc.
6. Sign in Method – Here you have the following options: RADIUS, Click Through, FortiCloud User DB or Social Media.
After this is complete, choose ‘Next’
Once there you can choose the features you want to enable on that particular SSID.
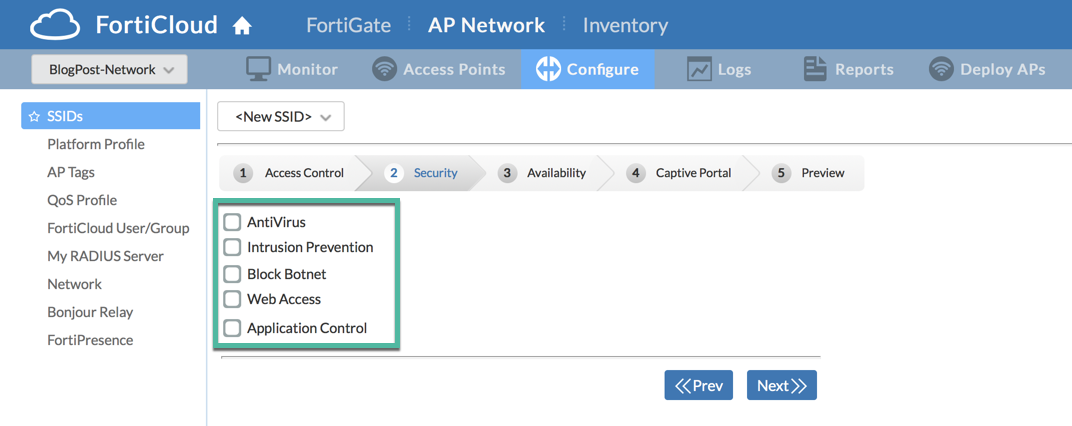
Once you select the feature, you will have a sub section for each.
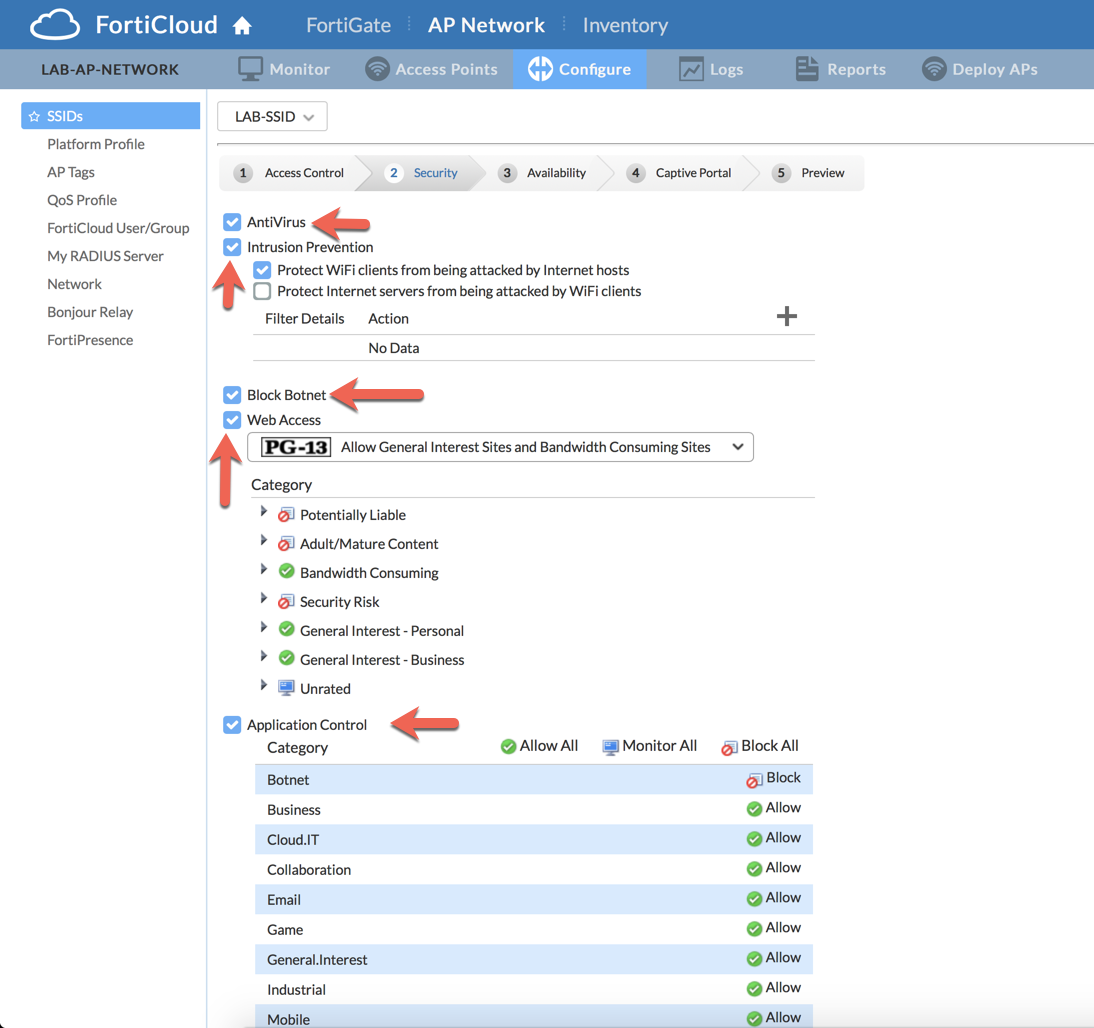
As you can see, you have many of the same features you love from the Fortigate platform.
Once you have finished selecting your features and the corresponding configurations, click ‘Next’
Next we have the ‘Availibility’ Section
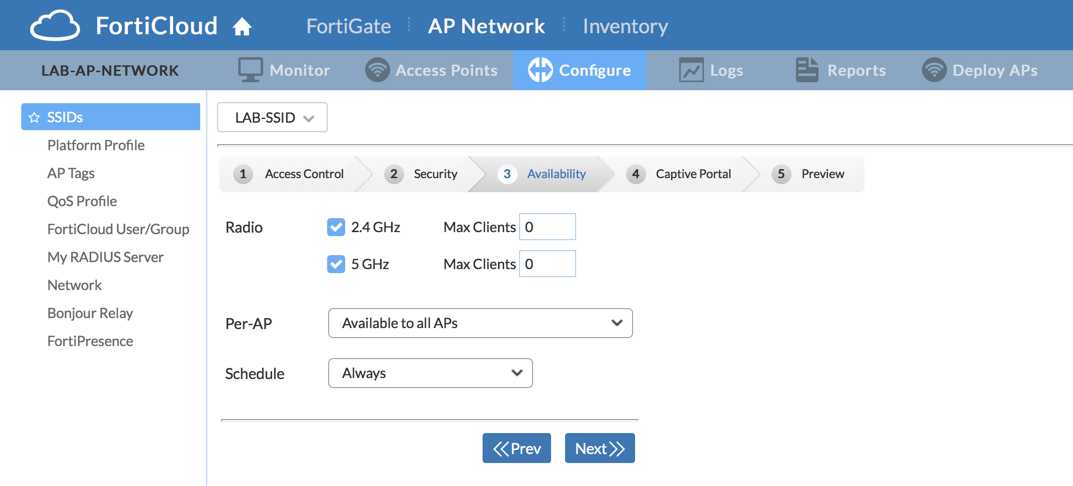
In this section, you can choose the Radio to be used for this SSID as well as the number of clients it is going to allow per radio. Nowe click ‘Next’
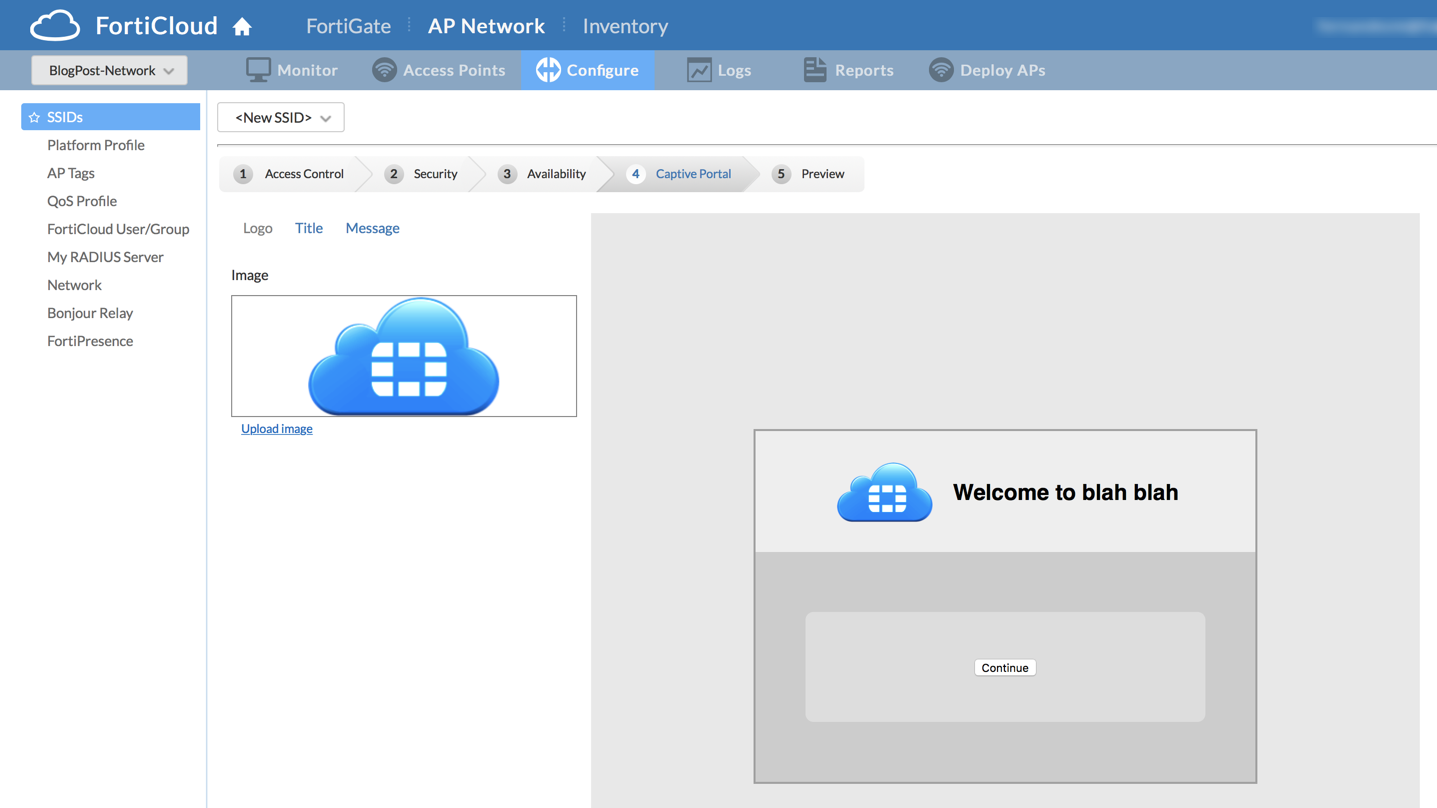
In this section, you can modify how the portal looks.
Click ‘Next’ and review you changes and then click ‘Apply’
Recent posts
-

-

Had a customer with over 200 static routes on... Full Story
-

This is a work in progress, I will be... Full Story
