Have you ever ordered a bunch of Fortinet gear... Full Story
By Manny Fernandez
May 2, 2019

Fortigate / Scrutinizer NetFlow Deployment
Today I had a customer talking to me about Netflow and the Fortigate. To demonstrate the functionality, I decided to write a blog post about it. I used to use a Netflow collector named Scrutinizer. I found that it is still available and there is a “community” version of it. I went ahead and downloaded it.
In this post, I will go through the deployment of the OVF as well as the Fortigate configuration (which is a few lines only).
Let’s get started.
Deploying the VM
After you download the files, you will have three files: .vmdk, .ovf, .pdf


Log into your VM environment. Choose ‘Create / Register VM’
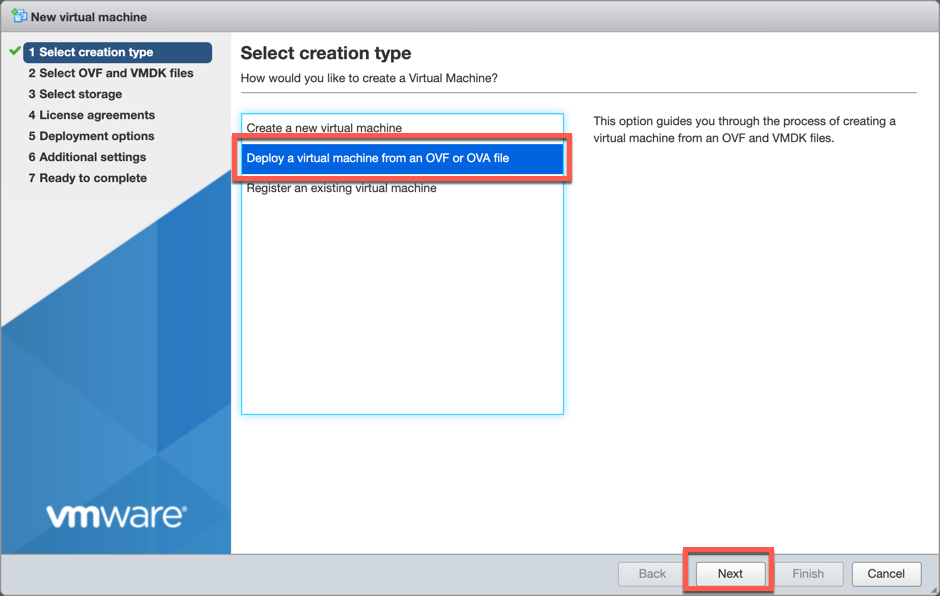
Choose the ‘Deploy a virtual machine from an OVF or OVA file’ and choose ‘Next’
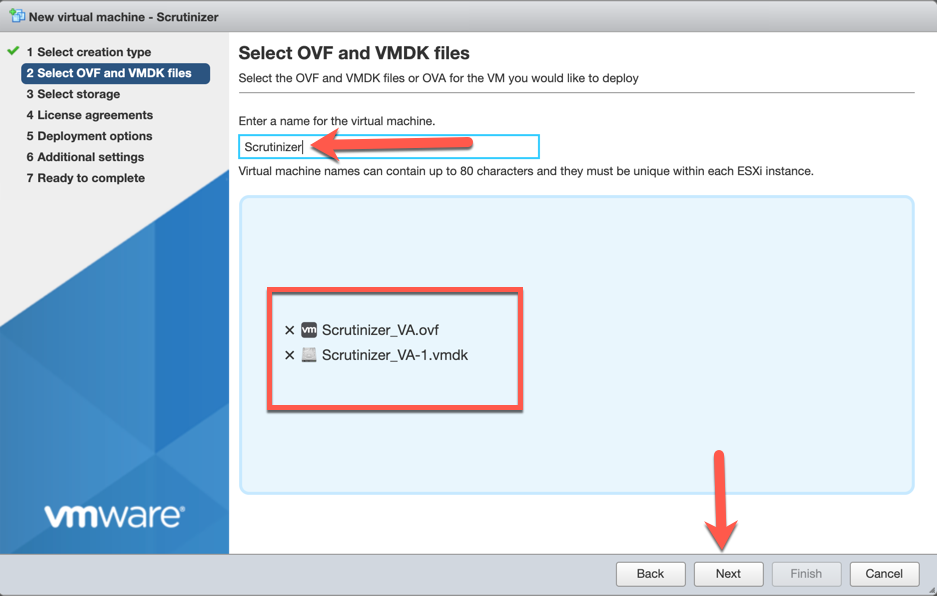
Name the VM and drag the .ovf and .vmdk file into the box and choose ‘Next’.
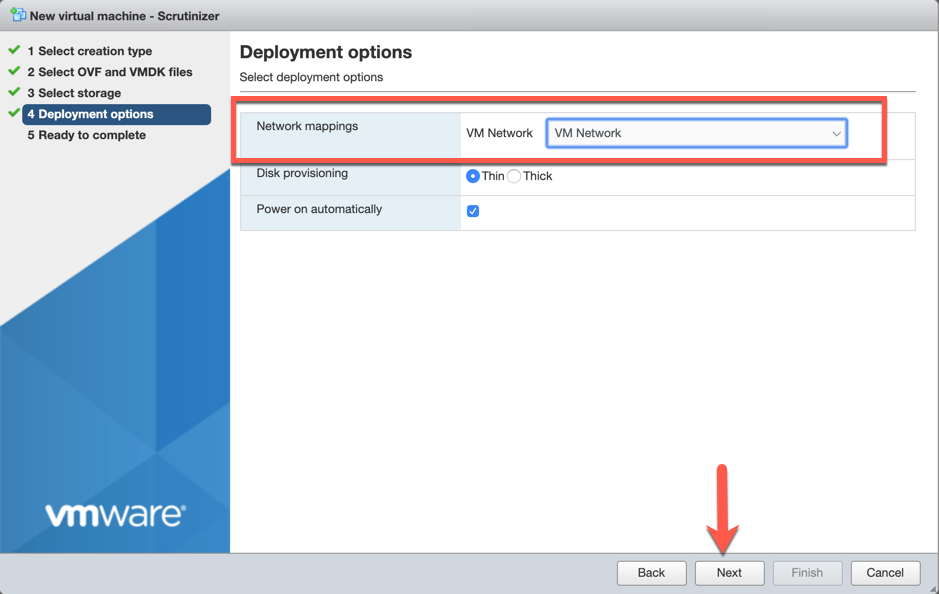
Choose the network that has access to the Fortigate and choose ‘Next’

You will need to wait for the process to finish before you can power up the VM.
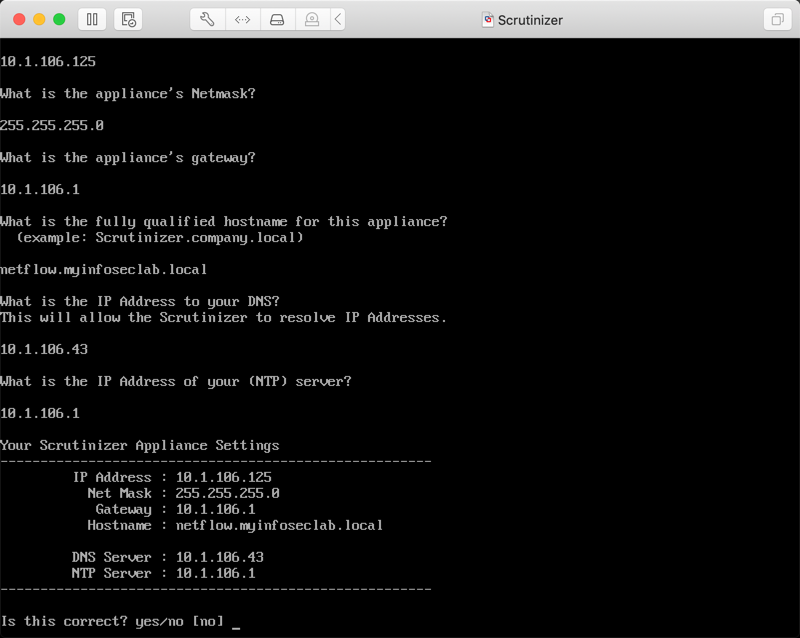
Log into the VM with the following credentials:
username: root
Password: scrutinizer
Fill in the IP address, mask, gateway, DNS server as well as NTP server IP.
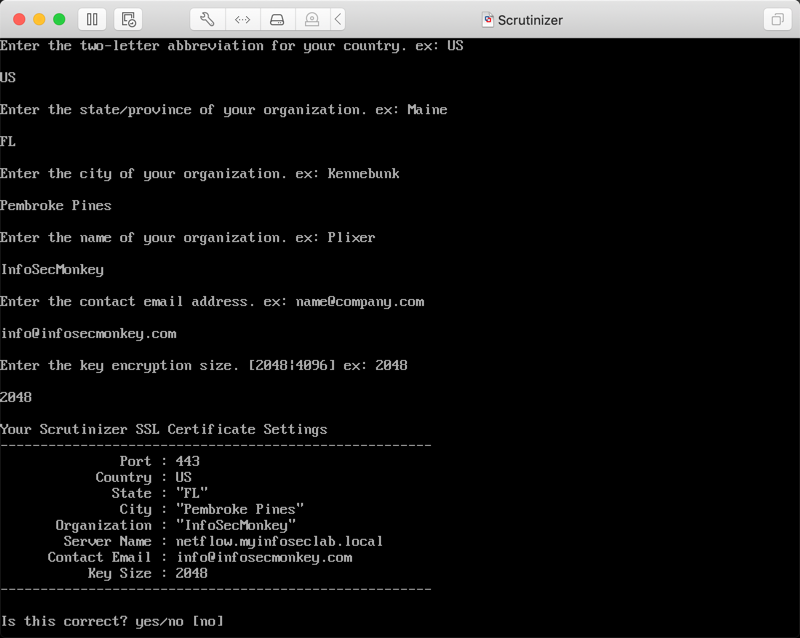
You will now need to configure the TLS support for the console. You will need to fill out a series of questions such as the port to use, certificate type information (e.g. key size).
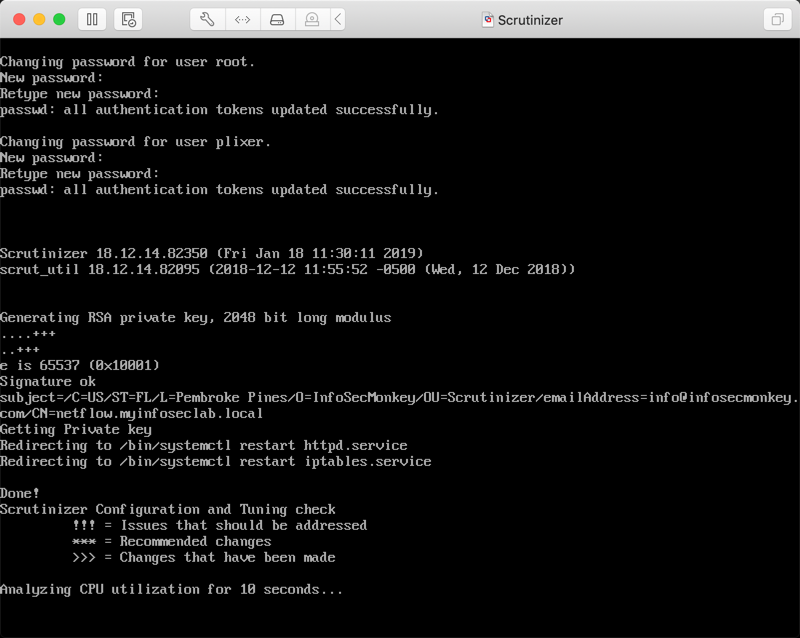
You will be asked to change the password for the ‘root’ user as well as the ‘plixer’ user. The VM will reboot. Once it is done rebooting, point your browser to the IP using any custom port if applicable (in my case https://10.1.106.125)
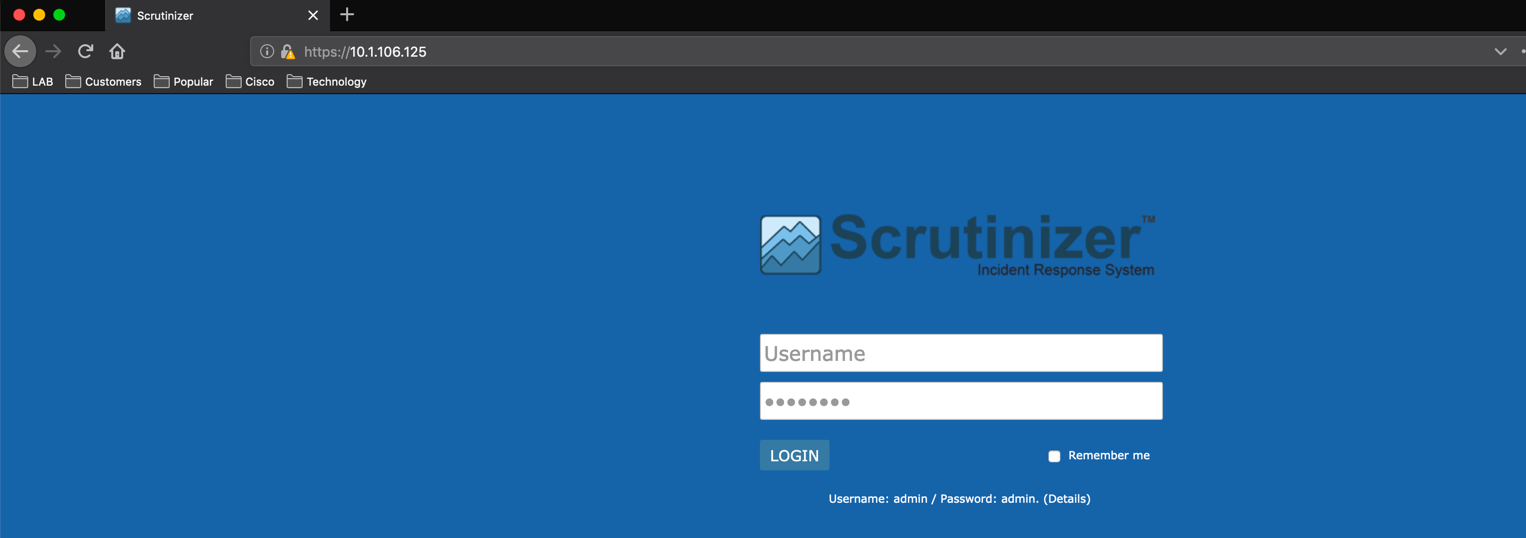
Login in with ‘admin’ ‘admin’ then choose ‘LOGIN’
Configuring the Fortigate Firewall
Now we are going to SSH to the Fortigate. You can use the SSH from the GUI if you want.

From the CLI, you can configure the IP address for the Scrutinizer VM as well as the port it is listening on. By default, it uses TCP 6343.
Now we need to configure Netflow on the interface you want to track.
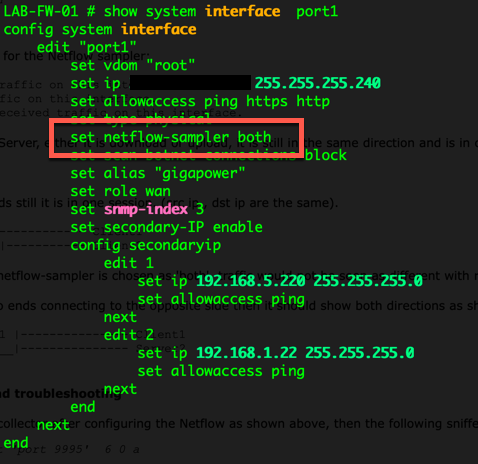
Above, you can see the netflow sampler is enabled on the interface with the keyword ‘both’ meaning it will see inbound and outbound.
Results
You can see in the dashboard that we are now seeing traffic. Granted, most of this information is visible with a FortiAnalyzer but Netflow is a valuable technology. You can also do this with FortiSwitches as well.

Hope this helps.
Recent posts
-

-

Had a customer with over 200 static routes on... Full Story
-

This is a work in progress, I will be... Full Story
