At its core, IEEE 802.1X is a network layer... Full Story
By Manny Fernandez
March 5, 2026
FortiNAC Initial Inventory Discovery – Session 2
In case you did not see the previous FortiNAC post, we installed FortiNAC on ProxMox. We went through the initial install and left it at that. In this article, we are going to go over the initial inventory scan.
In this configuration, I have a FortiGate 600E (getting long in the tooth), a FortiSwitch 548D-FPOE, a FortiSwitch 224 and a FortiSwitch-T1024F-FPOE
SNMPv3
First we will need to create an administrative user, and API user, enabled SNMP on the interface, Create an SMPv3
Let’s start with the SNMPv3
Go to System then SNMP. Ensure that SNMP Agent is turned on

Then scroll down to SNMPv3 and +Create New
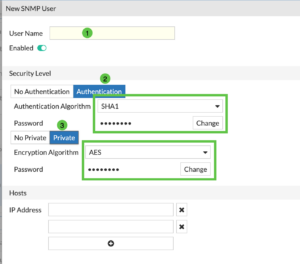
Give it a User Name (1) then we are going to ensure you have the Authentication and you hit the Change to add a password and do the same with the Private and add a password on that one as well. You can choose SHA1 as the Authentication Algorithm and AES for Encryption Algorithm
Under the Hosts ensure you add the IP address of the FortiNAC server.
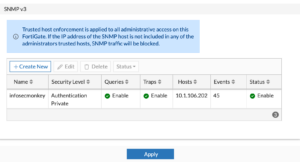
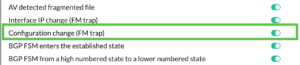
I like to enable the A new device is found

And the Configuration change (FM trap)
Create Admin Account
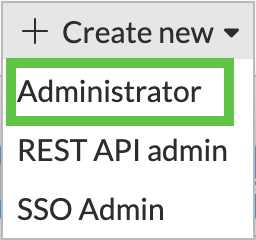
Now lets create an administrator account. Go to System then Administrators and Choose Administrator . Then choose +Create New , choose Administrator
Give it a Username and give it a super_admin profile. NOTE: Ensure that it has a Trusted Hosts
Note: While it might seem like a read-only account would suffice for discovery, FortiNAC actually requires Read-Write access to specific areas of the FortiGate configuration. This is because discovery in the FortiNAC context is rarely passive; the system needs to interact with the FortiGate API/CLI to pull ARP tables, MAC tables, and interface information.
If you are creating a custom profile on the FortiGate (under System > Admin Profiles), ensure the following toggles are set:

API Admin
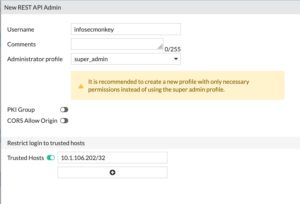
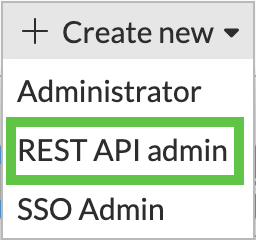
Now lets create the API admin. Go to System then Administrators then +Create New then choose REST API admin
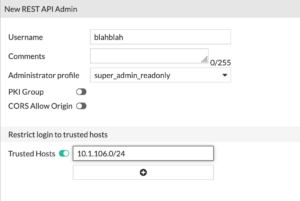
With this user, you can give them super_admin_readonly and give them a Trusted Hosts IP address.
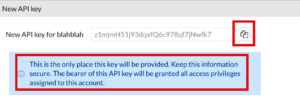
NOTE: You need to store this API key. You have only this one time to capture it. If you miss it or missplace it, you will need to regenerate it. If you have other devices using this particular API key, you willl need to visit all of them to update them.
Creating Container
Now that we have the FortiGate section squared away, lets move to the FortiNAC GUI. I am in Pembroke Pines, FL. I colloquially refer to it as the PPOC (Pembroke Pines Operations Center). I will create a container that will house my PPOC, this could be a Country, State, Location, etc.
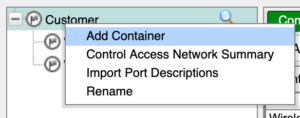
We are going to go to Network then Inventory and under Customer, we are going to Right Click and choose Add Container
There we will create PPOC
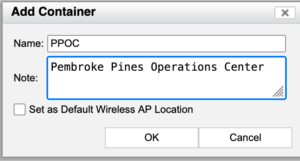
We will give it a Name and hit OK
Add Device
Now lets right click the PPOC and choose Add Device
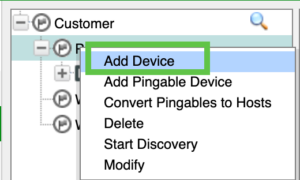
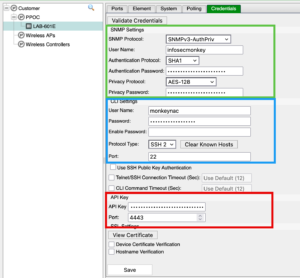
You will need to add the IP address of the FortiGate. Once there you will need to add the SNMPv3 credentials, the CLI credentials (the Administrator account), and finally the API key from the previous steps. Choose to Validate Credentials
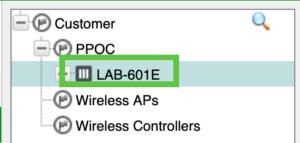
If all is successful, you should see the FortiGate under the PPOC container.
Right click on the FortiGate and choose Group Membership and you want to ensure you have the following selected.
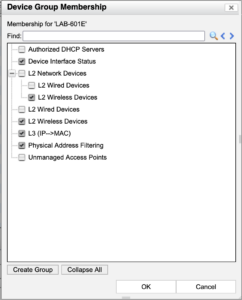
You will need to enable the L3 (IP-> MAC) and Physical Address Filtering which will give you the ability to disable a host with NAC.
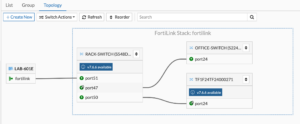
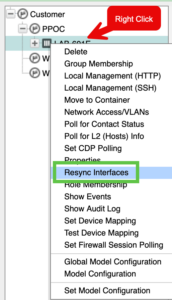
Now lets re-sync the interfaces by right clicking the FortiGate you discovered and choosing Resync Interfaces
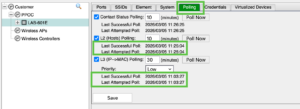
You will want to go to the Polling tab and ensure you have successful polling on L2 and L3.
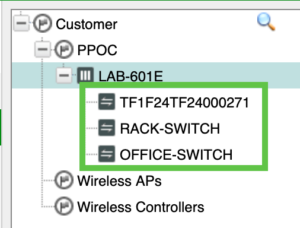
Once this is complete, you should see your FortiSwitches under the FortiGate.
In my next FortiNAC session, I will cover Establishing Trust (Session3) and then Policies (Session 4).
Thanks and hope this helps.
Recent posts
-

-

In case you did not see the previous FortiNAC... Full Story
-

This is our 5th session where we are going... Full Story
-

Now that we have Wireshark installed and somewhat configured,... Full Story
-

The Philosophy of Packet Analysis Troubleshooting isn't about looking... Full Story