Had a customer with over 200 static routes on... Full Story
By Manny Fernandez
January 18, 2020

VX-LAN over IPSec using Fortigate Firewalls
VXLAN is a tunneling protocol that encapsulates layer 2 frames into layer 3 UDP packets. VXLANs allow you to create logical/virtual layer 2 network that span physical Layer 3 networks. A use case for this is a customer that is looking to move their DC but cannot do it all inside a single maintenance windows. Since changing IP addresses for either the moved subnet or the subnet that “stayed behind” in my example, we could virtually extend the layer 2 segment which would allow the same network to live on both side of the VX LAN over IPSec device. See below.
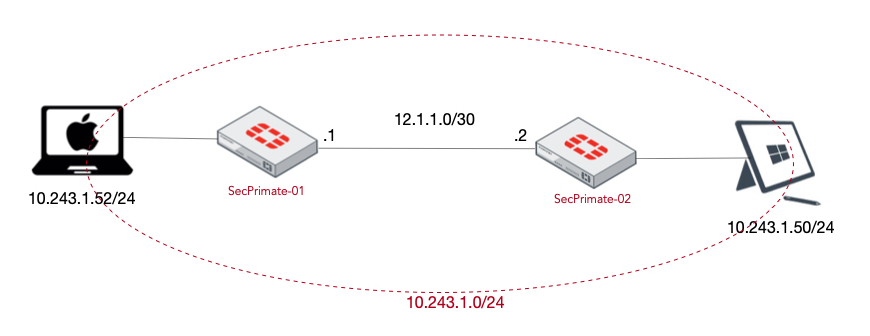
In my environment, I am using 10.243.1.0/24 as the network I was to extend.
Challenge: Be able to ping across the two Fortigate firewalls configured for VXLAN while two separate devices are connected to the same Layer 3 subnets.
Lets get started.
Computer Testing Environment Setup
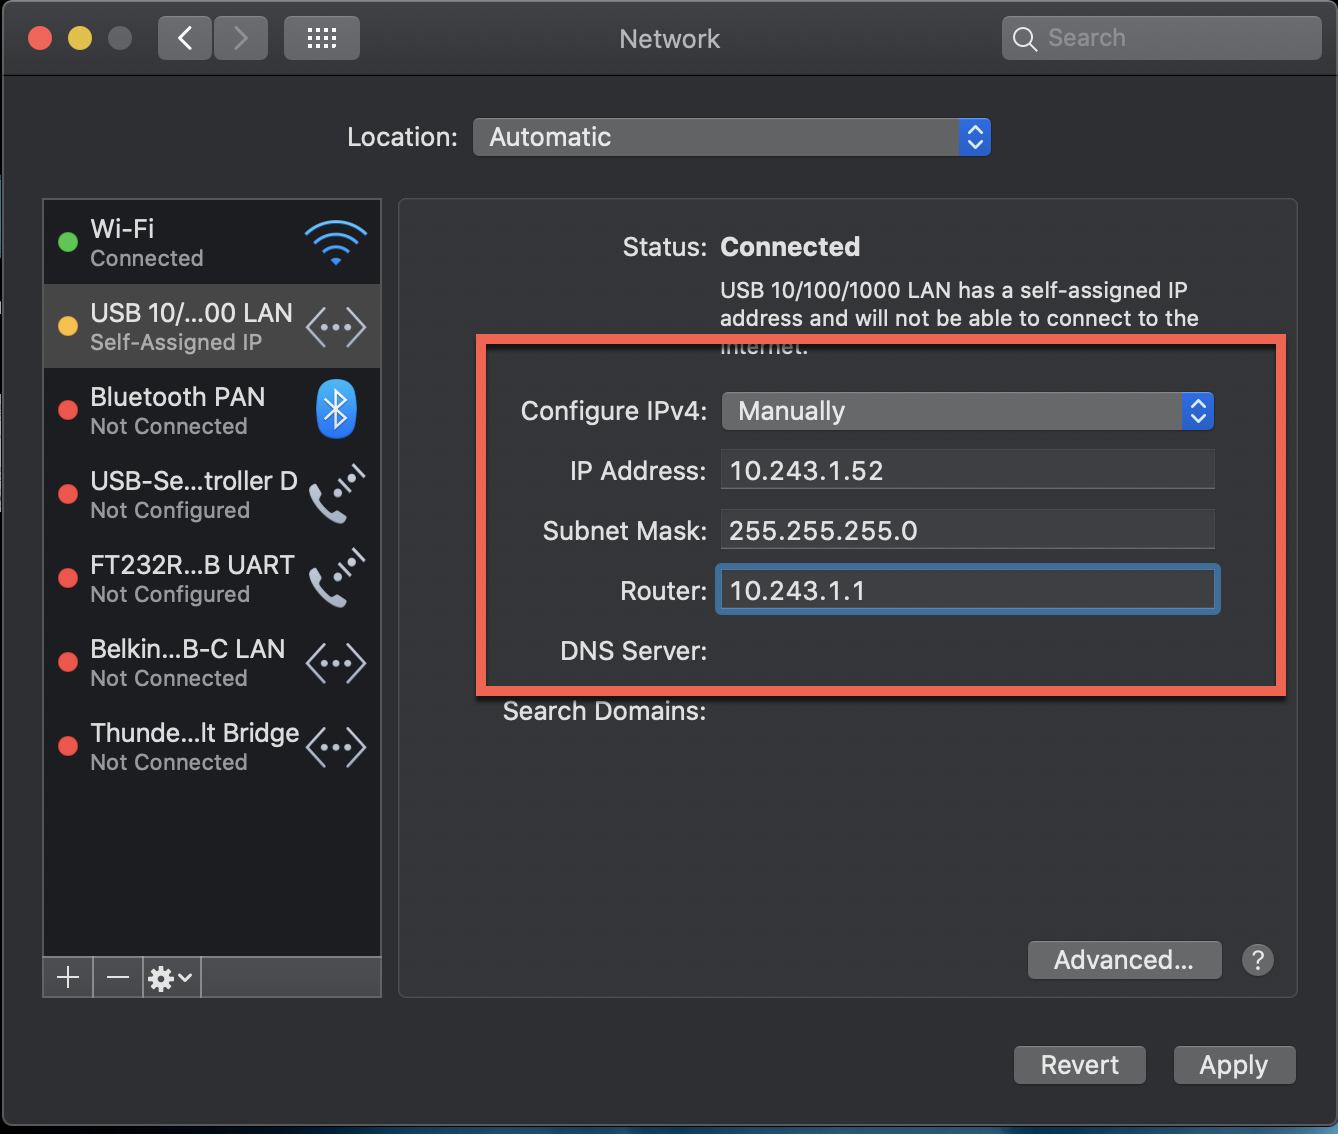
MacBook Pro Connected to SecPrimate-01 firewall
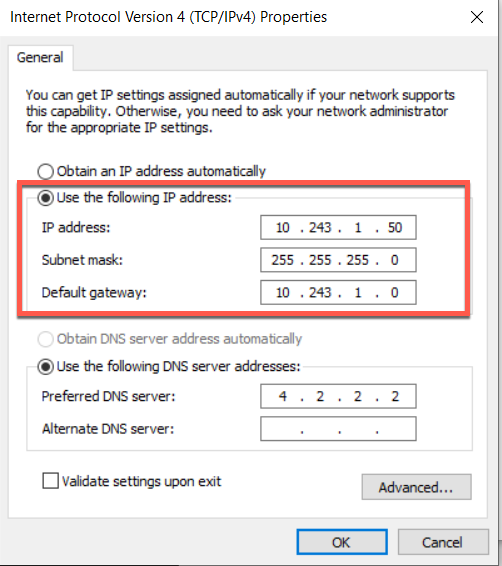
Windows 10 Machine Connected to SecPrimate-02 firewall
SecPrimate-01
You will want to configure your WAN ip addresses and default gateway as needed. Do NOT assign and IP address to the LAN side where the extended network will live.
Phase I Configuration
Next we will configure the Phase I portion of the IPSec VPN
config vpn ipsec phase1-interface
        edit "VPN-to-Sec2"
               set interface "wan1"
               set peertype any
               set proposal aes256-sha256
               set encapsulation vxlan
               set encapsulation-address ipv4
               set encap-local-gw4 12.1.1.1
               set encap-remote-gw4 12.1.1.2
               set remote-gw 12.1.1.2
               set psksecret Fortinet2020!
          next
end
In this Phase I configuration, you can see we gave it a descriptive name, we chose the proper egress interface, hard-coded the proposal we want to use, set the encap for this VPN as vxlan, gave it local and remote IPs and finally a PSK.
Phase II Configuration
Phase II is really not needed because by default, it will use all 0’s which is essentially what we have here. Since I wanted to force a single proposal, I configured it.
config vpn ipsec phase2-interface
        edit "Phase2-to-Sec2"
             set phase1name "VPN-to-Sec1"
             set proposal aes256-sha256
        next
end
Creating Soft-Switch
You need to make sure you do this in the proper order. I had an issue where I could NOT add the VPN name to the soft-switch.
config system switch-interface
        edit "VXLAN-SS"
               set vdom "root"
               set intra-switch-policy explicit
               set member "VPN-to-Sec2" "port6"
       next
end
So the issue is when you try to set members and the intra-switch-policy is set to implicit as opposed to set intra-switch-policy explicit. Once you set this, THEN you can add the members. See below.
“Witout”
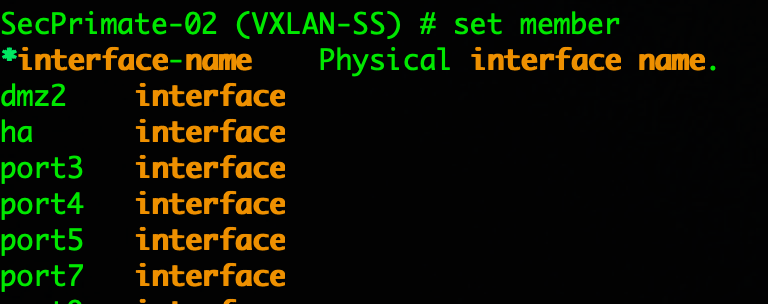
As you can see in the screenshot, you cannot see any VPN interface.
“Wit”
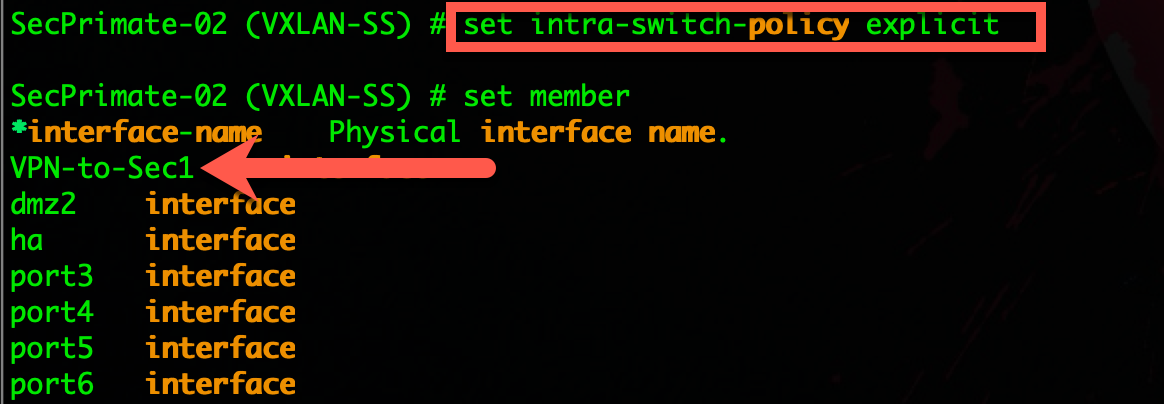
Now with the command in place, you can now see my VPN-to-Sec1 interface and it can be added to the soft-switch.
Firewall Address Objects
We will create a Firewall Address to be used in the IPv4 Policies
config firewall address
        edit "Extended-LAN"
               set color 18
               set subnet 10.243.1.0 255.255.255.0
         next
end
NOTE: Color is optional, but I like it 🙂
Firewall Policies
We will now create the firewall policies needed to pass the traffic.
config firewall policy
        edit 1
               set name "VXLAN to SEC2"
               set srcintf "port6"
               set dstintf "VPN-to-Sec2"
               set srcaddr "Extended-LAN"
               set dstaddr "Extended-LAN"
               set action accept
               set schedule "always"
               set service "ALL"
              set fsso disable
        next
        edit 2
              set name "SEC2 to VXLAN"
              set srcintf "VPN-to-Sec2"
              set dstintf "port6"
              set srcaddr "Extended-LAN"
              set dstaddr "Extended-LAN"
              set action accept
              set schedule "always"
              set service "ALL"
              set fsso disable
         next
end
SecPrimate-02
Phase I Configuration
config vpn ipsec phase1-interface
        edit "VPN-to-Sec1"
               set interface "wan1"
               set peertype any
               set proposal aes256-sha256
               set encapsulation vxlan
               set encapsulation-address ipv4
               set encap-local-gw4 12.1.1.2
               set encap-remote-gw4 12.1.1.1
               set remote-gw 12.1.1.1
               set psksecret Fortinet2020!
          next
end
Phase II Configuration
Phase II is really not needed because by default, it will use all 0’s which is essentially what we have here. Since I wanted to force a single proposal, I configured it.
config vpn ipsec phase2-interface
        edit "Phase2-to-Sec1"
             set phase1name "VPN-to-Sec1"
             set proposal aes256-sha256
        next
end
Creating Soft-Switch
You need to make sure you do this in the proper order. I had an issue where I could NOT add the VPN name to the soft-switch.
config system switch-interface
        edit "VXLAN-SS"
               set vdom "root"
               set intra-switch-policy explicit
               set member "VPN-to-Sec2" "port6"
       next
end
NOTE: See message of command order above
Firewall Address Objects
We will create a Firewall Address to be used in the IPv4 Policies
config firewall address
        edit "Extended-LAN"
               set color 18
               set subnet 10.243.1.0 255.255.255.0
         next
end
Firewall Policies
We will now create the firewall policies needed to pass the traffic.
config firewall policy
        edit 1
               set name "VXLAN to SEC1"
               set srcintf "port6"
               set dstintf "VPN-to-Sec1"
               set srcaddr "Extended-LAN"
               set dstaddr "Extended-LAN"
               set action accept
               set schedule "always"
               set service "ALL"
              set fsso disable
        next
        edit 2
              set name "SEC2 to VXLAN"
              set srcintf "VPN-to-Sec1"
              set dstintf "port6"
              set srcaddr "Extended-LAN"
              set dstaddr "Extended-LAN"
              set action accept
              set schedule "always"
              set service "ALL"
              set fsso disable
         next
end
Results
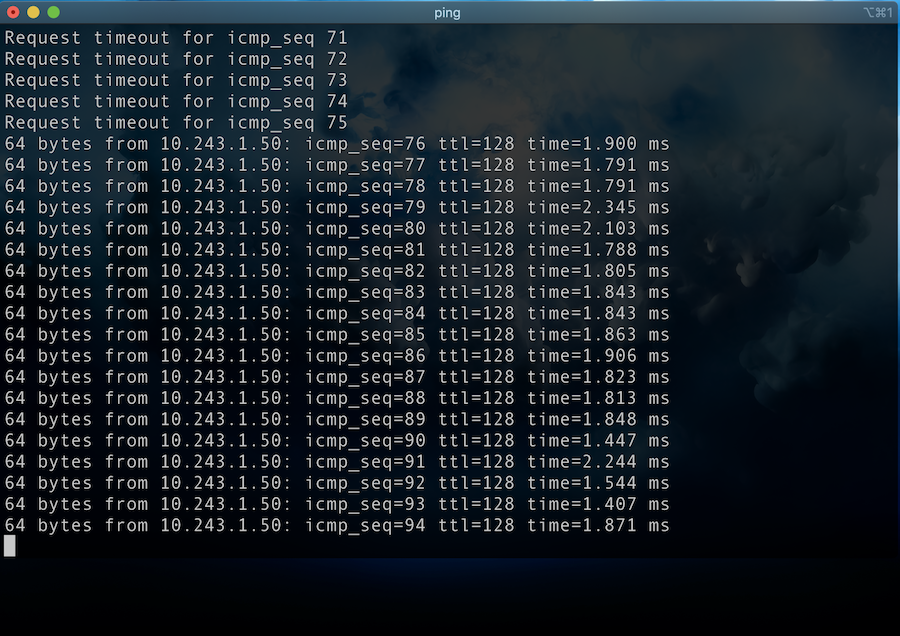
Above, we can see the MacBook Pro is pinging the 10.243.1.50 which is the Windows 10 machine connected to SecPrimate-02 across the VXLAN connection.

Here we see the reverse traffic from the Windows 10 machine to the MacBook Pro
UPDATE
After posting this article, I got a response from someone saying that they had experienced some MTU issues when sending non-ping packets due to packet size. I went ahead and ran some additional test to see if I could reproduce.
First test after the initial pings was making an RDP connection to the Windows 10 box from my MacBook Pro.
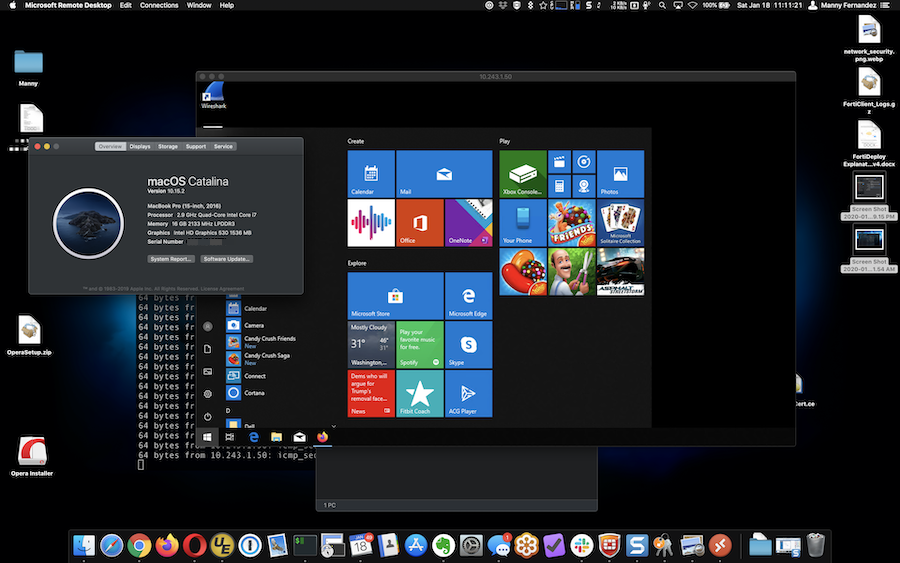
Above, you can see the MacOS Screen and the RDP Session to the Windows 10 box. No issues. RDP packets are not large at all so, this was barely a “stress test” on the connection.
Next, I tested by mounting a CIFS connection from my MacBook Pro to the Windows 10 box using a share. I transferred a series of files totaling over 32GB.


There were multiple files being copied at the same time. Again equally over 32GB in total size. I did not see any issues.
I will however configure my FortiTester and run some serious traffic through the VXLAN configuration and report back.
NOTE: You MAY need to modify the MTU size if you DO experience issues since there is an overhead for the VXLAN.
Hope this helps.
Recent posts
-

-

This is a work in progress, I will be... Full Story
-

I have been playing with the free version of... Full Story

