Had a customer with over 200 static routes on... Full Story
By Manny Fernandez
April 30, 2019

Writting Custom IPS Signatures on Fortigate
Yesterday, I was playing around and wanted to create some custom IPS signatures.
Defining the signature
Use Case – Block the ‘rottentomatoes.com’ website. (Yes I know there is a much easier way of doing this on the Fortigate, but I wanted to test it out without having to write some fake traffic to trigger, so work with me here).
F-SBID( --name "InfoSecMonkey.HTTP.Custom"; --protocol tcp; --service HTTP; --flow from_client; --pattern "rottentomatoes.com";--context host; )
In the above signature, we can see that:
- Protocol is TCP
- Service is HTTP
- Will match ‘client’ traffic only
- And the pattern we are looking for is ‘rottentomatoes.com’
Use Case – Block ping to 8.8.8.8 (Again, same as above, much easier way of doing it but used this to test).
F-SBID( --name "block-google-ping"; --protocol icmp; --icmp_type 8; --icmp_code 0; --dst_addr 8.8.8.8; )
- Protocol is ICMP
- We are matching ‘echo’ which is a ‘type 8’
- We are matching ‘echo-reply’ which is ‘type 0’
- And the destination is 8.8.8.8
Installing the Signature
First, lets test connectivity without the signatures in place.

Above, we can see that I am able to ping 8.8.8.8 without any issues
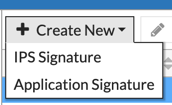
Now we will install the signatures. Browse over to ‘Security Profiles’ Section on the Fortinet GUI and choose ‘Custom Signatures’ and choose ‘Create New’. In our case, choose ‘IPS Signature’.

Now drop in your signature we created above, assign a name, and click ‘OK’

Now we will put these signatures into our Security Profile we are using:

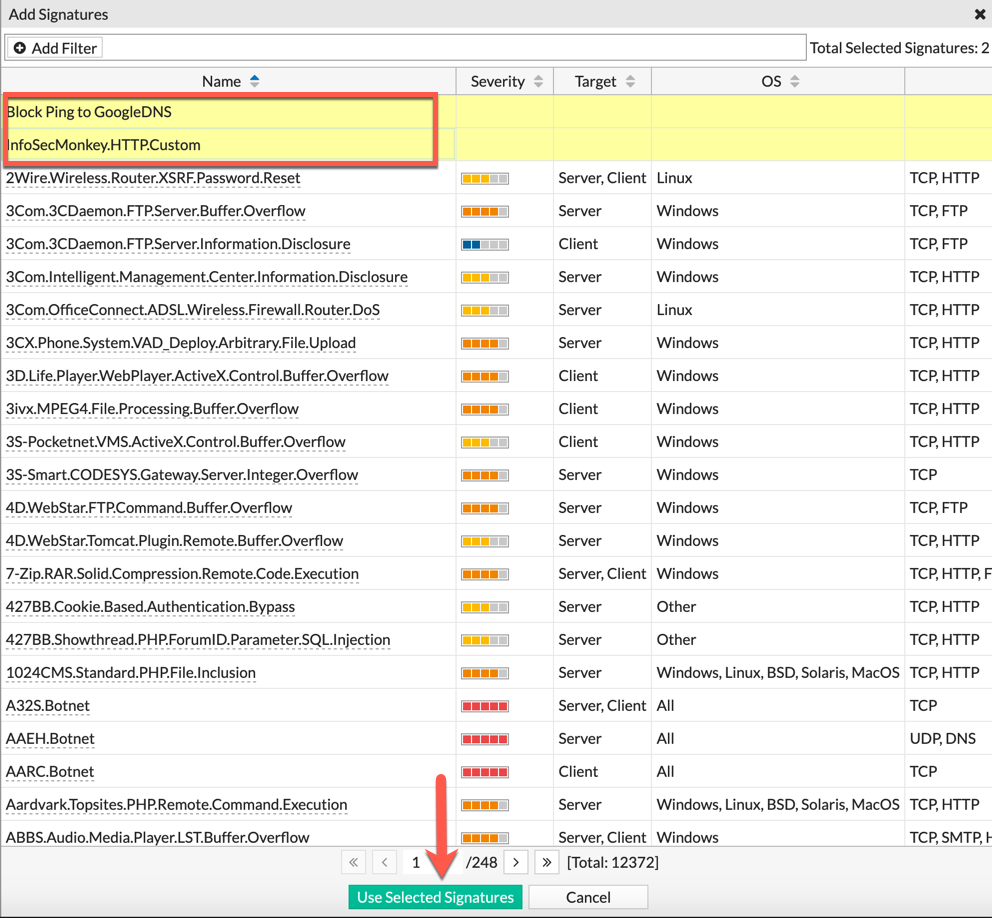
We will go to ‘Security Profiles’, ‘Intrusion Prevention’ and choose your Profile on the top right corner. Under ‘IPS Signatures’ click the ‘Add Signatures’ button.

Select the two signatures we created, and choose ‘Use Selected Signatures’

I will now select both in the list, right click and choose ‘Block’ in this case to show it working.

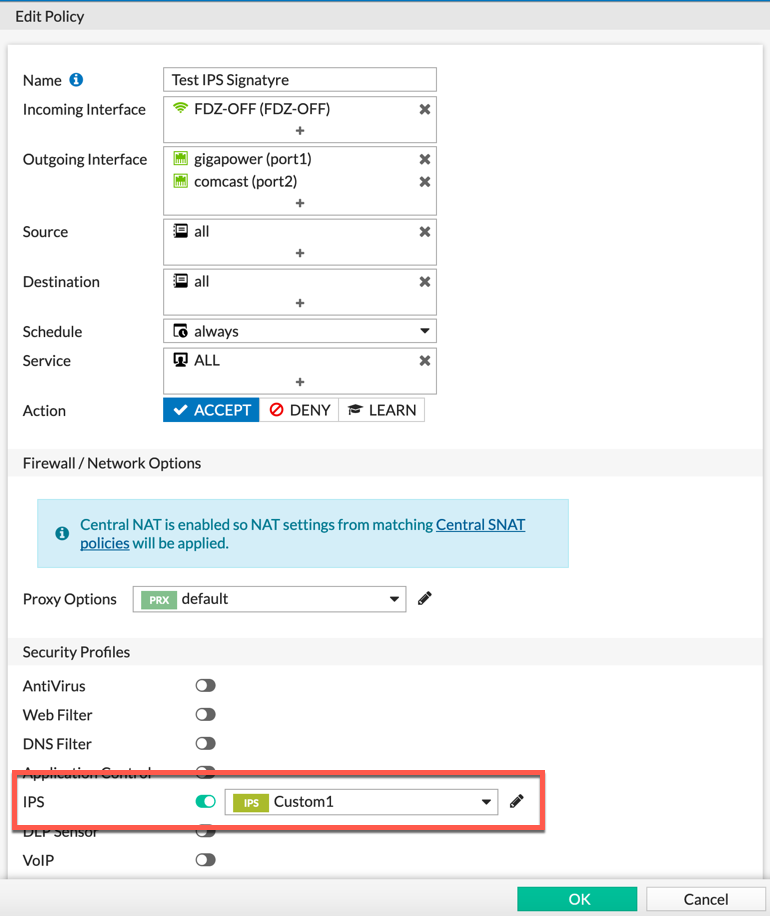
Ensure that you have a policy using the ‘Security Profile’ you modified. In my case, it was ‘Custom1’ .

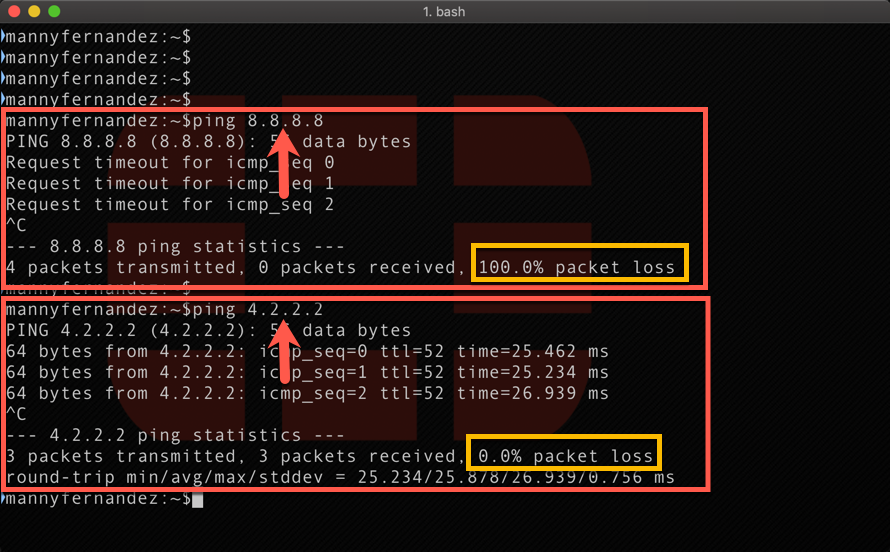
Now we test. As you can see above, I am getting 100% packet loss on the 8.8.8.8 target, while my 4.2.2.2 is still operational.

When we look in the ‘Log & Report’ section under ‘Intrusion Prevention’, we will see the event being triggered and subsequently blocked.
Additional Information
Here is an excerpt from the Fortinet documentation.
All custom signatures have a header and at least one keyword/value pair. The header is always the same:
F-SBID( )
The keyword/value pairs appear within the parentheses and each pair is followed by a semicolon.
Choose a name for the custom signature
Every custom signature requires a name, so it is a good practice to assign a name before adding any other keywords.Use the –name keyword to assign the custom signature a name. The name value follows the keyword after a space. Enclose the name value in double-quotes:
F-SBID( –name “Block.example.com”; )
The signature, as it appears here, will not do anything if you try to use it. It has a name, but does not look for any patterns in network traffic. You must specify a pattern that the FortiGate unit will search for.
Add a signature pattern
Use the –pattern keyword to specify what the FortiGate unit will search for:
F-SBID( –name “Block.example.com”; –pattern “example.com”; )
The signature will now detect the example.com URL appearing in network traffic. The custom signature should only detect the URL in HTTP traffic, however. Any other traffic with the URL should be allowed to pass. For example, an email message to or from example.com should not be stopped.
Specify the service
Use the –service keyword to limit the effect of the custom signature to only the HTTP protocol.
F-SBID( –name “Block.example.com”; –pattern “example.com”; ‑‑service HTTP; )
The FortiGate unit will limit its search for the pattern to the HTTP protocol. Even though the HTTP protocol uses only TCP traffic, the FortiGate will search for HTTP protocol communication in TCP, UDP, and ICMP traffic. This is a waste of system resources that you can avoid by limiting the search further, as shown below.
Specify the traffic type.
Use the –protocol tcp keyword to limit the effect of the custom signature to only TCP traffic. This will save system resources by not unnecessarily scanning UDP and ICMP traffic.
F-SBID( –name “Block.example.com”; –pattern “example.com”; ‑‑service HTTP; –protocol tcp; )
The FortiGate unit will limit its search for the pattern to TCP traffic and ignore UDP and ICMP network traffic.
Ignore case sensitivity
By default, patterns are case sensitive. If a user directed his or her browser to Example.com, the custom signature would not recognize the URL as a match.
Use the –no_case keyword to make the pattern matching case insensitive.
F-SBID( –name “Block.example.com”; –pattern “example.com”; ‑‑service HTTP; –protocol tcp; –no_case; )
Unlike all of the other keywords in this example, the –no_case keyword has no value. Only the keyword is required.
Limit pattern scans to only traffic sent from the client
The –flow command can be used to further limit the network traffic being scanned to only that send by the client or by the server.
F-SBID( –name “Block.example.com”; ‑‑pattern “example.com”; ‑‑service HTTP; –protocol tcp; –no_case; ‑‑flow from_client; )
Web servers do not contact clients until clients first open a communication session. Therefore, using the –flow from_client command will force the FortiGate to ignore all traffic from the server. Since the majority of HTTP traffic flows from the server to the client, this will save considerable system resources and still maintain protection.
Specify the context
When the client browser tries to contact example.com, a DNS is first consulted to get the example.com server IP address. The IP address is then specified in the URL field of the HTTP communication. The domain name will still appear in the host field, so this custom signature will not function without the ‑‑context host keyword/value pair.
F-SBID( –name “Block.example.com”; ‑‑pattern “example.com”; ‑‑service HTTP; –no_case; ‑‑flow from_client; ‑‑context host; )
Recent posts
-

-

This is a work in progress, I will be... Full Story
-

I have been playing with the free version of... Full Story
