Had a customer with over 200 static routes on... Full Story
By Manny Fernandez
March 25, 2020

Adding Elastic IPs to AWS FortiGate to be used as VIPs
Lately I have been doing some AWS. I am looking to get certified in the short-term. I was struggling with a customer after I deployed a FortiGate in AWS and could not figure out how to allocate Elastic IPs to be used by the FortiGate to perform NATs for different internal instances. Here is an article showing what I did.
On AWS
Log into you AWS Console and choose you VPC

Then choose the Instances and choose your Fortigate instance.
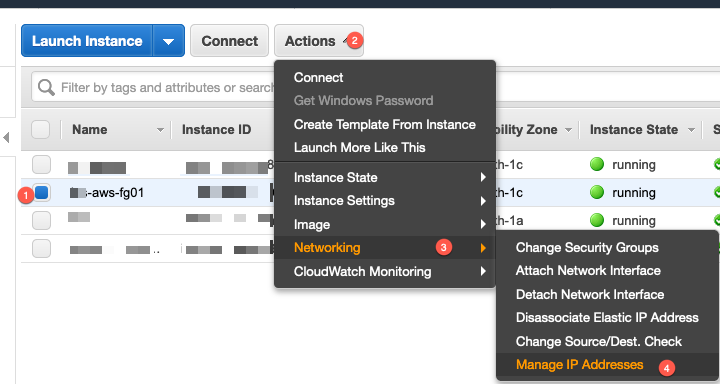
Then you will need to (1) Choose the Instance, (2) Click Actions (3) Choose
Networking then choose (4) Manage IP Addresses
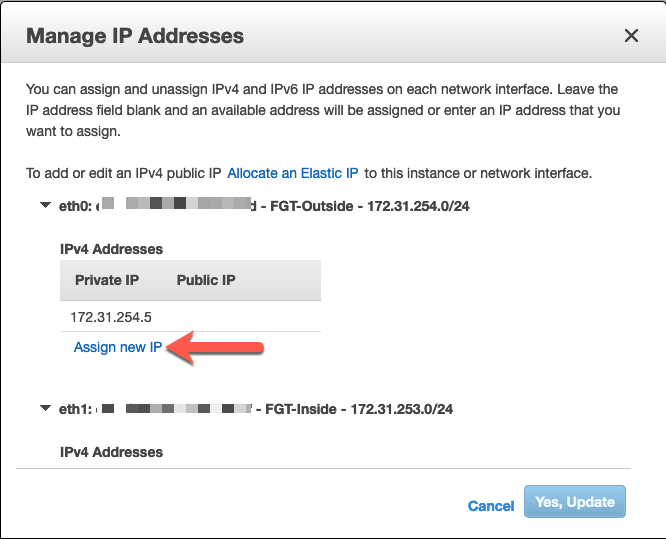
Once in Manage IP Addresses you will see your interfaces that you have assigned to your Fortigate instance. Choose the interface that represents the outside of the Fortigate and click Assign new IP.
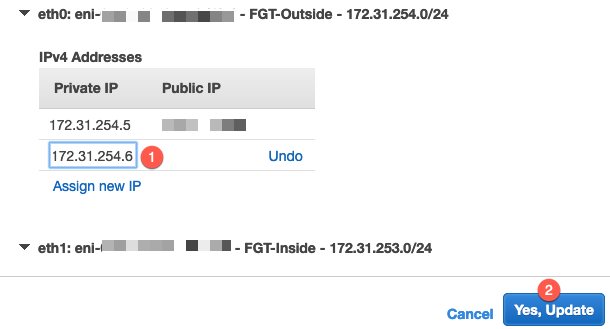
You can see that my subnet is 172.31.254.0/24 and I have .5 assigned to my Public Facing IP address. Enter another IP in that same range (I believe AWS reserves the first 4 IP addresses) and then click Yes, Update
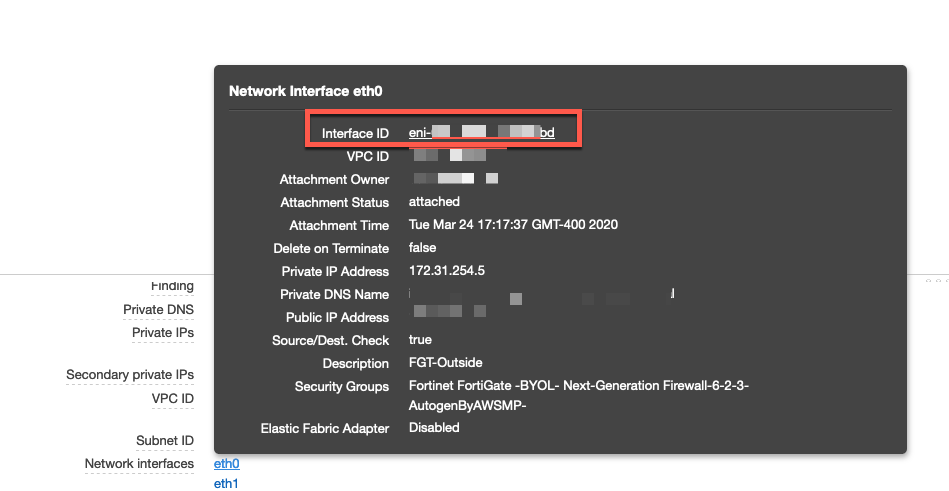
You will need to get the interface ID by going to EC2 then the instance and go to the bottom portion of the screen. You can hover over the eth0 (or whatever interface you are using for the outside) and write down the ID. In my example below, you can see my Interface ID ends in bd
Now you will need to go to your (2) Elastic IPs under your (1) VPC and choose (3) Allocate new addresses .
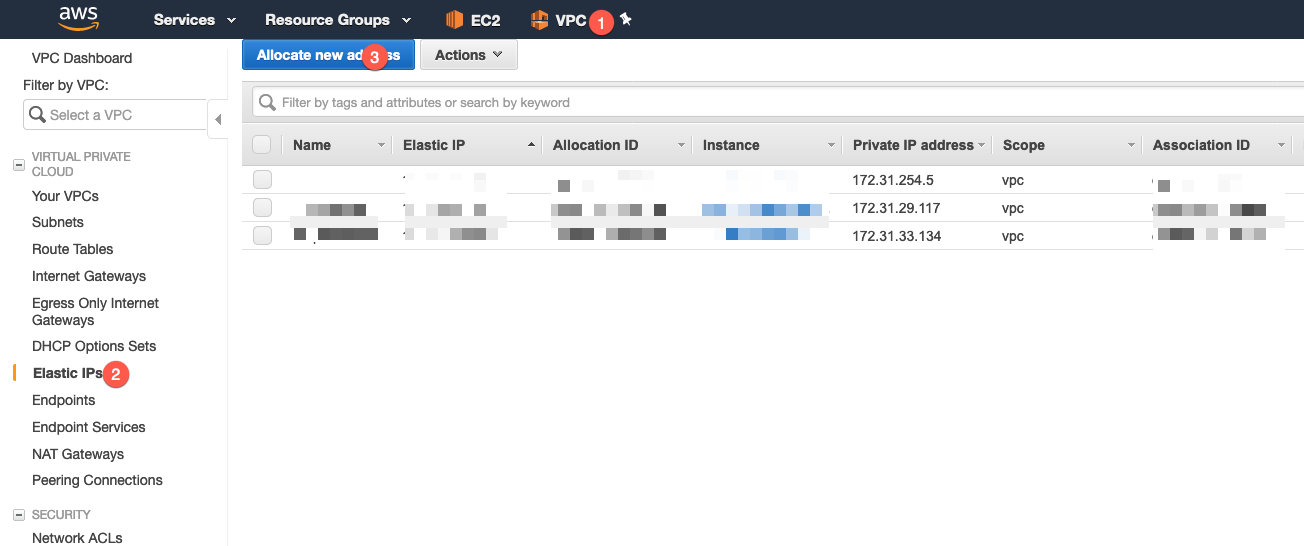
Next you will need to choose Amazon pool and click Allocate

You should now see the newly allocated Elastic IP allocated to the VPC.

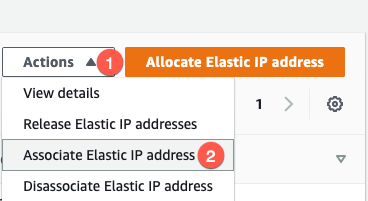
Once this is done, you will see the newly allocated Elastic IP on the list of Elastic IPs. Choose (1) Actions then choose (2) Associate Elastic IP address
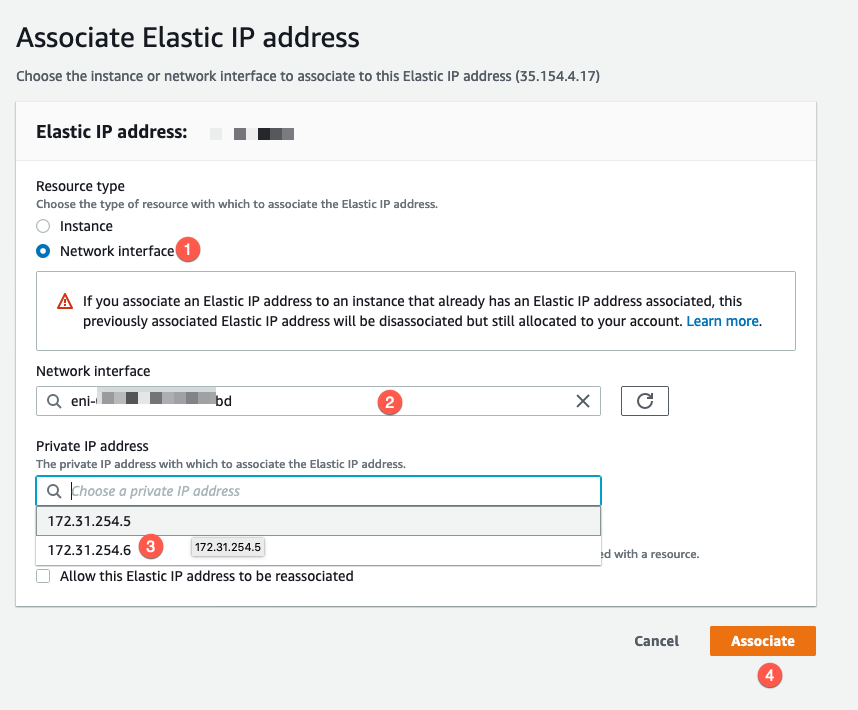
Next you will need to choose (1) Network Interface instead of the default of Instance , then choose (2) the Network Interface from the drop-down list. Finally choose the additional (3) IP we created in the Managed IP Addresses section of this article and choose (4) Associate
On FortiGate
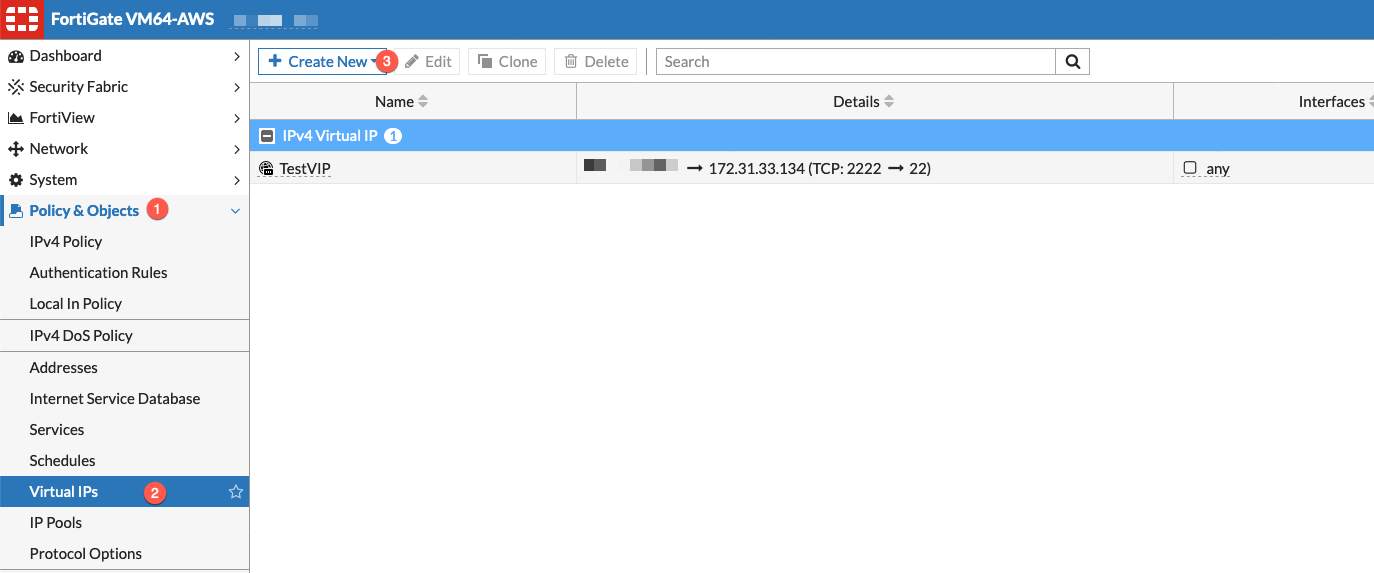
Log into your ForitGate instance via the FortiGate GUI. Then choose (1) Policy & Objects then (2) Virtual IPs or DNAT & Virtual IPs (if you are using Central NAT), and (3) Create New
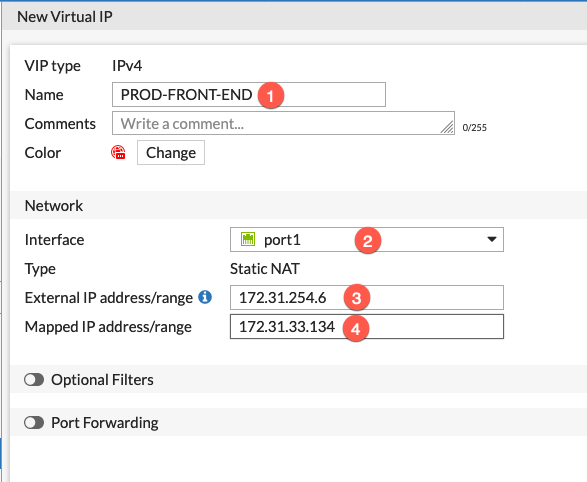
Now it is just like creating a VIP on any FortiGate device. (1) Give it a descriptive name, (2) (Optional) choose the interface from the dropdown then (3) enter the external IP address, this is the one we added as an additional IP to your FortiGate instance, then (4) enter the internal IP of the device you are NAT’ng.

Finally, create your policy. If you are using Central NAT you will have the internal IP address of the NAT’d device in the destination, if you are using policy nat then you will have the VIP as the destination.
UPDATES:
You will need to disable Source/Dest. Check before the VIP works.
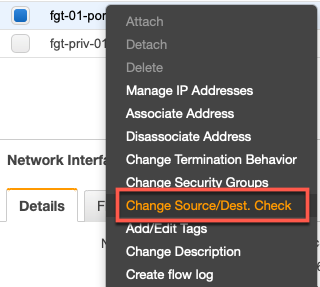
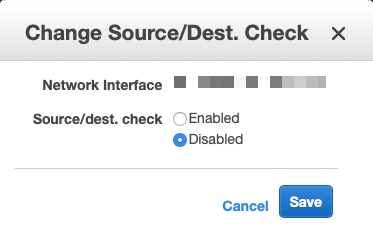
Make sure you do this for all the interfaces on the FortiGate in your VPCs
Hope this helps.
Recent posts
-

-

This is a work in progress, I will be... Full Story
-

I have been playing with the free version of... Full Story
