If you've spent any time configuring user authentication on... Full Story
By Manny Fernandez
May 15, 2019
UPDATED – Certificate Pinning you SSL VPN with Microsoft CA and Fortigate Forticlient Using ‘user’ certificates
Customer wanted to ONLY allow devices that are trusted devices (owned by the customer) to connect using the ‘Full Access” VPN portal. They wanted to use certificates issued from their Windows CA server and pushed down to the PC via GPO. If the user leaves the organization or the device is lost or stolen, customer wanted to use OCSP (Online Certificate Status Protocol) to revoke the cert.
1. Two VPN Portals (WebPortal and Full Access)
2. Active Directory Authentication
3. Multi-Factor with FortiToken
4. AD Integrated CA services to deploy certificates (Non-Exportable)
5. Optional – User certificates to be automatically assigned to users based on AD Groups
6. OCSP to revoke certificates
Microsoft CA Certificate
If you are going to use Microsoft CA services for this configuration, you will obviously need to have it installed in your Windows environment. You can enable the role on an existing server or spin up a new one. I recommend having a dedicated CA server in a production environment but since mine is a lab, I need to save cycles, RAM and storage 🙂
You will need 2 Certificates for this configuration. The CA certificate and a user certificate for each user. I am running a wildcard cert for the VPN itself (what Fortinet calls a ‘Server Certificate’ which is the one you would be presented when you make the connection to the Fortigate via a browser). If you do not have a wildcard or a proper SSL certificate, there are many places that are cheap. As of the writing of this blog, www.sslcertificate.com has a 1 year cert for ~$11.00 a year.
Exporting your root CA Certificate
Requesting the Root Certification Authority Certificate by using command line:
a. Log into the Root Certification Authority server with Administrator Account.
b. Go to “Start” -> “Run” -> and write “Cmd” and press on “Enter” button.
c. To export the Root Certification Authority server to a new file name “ca_name.cer”
certutil -ca.cert dccert.cer
When you run this command, you will get an output similar to the one below
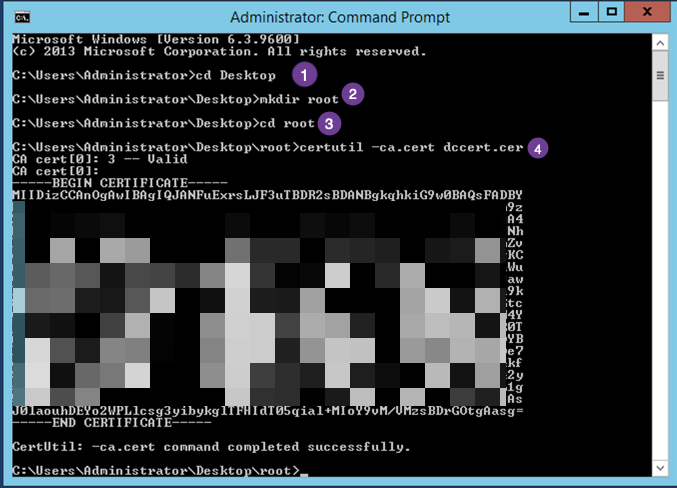
- I changed to the Desktop folder or directory
- I made a directory to store the exported certificate (easier to clean up after)
- I changed into that ‘root’ directory.
- Ran the ‘certutil -ca.cert dccert.cer’ from the command line.
Importing Certificate Into Fortigate
To import the certificate into the Fortigate, log in and ensure that the “Certificate” feature is enabled under “Feature Visibility“.
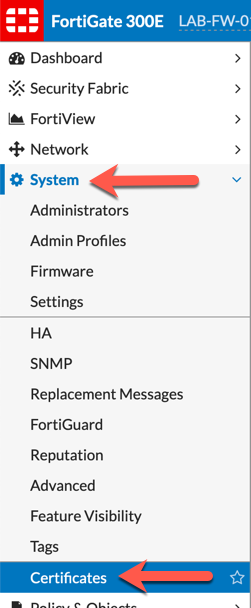
Go to ‘System‘ then ‘Certificates‘
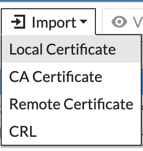
Choose ‘Import‘ and then ‘Local Certificate‘
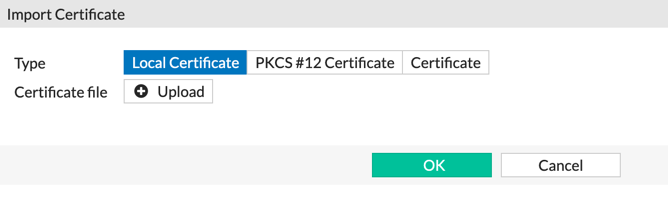
Now you need to choose ‘Local Certificate‘ then choose ‘Upload‘ the cert then ‘OK‘

The Certificate should now be visible under the ‘External CA Certificates‘ . Remember, that you can rename the certificate to something meaningful from the CLI. By default it will create it with ‘CA_Cert_1‘ which I do not like. When you start loading up certs, you will be lost. And worst yet, renewing them will be a pain.
config vpn certificate ca
rename CA_Cert_1 to DC01-CA
end
OCSP – Online Certificate Status Protocol
You want to make sure that when you generate a certificate, that it has a pointer back to the revocation list. In the past, Certificate Revocation Lists (CRL) would like the certificates that had been revoked. The new and improved method is OCSP.
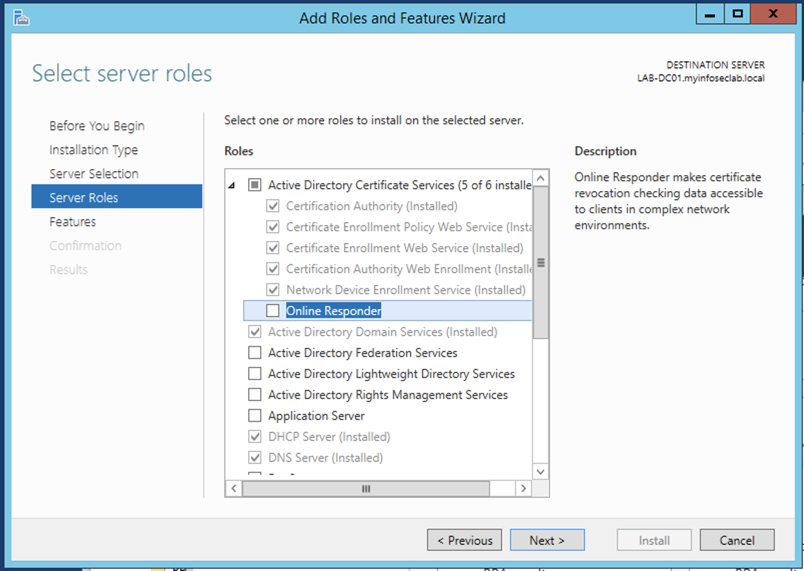
You will need to add the ‘Online Responder’ role to the CA server.
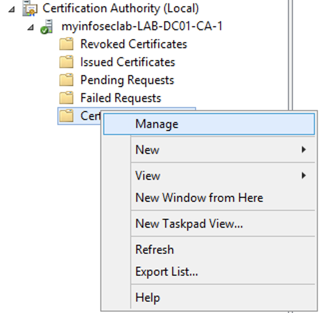
From the MMC, Right click on ‘Certificate Templates’ and choose ‘Manage’.
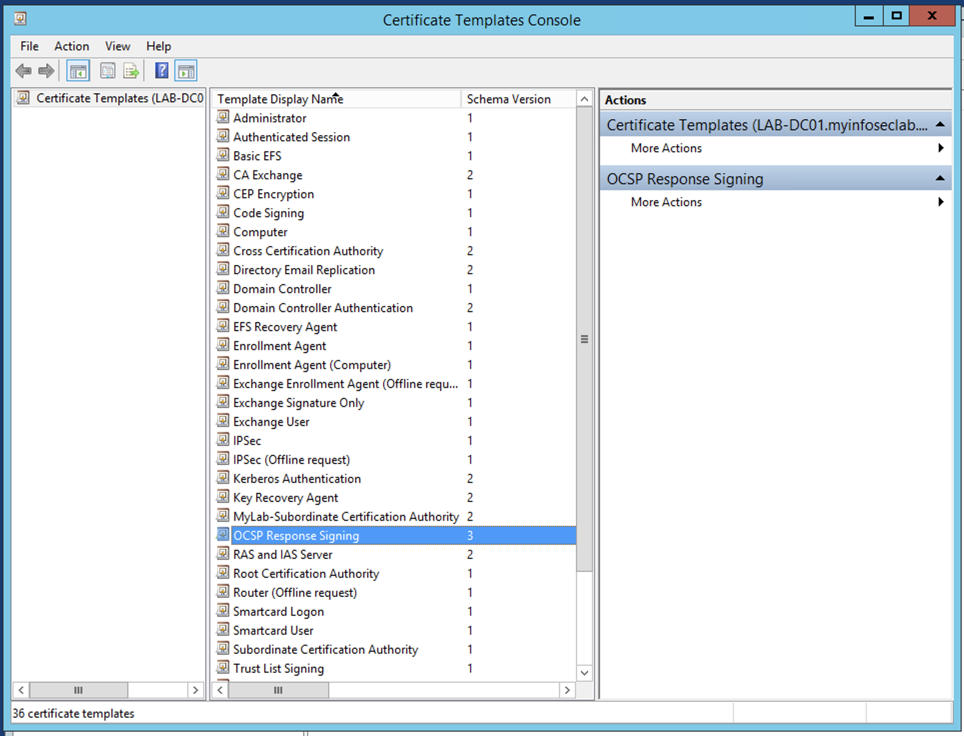
Choose the ‘OCSP Response Signing’ template and right click and choose ‘Properties’ (Optionally, you can make a duplicate of the OCSP template). When you edit the properies, you will need to go to the ‘Security’ tab. You will need to add the computer account for the CA server. In my case, it is ‘LAB-DC-01’.
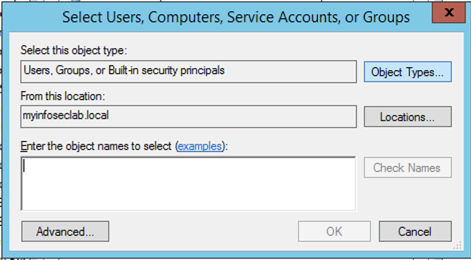
By default, the search windows will search for users and groups, however we want to serach for computers names as well. For this, click on ‘Object Types’ on top right.
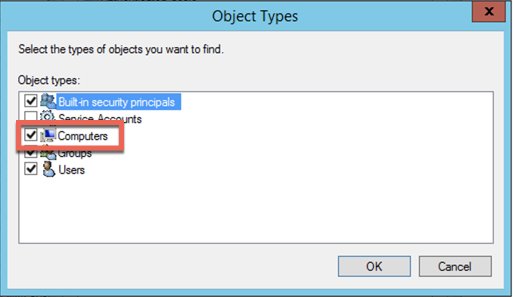
You can now choose ‘Computers’ and click ‘OK’. Now it will allow you to search for the computer name.
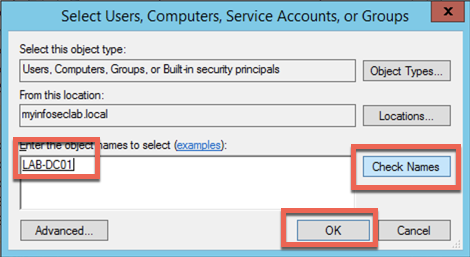
Now that you have the CA server selected, click OK. (If you have not done this before, you can enter the name or partial name and choose ‘Check Names’ then OK).
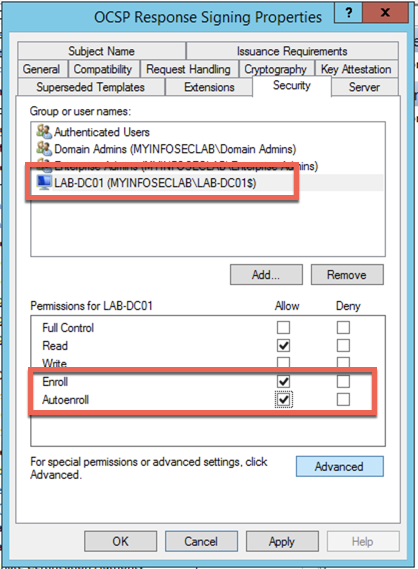
Once you have the server on the top portion, select it and on the bottom, assign the ‘Enroll’ and ‘Autoenroll’. Now click on ‘Extensions’ tab.

On the top section under the ‘Select Extension’ click the dropdown and choose ‘Authority Information Access (AIA)’. Then you will need to clicl ‘Add…’ button.
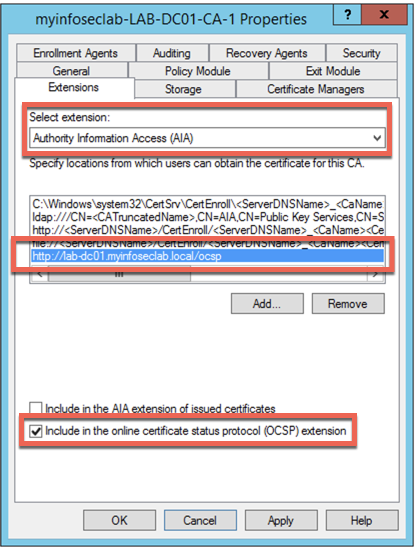
In the ‘Add..’ dialog box, enter the URL where the Fortigate will poll to get certificates that are revoked. DO NOT USE HTTPS. It will error out if you do so. You will need to enter the FQDN with the trailing ‘/ocsp’ at the end.
http://lab-dc-01/myinfoseclab.local/ocsp
And you click the bottom radio button ‘Include in the online certificate status protocol (OCSP) extension’. And click OK.
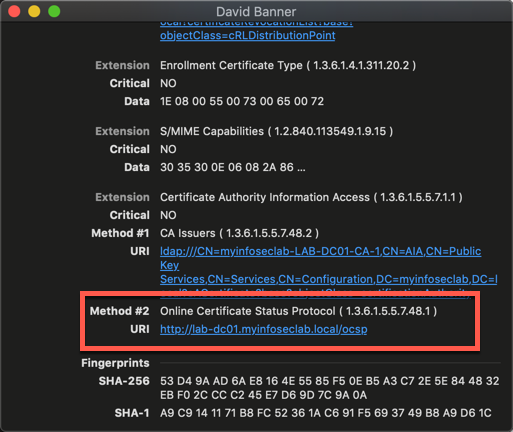
Now when you generate a certificate, it will have the location of the OCPS inside the certificate
Configuring OCSP on the Fortigate
In order for the Fortigate to test against the OCSP database, you need to tell it where to look for the revokated certs.
LAB-FW-01 # show vpn certificate ocsp-server
config vpn certificate ocsp-server
edit "1"
set url "https://10.1.106.43/ocsp"
set cert "DC01-CA"
set source-ip 10.1.106.1
next
end
Generating User Certificates
First things first, in order to have a user request a certificate, you will need to enable the template in Windows CA server.
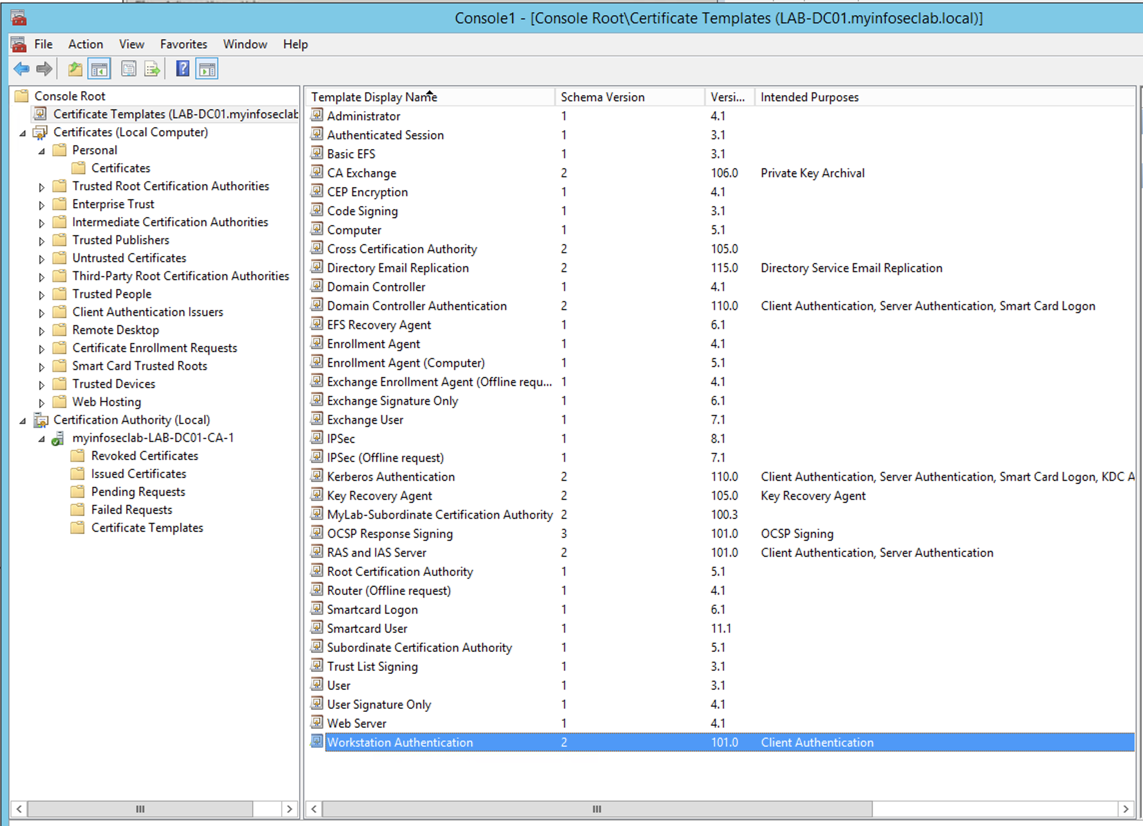
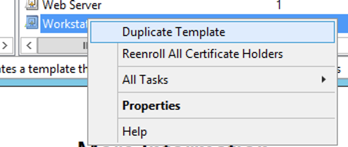
You will need to load the MMC from the CA server. Once there, choose the three ‘Certificate’ snap-ins and add them. Now go to ‘Certificate Templates‘ and scroll down to the bottom to ‘Workstation Authentication‘, right click, and choose ‘Duplicate Template‘
Now name it something meaningful.
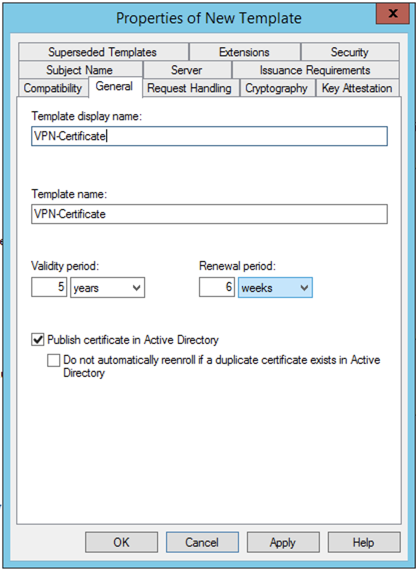
Change the settings such as ‘Validity Period‘, then move to the ‘Security‘ tab.
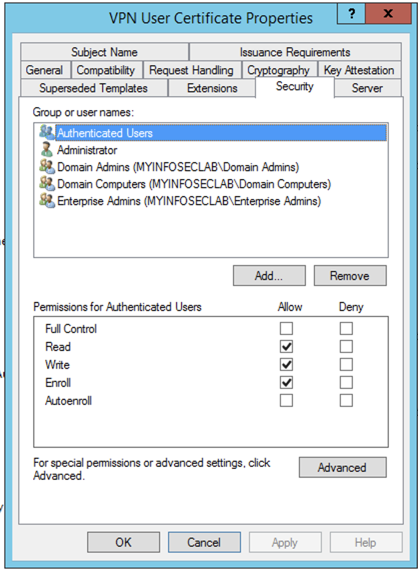
Ensure that the ‘Authenticated Users‘ have the ‘Enroll‘ right set to ‘Allow‘
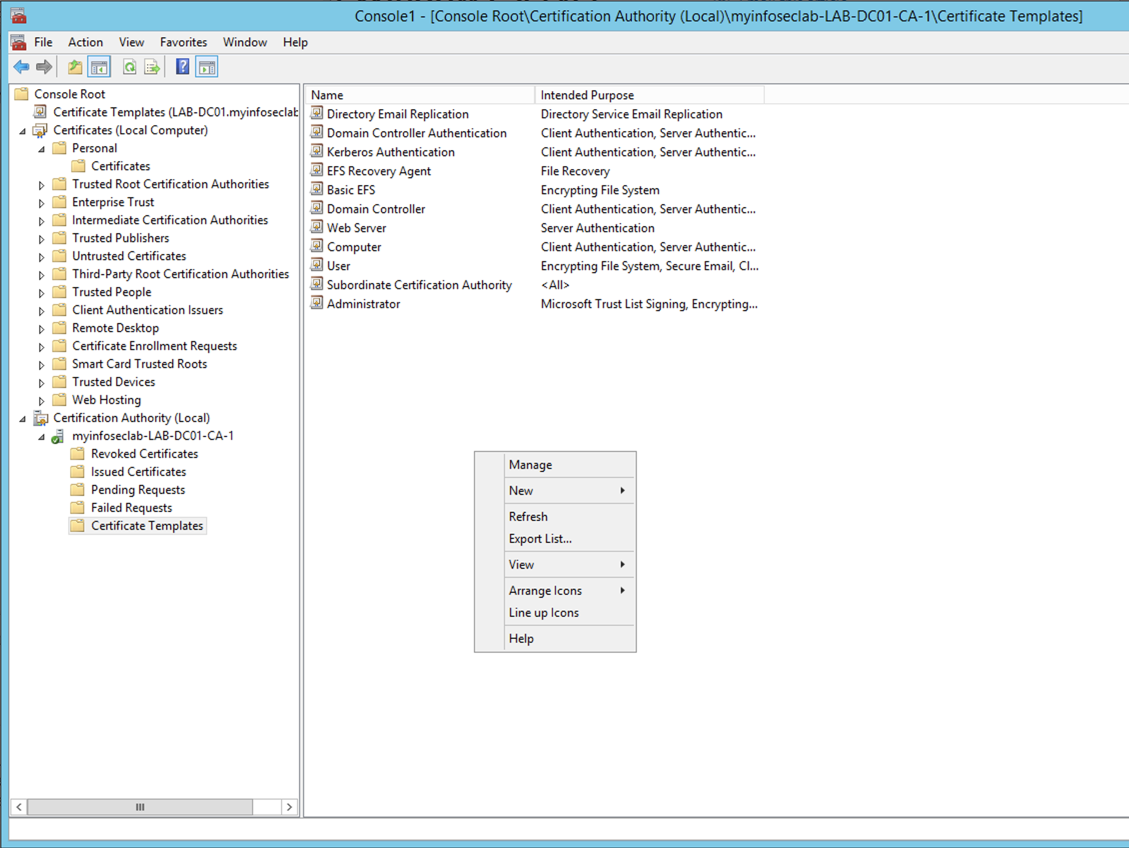
Now go to the ‘Certification Authority‘ snap-in. Expand up your CA server with the small triangle, and choose ‘Certificate Templates‘. Right click on any blank area, and choose ‘New‘

Then choose the ‘Certificate Template to Issue‘

Find your duplicate template you modified in the previous steps, and choose ‘OK‘.
Now you are ready to request certificates.
Deploying Certificates
Self Service Request
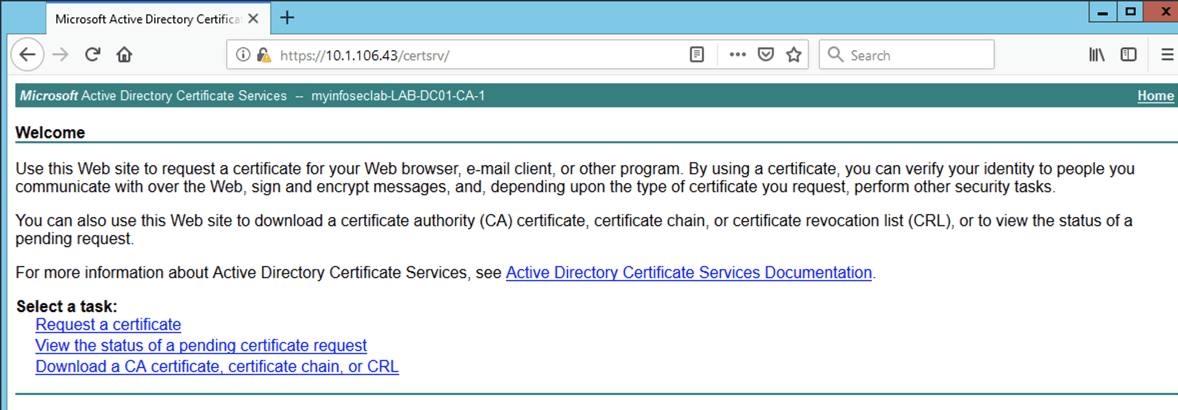
One way to have them request the certificate from the ‘https://%ca-server-ip%/certsrv and have them request a certificate. The username that you use to log into the webportal, will be the user the certificate is issued to.
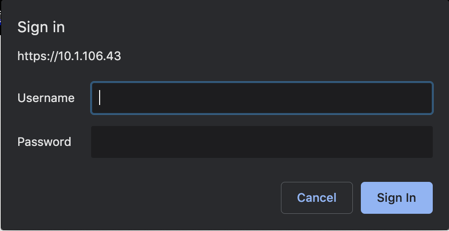
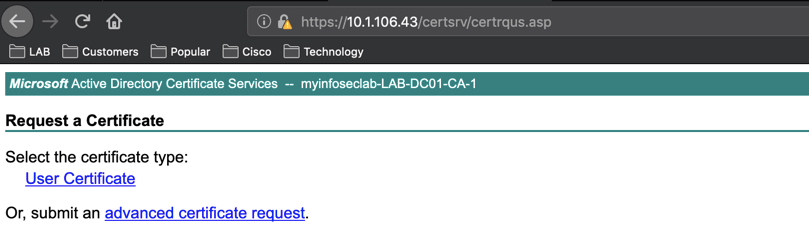
Once you have logged into the ‘certsrv‘ portal, you can choose the ‘Request a certificate‘ link.
Then choose ‘User Certificate‘.
NOTE: If you log into the CA portal via Firefox, it will install the certificate in the Firefox certificate container.
Depending on the OS you are running, you will need to import the certificate into you key manager. In macOS, it will automatically open in ‘Keychain Access‘. You will also need the root CA certificate we exported in the begining of this exercise. Import them both.
![]()
Once installed, you should see the following:

The other option is to do it via a Certificate template
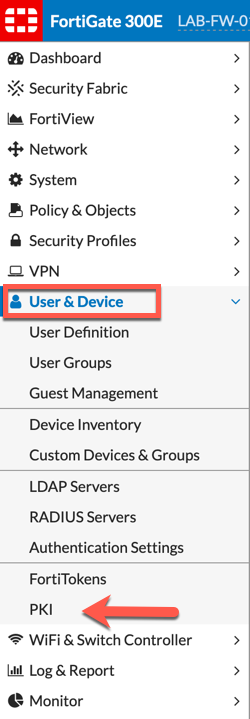
Setting Up Fortigate for PKI
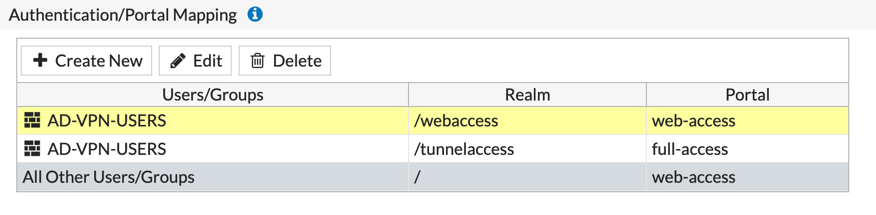
When I was labbing this up for my customer, I ran into a problem. The issue was that the VPN Settings page has the ‘Authentication/Portal Mapping‘ section and the requirement was not being met. The ‘web-access‘ portal was also asking me for certificate which is NOT what they wanted. The issue is that it was matching the ‘AD-VPN-USERS‘ group. Apparently, the Fortigate looks at the group first and the portal last. I was able to get around it using ‘SSL-VPN Realms‘
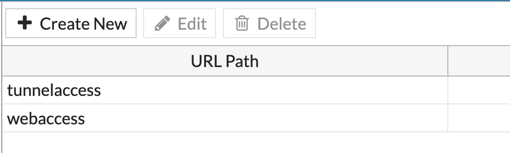
Simply create two realms. You need to enable this feature in the ‘System‘, ‘Feature Visibility‘ before doing so.
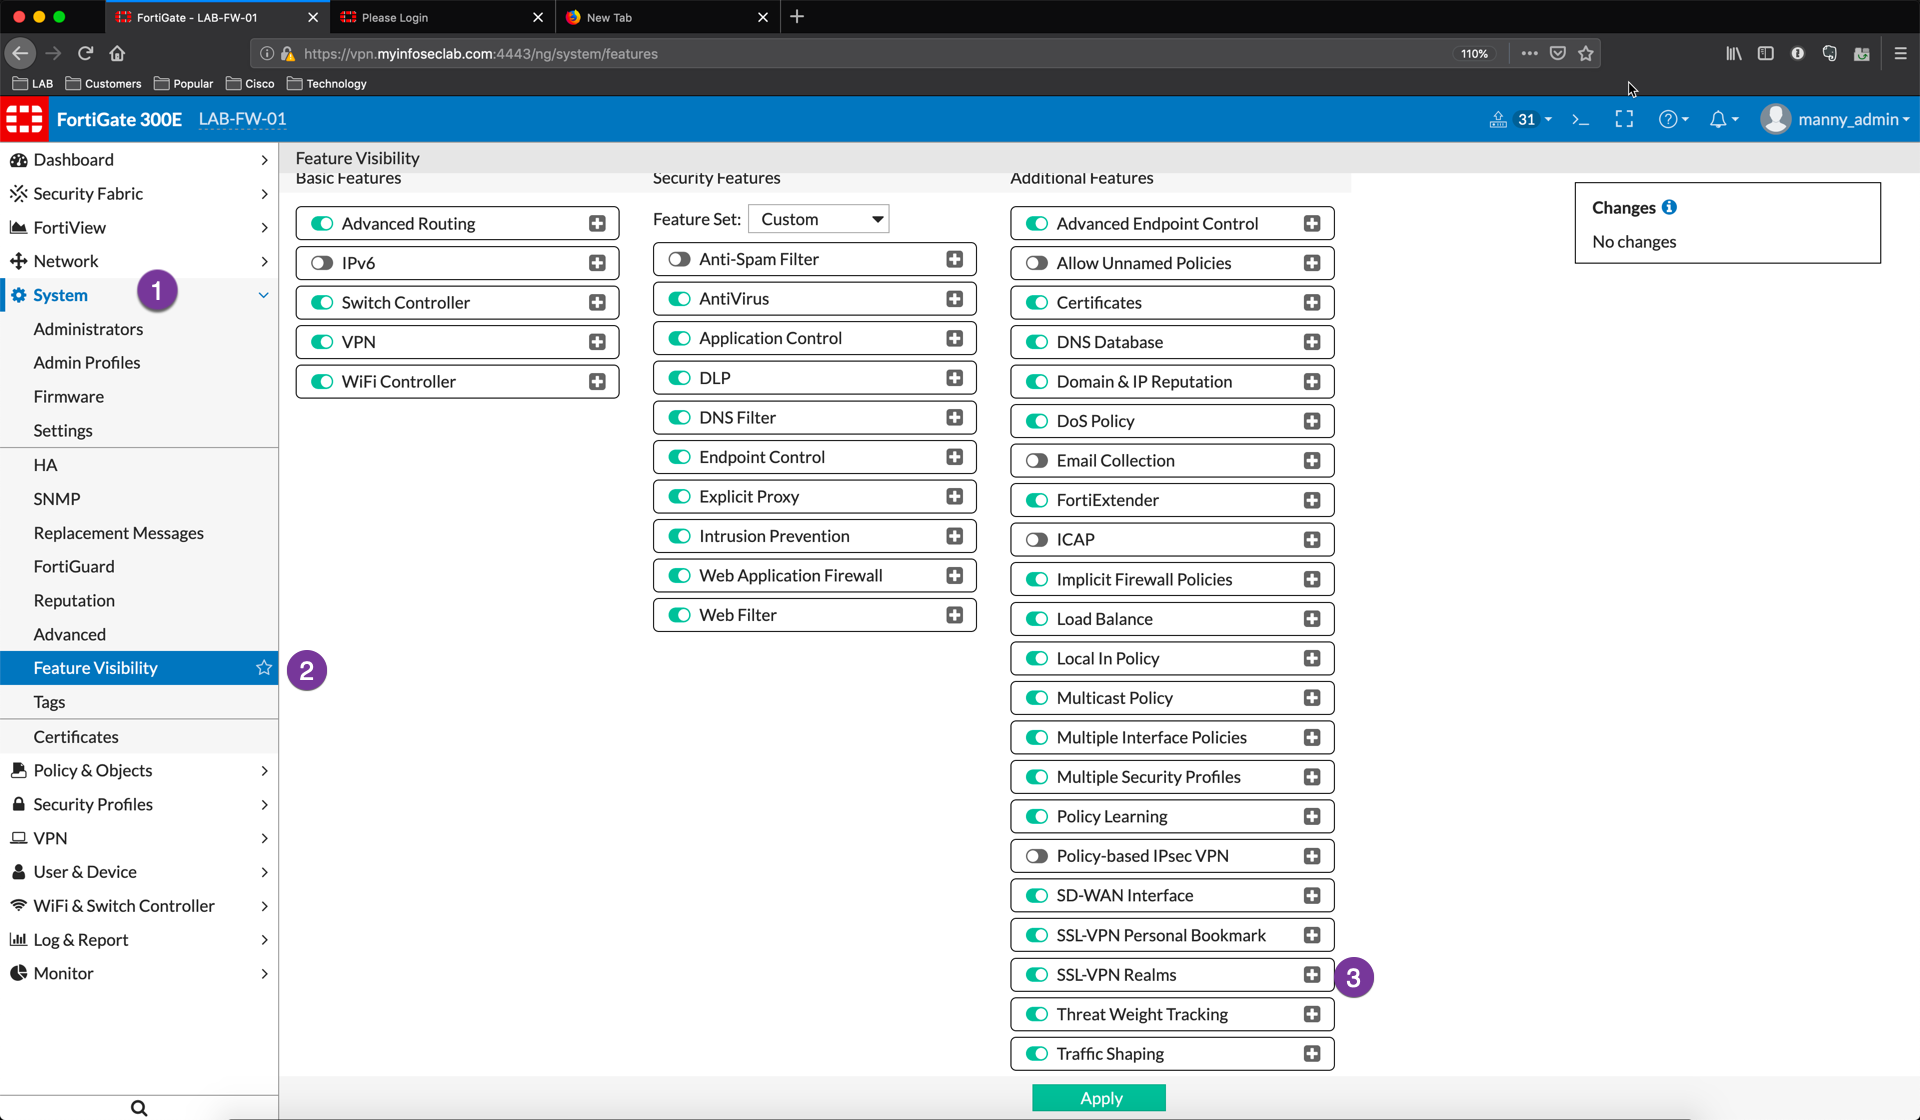
- System
- Feature Visibility
- SSL-VPN Realms
Since my requirements were to authenticate with Active Directory, I created a ‘VPN-Users‘ group in AD and created a user named ‘Tony Stark‘… Yes, I am an Iron Man Fan.
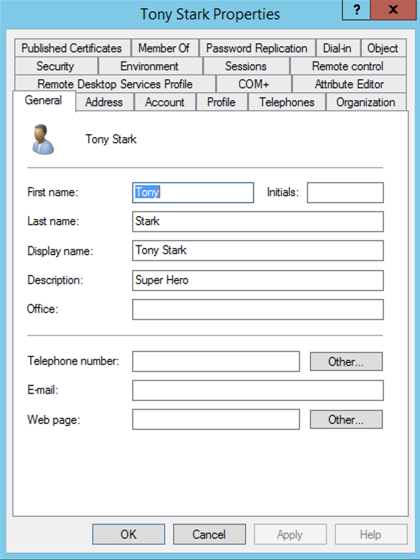

Above, you can see the user in the AD and his group membership.
Creating PKI User
In order to use certificates and be able to revoke a particular certificate due to loss or theft of equipment or the employee quitting (of being quit), you will need to create a PKI user and tie them to a subject name and certificate. By default, the PKI GUI button does not appear however once you create one user in the CLI, the PKI
To enable the PKI, go to the CLI and issue the following commands with your particulars and go back into the GUI. You may need to logout and log back in for it to show up.
config user peer
edit "tstark"
set ca "DC01-CA"
set subject "Tony Stark"
set ldap-server "DC01"
set ldap-username "administrator@myinfoseclab.local"
set ldap-password ENC <REMOVED>
next
end
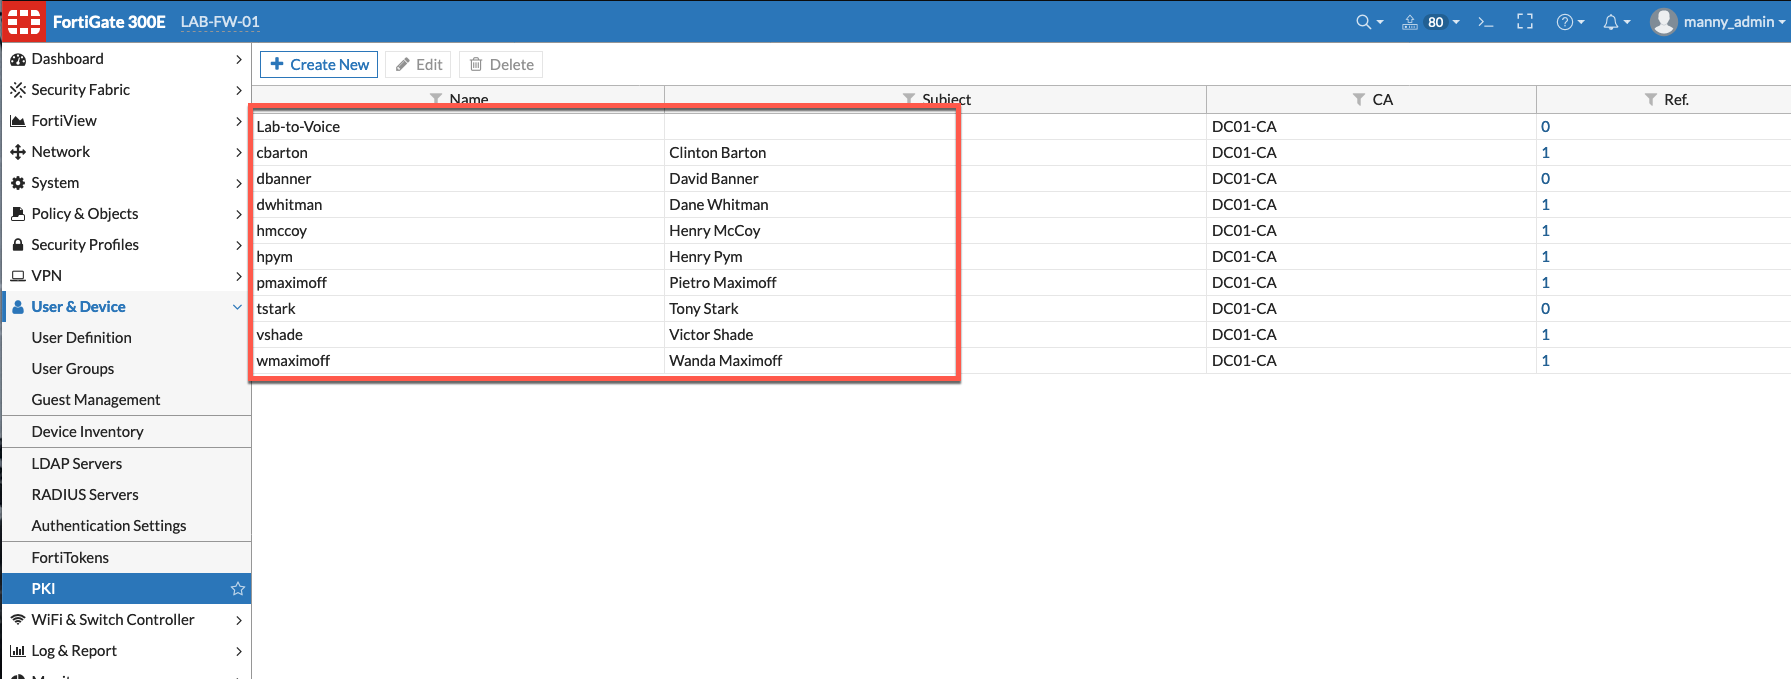
Once the user is created on the CLI and you log back into the GUI, you will be able to use the GUI to add subsequent users.

Here we added ‘David Banner‘. You need to match the username with the AD username.
- Enter the AD username
- Subject, enter the ‘Display Name’ from AD.
- Choose your CA Server.
- Choose OK
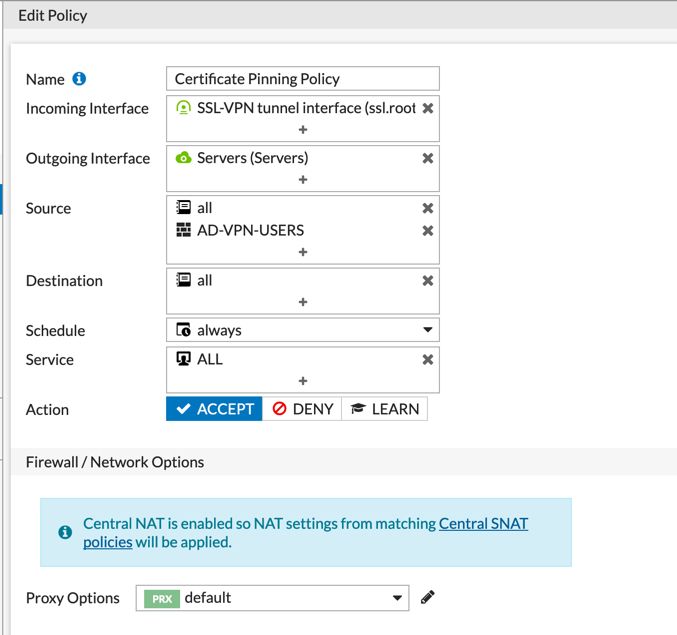
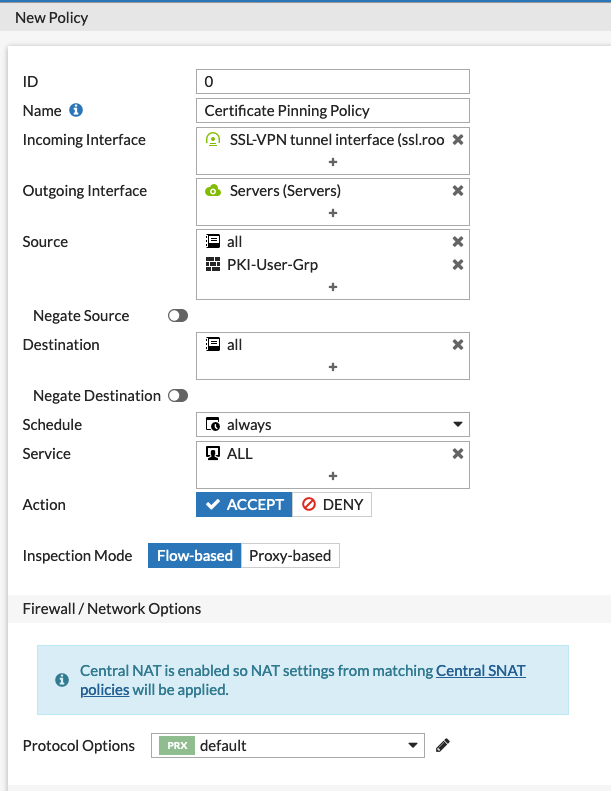
AD Group In the Policy
You need to make sure you create the appropriate IPv4 Policies for the SSL VPN.

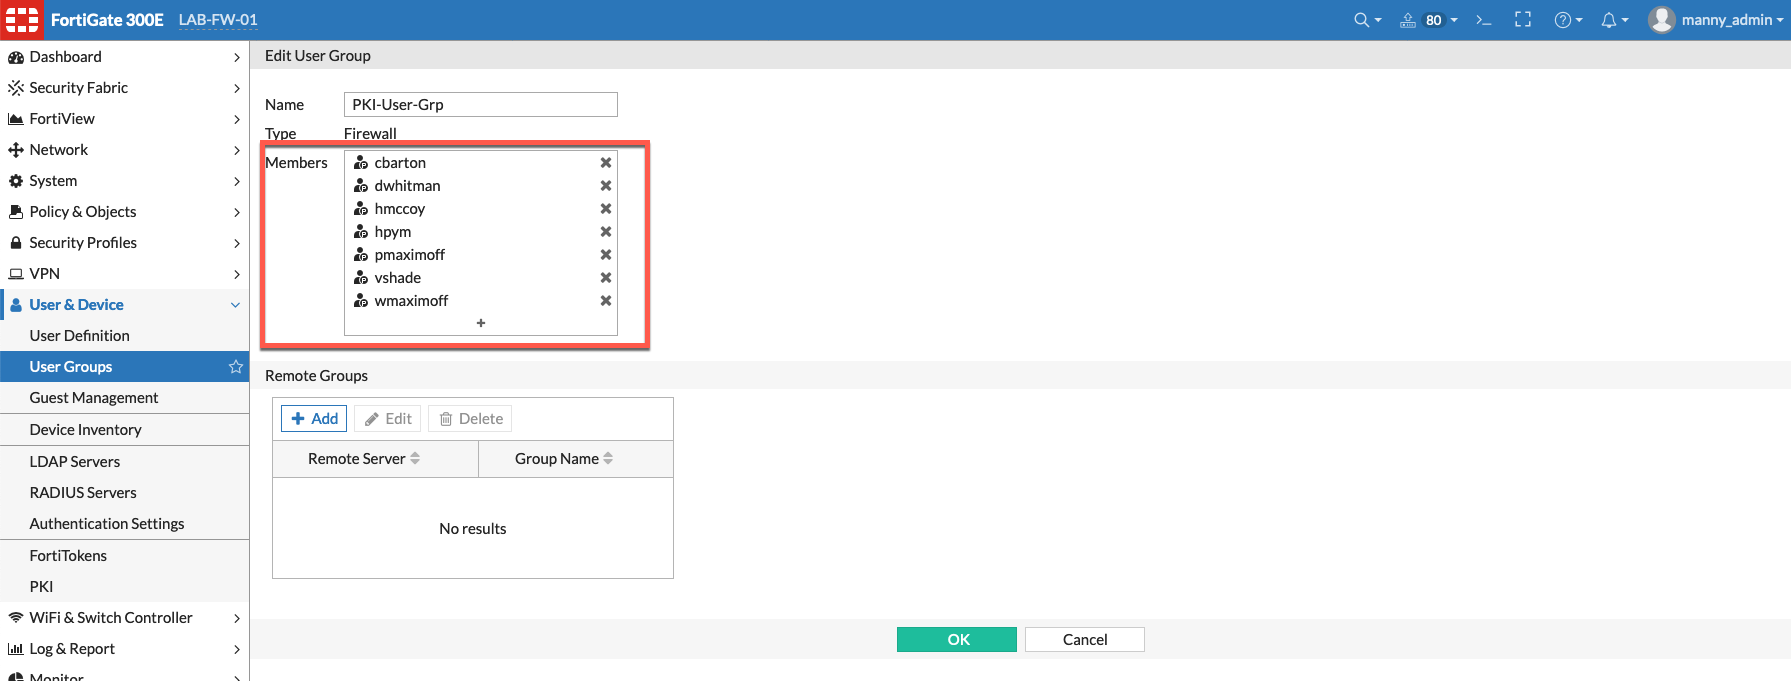
PKI Group In Policy
I created some scripts to make the process of creating the PKI users on the Fortigate, much easier.
PowerShell

Once you have the output from the AD, you can create a script using my script article and have something that looks like this.
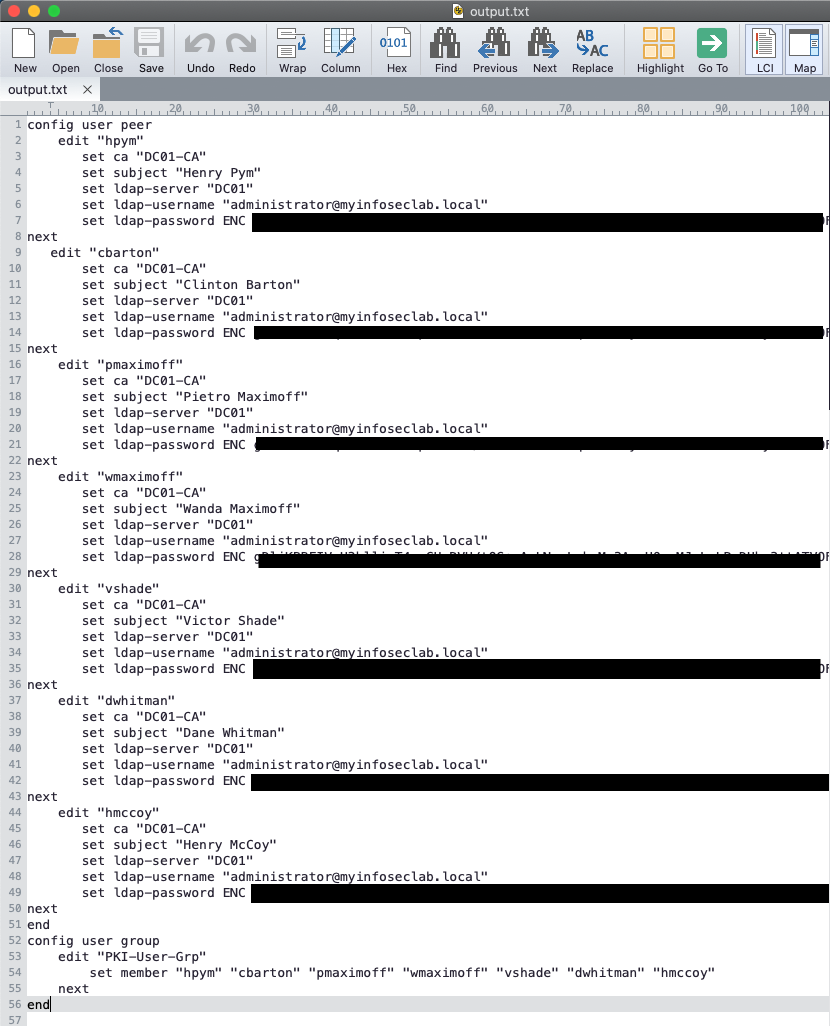
Once you run the script from either the System then Advanced from version >6.2.1 or from the user name on the top right, Configuration then Script you will see the following users and groups.
Configuring Forticlient for Certificate
Since we are using ‘SSL-VPN Realms‘ as well as certificates, the configuration is a little different
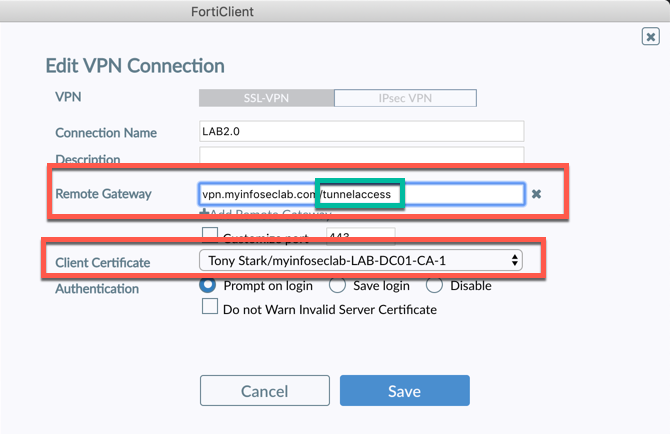
As you can see, we needed to add the ‘/tunnelaccess‘ (or the name of your realm). Additionally, we need to pick the ‘Client Certificate‘. The other option is to prompt at connection. I think the user experience is negatively affected by the additional choice, not to mention the two-factor authentication step.
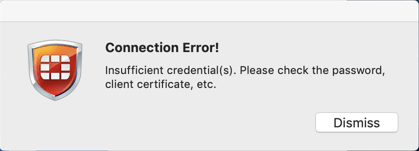
Now, when I test the VPN connection with the Certificate, I am connected, however If I attempt to connect with Forticlient without the certificate, I get the following error message:
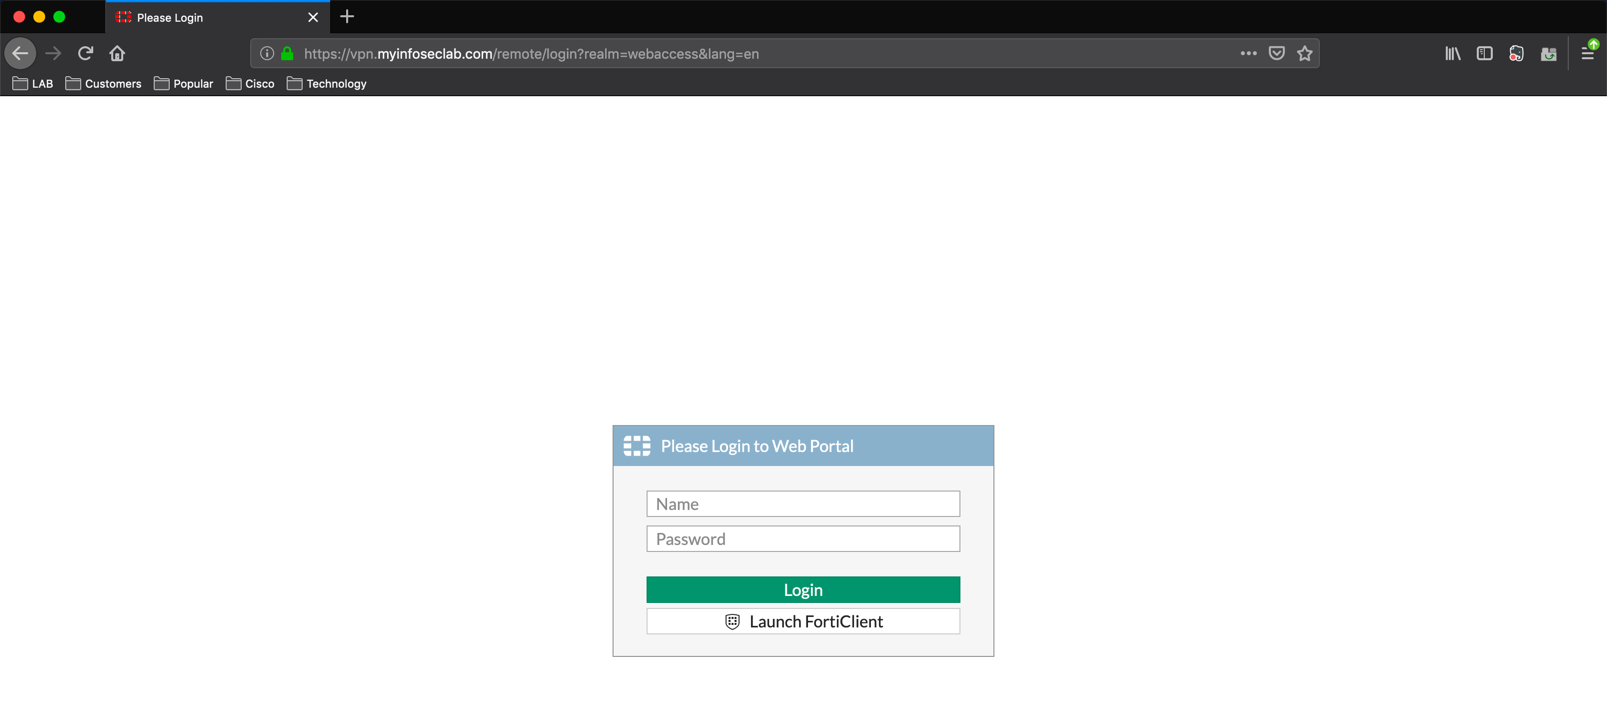
In my scenario, when the user fails to connect with their non-company PC, they will need to connect to the ‘https://vpn-fqdn.com/webaccess‘ where they will not be presented the prompt for the certificate:
I am going to follow this post up with one using Computer Certificates instead of user certificates.
Hope this helps.
Recent posts
-

-

DNS is one of those technologies that quietly underpins... Full Story
-

BGP issues on FortiGate firewalls usually trace back to... Full Story
-

Every time your laptop talks to your router, a... Full Story
-

If you've spent any time configuring NAT on a... Full Story
-

If you have spent any time configuring firewall policies... Full Story
-

High availability on FortiGate is one of those features... Full Story
-

If you've configured SD-WAN on a FortiGate, you've almost... Full Story
-

FortiLink is the management protocol that turns a FortiSwitch... Full Story
-

FortiSwitches are pretty rock solid from Mean Time Between... Full Story
-

This is a quicky tip. Have you ever gone... Full Story
-

DNS is one of those quiet pieces of internet... Full Story
-

This article is an updated version of the previous... Full Story
-

You will add ns2 as a secondary (slave) BIND9... Full Story
-

In the process of deploying my lab, I needed... Full Story
-

RFC 8805, used to be known as Self-Correcting IP... Full Story
-

Years back, I wrote an article about certificate pinning. ... Full Story
-

FortiGates have the ability to send alerts to Microsoft... Full Story
-

In this post, I am going to walk through... Full Story
-

Troubleshooting VoIP on a FortiGate can feel like trying... Full Story
-

Prior to FortiOS 7.0, there were three commands to... Full Story
-

In this post, I am going to go over... Full Story
-

What we are going to do: We are going... Full Story
-

Choosing between FGCP (FortiGate Clustering Protocol) and FGSP (FortiGate... Full Story
-

Creating a VLAN on macOS (The "Pro" Move) A... Full Story
-

This blog post explores the logic behind how macOS... Full Story
-

Pretty Fly for a Wi-Fi Tell My Wi-Fi Love... Full Story
-

Part of my daily gig is creating BoMs (Bill-of-Materials)... Full Story
-

ICMP introduces several security risks, but careful filtering, rate... Full Story
-

The command diag debug application dhcps -1 enables full... Full Story
-

In the world of FortiOS, execute tac report is... Full Story
-

LLDP; What is it The Link Layer Discovery Protocol... Full Story
-

What it actually does When you run diagnose fdsm... Full Story
-

Monkey Bites are bite-sized, high-impact security insights designed for... Full Story
-

I have run macOS in macOS with Parallels but... Full Story
-

Don't be confused with my other FortiNAC posts where... Full Story
-

This is the third session in a multi-part article... Full Story
-

Today I was configuring key-based authentication on a FortiGate... Full Story
-

Netcat, often called the "Swiss Army knife" of networking,... Full Story
-

At its core, IEEE 802.1X is a network layer... Full Story
-

In case you did not see the previous FortiNAC... Full Story
-

This is our 5th session where we are going... Full Story
-

Now that we have Wireshark installed and somewhat configured,... Full Story
-

The Philosophy of Packet Analysis Troubleshooting isn't about looking... Full Story
-

Have you ever wanted to do some testing on... Full Story
-

Ask ten engineers to define "a network" and you... Full Story
-

1. Executive Summary Objective: This guide turns a FortiAuthenticator... Full Story