Have you ever ordered a bunch of Fortinet gear... Full Story
By Manny Fernandez
September 23, 2019

Deploying a Decoy in FortiDeceptor
For those not familiar with FortiDeceptor, it is a fairly new product but has been adopted by some of my customers with great success. In this post, I will show you how to deploy a decoy and the corresponding lures. The decoy is the OS and the lures are fake usernames and password, SAMBA shares with weak passwords etc.
The next post will be “exploiting” the decoy I just created. I will show you the output and the incidents and how they are extremely helpful.
Deploying the Decoy
Below you can see that I was in the process of downloading the new decoys available in this version which includes Windows 10 as well as SCADA devices. The SCADA devices has specific lures particular to it (see at the bottom of the post)
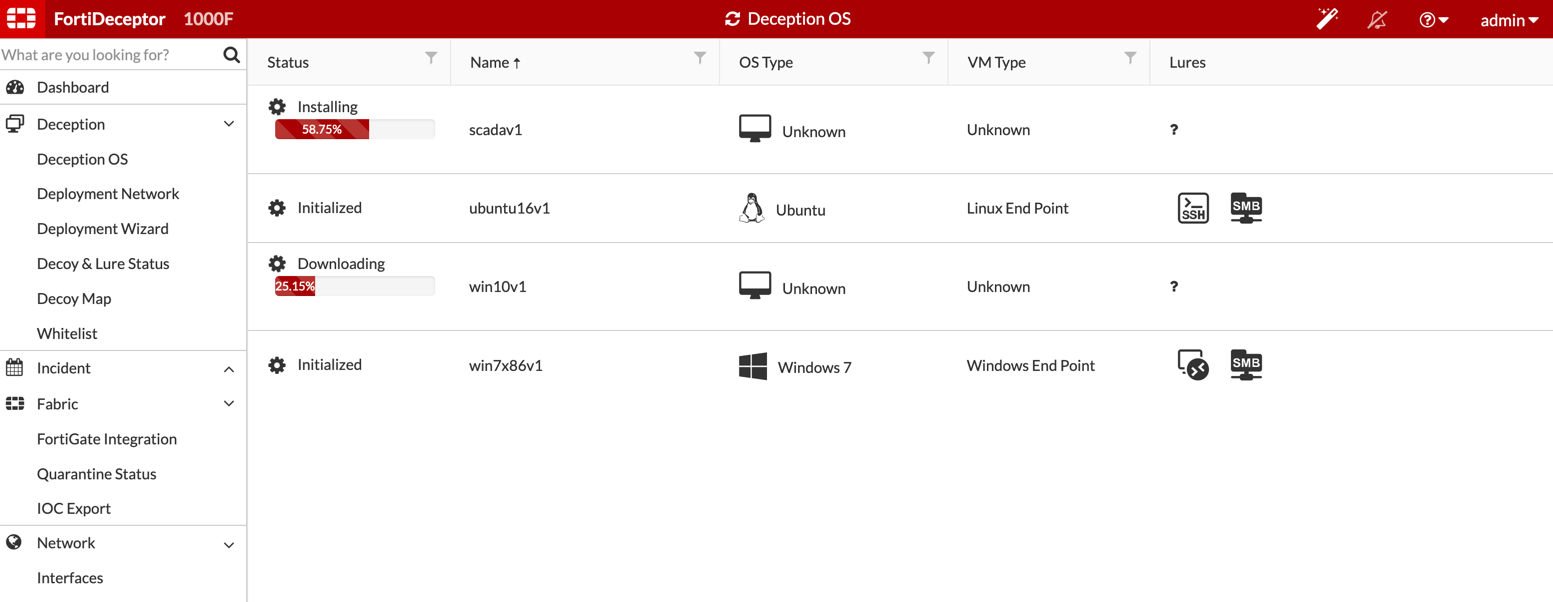
However, you can see that I have Ubuntu and Windows 7 already downloaded and initialized.
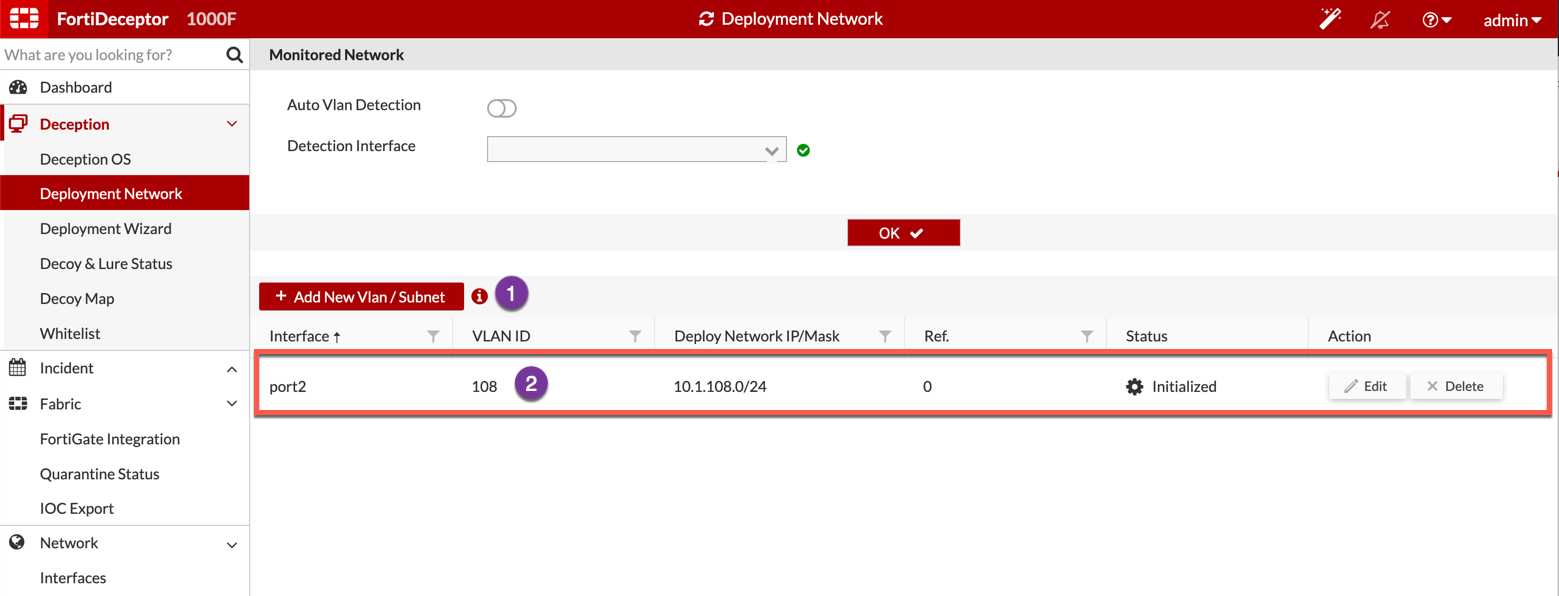
You need to already have a Deployment Network configured. This will be where the decoys will be seen on. In my case, I create a VLAN 108 and connected port2 to it.

Next, we will go to the Deception tab and then choose Deployment Wizard. Now we will see the ginormous + sign. (It is pretty big)

Once you click the + sign, you need to:
- Give the decoy a descriptive name
- Choose the Decoy OS you want to use.
- Add a lure (in this case, I am adding a user named
manny) - Here is the second part of the lure, the password. I used the super, duper, secure
qwerty - And finally,
Update

Next I added a SAMBA share with a fake user and password.
{Sarcasm Font} I used the same password since that is a good way to remember them 😉

Now, you can choose to automatically launch the decoy. The other option 2 when enabled will give you additional configuration options…..

When enabled, you can configure it to reset after a certain period of time after an incident is detected.
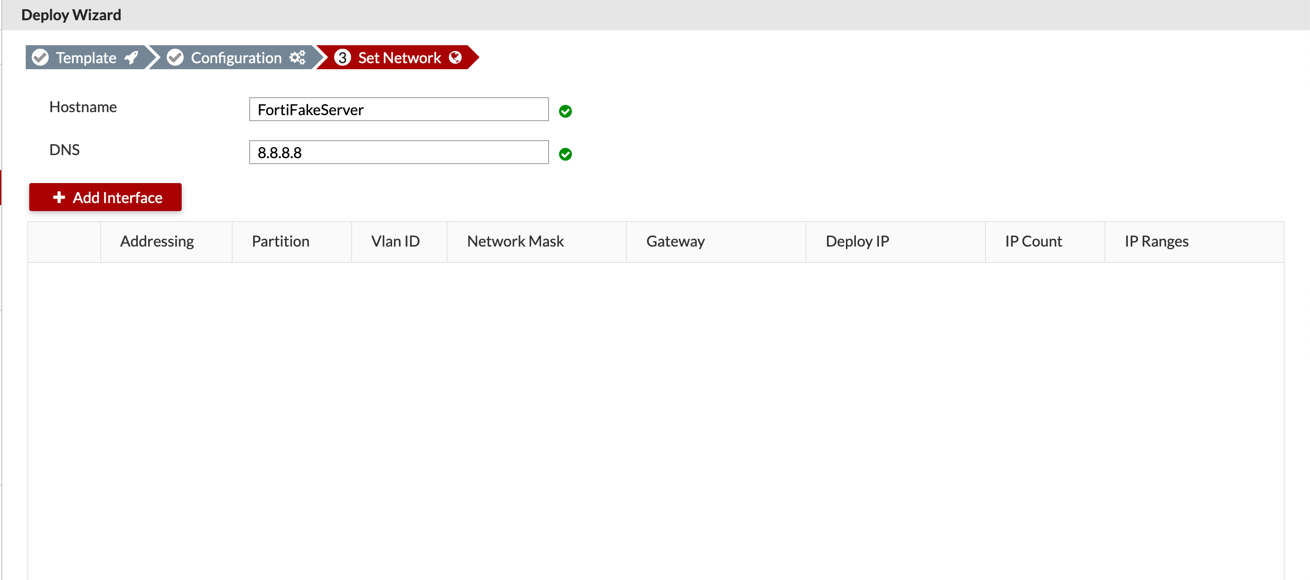
Now you will need to give the decoy and IP address etc.

Choose the Deploy Interface from the drop down. HINT: We did it above VLAN108
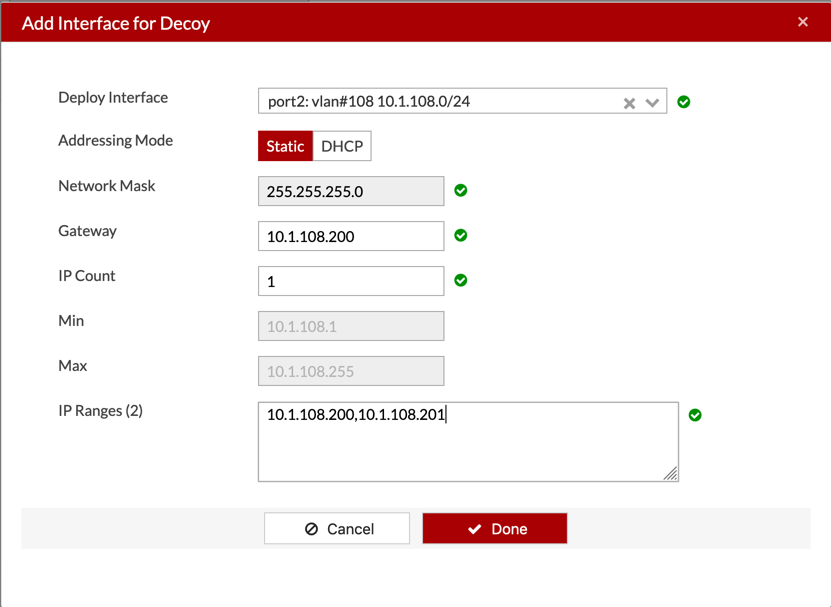
Now you can define the additional information.

It will now start initializing.

Now we can see that the decoy is Running.
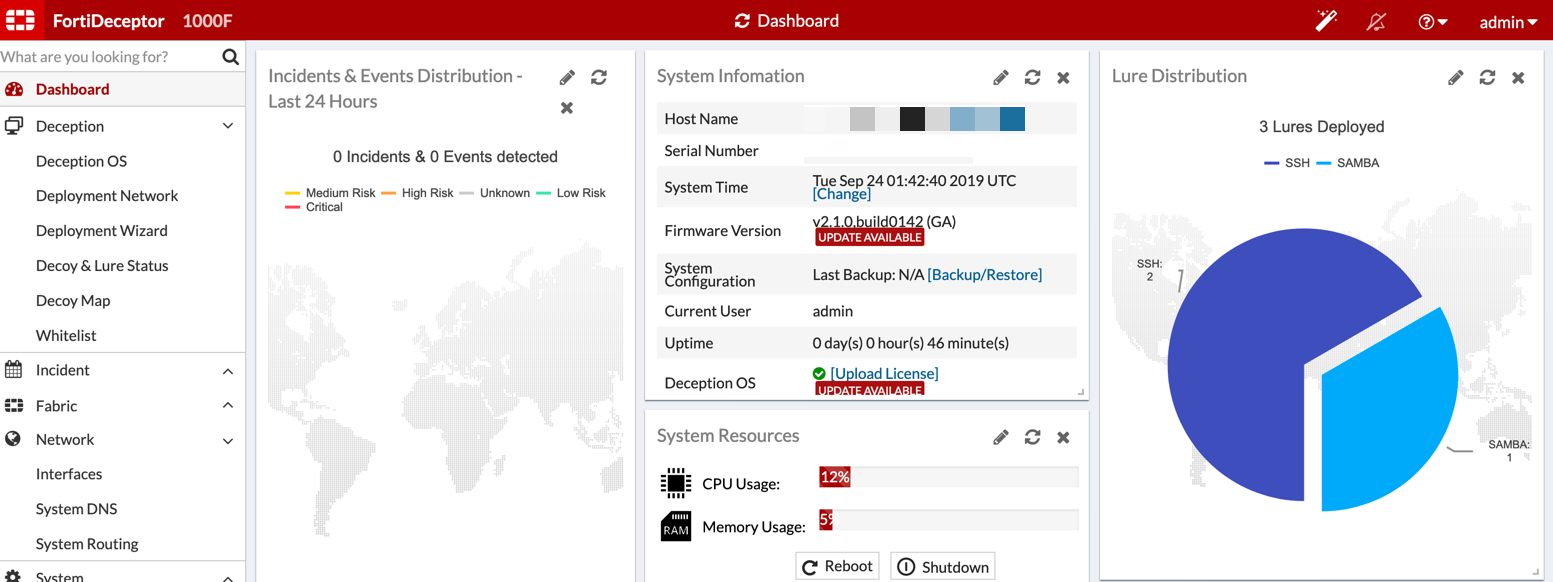
From the Dashboard you can see we have 3 lures deployed.
SCADA
Here are the lures we can use with the SCADA image

Here is the Lures, magnified.

Recent posts
-

-

Had a customer with over 200 static routes on... Full Story
-

This is a work in progress, I will be... Full Story
