There are many options when troubleshooting in FortiGate firewalls. ... Full Story
By Manny Fernandez
September 20, 2019
Using Dynamic Address Lists in Fortigate Firewalls using 6.2.+
In 6.0, Fortinet released the ability to pull IP addresses from a web-server and use them in the configuration. However there was limitations in how you could use it. Here was the issue:
- You create a list and host it on a web-server.
- You could use the
listin the DNS Filter. - So if we had
1.1.1.1in the list, and we queriedwww.goodguy.comand the DNS server replied with1.1.1.1it would block the connection, However if you opened your browser and in the URL bar typedhttp://1.1.1.1it would permit the traffic. - There was no ability to authenticate.
This behavior changed in 6.2 and was enhanced even more in 6.2.1. In 6.2 you were able to use the address list in address objects as source or destination and in 6.2.1 you were able to authenticate. In this post, I will show you how to configure a list, post it to a web-server and configure the Fortigate.
Web Server
I am using a Synology NAS. I added the web-server app to it.
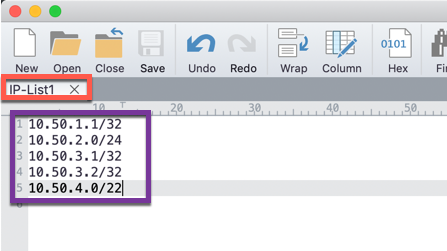
Next, I created a file with IP addresses using CIDR notation. I named it IP-List1.txt
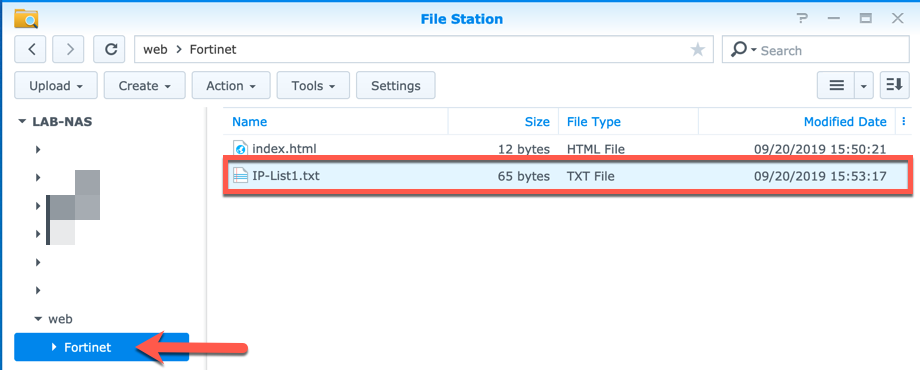
Next, I uploaded the IP-List1.txt to the web-server under a virtual folder named Fortinet
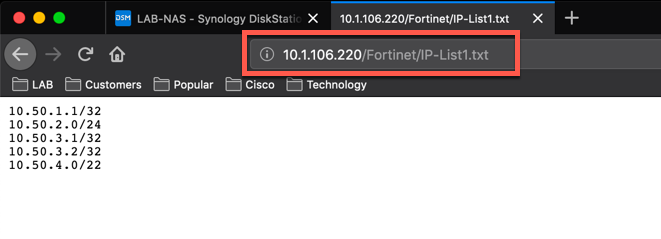
You can test it by pointing your browser to the web-server IP address followed by the Virtual folder ( Fortinet ) and then adding the file name ( IP-List1.txt ) and you show see something similar to what I have in the screenshot.
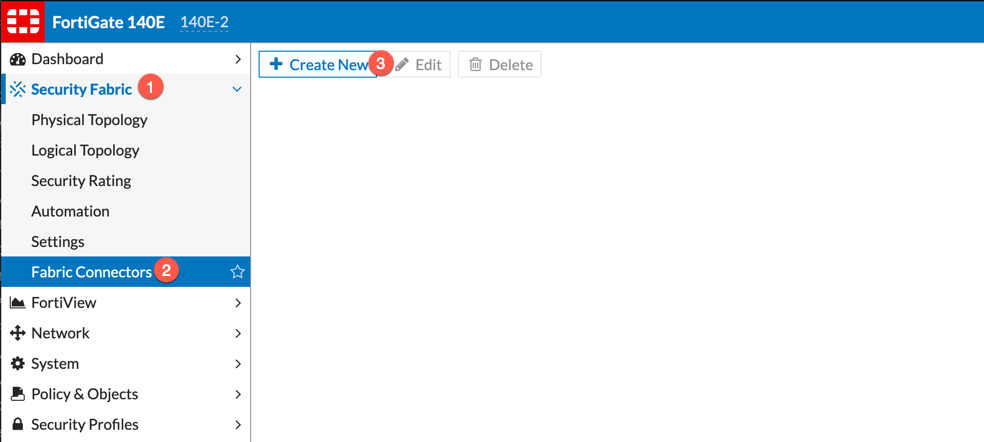
Next we will:
- Go to
Security Fabric - Then choose
Fabric Connector - Then
Create New
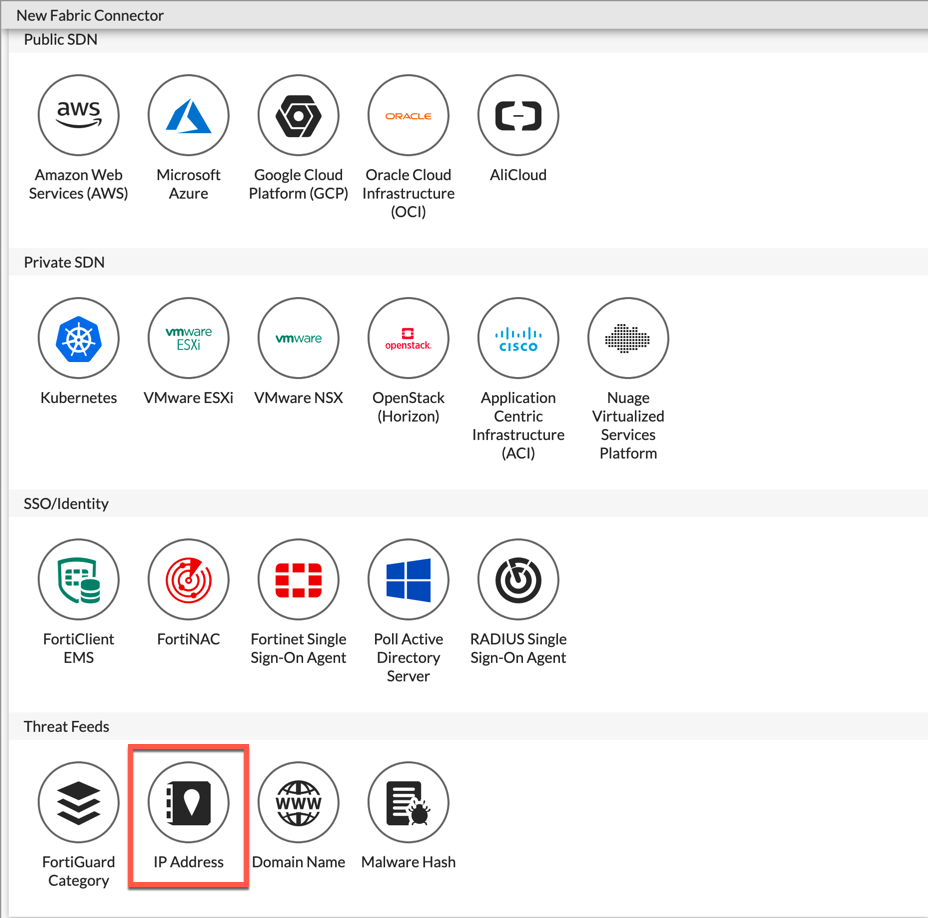
Choose IP Address. I will cover the other connectors in future posts. I am so excited about these connectors. It really makes a difference.
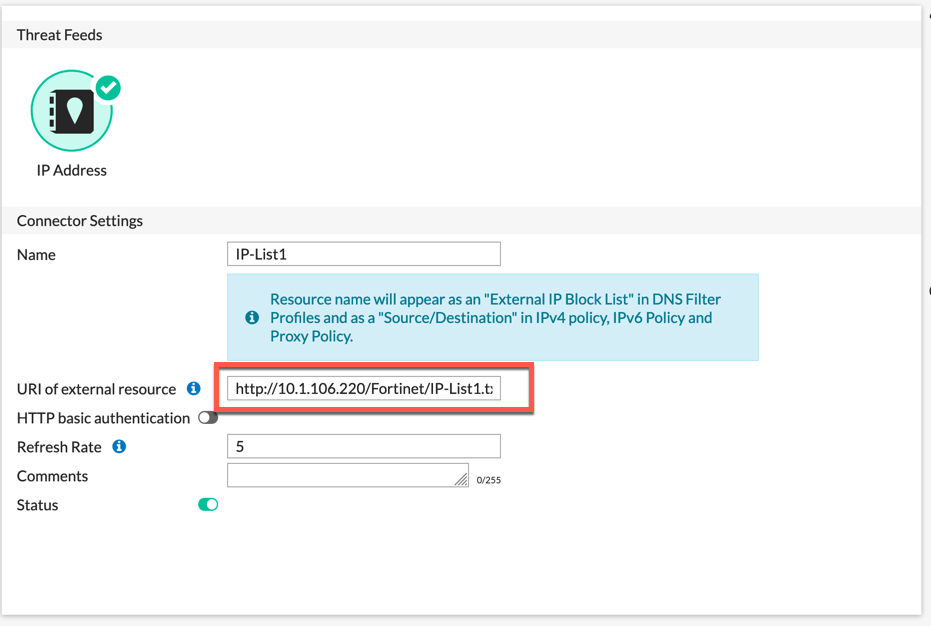
Name the Connector with a descriptive name and enter the URL in the URI of external resource section. You can play with the Refresh Rate if this is a highly dynamic list, otherwise the default should suffice.
Other options (not in 6.2.0 but 6.2.1) is the ability to use authentication. This gives you an additional layer of security and for some third-party thread feeds and the like, this is required.
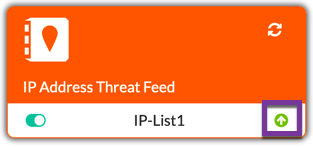
Once you have the URL in and the status is set to on, you should see the green arrow pointing up on the bottom right.
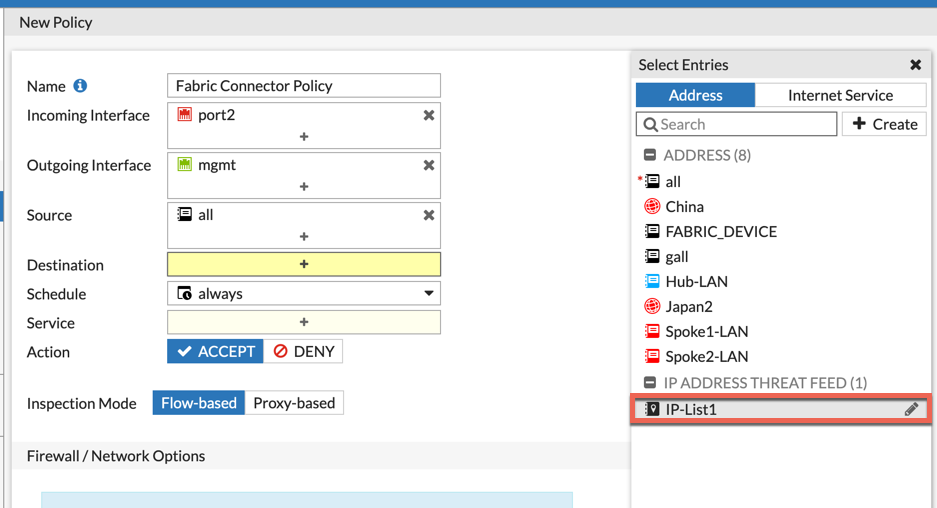
Now we will create a new policy. As you can see there is a section in gray named IP ADDRESS THREAT FEED and it has the same icon as the connector we created.
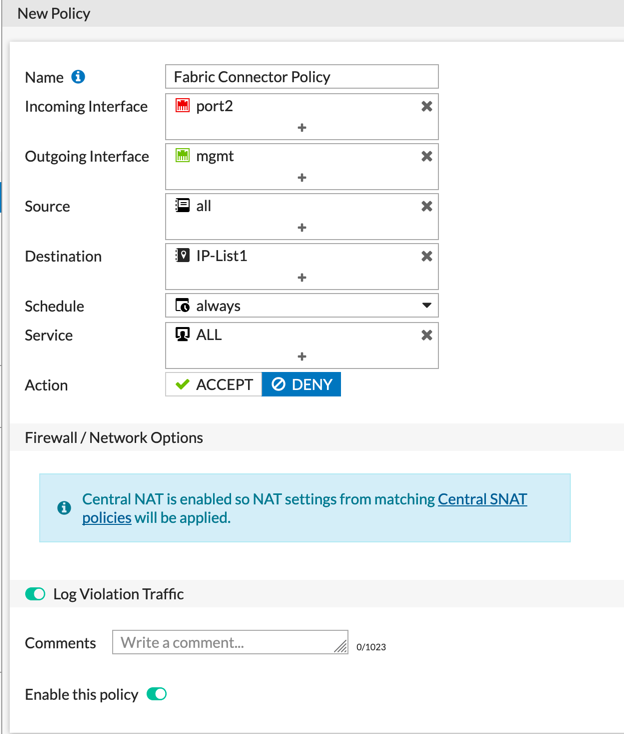
In this example, I am going to Deny all traffic to these IP addresses, however this COULD be used in the Source as well.
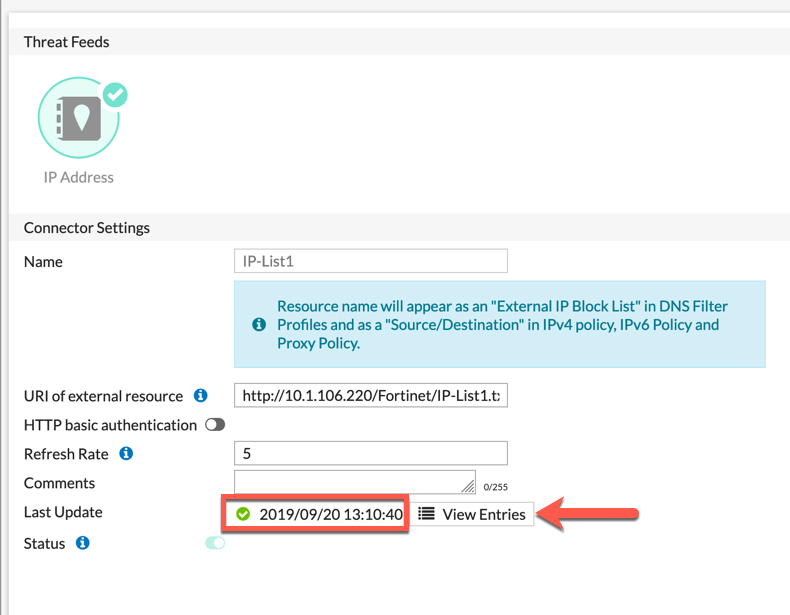
By going back into the Fabric Connector we created, you will see the last time it updated. Also, you can click the View Entries to see what is in the list.

And there you go. Hope this helps.
Recent posts
-

-

Have you ever had an IPS signature that continues... Full Story
-

Use case: Customer has a Split Tunnel Enabled but... Full Story
