Have you ever ordered a bunch of Fortinet gear... Full Story
By Manny Fernandez
December 5, 2019

FortiOS AutoScript from CLI
OK folks, time for another quick scripting article. As many may know, there has been some folks that have hit a bug with v6.2.x (as of the writing of this article) with the wad daemon. It causes conserve mode Fortinet is working on fixing this in the next release v6.2.3. However until this occurs, there is a work around. This work around can be used for all types scripts to be run automatically in FortiOS.
Creating the Script
config system auto-script

      edit wad

          set interval 86400

          set repeat 180

          set start auto

          set script "diag test app wad 99"

      next

end
Note that in the set script line, you will need the double quotes "".
Other use cases include backing up configs as an example. I recommend getting FortManager as it has this feature built in and is easier to manage centrally.
config system auto-script

      edit backup-config

         set interval 1

         set repeat 0

         set start auto

         set script "execute backup config ftp FGT_AUTOCOFING.conf 192.168.1.200 ftpuser ftpuser"

      next

end
Some of the options for the scripts are listed below
NOTE: I do not recommend you back up your configs via FTP since the password would be in clear text.
Interval is the interval time in seconds between instances of the script running.
Repeat is the number of times to repeat the running of the script. The value 0 is used to set an infinite number of repetitions.
Start can be selected as manual to start the script manually or as auto to start the script automatically.
Script is the content of the script
From the admin guide:
config system auto-script

      edit {name}
# Configure auto script.

         set name {string} Auto script name. size[35]

         set interval {integer} Repeat interval in seconds. range[0-31557600]

         set repeat {integer} Number of times to repeat this script (0 = infinite). range[0-65535]

         set start {manual | auto} Script starting mode.
manual Starting manually.
auto Starting automatically.

         set script {string} List of FortiOS CLI commands to repeat. size[255]

         set output-size {integer} Number of megabytes to limit script output to (10 - 1024, default = 10). range[10-1024]

      next

end
Automation in 6.2
In 6.2, Fortinet enhanced its ability to have triggers and actions. One of the Triggers was the ability to look at logs generated by FortiOS and the ability to run CLI scripts based on those messages. Below we see what that looks like.
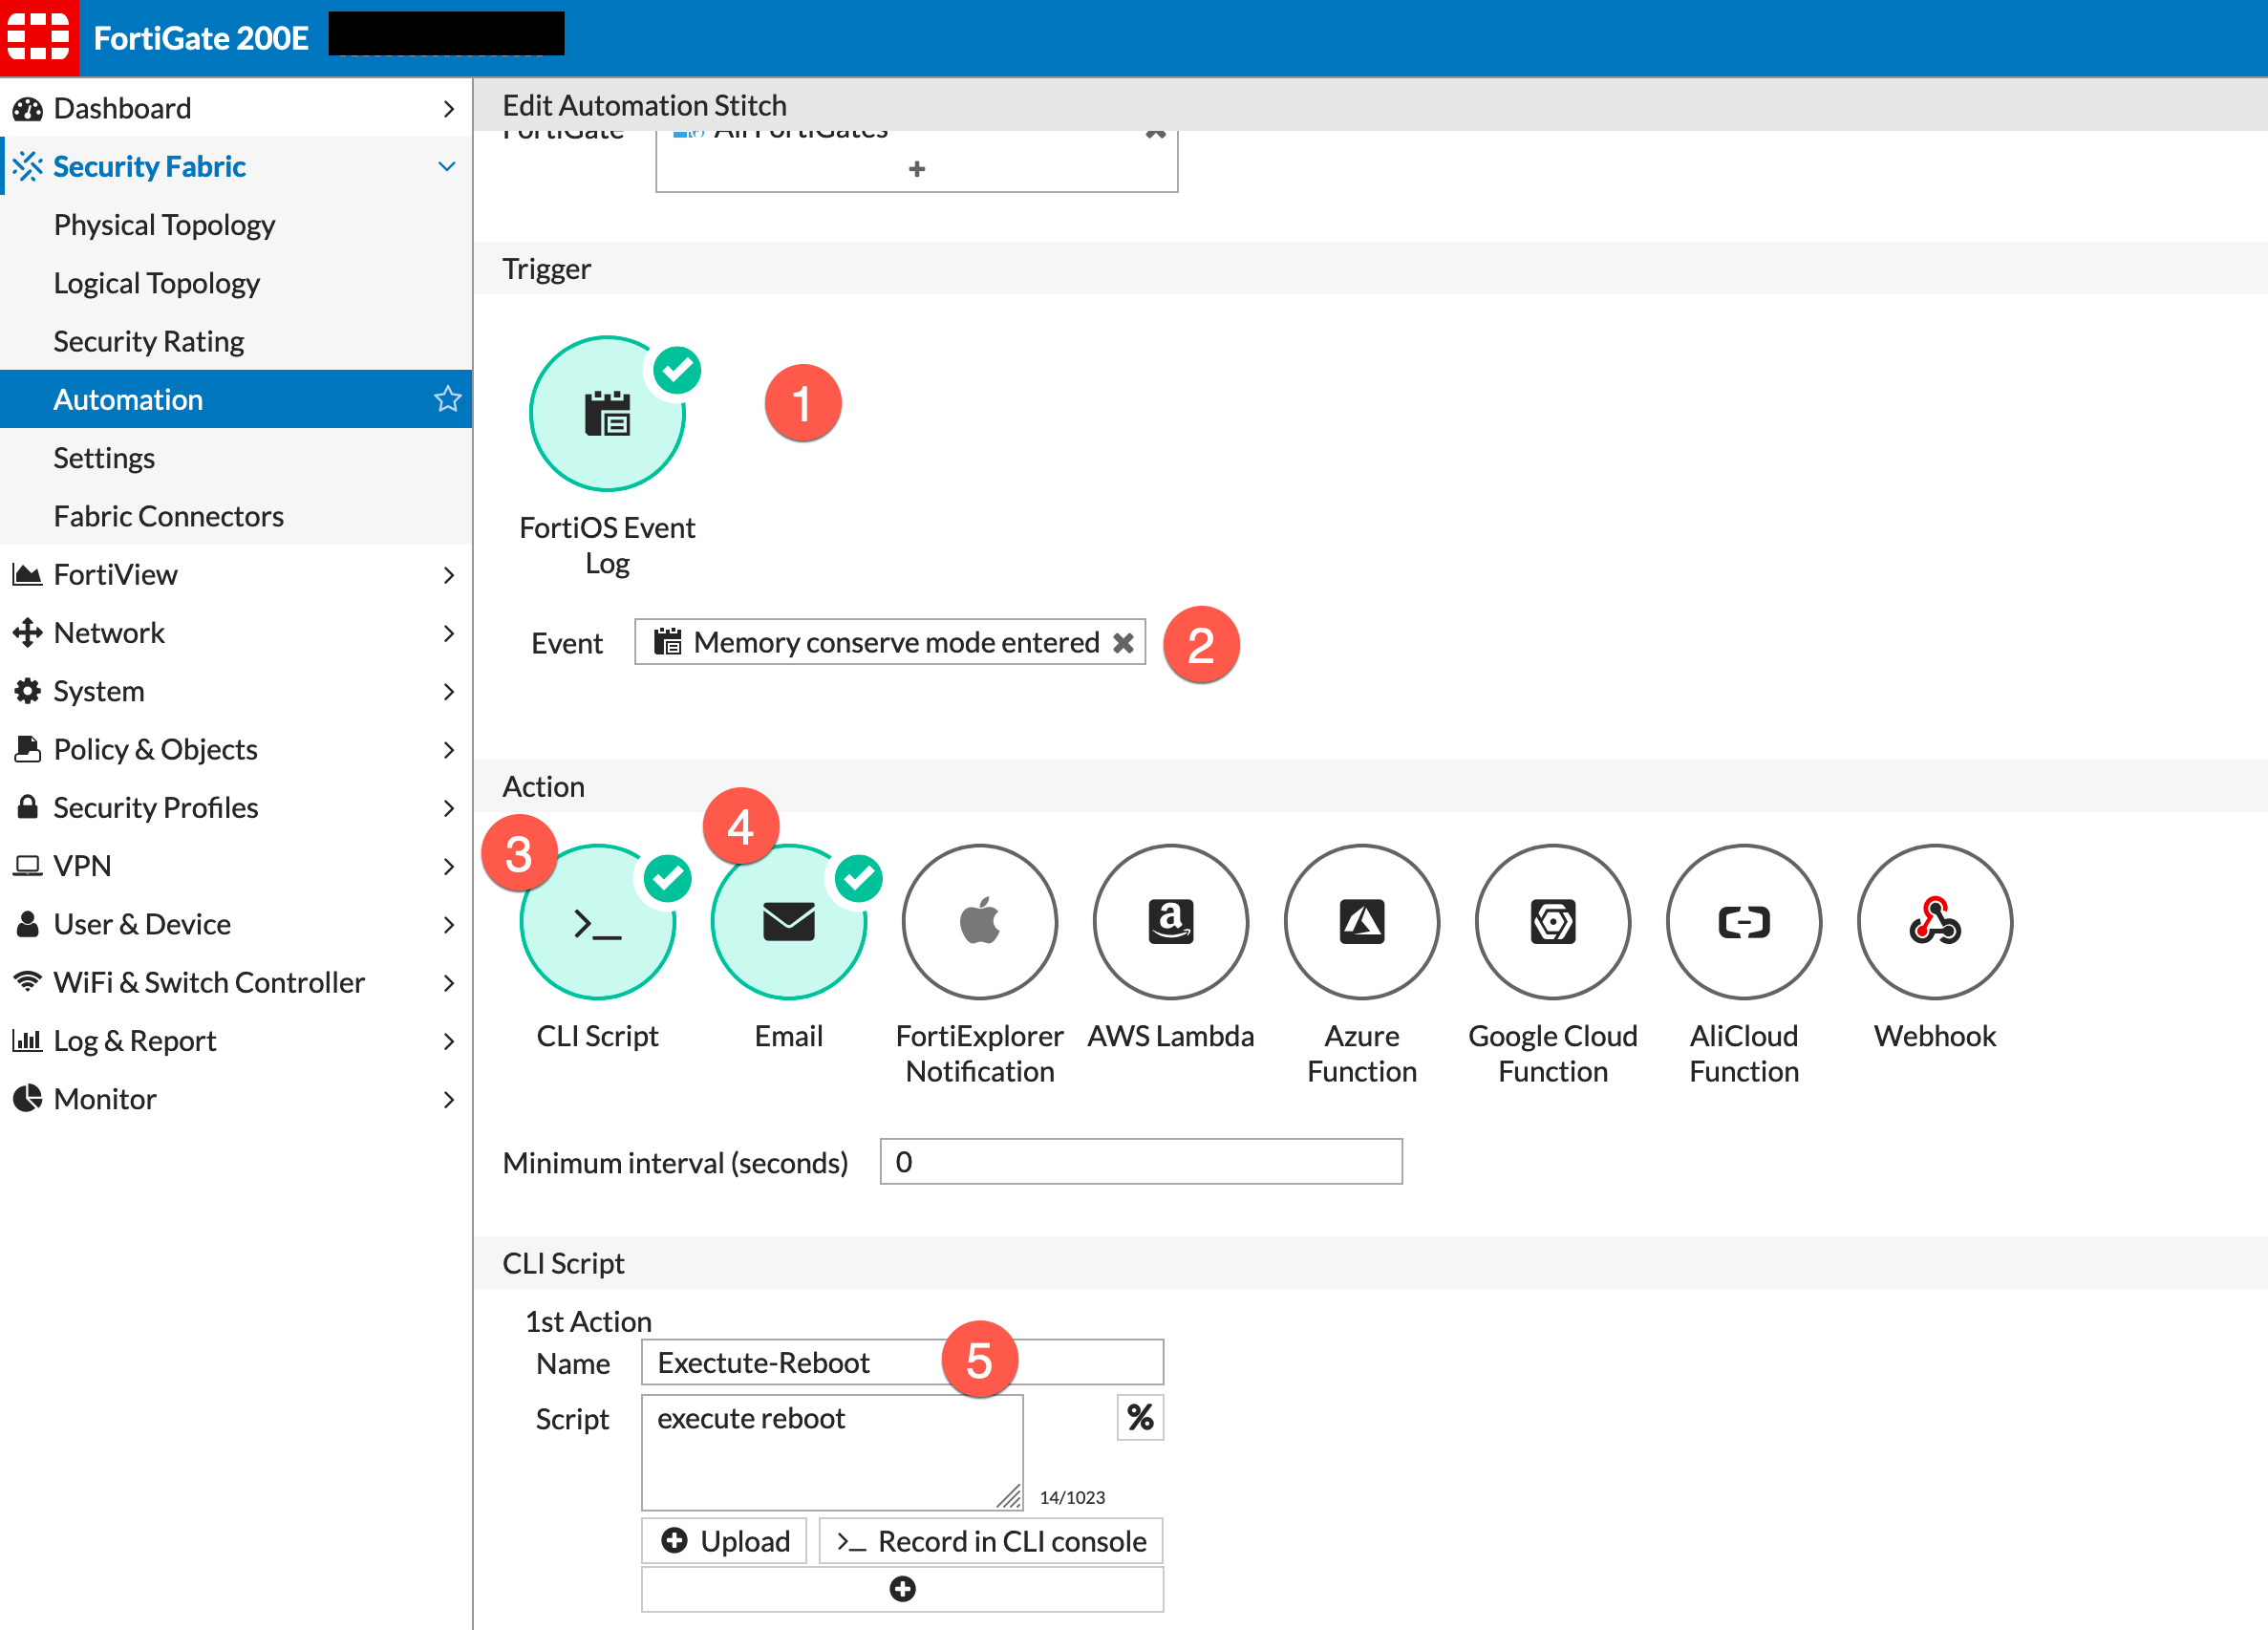
- Under
Security FabricthenAutomation. Now you can create a new trigger, In my example , we chose to look for a particular message (see item 2 in above picture). - Particular message.
- Choose the action of
CLI Script - Optionally, you can have an email sent out.
- Enter the script.
Verifying Schedule
You can validate what is running or scheduled to run by going into the GUI
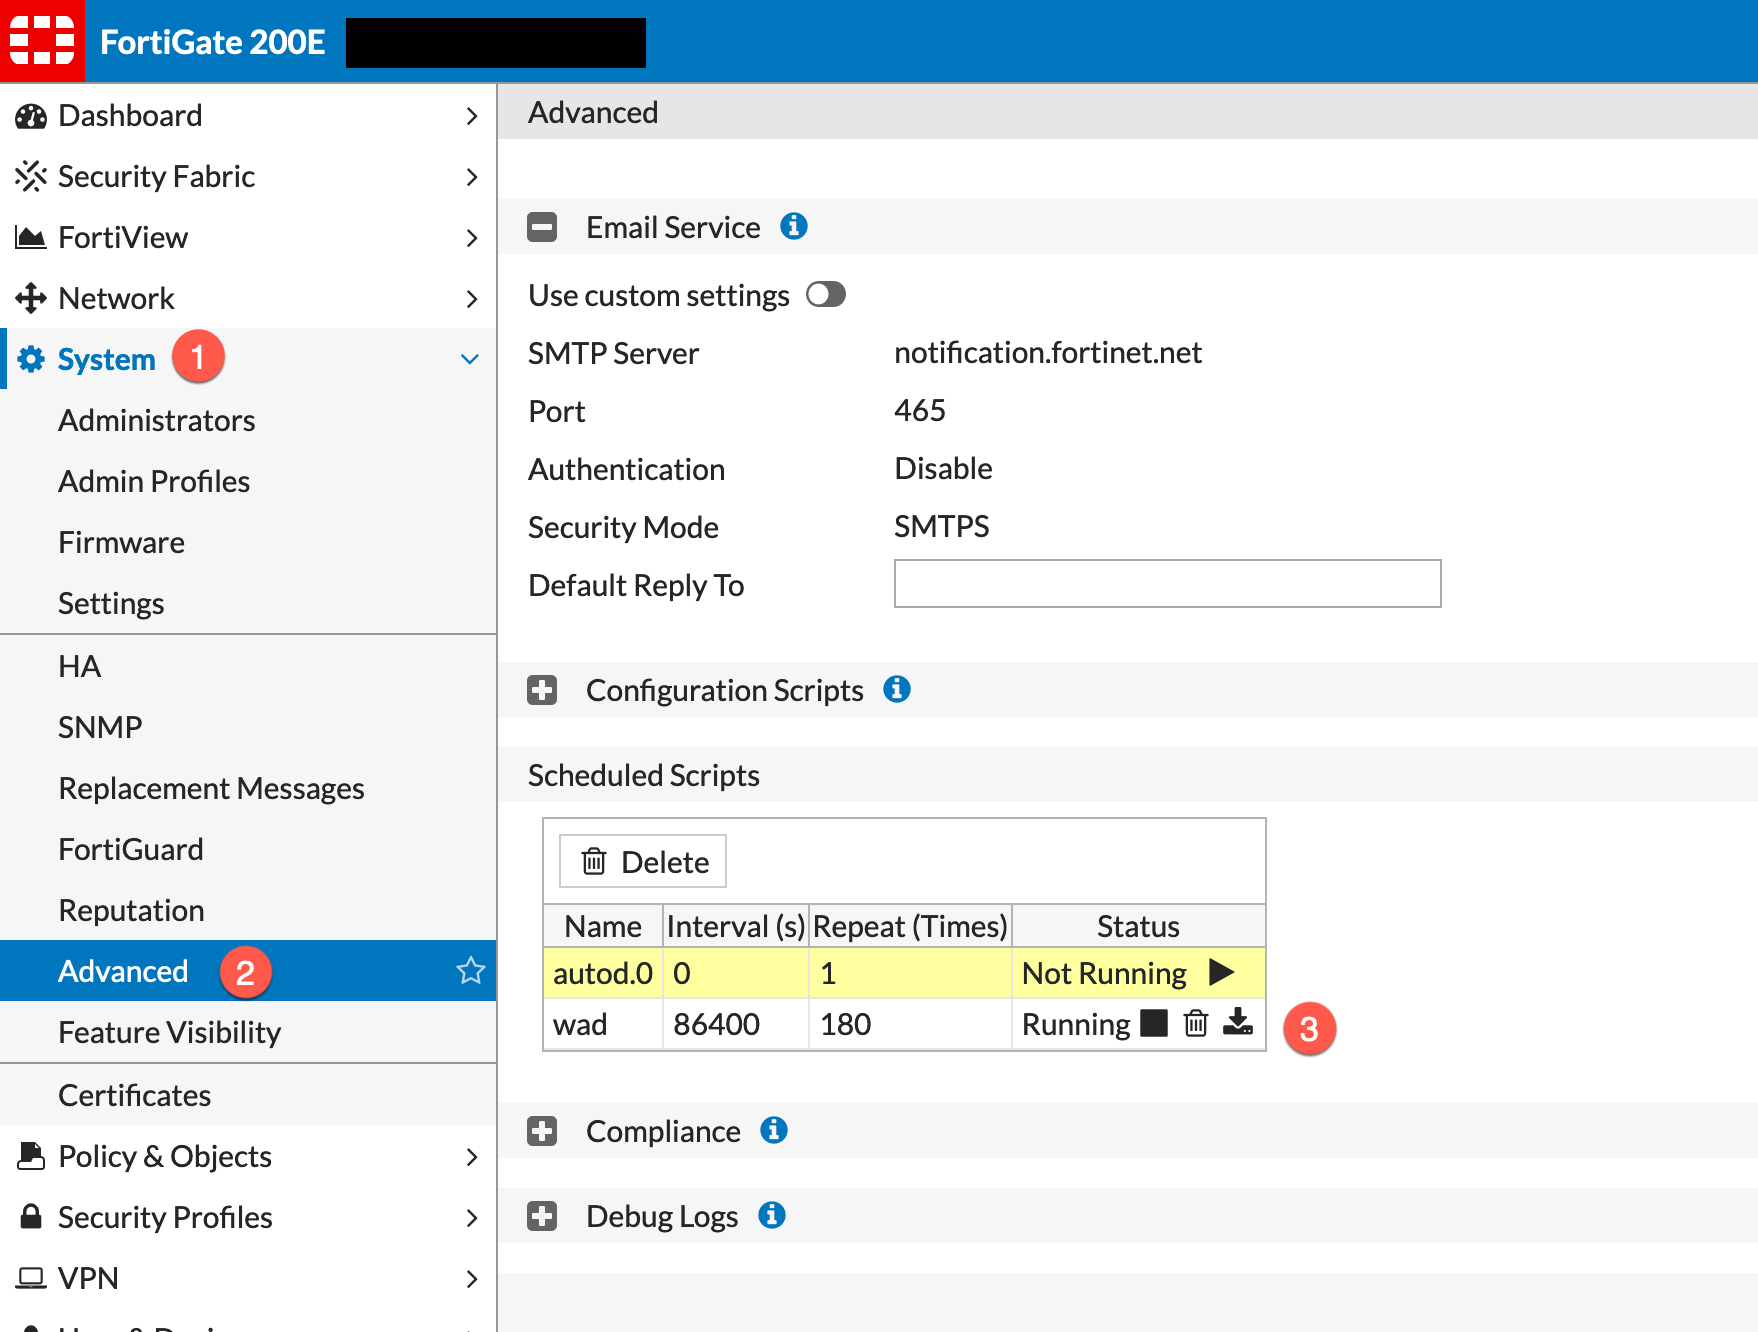
- Go to
System - Then choose
Advanced - Choose the script. You can stop it, delete it and download the results of the script
When you download the file using the download button, it will download a %script-name.out% file. This will show you the stdout when you ran the script.
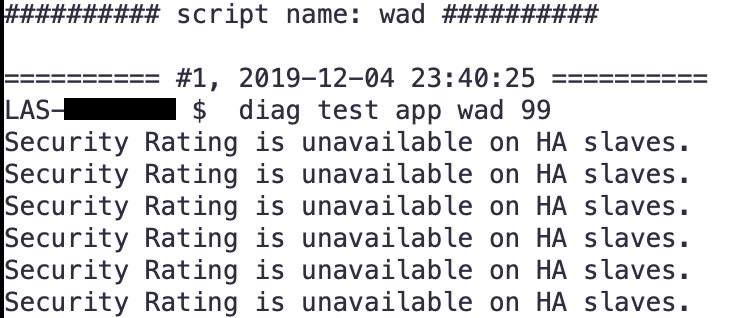
NOTE: In 6.2.3 this GUI option was removed.
Other Options
In case you are wondering what the 99 means in the script, here is a table showing those numbers and what each of them do.
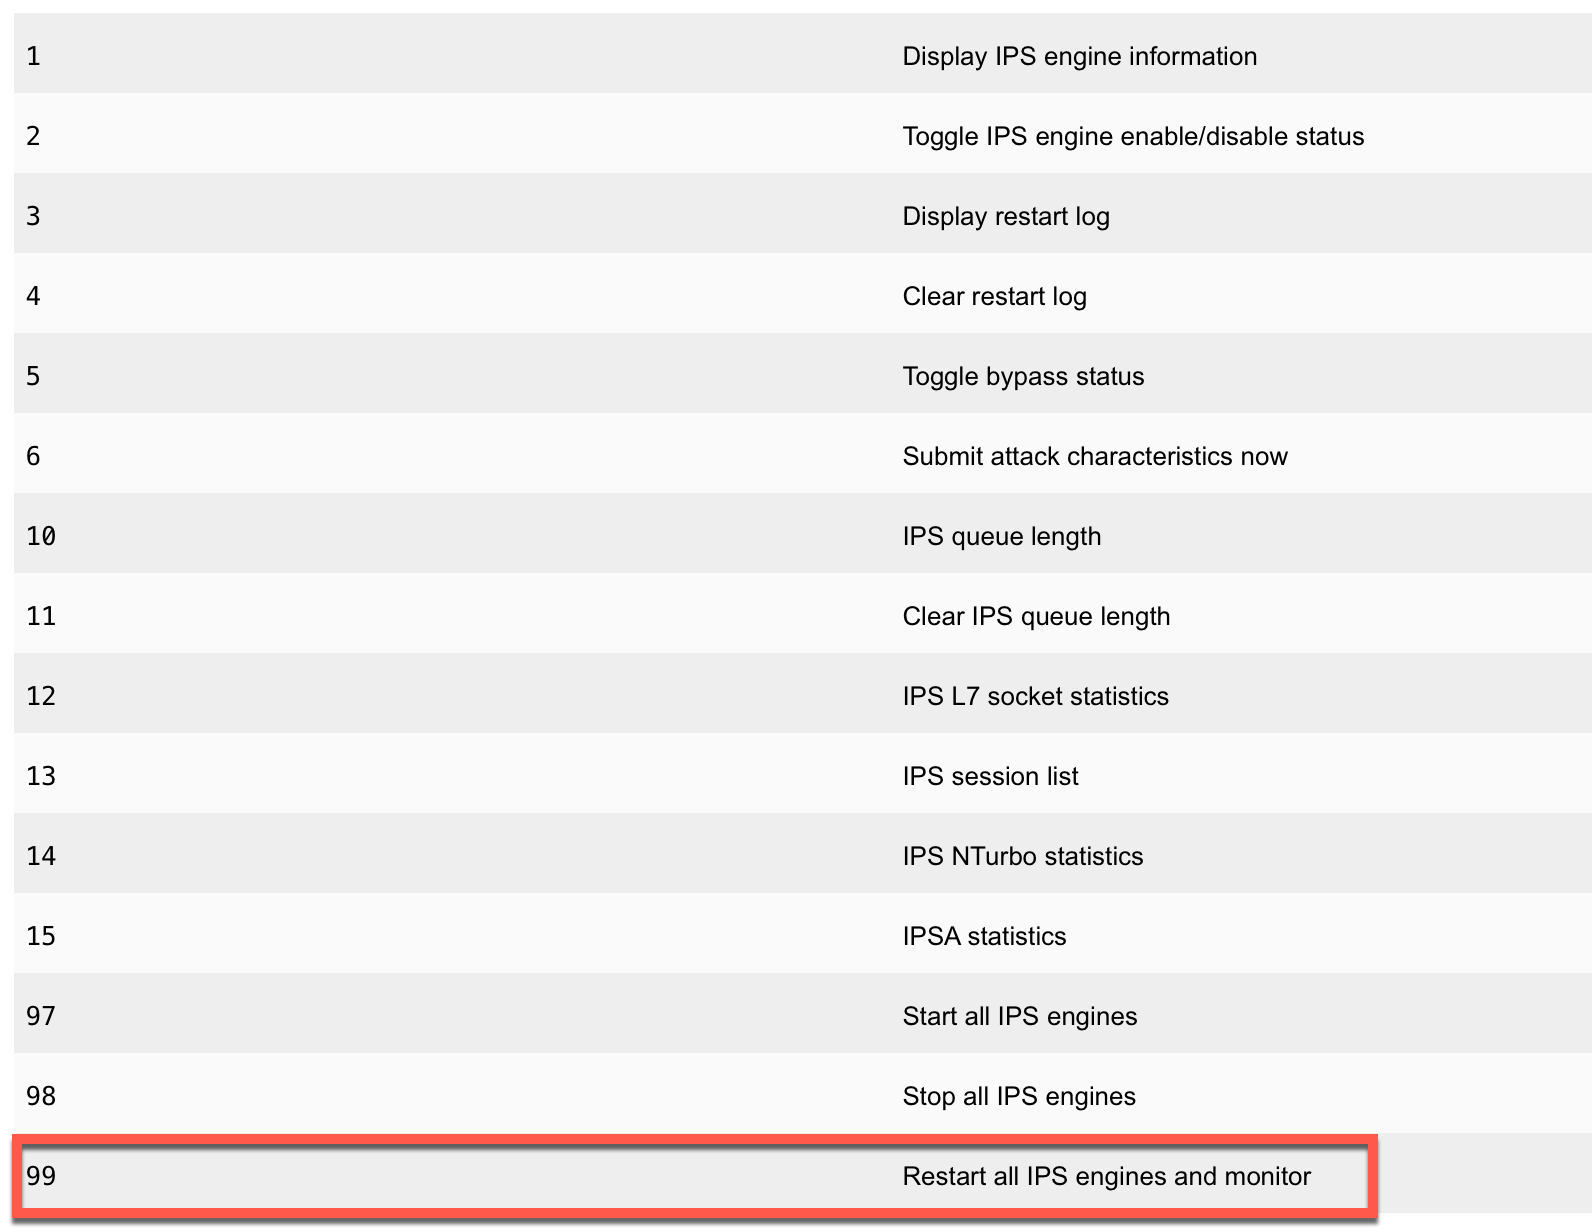
UPDATE: 20200529
Here is an update from FortiOS 6.2.3 and above. Fortinet moved it to the Automation section.
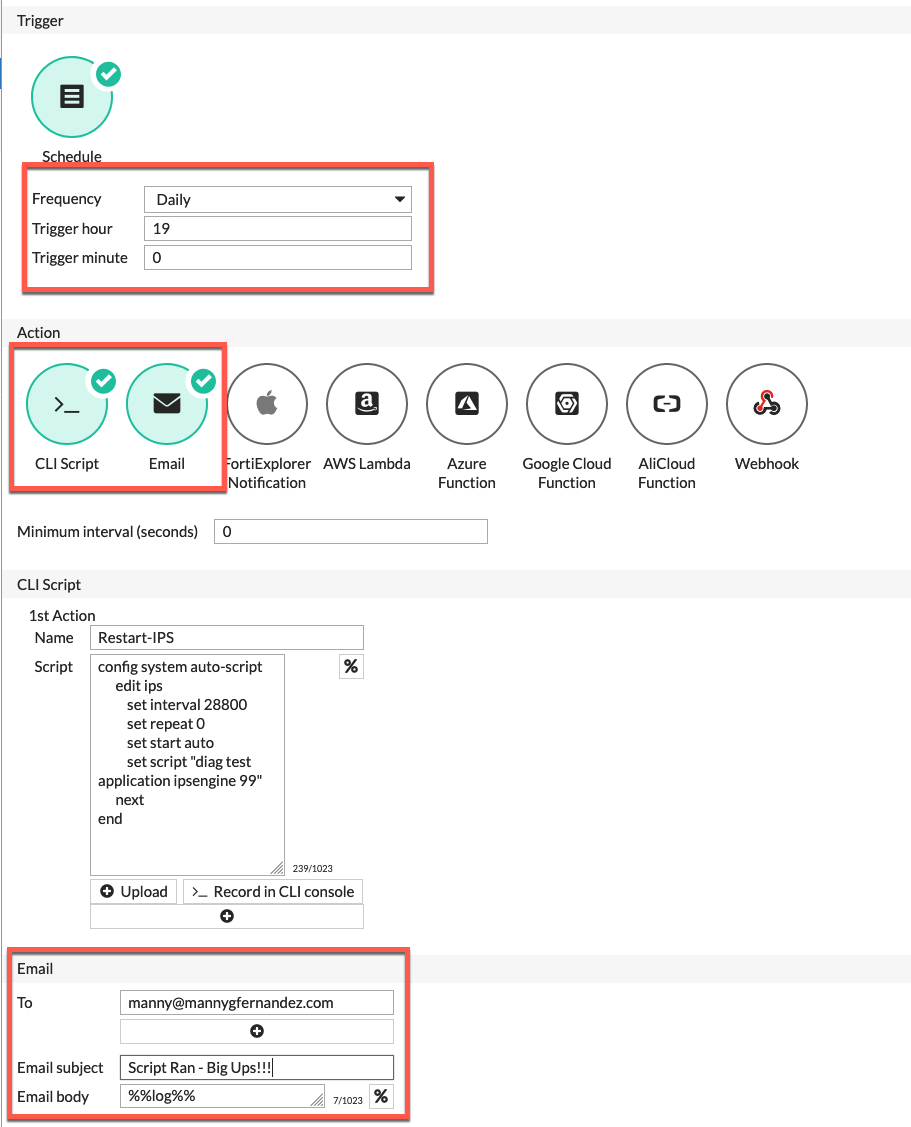
Here you can see the script entered in the Script section. We can also see the Frequency where it defined the time it is going to run. Additionally I am sending an email when it runs.

You can now see the script scheduled to run and that it is enabled.

Hope this helps
Recent posts
-

-

Had a customer with over 200 static routes on... Full Story
-

This is a work in progress, I will be... Full Story
