I have run macOS in macOS with Parallels but... Full Story
By Manny Fernandez
February 4, 2026

Installing EVE-NG on ProxMox
As you may have read in an earlier article, I am in the process of rebuilding my lab. One of the things I plan on doing is to use EVE-NG as a platform to do all my virtual testing. I plan on running the Professional version of EVE-NG and will have Vayata routers as my ISP 1-4 and will have FortiEverything running in it. There are a few things we are going to have to have in place before we can move forward.
Getting EVE-NG up and running on Proxmox is a great way to build a powerful lab, but it does require a little bit of “Inception-style” setup! To get your network nodes running smoothly inside EVE-NG, you’ll need to enable nested virtualization. This essentially gives your EVE-NG virtual machine the power to run its own VMs.
Here is how to make it happen:
Set the CPU to “Host” – In your Proxmox VM settings, head over to the hardware tab and switch the CPU type to host. This lets EVE-NG see the full capabilities of your physical processor.
Enable Nested KVM – You’ll need to run a quick command on your Proxmox host’s command line to turn on nested virtualization features.
Check Your Resources – Since you’re running VMs inside a VM, make sure you’ve allocated enough RAM and CPU cores to keep everything snappy.
Quick Tip – If you aren’t sure if nesting is already active, you can check by running cat /sys/module/kvm_intel/parameters/nested (for Intel) or cat /sys/module/kvm_amd/parameters/nested (for AMD) in your Proxmox shell. If it returns Y or 1, you’re good to go! Most new instances of ProxMox already come with it turned on.
If you need to enable it, here is how to, remember to choose your processor
For Intel
echo "options kvm-intel nested=Y" > /etc/modprobe.d/kvm-intel.conf
modprobe -r kvm_intel
modprobe kvm_intel
For AMD
echo "options kvm-amd nested=1" > /etc/modprobe.d/kvm-amd.conf
modprobe -r kvm_amd
modprobe kvm_amd
In my case, I am running Intel
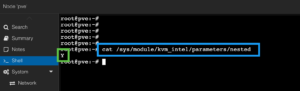
As you can see, the /sys/module/kvm_intel/parameters/nested command returned a Y.
Downloading EVE-NG
There is a couple of ways to do this. One is to download the ISO file from the EVE-NG website and the other is to tell ProxMox to download it for you. Obviously, having ProxMox do it for you saves you the time to upload it back to the pve.
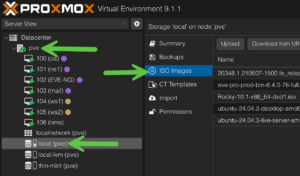
Go to your local (or wherever you are storing your ISOs), choose ISO images.
Now you can either Upload the ISO you downloaded, or ….
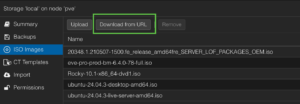
You can click the Download from URL
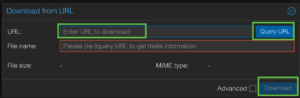
You can paste the URL in the URL section, then click Query URL, then Download.
Creating the VM
Now lets Create VM on the top right
![]()
Note: If you have not already done so, ensure you have either enough disk space for LVM or have a LVM-Thin which allows for thin provisioning.
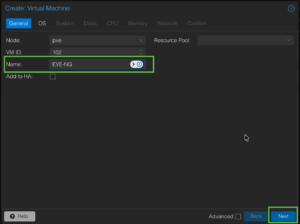
You are going to give it a name and hit Next
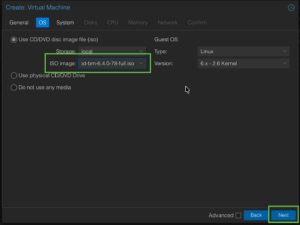
Now we will choose the OS. Here you will point to the ISO you downloaded in the previous step. You can leave the rest as defaults and choose Next.
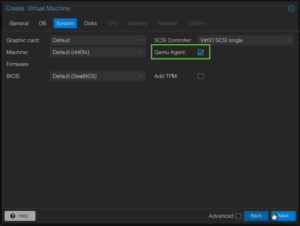
I only changed the QEMU Agent and hit Next.
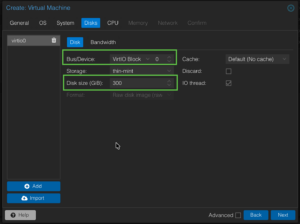
Now in Disk, I chose the VirtIO Block for the Bus/Device as I read it give better performance. Give it how much space you want to allocate to EVE-NG then click Next.
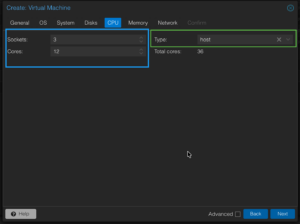
Choose the Sockets and Cores and then the important part is under Type, you need to ensure you choose Host (its at the bottom of the list).
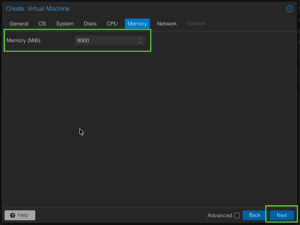
Now choose the amount of memory you want to allocate, I did 8GB but I think I am going to up that supstantially.
For Network, I used the default VMBR0 for now. Since I am waiting for some switches to come in, I will just use the vmbr0.
Go to the Confirm tab and click Finish.
Lets boot it up if you did not choose the auto start.

Initial EVE-NG Install
First thing I want to let you know is that once the install gets going, It will take a while, not hours but it won’t be like deploying an Ubuntu minimal install.
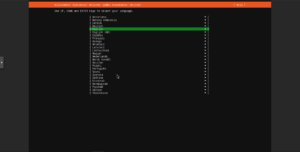
I am choosing English for obvious reasons.
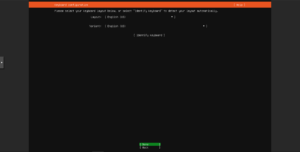
English again…..
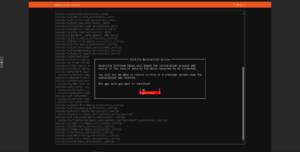
Choose Continue.
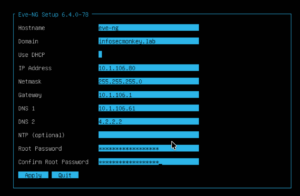
Name the EVEN-NG Host, fill out your information, then hit Apply
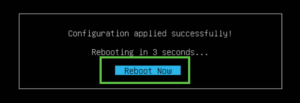
Now choose Reboot Now.
Initial Login
To connect to the EVE-NG server, open you browser to the IP address you configured during the install.
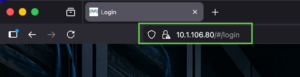
Default credentials are admin and eve as the password.
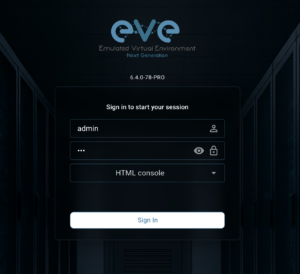
The first thing you SHOULD do is change the password

Go to your profile by choosing the icon to the left of your name.
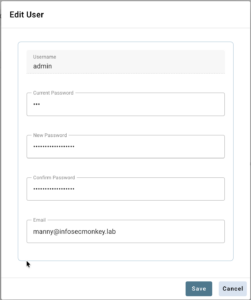
Enter the eve password and your new one then hit save
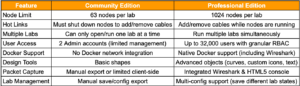
Licensing EVE-NG (Optional)
Although EVE-NG offers Community version of its platform, there is a Professional subscription which is yearly. I chose to purchase the Professional License.
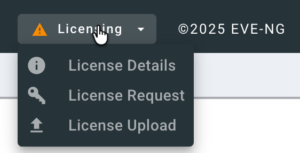
Go to the Licensing button on the top bar. Choose License Request
Read the EULA and if you accept it, indicate as such and click Continue.
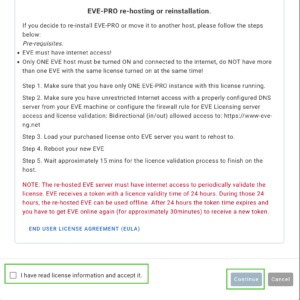
You will now be shown your certificate that will be pasted into the EVE-NG website.

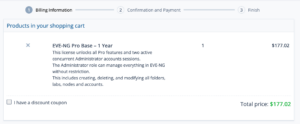
This is what I purchased…
Hope this helps.
Recent posts
-

-

Don't be confused with my other FortiNAC posts where... Full Story
-

This is the third session in a multi-part article... Full Story
-

Today I was configuring key-based authentication on a FortiGate... Full Story
-

Netcat, often called the "Swiss Army knife" of networking,... Full Story
-

At its core, IEEE 802.1X is a network layer... Full Story
-

In case you did not see the previous FortiNAC... Full Story
-

This is our 5th session where we are going... Full Story
-

Now that we have Wireshark installed and somewhat configured,... Full Story
-

The Philosophy of Packet Analysis Troubleshooting isn't about looking... Full Story