There are many options when troubleshooting in FortiGate firewalls. ... Full Story
By Manny Fernandez
May 21, 2019
Administering the Fortigate Firewall with LDAP Credentials
I am a big fan of having a centralized directory of users. This makes it easy when that serial, crazy bus driver murderer kills one of the administrators. Seriously, though, by having AD manage the admin accounts, you can so password history, force change like feature currently not available on the Fortigate today.
What we will need:
- Fortigate
- Active Directory
Configuring the AD
First thing we are going to need to do is configure a Domain Admin user account on the domain to bind to the LDAP server. I created a user named ‘monkey’ and made him a member of the ‘Domain Admins’ group.
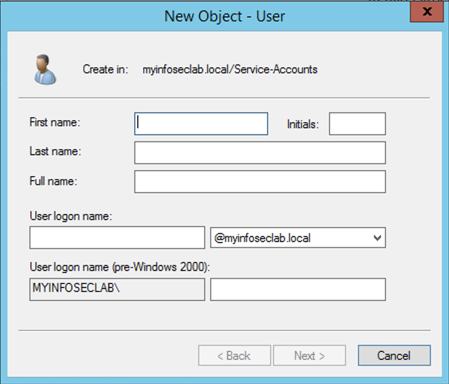
Connect to your Domain Controller and create a new user.
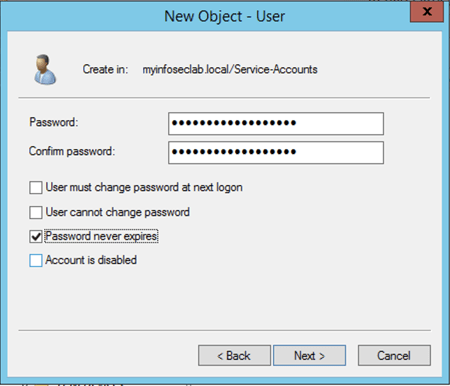
Assign a password and make appropriate changes to account.
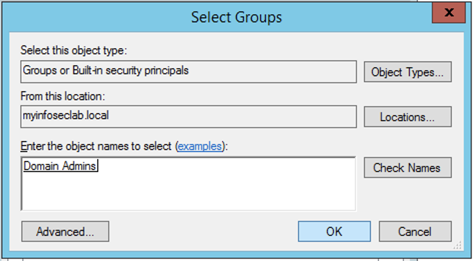
Select the ‘Member of’ tab and add ‘Domain Admin’ and choose OK.
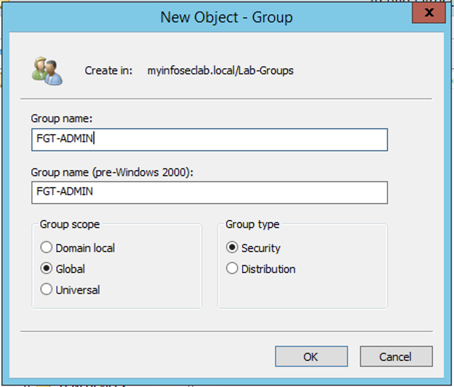
Now we will create a group that will be used to house the administrators for the Fortigate. In my example, I named it ‘FGT-ADMIN’
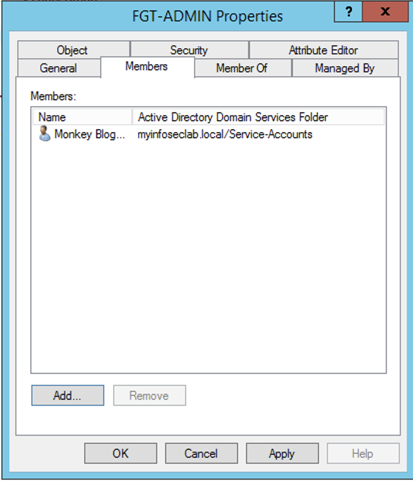
Select the ‘Members’ tab and add the users you want to be able to manage the Fortigate and hit OK.
Configuring the LDAP Connection on Fortigate
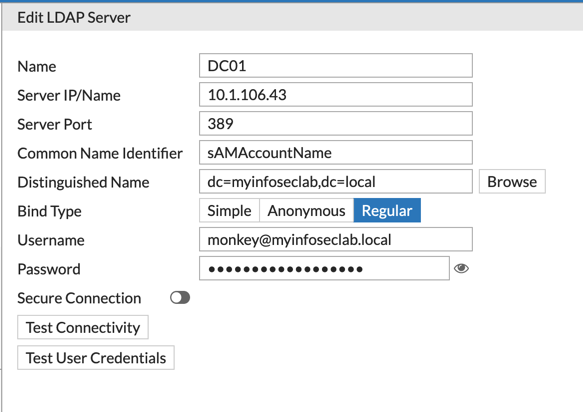
Inisde the Fortigate GUI, go to ‘User & Device’, then ‘LDAP Servers’ and ‘Create New’. Ensure that you use the ‘sAMAccountName’ (case sensitive) in the ‘Comman Name Identifier’ field. Enter the other information as you created them and save it.

Underneath the ‘User & Device’ section, choose ‘User Groups’ and create a new one. Give it a discriptive name (NOTE: I use a prefix of ‘AD-‘ so I know it is an AD group). Do NOT choose local members (even though you can), but rather choose ‘Remote Groups’ on the bottom portion of the page. Then choose the LDAP server you want to use and search for the group we created above.
When you find you group, right click and choose ‘Add Selected’ and save it.
Creating the Admin user in Fortigate
Now we are going to create the admin user on the Fortigate that will be compared to the AD group. We need to match the username to what is in AD. Go to ‘System’, ‘Administrators’ and ‘Create New’.

We will now choose the ‘Match all users in a remote server group’ from the list. Then choose the drop down ‘Remote User Group’ and choose the AD group we created earlier.
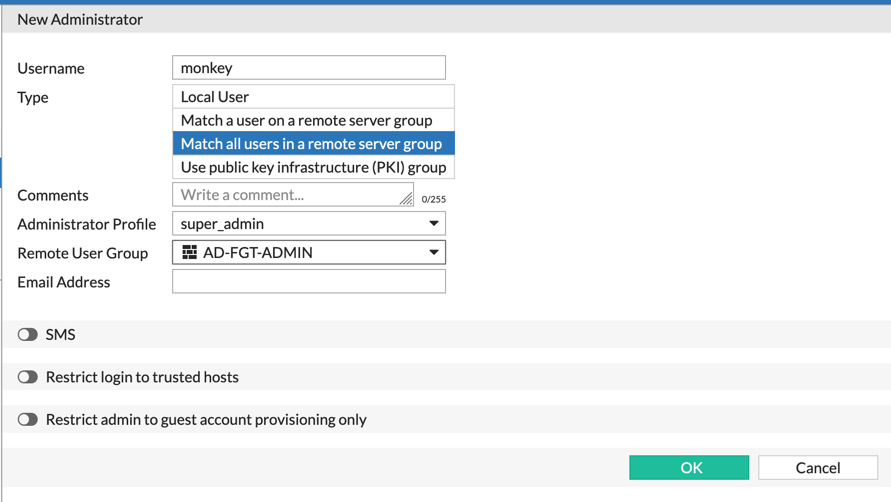
Assign the profile he is going to use and fill in ‘Trusted Hosts’ as needed.
Once this is complete, you are ready to test. Make sure before you do this that your ‘admin’ username and password did not get jacked up and you can administer the box.
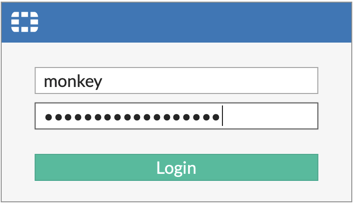
We should now be able to log in without any issues.
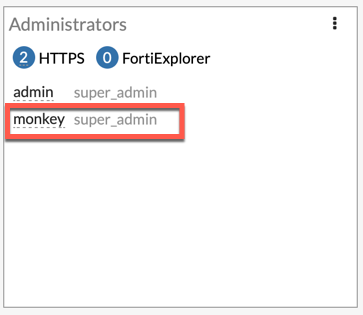
As you can see from above, ‘admin’ is still logged in from another browser (just in case), and the newly created ‘monkey’ is logged in as well.
Hope this helps
Recent posts
-

-

Have you ever had an IPS signature that continues... Full Story
-

Use case: Customer has a Split Tunnel Enabled but... Full Story
