If you've spent any time configuring user authentication on... Full Story
By Manny Fernandez
June 4, 2019
Installing Observium to Monitor SNMP enabled devices
Observium is a fantastic solution to monitor network devices. It has a map where you can enter the physical address of the location and it will display it on the map. There are two versions of Obervium; one is a paid version and the other is a “community” version. There are some features that are absent in the community version that may be useful for someone like an MSP or MSSP. The one that comes to mind is the ability to have a group of devices grouped into a location group, similar to the ADOMs of the Fortianalyzer world. I am going to install this on CentOS 7 (minimal install). Let’s get started.
Install a Linux (CentOS) VM
I am running a free ESXi version for my lab. I do not have a VCenter so I will connect straight to the host.
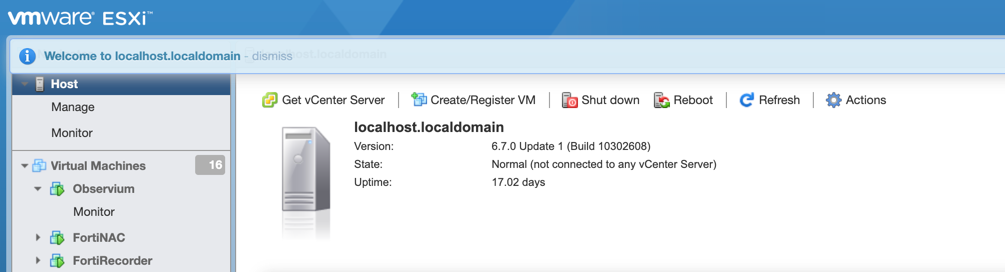
Under ‘Virtual Machines’ and to the right, click on the ‘Create/Register VM’
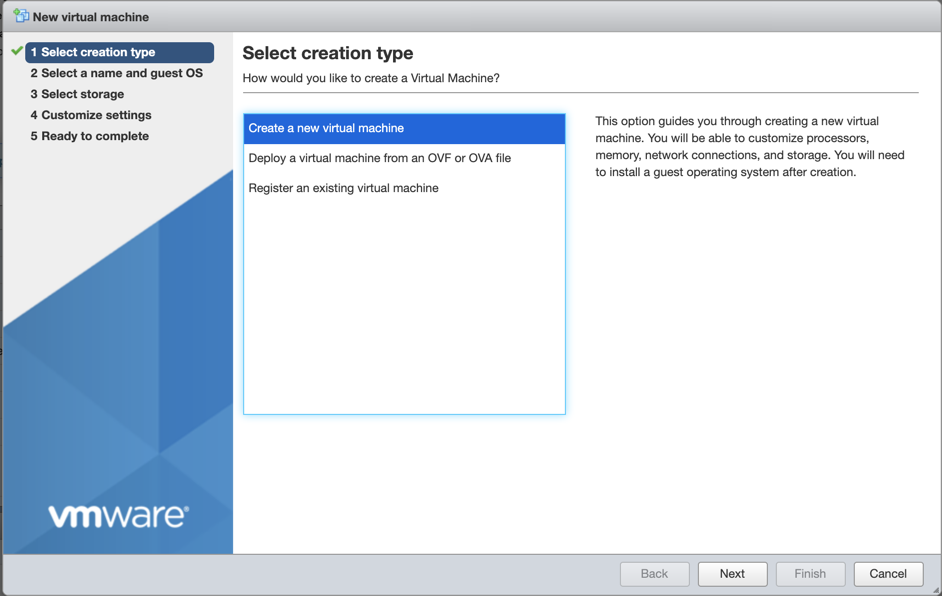
Since it is NOT an OVA or OVF file but rather an ISO image I have, choose ‘Create a new virtual machine’
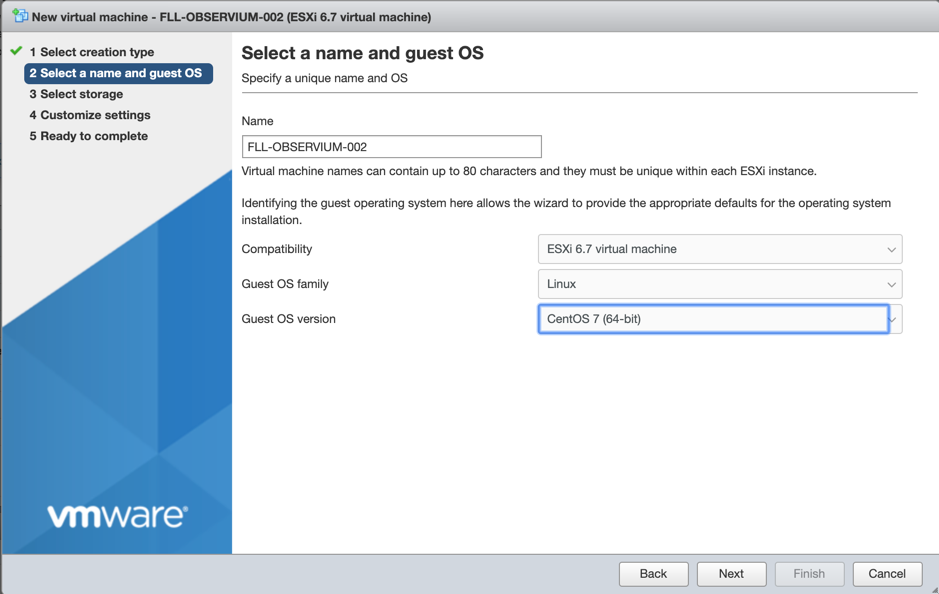
Give it a name, choose ‘Linux’ from the ‘Guest OS Family’. Finally, choose the ‘Guest OS version’ (in my case, CentOS 7 (64-bit)).
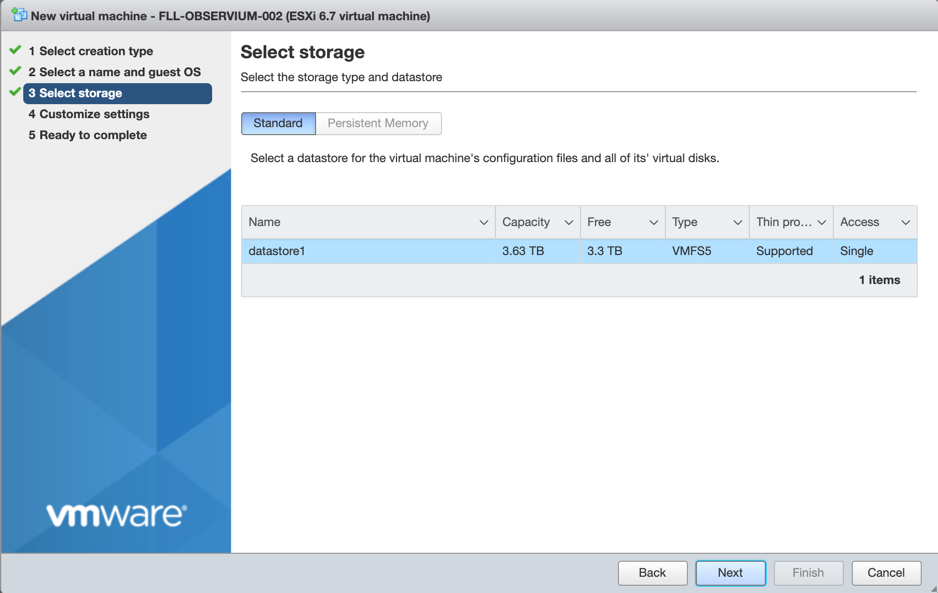
Choose your ‘datastore’, I only have one 🙁
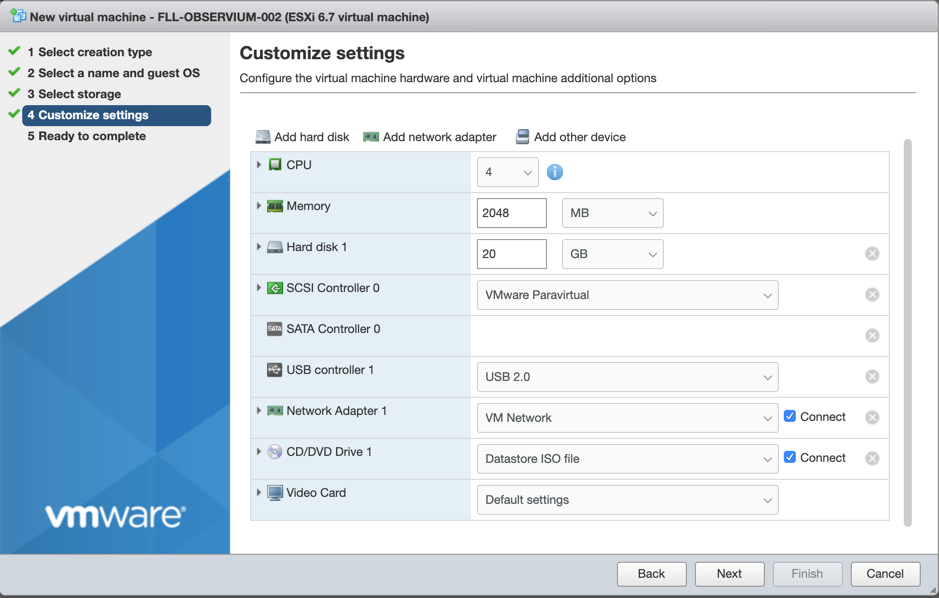
I chose ‘4 CPUs’, (2) GB of RAM and a ’20GB’ Hard Drive
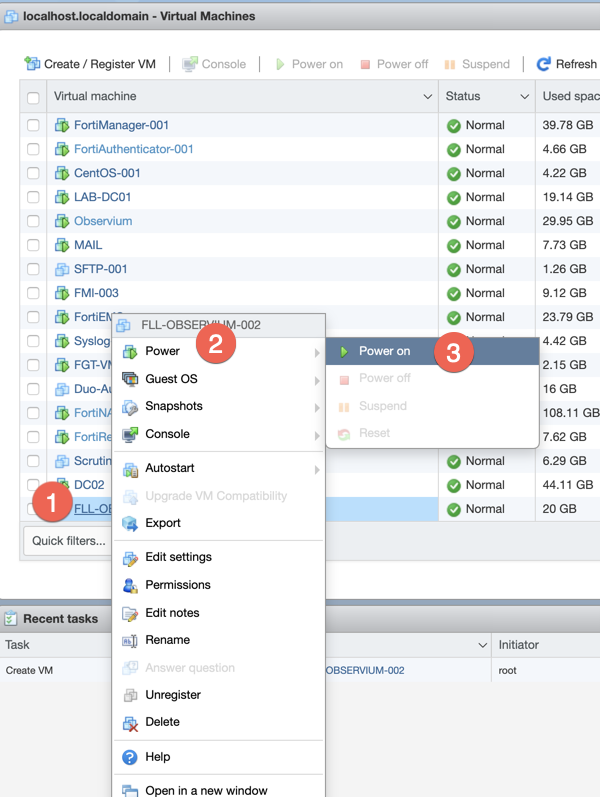
Choose the server, (FLL-OBSERVIUM-002) and ‘Right Click’, go to ‘Power’ and then choose ‘Power on’
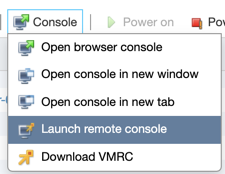
You can now click on the ‘Console’ button and I choose to use ‘Launch remote console’. Accept the certificate error and you should see the screen below.
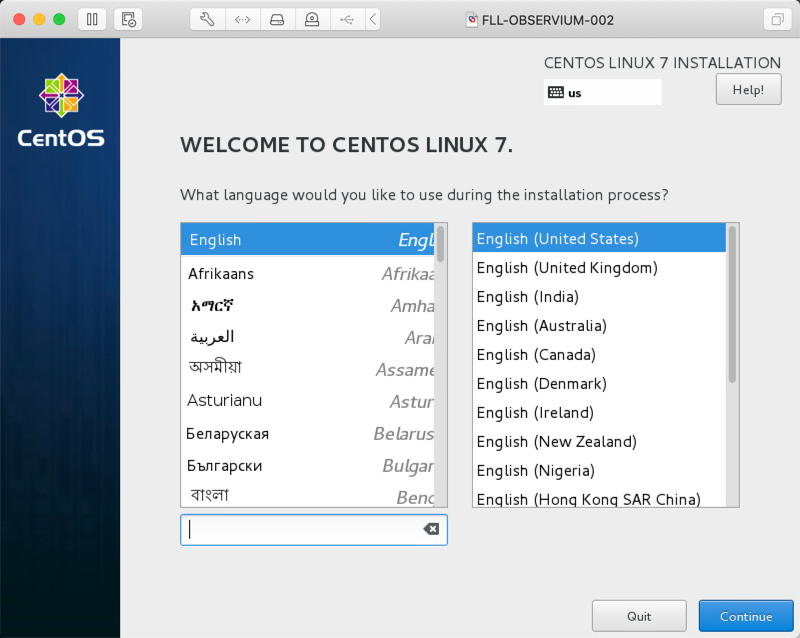
Choose your server language. In my case, I chose the defaults.
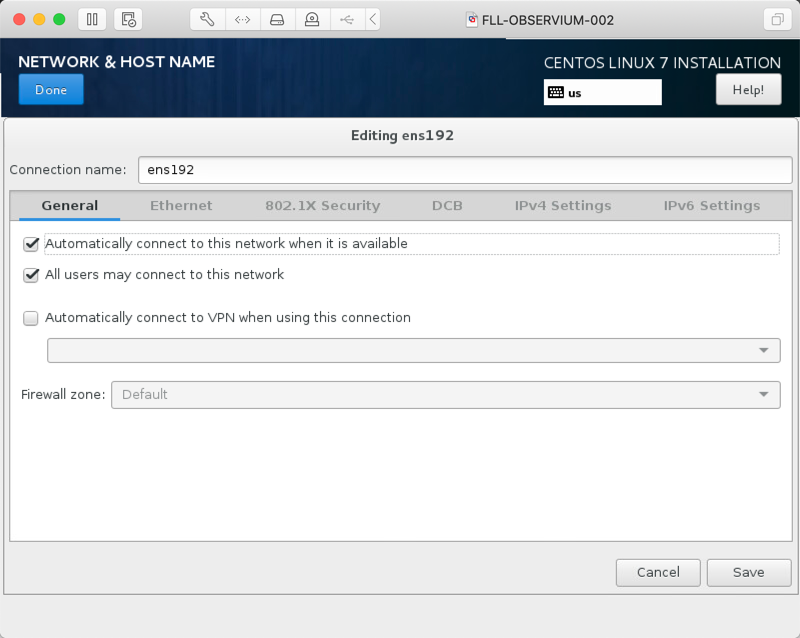
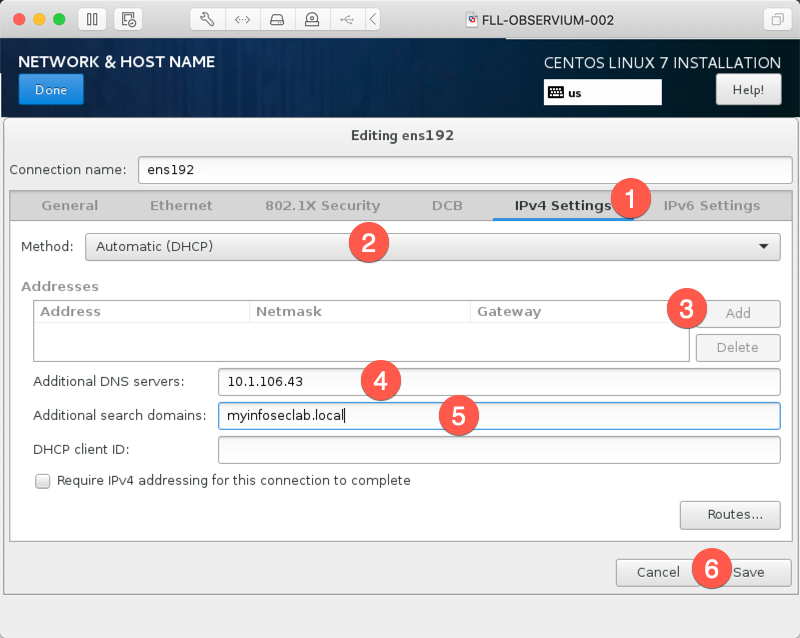
Configure your settings. Ensure that:
- Choose IPv4 Settings
- Change ‘Automatic (DHCP)’ to static
- Add an IP address, subnet mask and gateway.
- Add your DNS server(s).
- Add your search domains (suffixes)
- Then Save
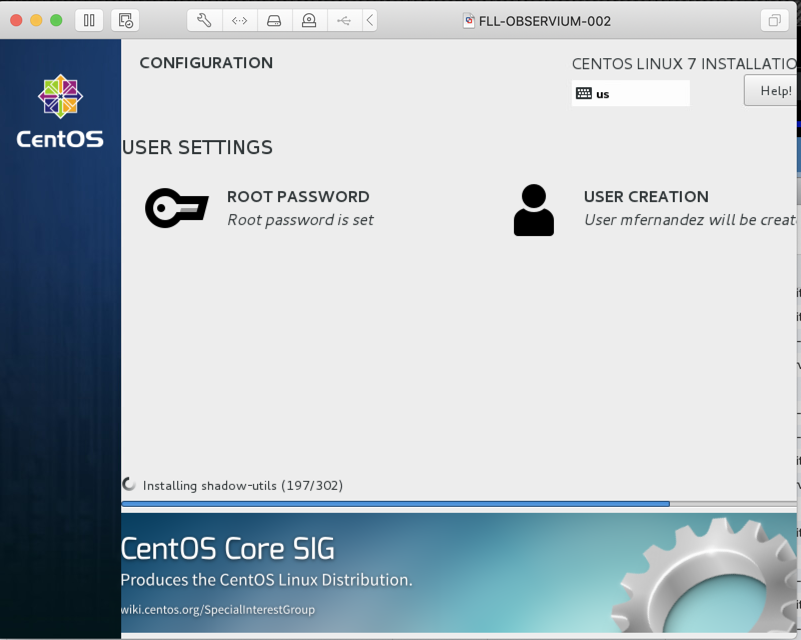
Set the ‘root’ password and create a user (optional).
Follow the prompts until you have to reboot and let the VM come up.
Relaunch the ‘Remote Console’ if needed.
Installing Observium
By default (at least the version of CentOS I installed, the minimum version), the OS does not come with the standard ‘ifconig’ commands. This is part of a package ‘net-tools’ that does not get installed bu default on this version. To see the IP assigned to your machine, type ‘ip add’. Although I instructed you to modify the IPv4 settings in the previous step, I left mine out on purpose so I can show you this step. If you already have the IP address then skip these steps.

Above you can see that I went to the ‘network-scripts’ directory ( cd /etc/sysconfig/network-scripts). When you do an ‘ls’, you will see your interface name, in my case ‘ifcfg-ens192’. I ‘cat’d’ the contents of that file above. You can see there is a lot of information there as well as some IPv6 which I am not using.
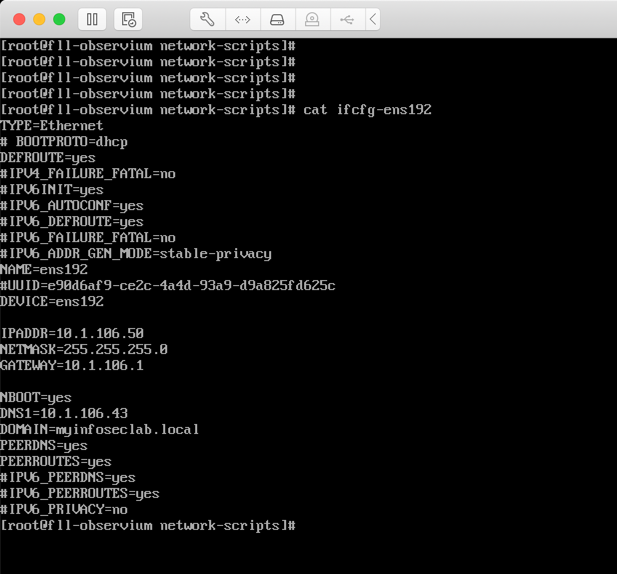
As you can see above, I added some lines and commented other out.
IPADDR=10.1.106.50
NETMASK=255.255.255.0
GATEWAY=10.1.106.1
DEFROUTE=yes
NAME=ens192
DEVICE=ens192
ONBOOT=yes
DNS1=10.1.106.43
DOMAIN=myinfoseclab.local
Above you can see the essentials for making this work.
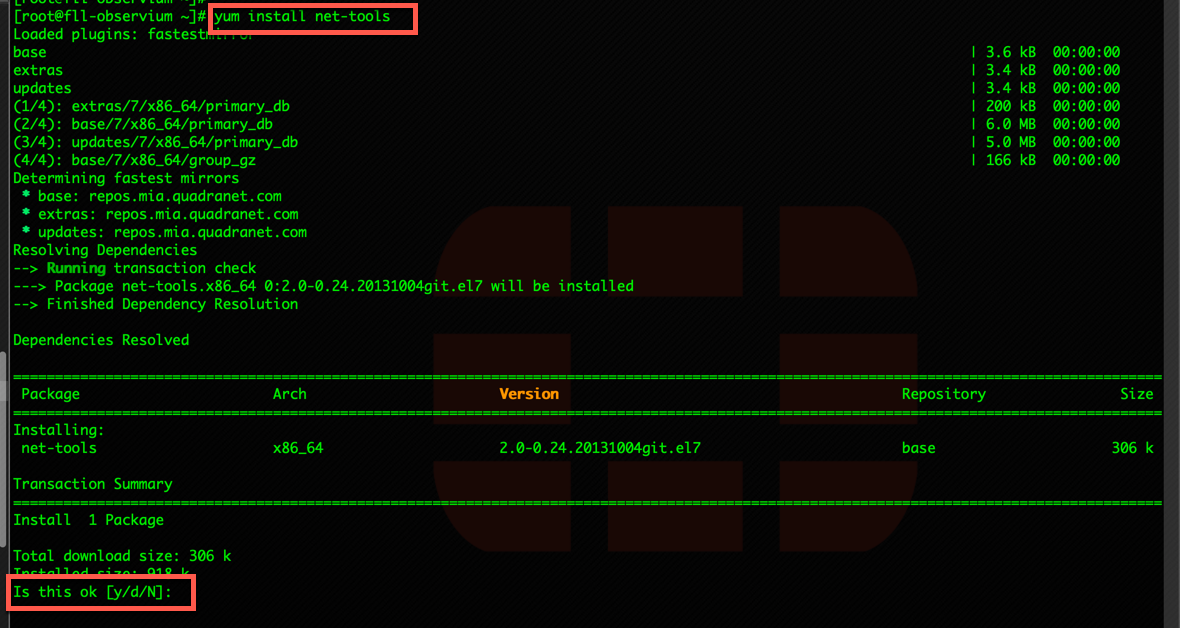
All of the package installs will follow this same MO so I will NOT be posting every screenshot of each package install. However note that when you run the ‘yum install %package-name%’ you will need to choose ‘Y’ to accept
Let’s start with the basic tools we are going to need.
yum install net-tools
yum install tcpdump
yum install wget
Net-tools, as stated earlier, give you the ‘ifconfig’ commands and other commands needed. Tcpdump is a packet-capture utility that is very helpful when troubleshooting connectivity problems “When in doubt, sniff it out” ~ Me. And finally ‘wget’ which allows you to download via the CLI.
(1) You will need to install openssh, enable it, and start it.
yum install openssh
systemctl enable sshd
systemctl start sshd
(2) You will need additional repositories (sites that provide Linux packages outside of the distribution). These are, REMI, OpenNMS and EPEL repositories.
yum install https://dl.fedoraproject.org/pub/epel/epel-release-latest-7.noarch.rpm
yum install http://yum.opennms.org/repofiles/opennms-repo-stable-rhel7.noarch.rpm
yum install http://rpms.remirepo.net/enterprise/remi-release-7.rpm
(3) Install yum-utils
yum install yum-utils
(4) Enable PHP 7.2 from the REMI repository as default
yum-config-manager --enable remi-php72
(5) Now we are going to update all the packages that have been released since the release of the distro you installed.
yum update
(6) Now we will install the necessary Observium requirements
yum install wget.x86_64 httpd.x86_64 php.x86_64 php-opcache.x86_64 php-mysql.x86_64 php-gd.x86_64 \
php-posix php-pear.noarch cronie.x86_64 net-snmp.x86_64 net-snmp-utils.x86_64 \
fping.x86_64 mariadb-server.x86_64 mariadb.x86_64 MySQL-python.x86_64 rrdtool.x86_64 \
subversion.x86_64 jwhois.x86_64 ipmitool.x86_64 graphviz.x86_64 ImageMagick.x86_64 \
php-sodium.x86_64
(7) If you want to be able to monitor libvirt virtual machines, install libvirt:
yum install libvirt.x86_64
(8) We will now create a directory for Observium and move ourselves into that directory.
mkdir -p /opt/observium && cd /opt
(9) Download the latest .tar.gz of Observium and unpack:
wget http://www.observium.org/observium-community-latest.tar.gz
tar zxvf observium-community-latest.tar.gz
(10) Now we need to start “MySQL/MariaDB” and configure it to be run at startup.
systemctl enable mariadb
systemctl start mariadb
(11) Set the MySQL root password:
/usr/bin/mysqladmin -u root password 'some-complex-password'
NOTE: you need to have the ‘single-quotes’ at each end
(12) Now we will create the MySQL database:
mysql -u root -p
mysql> CREATE DATABASE observium DEFAULT CHARACTER SET utf8 COLLATE utf8_general_ci;
mysql> GRANT ALL PRIVILEGES ON observium.* TO 'observium'@'localhost' IDENTIFIED BY '<observium db password>';
mysql> exit;
(13) Change into the new install directory:
cd observium
(14) Copy the default configuration file and edit it for your system:
cp config.php.default config.php
(15) Edit config.php. Change the options to reflect your installation. You must change the MySQL username and password contained in db_user and db_pass. Most other settings can be left as default.
vi config.php
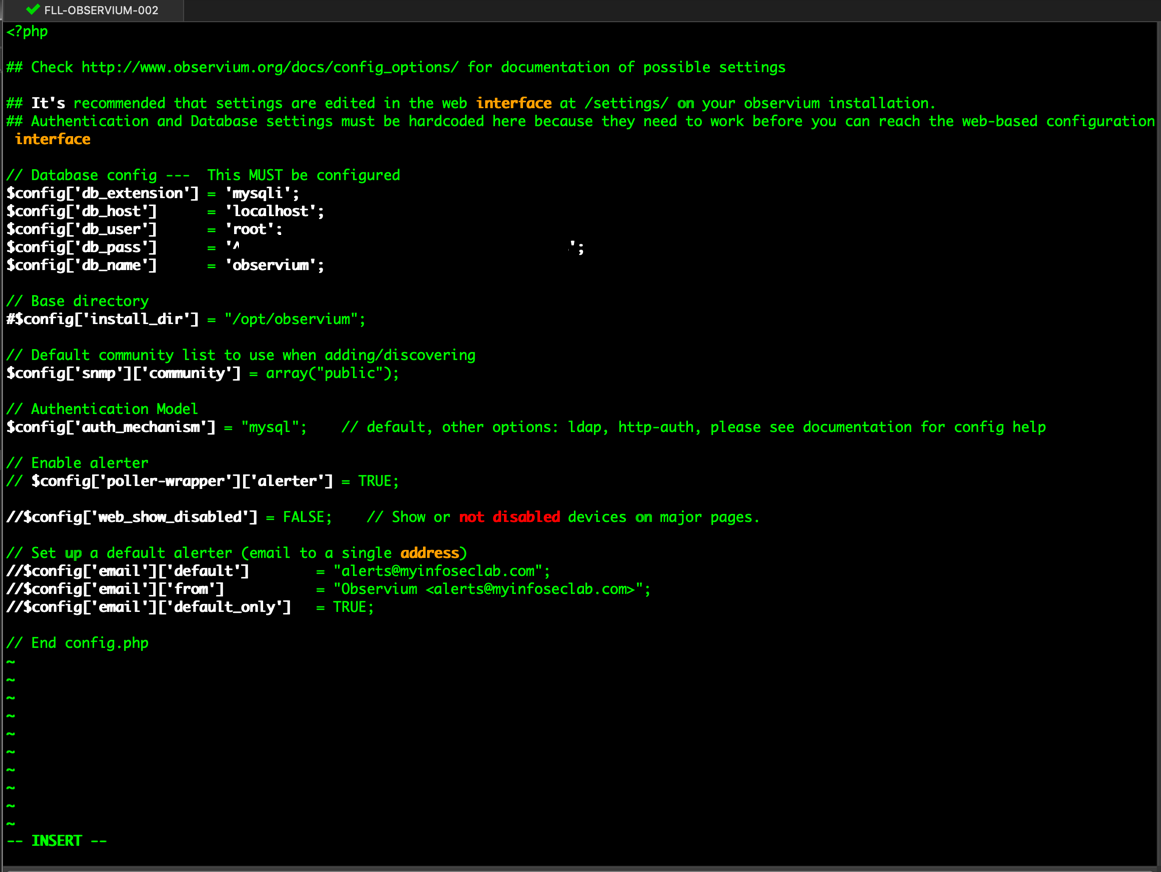
Note: you require the single quotes and the semi-colon at the end of each line.
(16) Run the discovery.php script with the upgrade switch -u in order to insert the initial MySQL schema
./discovery.php -u
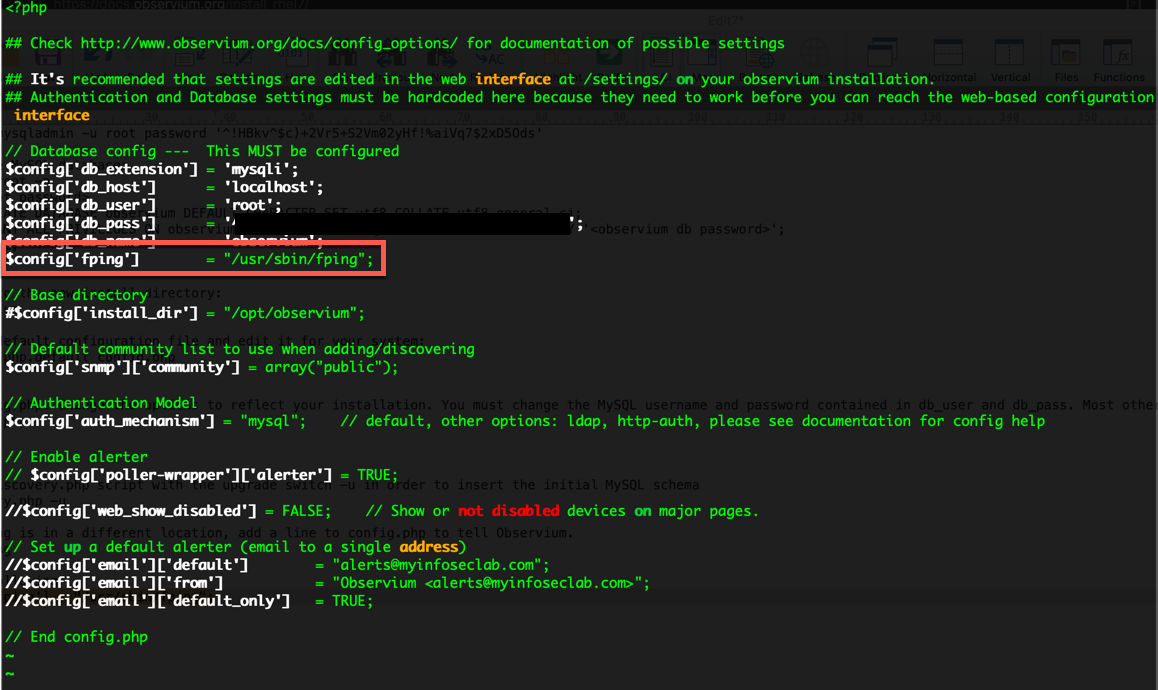
(17) Since Fping is in a different location, add a line to config.php to tell Observium.
which fping
(18) Add the following
$config['fping'] = "/usr/sbin/fping";
(19) We need to either disable SELinux or modify it. You can do this temporarily with the following command:
setenforce 0
(20) We need to disable SELinux permanently, so you also need to change /etc/selinux/config so that the SELINUX option is set to permissive
vi /etc/selinux/config
SELINUX=permissive
(21) Create the rrd directory to store RRDs in and change ownership to the apache user and group.
mkdir rrd
chown apache:apache rrd
(22) If the server will be running only Observium, change /etc/httpd/conf.d/observium.conf and add the following to the end :
vi /etc/httpd/conf.d/observium.conf

<VirtualHost *>
DocumentRoot /opt/observium/html/
ServerName observium.domain.com
CustomLog /opt/observium/logs/access_log combined
ErrorLog /opt/observium/logs/error_log
<Directory "/opt/observium/html/">
AllowOverride All
Options FollowSymLinks MultiViews
Require all granted
</Directory>
</VirtualHost>
(23) Create logs directory for apache
mkdir /opt/observium/logs
chown apache:apache /opt/observium/logs
(24) Add a first user, use level of 10 for admin:
cd /opt/observium
./adduser.php admin <password> 10
(25) Add a first device to monitor:
./add_device.php 10.1.106.1 temp v2c
(26) Do an initial discovery and polling run to populate the data for the new device:
./discovery.php -h all
./poller.php -h all
(27) Add cron jobs, create a new file /etc/cron.d/observium with the following contents:
Cron Usage
The below example includes a username, so will only work in /etc/crontab or /etc/cron.d/observium. It will NOT work in a user crontab edited with crontab -e without removing the username.
vi /etc/cron.d/observium
# Run a complete discovery of all devices once every 6 hours
33 */6 * * * root /opt/observium/discovery.php -h all >> /dev/null 2>&1

# Run automated discovery of newly added devices every 5 minutes
*/5 * * * * root /opt/observium/discovery.php -h new >> /dev/null 2>&1

# Run multithreaded poller wrapper every 5 minutes
*/5 * * * * root /opt/observium/poller-wrapper.py >> /dev/null 2>&1

# Run housekeeping script daily for syslog, eventlog and alert log
13 5 * * * root /opt/observium/housekeeping.php -ysel

# Run housekeeping script daily for rrds, ports, orphaned entries in the database and performance data
47 4 * * * root /opt/observium/housekeeping.php -yrptb
(28) And reload the cron process:
systemctl reload crond
(29) Let’s set the httpd to startup when we reboot the server:
systemctl enable httpd
systemctl start httpd
Tip: If you need to re-scan or force a scan when you first add the device.
cd /opt/observium
./discovery.php -h <IPADDRESS>
Command Line Testing
Testing snmp v3 from your Observium installation
snmpwalk -v3 -l authPriv -u -a SHA -A "" -x AES -X ""
Adding devices from the GUI
Point your browser to http://%IP-Of-Your-Install%
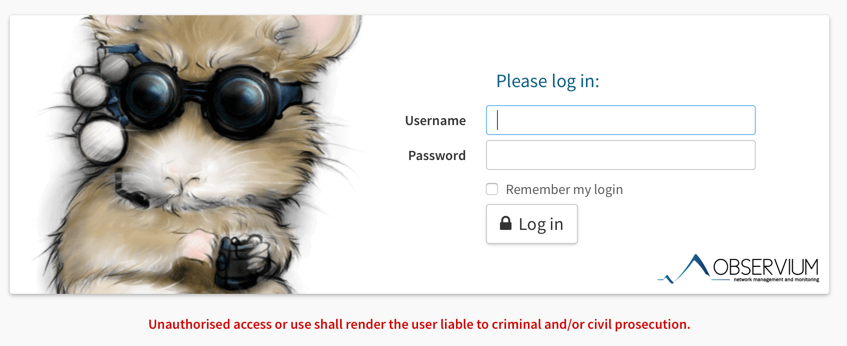
Log in with the credentials you created in step 11.
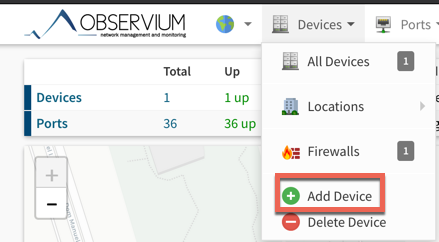
Go to ‘Devices’ then ‘Add Device’
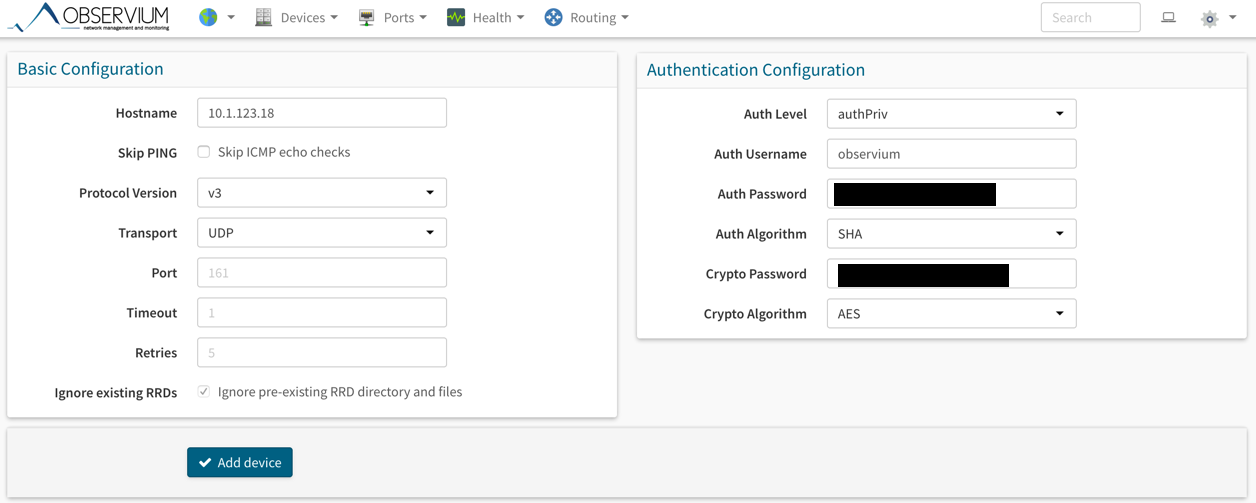
Add the IP address of the device you want to discover. Change the ‘Protocol Version’ to ‘v3’. Add the proper information from a username, password, and algorithm, then ‘Add Device’
NOTE: If you do not have ping enabled or it fails at first, try enabling the ‘Skip ICMP echo checks’
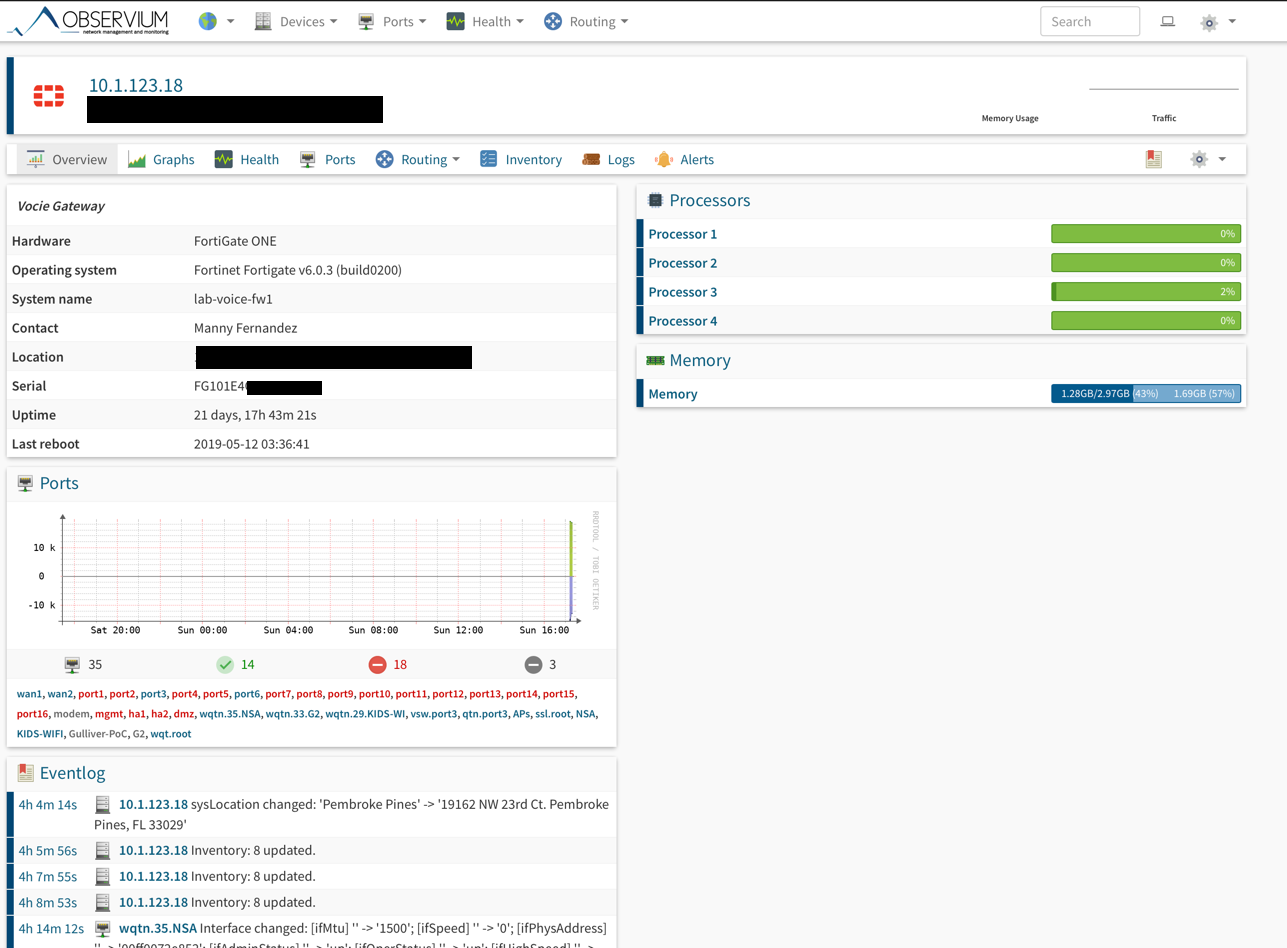
Once the device is discovered, you will be able to see the graphs and information about the device. The gear icon on the second row (the top is for global while the bottom one is the device you are viewing) will allow you to enter the physical address so it will show up in your ‘Overview’ section. There is a small icon with a red ribbon, this is a notes section.
Getting API Key for Google Maps

From inside Observium, you can go to the top gear, choose ‘Global Settings’ then ‘Edit’
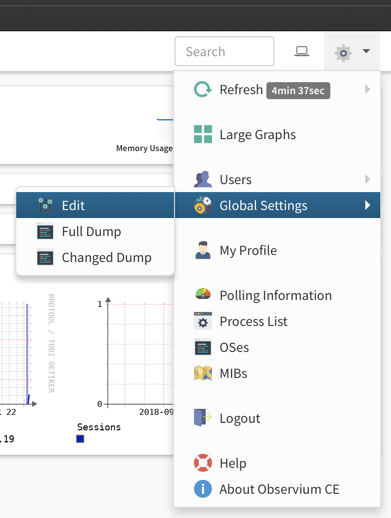
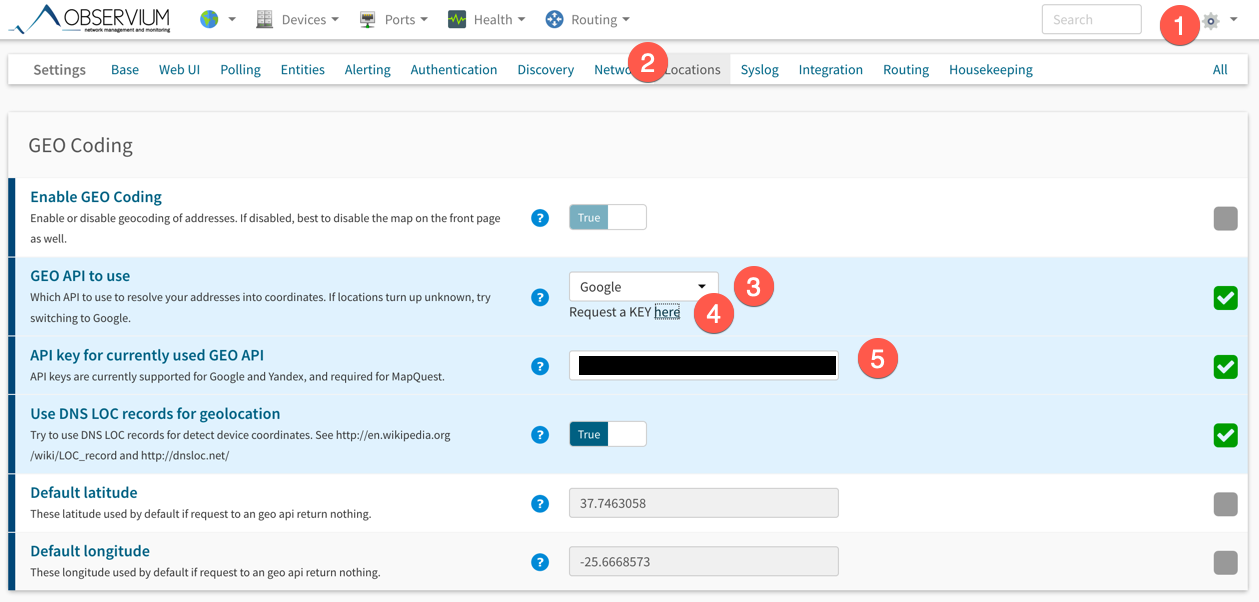
- Top Gear (Global Settings)
- Location Section – Here is where you will define configuration specific to the location services, including the API Key for Google or any of the Map services Observium supports.
- Here you can select from Google, OpenStreetMap, Yahoo, Yandex or MapQuest
- The link to request the API key from the above selection.
- API Key
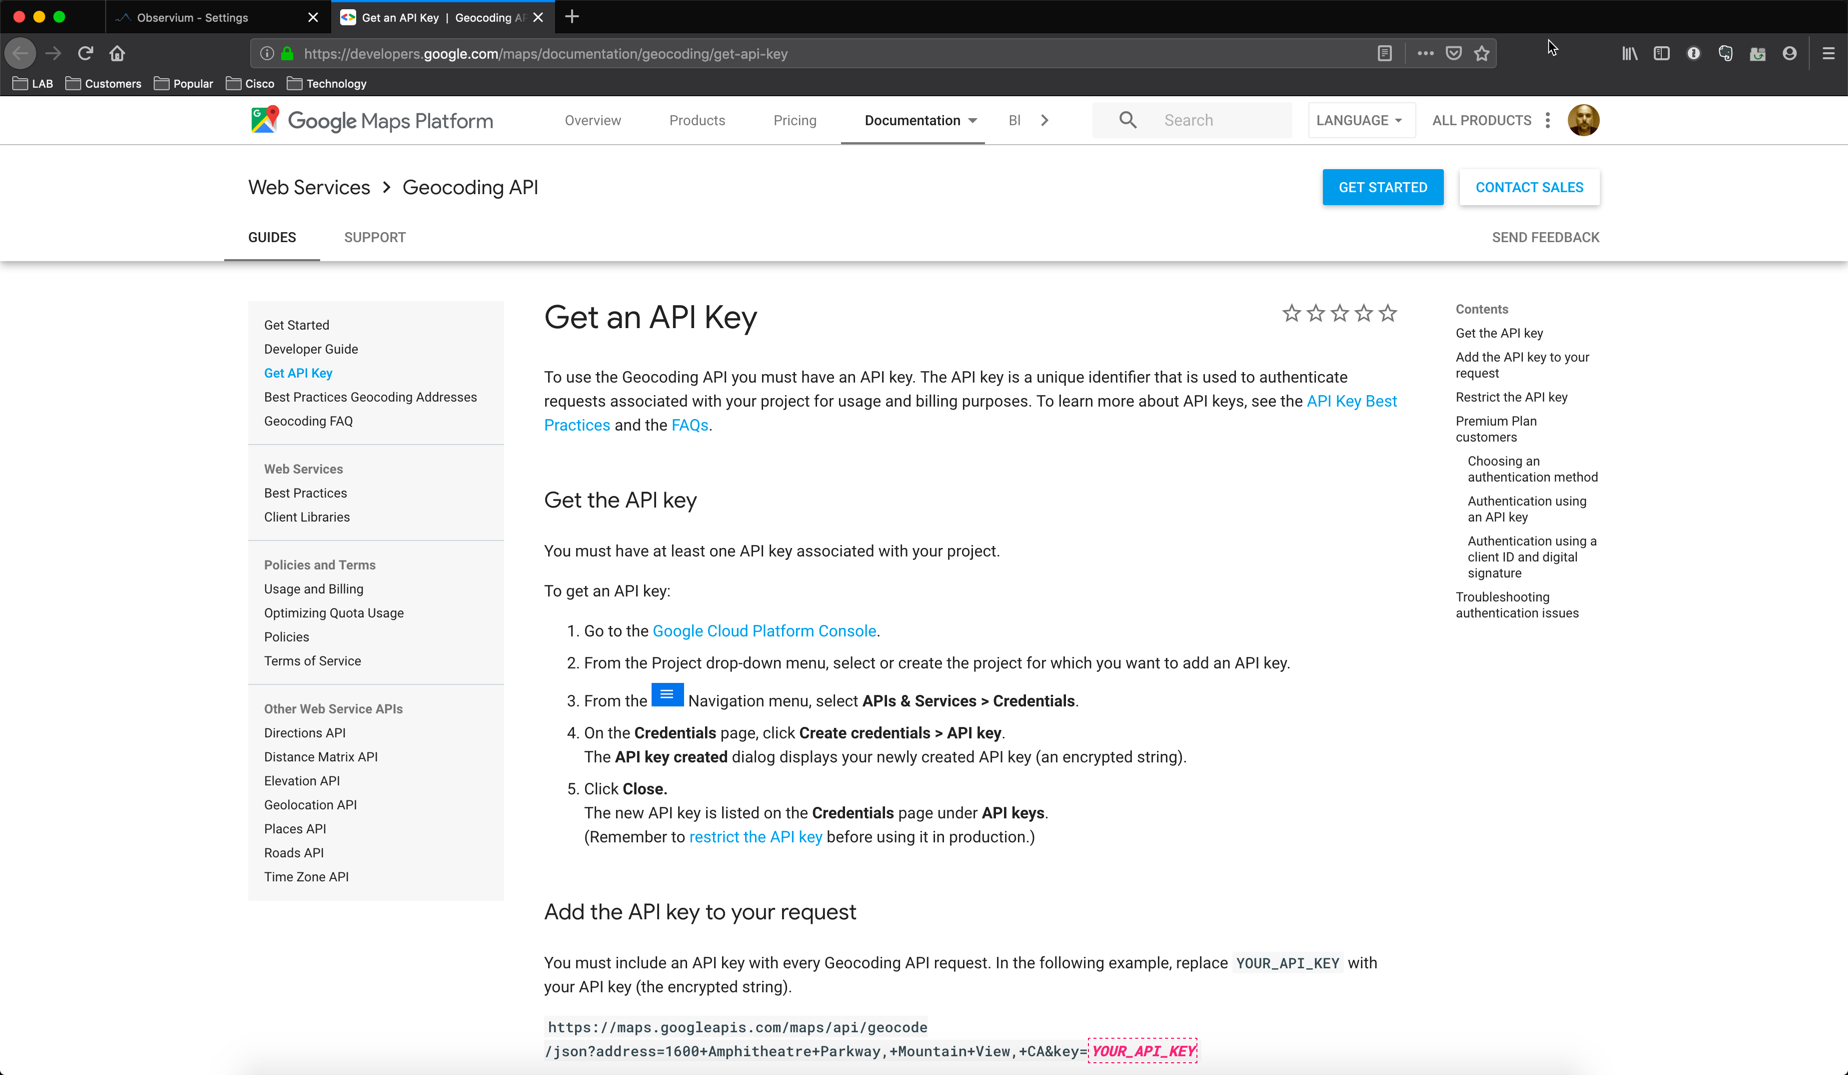
You can not click on the link that will take you to the Google API request info page. Here is that link.
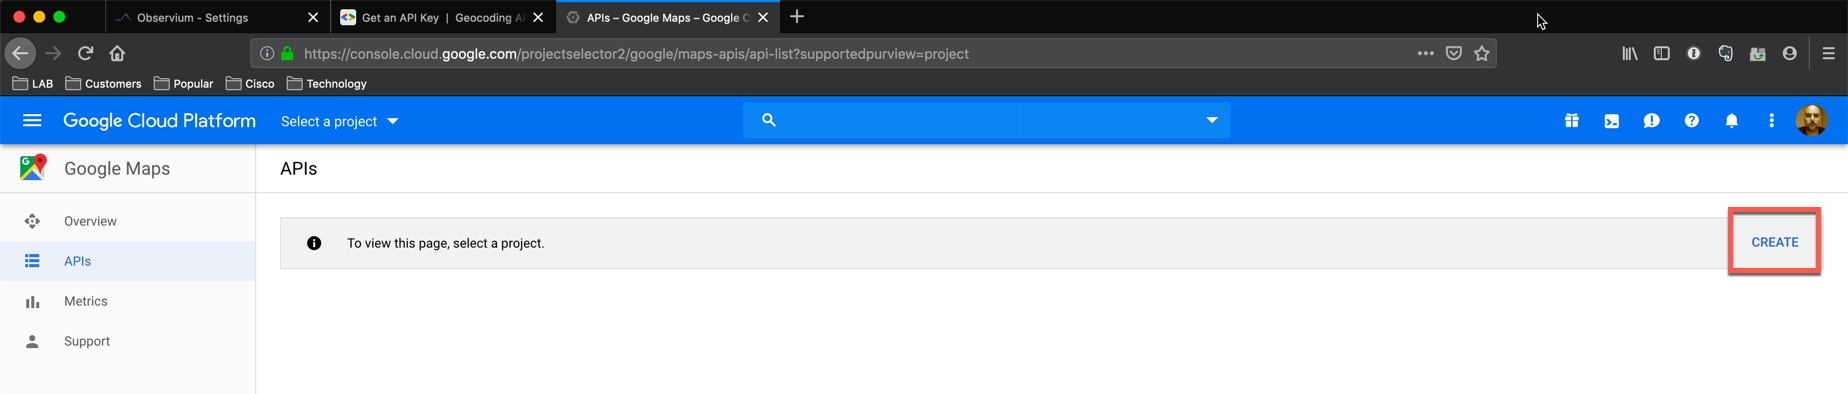
Hit the ‘Create’ button.

From the ‘Navigation Icon’ Choose ‘APIs & Services’ then ‘Credentials’
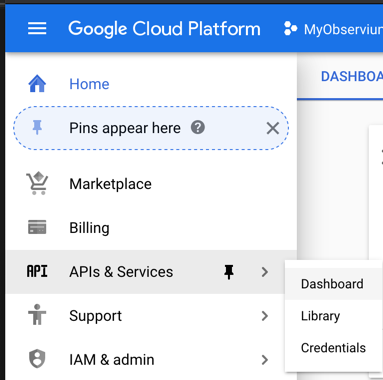
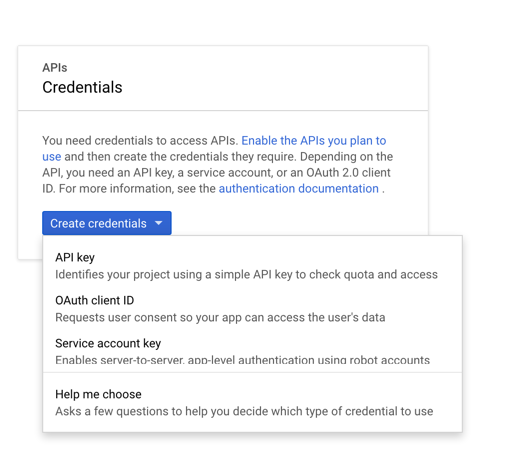
Now choose ‘API Key’

An API key will be generated. I recommend that you ‘Restrict Key’ to either an application or an IP address. If you are running in a cloud environment where you may have dynamic IPs, you should research the risks with IP changes.
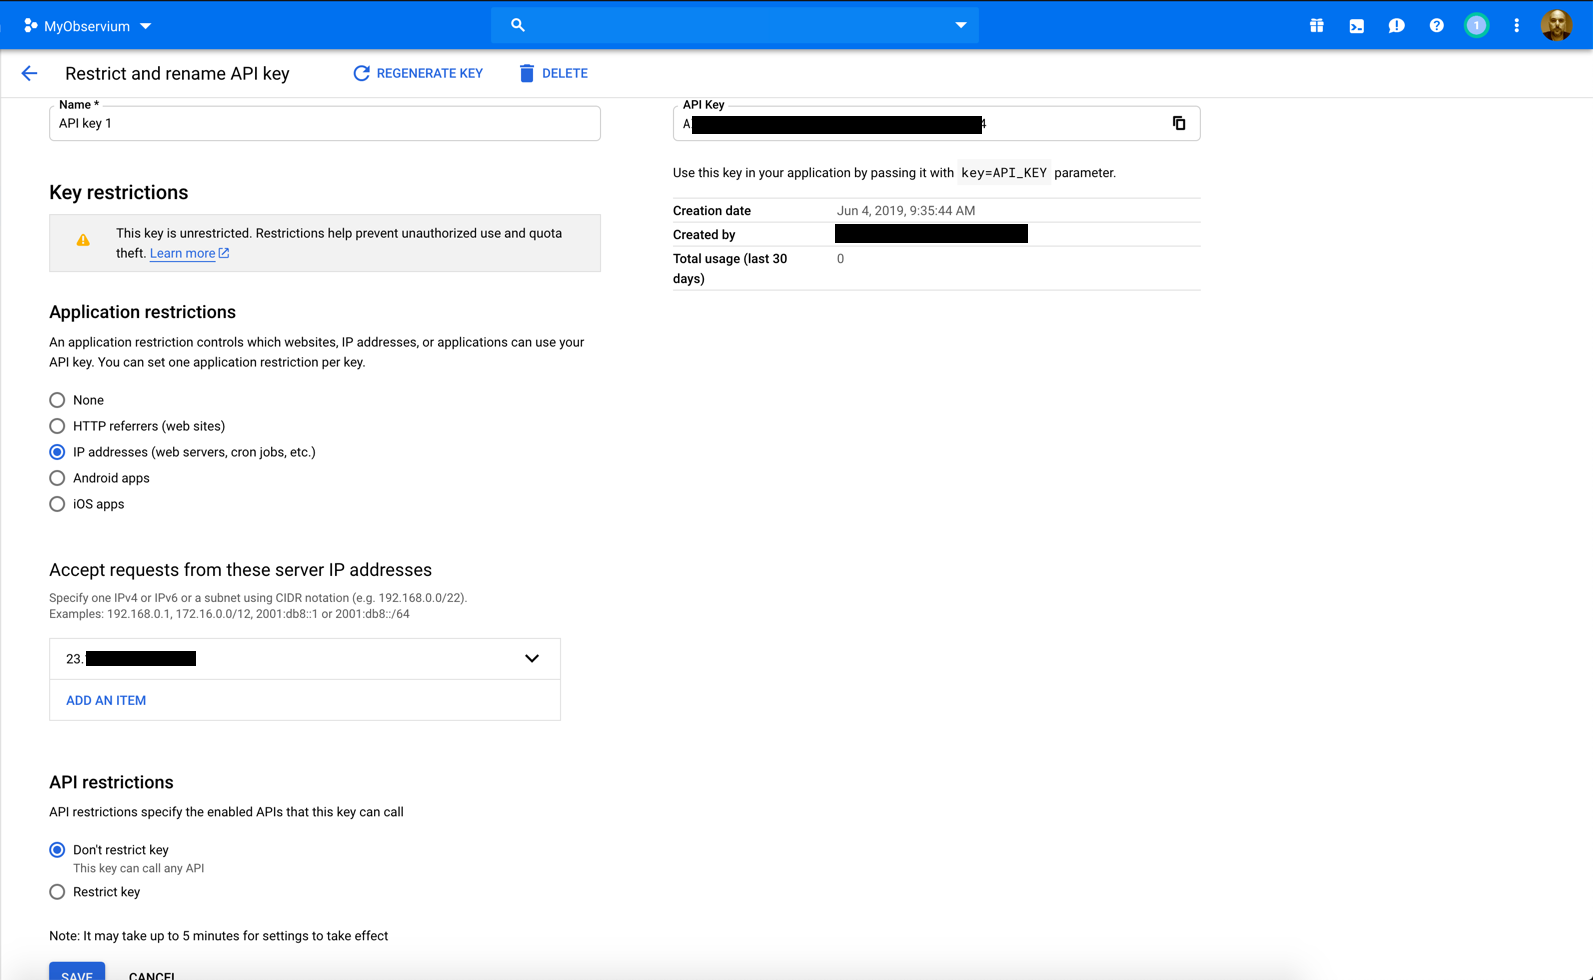
Above, we can see that I restricted via IP address.

Now go back to your Observium GUI (go to the top gear, choose ‘Global Settings’ then ‘Edit’) and choose ‘Locations’
Enter you API Key and save.
Additional Options
Observium can support LDAP and RADIUS authentication for administration. And we can change the Apache config to support TLS. (I will have a sepatate post with some of these features).
Hope this helps.
Recent posts
-

-

DNS is one of those technologies that quietly underpins... Full Story
-

BGP issues on FortiGate firewalls usually trace back to... Full Story
-

Every time your laptop talks to your router, a... Full Story
-

If you've spent any time configuring NAT on a... Full Story
-

If you have spent any time configuring firewall policies... Full Story
-

High availability on FortiGate is one of those features... Full Story
-

If you've configured SD-WAN on a FortiGate, you've almost... Full Story
-

FortiLink is the management protocol that turns a FortiSwitch... Full Story
-

FortiSwitches are pretty rock solid from Mean Time Between... Full Story
-

This is a quicky tip. Have you ever gone... Full Story
-

DNS is one of those quiet pieces of internet... Full Story
-

This article is an updated version of the previous... Full Story
-

You will add ns2 as a secondary (slave) BIND9... Full Story
-

In the process of deploying my lab, I needed... Full Story
-

RFC 8805, used to be known as Self-Correcting IP... Full Story
-

Years back, I wrote an article about certificate pinning. ... Full Story
-

FortiGates have the ability to send alerts to Microsoft... Full Story
-

In this post, I am going to walk through... Full Story
-

Troubleshooting VoIP on a FortiGate can feel like trying... Full Story
-

Prior to FortiOS 7.0, there were three commands to... Full Story
-

In this post, I am going to go over... Full Story
-

What we are going to do: We are going... Full Story
-

Choosing between FGCP (FortiGate Clustering Protocol) and FGSP (FortiGate... Full Story
-

Creating a VLAN on macOS (The "Pro" Move) A... Full Story
-

This blog post explores the logic behind how macOS... Full Story
-

Pretty Fly for a Wi-Fi Tell My Wi-Fi Love... Full Story
-

Part of my daily gig is creating BoMs (Bill-of-Materials)... Full Story
-

ICMP introduces several security risks, but careful filtering, rate... Full Story
-

The command diag debug application dhcps -1 enables full... Full Story
-

In the world of FortiOS, execute tac report is... Full Story
-

LLDP; What is it The Link Layer Discovery Protocol... Full Story
-

What it actually does When you run diagnose fdsm... Full Story
-

Monkey Bites are bite-sized, high-impact security insights designed for... Full Story
-

I have run macOS in macOS with Parallels but... Full Story
-

Don't be confused with my other FortiNAC posts where... Full Story
-

This is the third session in a multi-part article... Full Story
-

Today I was configuring key-based authentication on a FortiGate... Full Story
-

Netcat, often called the "Swiss Army knife" of networking,... Full Story
-

At its core, IEEE 802.1X is a network layer... Full Story
-

In case you did not see the previous FortiNAC... Full Story
-

This is our 5th session where we are going... Full Story
-

Now that we have Wireshark installed and somewhat configured,... Full Story
-

The Philosophy of Packet Analysis Troubleshooting isn't about looking... Full Story
-

Have you ever wanted to do some testing on... Full Story
-

Ask ten engineers to define "a network" and you... Full Story
-

1. Executive Summary Objective: This guide turns a FortiAuthenticator... Full Story