There are many options when troubleshooting in FortiGate firewalls. ... Full Story
By Manny Fernandez
April 20, 2019
Secure LDAP and AD Password Change via Forticlient
First of all, I wanted to give credit to a good friend of mine (Brian Modlin) that hit me up with this question and since I was busy as hell, he figured it out and told me about it. I recreated it in my lab and here it is.
First, we are going to configure Secure LDAP (LDAPS) to communicate to our lab DC, then we will make the modifications to permit the password expiring message and then enable the password change.
Secure LDAP (LDAPS)
For this step, we will need to connect to the Domain Controller (of CA server).
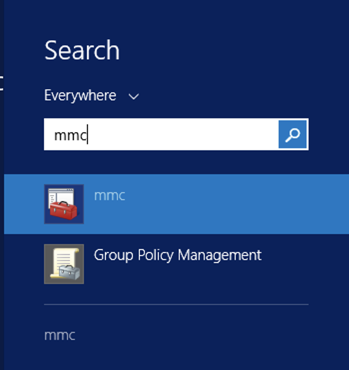
Go to run, then choose ‘mmc‘ and hit enter.
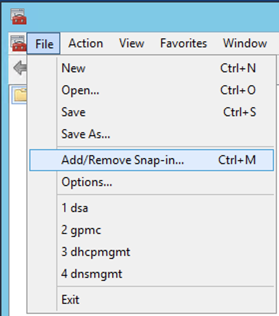
You are going to want to ‘Add/Remove Snap-in…‘ or CTRL M
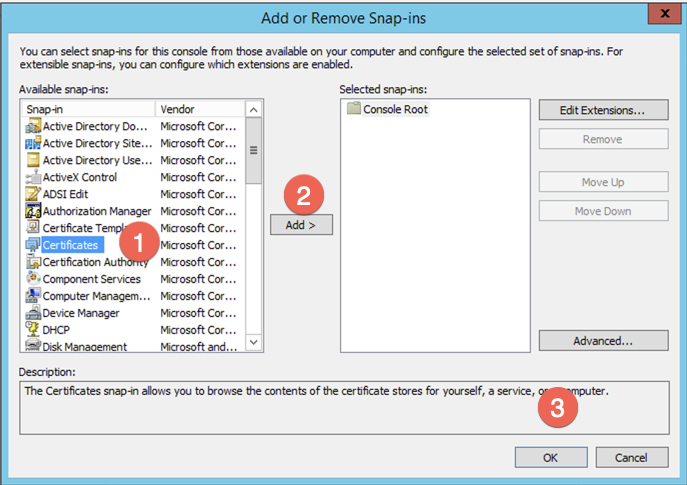
Next we are going to choose (1) ‘Certificates‘ then click the (2) ‘Add‘ button, and then the (3) ‘OK‘.
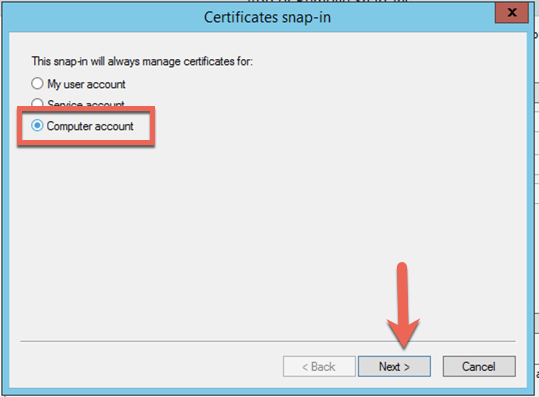
Ensure that you choose ‘Computer Account‘ and then ‘Next‘
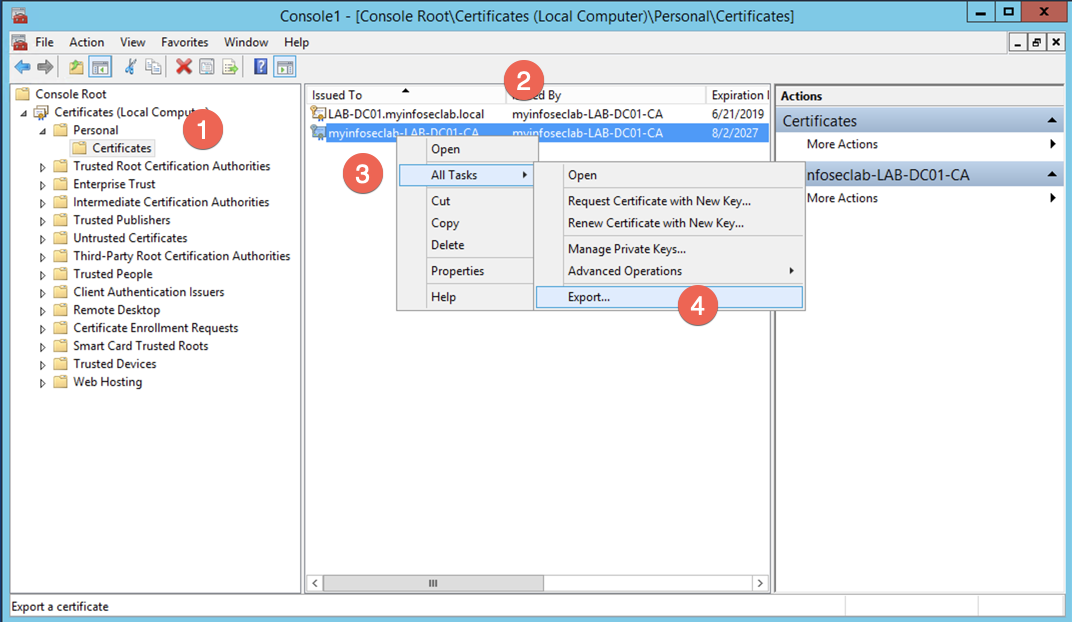
Select (1) ‘Personal‘, ‘Certificate‘ (2) Choose your CA certificate, (3) Right Click on the certificate and choose ‘All Tasks‘ Then choose (4) ‘Export‘.
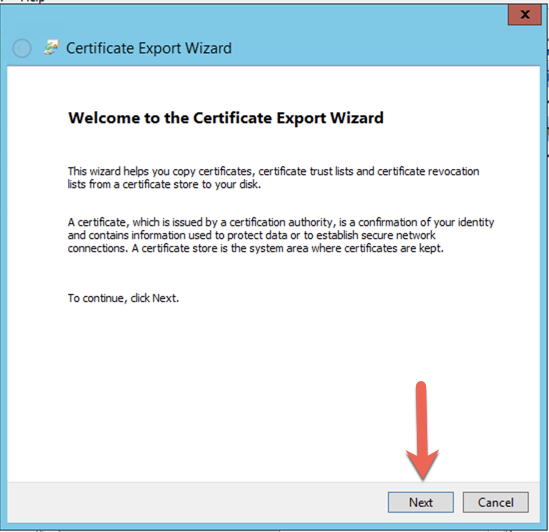
If you are seeing the above screen, then you are doing fine. Hit ‘Next‘.
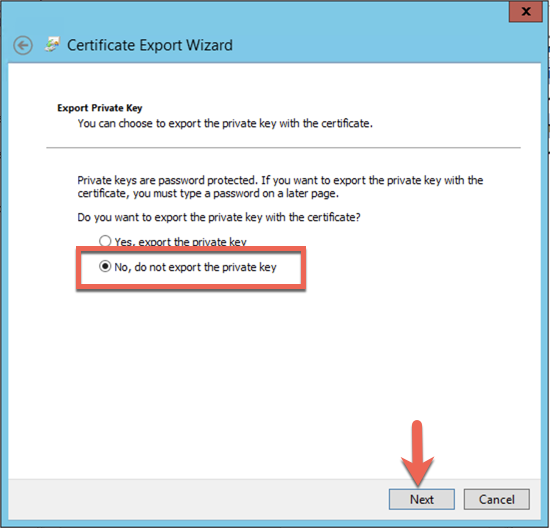
Choose ‘No, do not export the private key‘ and choose ‘Next‘
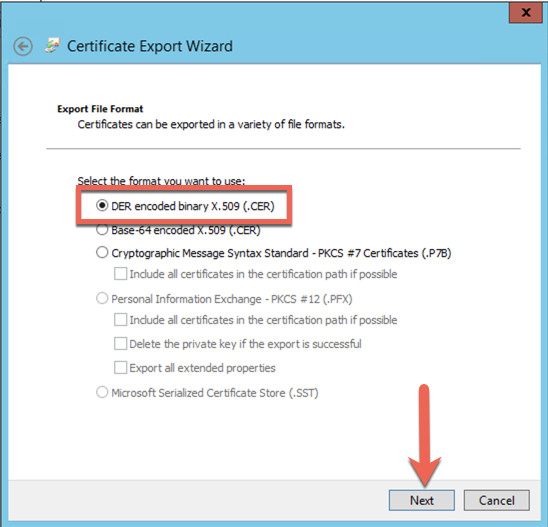
It should default to ‘DER‘ but if not, choose it and hit ‘Next‘
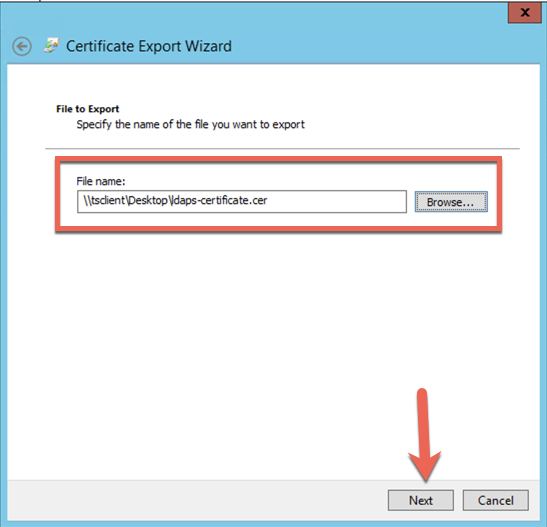
Choose the path and file name you want to use and hit ‘Next‘
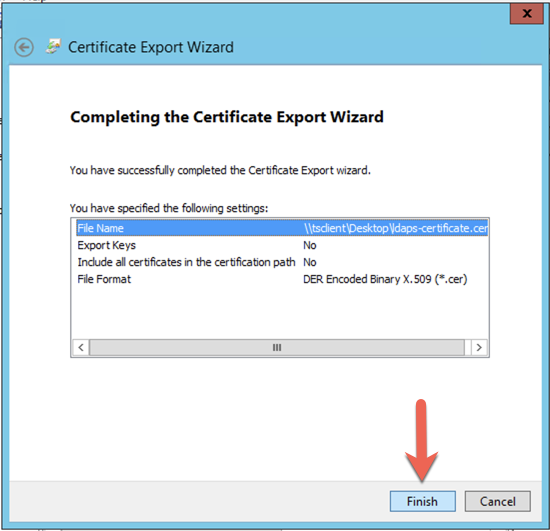
Now choose ‘Finish‘
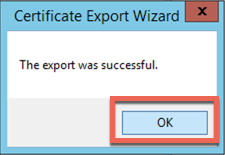
Once you get ‘The export was successful‘ hit the ‘OK‘ button.
Importing certificate into Fortigate
Log into your Fortigate.

NOTE: If you have not already done so, navigate to ‘System‘ then ‘Feature Visibility‘ and ensure you have ‘Certificates‘ selected.
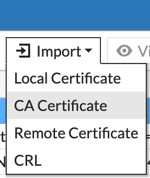
Under the ‘Certificates‘ section, choose ‘Import‘ then ‘CA Certificate‘ Once the certificate is imported you can rename the certificate into something meaningful.
LAB-FW-01 # config vpn certificate ca
LAB-FW-01 (ca) # rename CA_Cert_1 to LDAPS-CA
LAB-FW-01(ca) # end
Creating the LDAPS Profile
Now we are going to configure the Fortigate to use the certificate we exported and the Domain Controller to do authentication. Note, you will need to have a ‘Domain Admin’ service account ready to go for this.
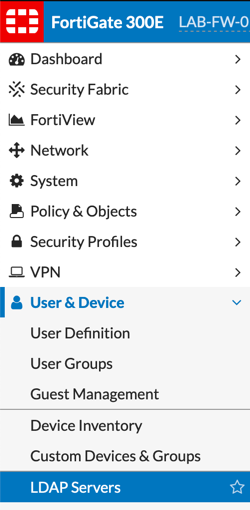
Navigate to ‘Users & Device‘ then choose ‘LDAP Servers‘ then choose ‘Create New‘
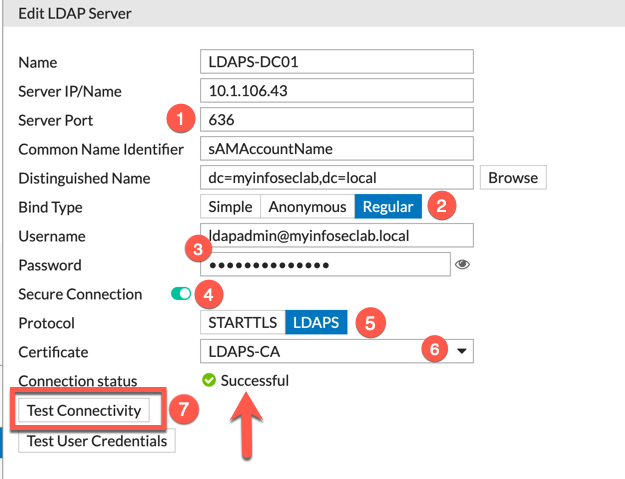
The screenshot above is busy, so lets unpack it:
Aside from entering the Name and IP Address for your Domain Controller, you will need to set the (1) ‘Server Port‘ to ‘636‘. Change the ‘Common Name Identifier‘ to ‘sAMAccountName‘ (YES IT IS CASE SENSITIVE). Then choose (2) ‘Regular‘ as the ‘Bind Type‘, (3) enter the service account and password (you can use the @domain or the LDIF format (e.g. cn=X,dc=y,dc=com), I think this one is easier though), (4) Tick the ‘Secure Connection‘ button. Next choose the (5) ‘LDAPS‘ under ‘Protocol‘, next choose the drop-down and choose the (6) Certificate we imported and renamed (if you renamed it). Test the connectivity by clicking (7) ‘Test Connectivity‘ and look for the ‘Successful‘ .
Creating the LDAPS Group
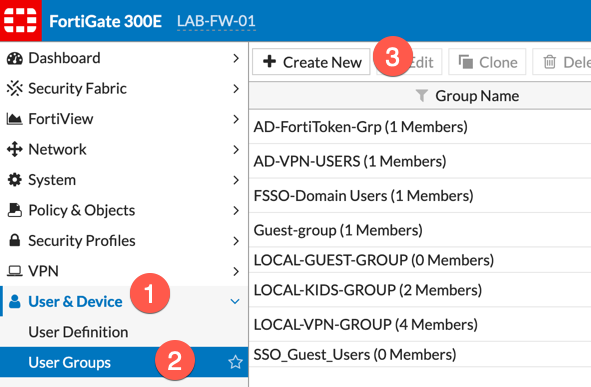
Now we will create the Secure LDAP group. Navigate to (1) ‘User & Device‘ and choose (2) ‘User Groups’, then (3) ‘Create New‘.
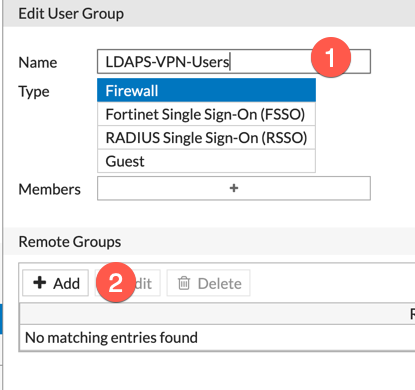
Give the groups a (1) ‘Name‘ then go down to the ‘Remote Groups‘ and choose (2) ‘Add‘
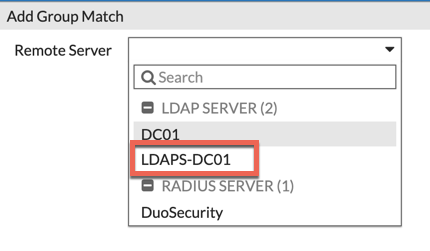
Drop-down and choose ‘LDAPS-DC01‘ (obviously choose the name of the LDAP server you created).

Choose your (1) Group Name and hit the (2) ‘search button‘, then select the group name and right-click on it.
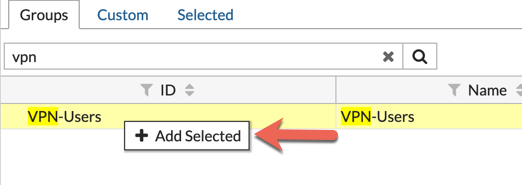
When you right-click, you will see the ‘Add Selected‘… click it.
Modifying the VPN Configuration
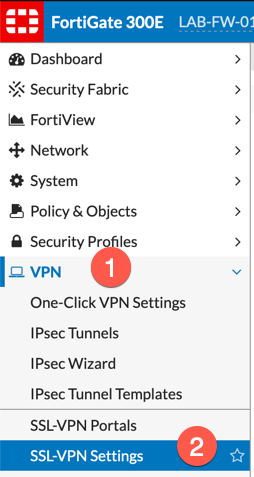
Navigate to (1) ‘VPN‘, then choose (2) ‘SSL-VPN Settings‘

Under the ‘Authentication/Portal Mappings‘ choose ‘Create New‘
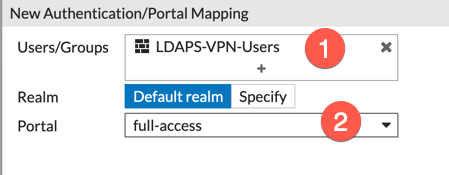
Once here, choose the (1) LDAPS group you created above, then choose the (2) ‘Portal‘ (In my case, I am using the ‘full-access‘ portal.

NOTE: Remove any duplicate access of other non-secure LDAP servers as you want to ensure that the logins are secure.
Results

As you can see above, the ‘Your password expired. Please provide a new one‘ message is visible for the user in question.
Hope this helps.
Recent posts
-

-

Have you ever had an IPS signature that continues... Full Story
-

Use case: Customer has a Split Tunnel Enabled but... Full Story
