By Manny Fernandez

April 7, 2019

Using NMAP

On September 1, 1997, Nmap was first released in Phrack magazine Issue 51, Article 11.  Since then it has been used by black hats, white hats and everyone in between.  It is a super useful tool and I can tell you that being in the role I am in today, I do not use it as much as I used to but even still, I use it at least 5 times a week.  In this post, I will try to touch on the basics and maybe some advanced uses for nmap.

Nmap works on the most major operating systems.  From their website, this is what they say:

Linux (all distributions)
Microsoft Windows
Mac OS X
FreeBSD, OpenBSD, and NetBSD
Sun Solaris
Amiga, HP-UX, and Other Platforms

I will be running this from a Linux VM and it happens to be running :

[root@observium ~]# nmap -version

Nmap version 6.40 ( http://nmap.org )
Platform: x86_64-redhat-linux-gnu
Compiled with: nmap-liblua-5.2.2 openssl-1.0.1e libpcre-8.32 libpcap-1.5.3 nmap-libdnet-1.12 ipv6
Compiled without:
Available nsock engines: epoll poll select

Target Selection

In this section, you can see the various types of switches you can use to get the results you are looking for from a target selection perspective.

Scan a single IP nmap 172.16.16.1
Scan a host nmap www.scanme.com
Scan a range of IPs nmap 172.16.16.1-20
Scan a subnet nmap 172.16.16.0/24
Scan targets from a text file nmap -iL ip-list.txt

Other options, are the iR which chooses random IPs

nmap -iR 10 10.1.106.0/24
Nmap done: 11 IP addresses (1 host up) scanned in 7.98 seconds

nmap -iR 10 10.1.106.0/24
Nmap done: 16 IP addresses (6 hosts up) scanned in 36.22 seconds

Specifying Ports

You do not always need to scan all open ports on a host.  You may be testing a firewall policy and want to make sure the port is listening. Here are some of your options.
Scan a single Port nmap -p 22 172.16.16.1
Scan a range of ports nmap -p 1-100 172.16.16.1
Scan 100 most common ports (Fast) nmap -F 172.16.16.1
Scan all 65535 ports nmap -p- 172.16.16.1

Types of Scan

Similar to the ports, you may not want to run a scan using the standard icmp packet.  Sometimes ICMP is blocked and we want to be more stealthy.  There are different types of scans you can use.
Scan using TCP connect nmap -sT 172.16.16.1
Scan using TCP SYN scan (default) nmap -sS 172.16.16.1
Scan UDP ports nmap -sU -p 123,161,162 172.16.16.1
Scan selected ports – ignore discovery nmap -Pn -F 172.16.16.1
NOTE: The difference between the TCP connect and the TCP SYN types is the ‘Connect’ uses full ‘three-way handshake’ mode as opposed to just the SYN packet.

Operating System and Service Detection Type

Detect OS and Services nmap -A 172.16.16.1
Standard service detection nmap -sV 172.16.16.1
More aggressive Service Detection nmap -sV –version-intensity 5 172.16.16.1
Lighter banner grabbing detection nmap -sV –version-intensity 0 172.16.16.1
You can use the standard -O option or you can get more aggressive.

Saving Results to a File

Save default output to file nmap -oN output.txt 172.16.16.1
Save results as XML nmap -oX output.xml 172.16.16.1
Save results in a format for grep nmap -oG output.txt 172.16.16.1
Save in all formats nmap -oA output 172.16.16.1

GUI Version

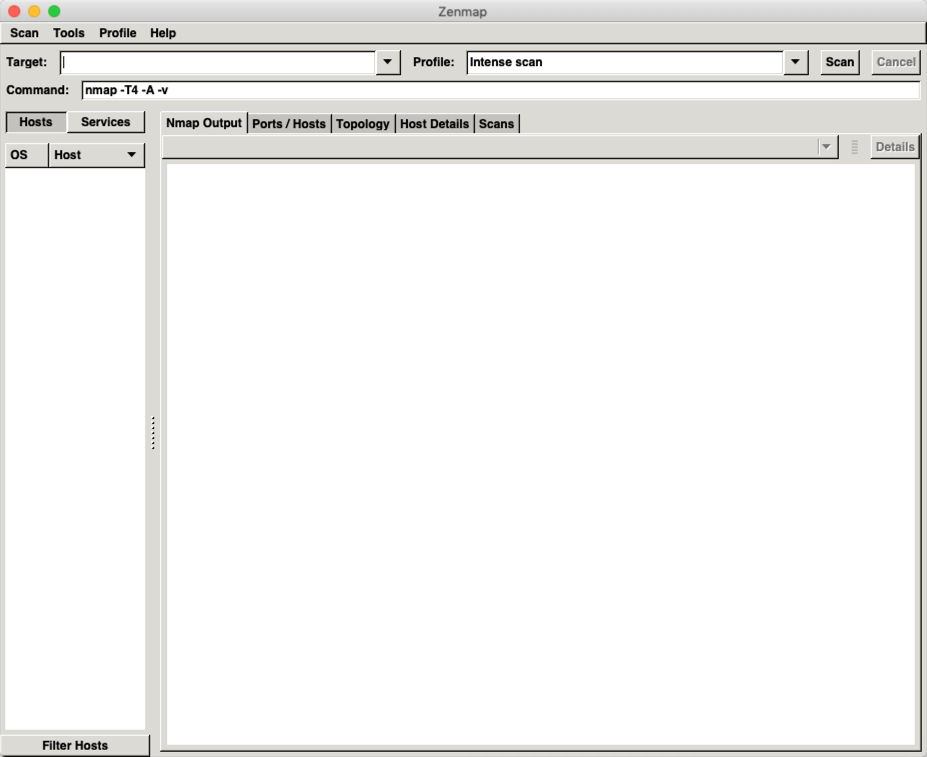
There is a GUI overlay for nmap.  It is useful if you want to have a nice visual representation of the utility.
2019-04-07_18-25-29.png
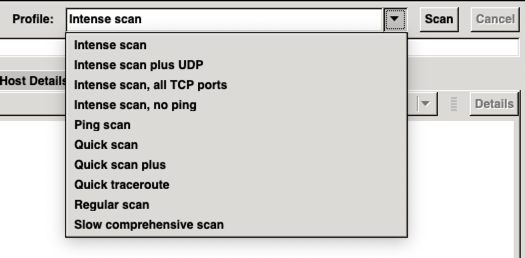
Using the drop down ‘Profile’ and from there, you can select the type of scan you want to run.  The GUI has fewer options as would be expected but serves well for nubes and those that are not comfortable with the CLI.
2019-04-07_18-26-20
This is NOT an exhaustive list of options available.  For a more comprehensive list of options and features, check out the nmap.org site and ‘Ref Guide

Recent posts

  • There are many options when troubleshooting in FortiGate firewalls. ... Full Story

  • Have you ever had an IPS signature that continues... Full Story

  • Use case:  Customer has a Split Tunnel Enabled but... Full Story