If you've spent any time configuring user authentication on... Full Story
By Manny Fernandez
April 7, 2019
Using OpenSSL for your SSL Decryption and distributing the cert via GPO
I have another post from a while back that uses Microsoft CA services which I will be updating in the next month. However in this post, I will use OpenSSL to generate a CA cert to use in SSL decryption. After, we will push the new Fortigate certificate out to the PCs in the environment via GPO.
Installing a Linux VM with OpenSSL
For this post, I used a minimal install of CentOS 7. The only additional packages I installed was ‘net-tools’ and ‘tcpdump’. In my lab, I am running a DHCP server for all of my crazy labs I do, so in my case the Linux server used DHCP. You can configure a static IP by editing ‘/etc/sysconfig/network-scripts and choosing the interface that you are using. Here are two examples of DHCP and static:
DHCP
TYPE="Ethernet"
BOOTPROTO="dhcp"
DEFROUTE="yes"
PEERDNS="yes"
PEERROUTES="yes"
NAME="ens33"
DEVICE="ens33"
ONBOOT="yes"
STATIC
TYPE=Ethernet
BOOTPROTO=static
DEFROUTE=yes
NAME=ens192
DEVICE=ens192
ONBOOT=yes
IPADDR=10.1.106.48
PREFIX=24
GATEWAY=10.1.106.1
DNS1=8.8.8.8
DNS2=4.2.2.2
You will need to restart the network services once you make a change. To do this, you can enter:
sudo /etc/init.d/network restartYou can issue the ‘ifconfig‘ after installing the ‘net-tools’ package ‘yum install net-tools‘.
Creating the Certificate in OpenSSL

To check which version of openssl you are going to use, you can use the ‘which‘ command followed by the command you want to run (e.g. ‘openssl‘).
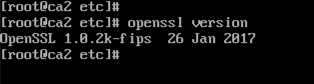
To see version of openssl you are running, run the command from the above screenshot, ‘openssl version’.
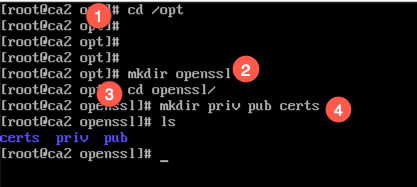
I like to create folders or directories to keep things neat. I create them under /opt. But feel free to create them wherever you want. You can issue the ‘cd /opt’, then you can ‘mkdir openssl’, then change into that directory and create whatever directories you want. In my case I issued the ‘mkdir priv pub certs’ command which created three sub-directories under /opt/openssl.
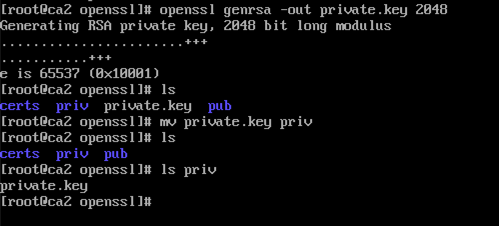
Next we will create a private key for the CA server. We run the following command
openssl genrsa -out private.key 2048
Now to create the CA cert for the Fortigate
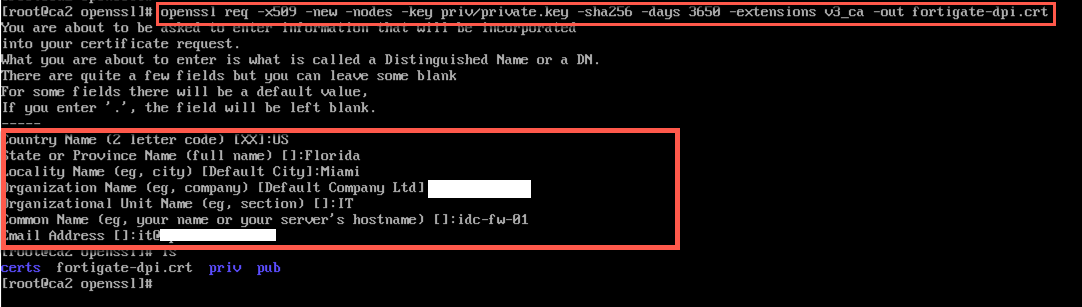
openssl req -x509 -new -nodes -key private.key -sha256 -days 3650 -extensions v3_ca -out fortigate-dpi.crt
In this example we are making this certificate good for 10 years (your mileage may vary). Name the certificate something that makes sense to you as you will need to use it in your Fortigate configuration. You will need to fill in pertinent information specific to your environment.
Next you will need to export the file you created (fortigate-dpi.crt) and the (privatekey.key) to import into the Fortigate. Once you have the files locally, browse to your Fortigate and go to the ‘Certificates’ section under ‘Settings’
Importing Certificate into Fortigate
NOTE: You will need to ensure that under ‘system, Feature Visibility’ you have ‘Certificates’ selected.
Once you are in the Fortigate under the Certificate, you can go to ‘import’
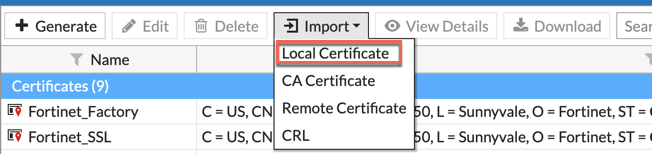 Choose the ‘Local Certificate’ option
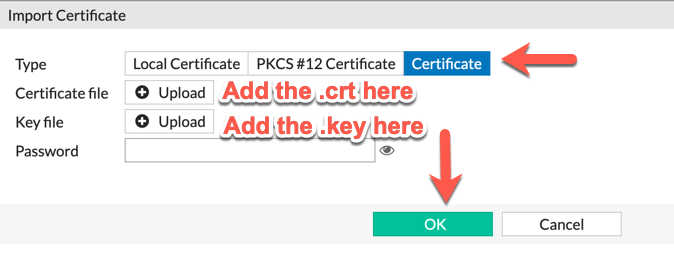
Ensure that you use the ‘Certificate‘ option on top. Browse to the location of your .crt file and your .key file and enter them here, then choose ‘OK‘.
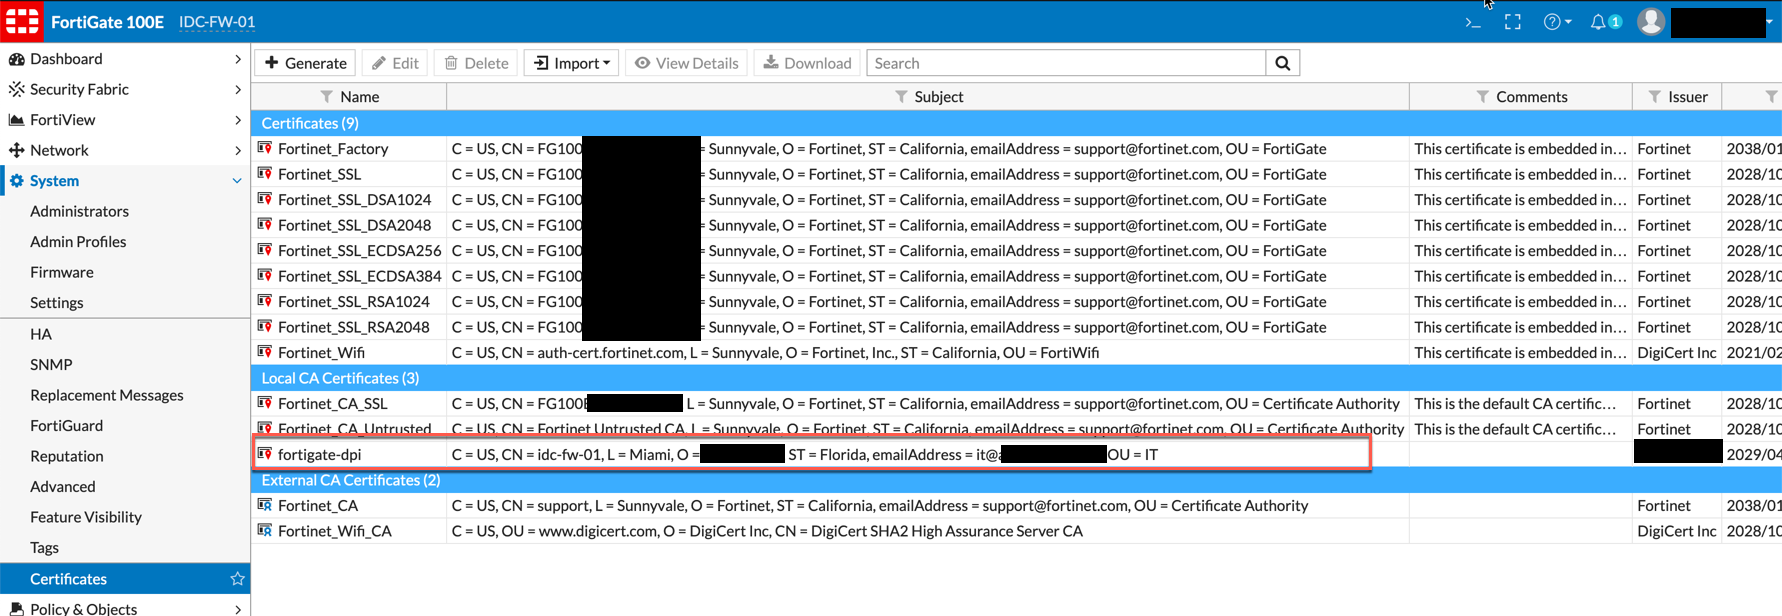
You should be able to see the newly import certificate under the ‘Local CA’ section.
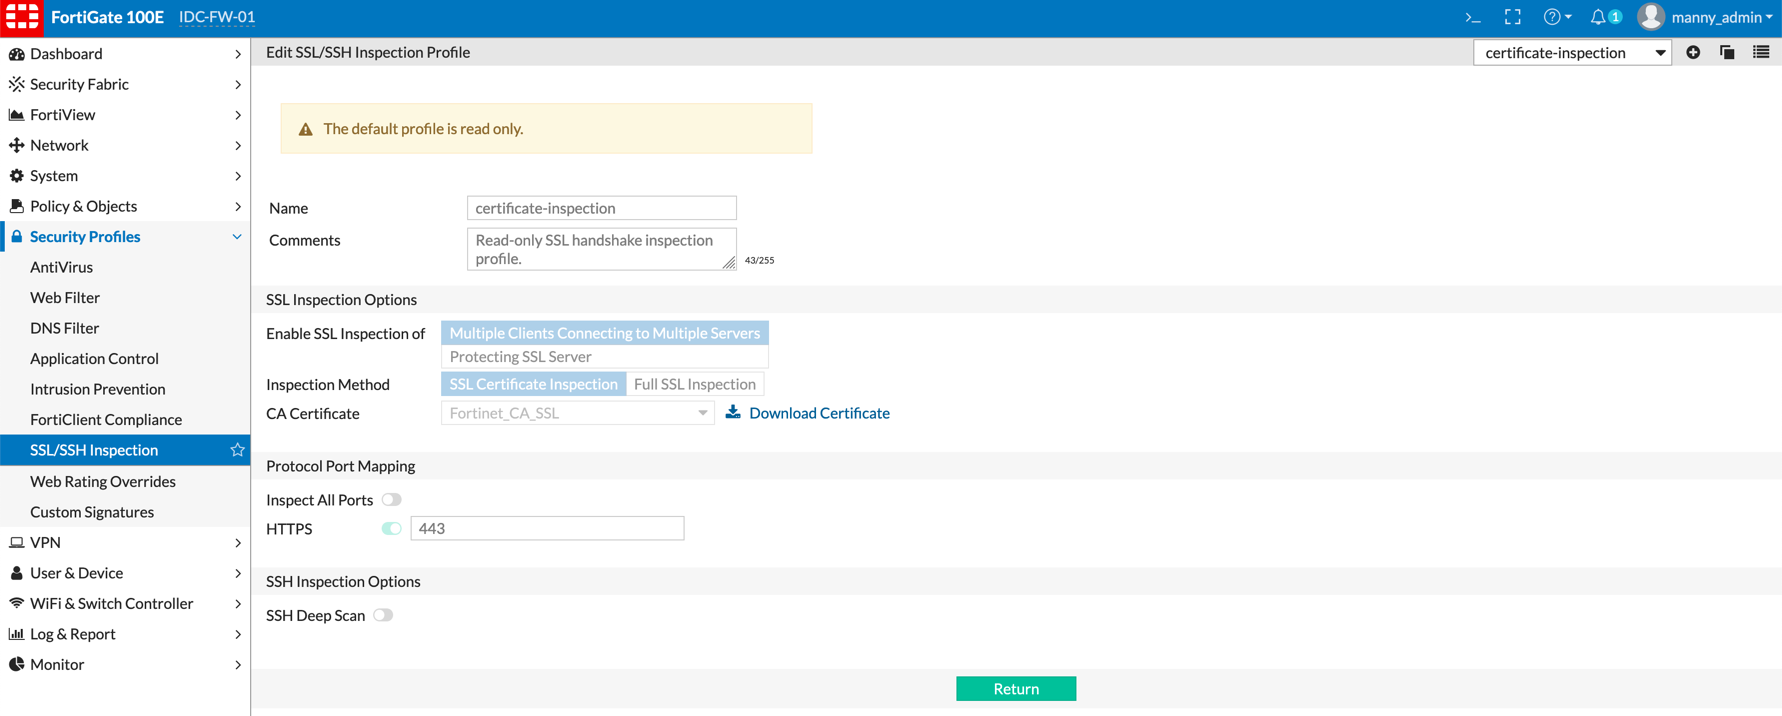
You can now go to ‘Security Profiles, SSL/SSH Inspection’ and create a copy of the ‘deep-inspection’ profile by selecting the ‘deep-inspection’ from the drop down list and choosing the following icon:
Configure your needs on this screen and choose the certificate you want to use.
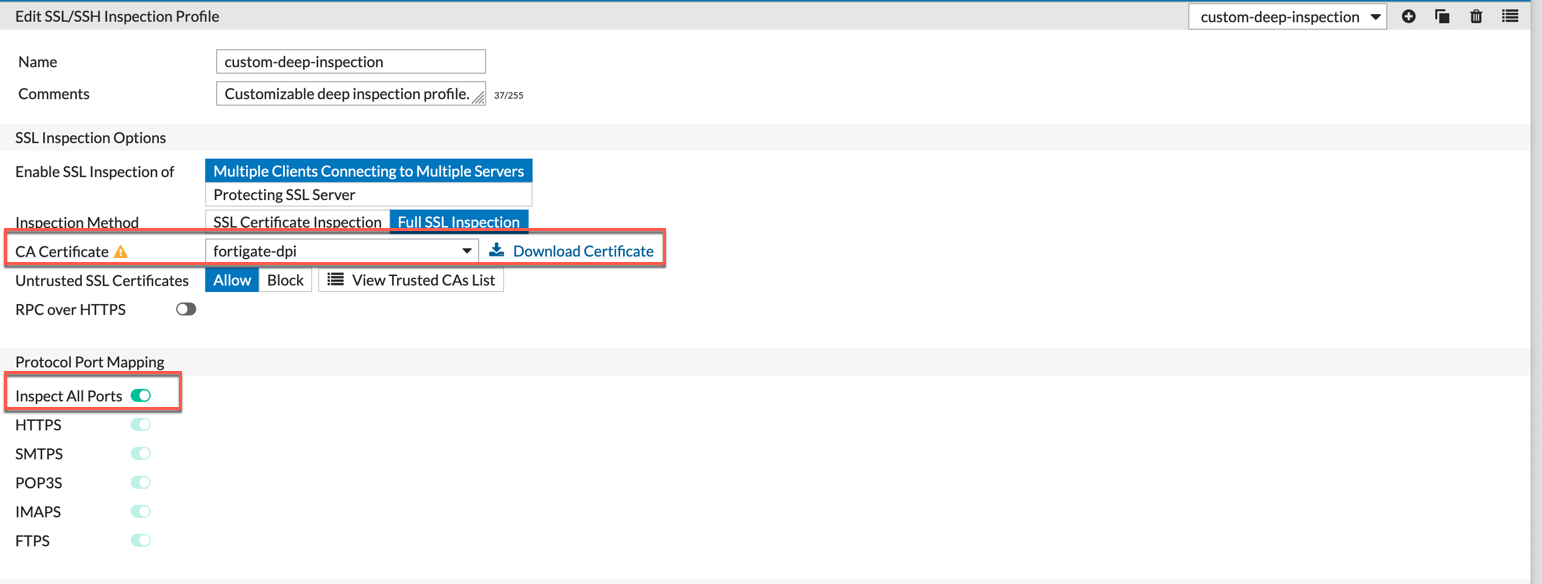
I recommend the ‘Inspect All Ports’ but that is a different discussion for a different post. For now, know that you need to choose the drop down under ‘CA Certificate’ and choose the newly created cert.
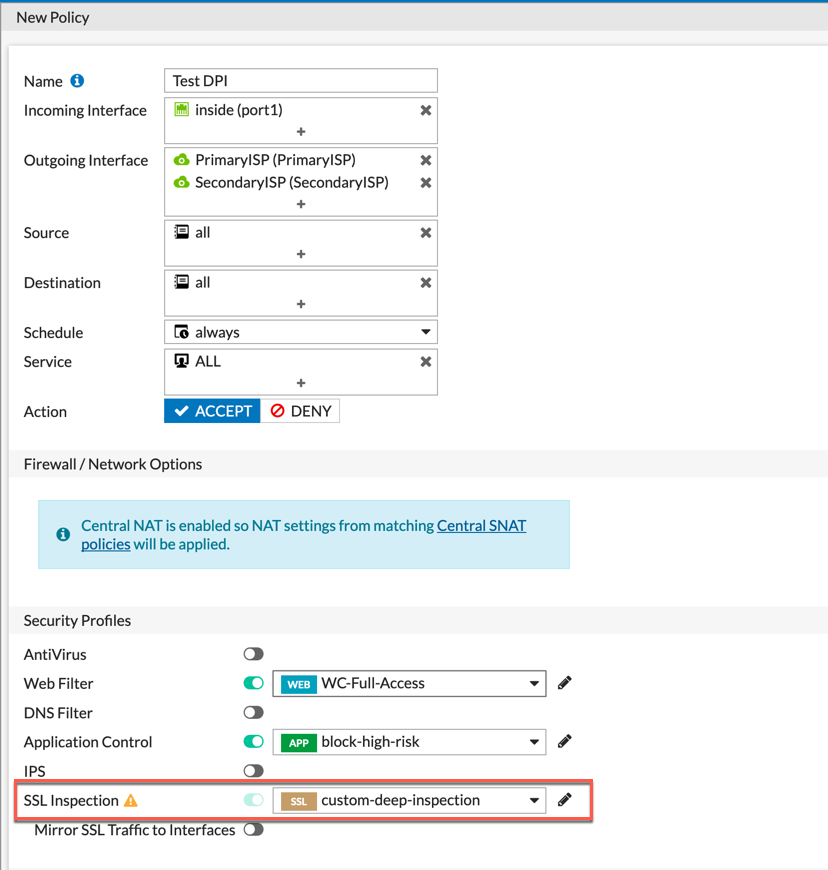
In your policies, when you want to use the certificate for the deep-packet inspection (SSL Decrypt), choose it from the drop down.
NOTE: You can have multiple DPI profiles set up. I did some work for a city, and they had one certificate that they used for the Police Department and one for the remainder of the City.
Distributing the Certificate via GPO
In full disclosure, I am not a Windows guy. I got some of this info from a blog site.
Connect to your Domain Controller
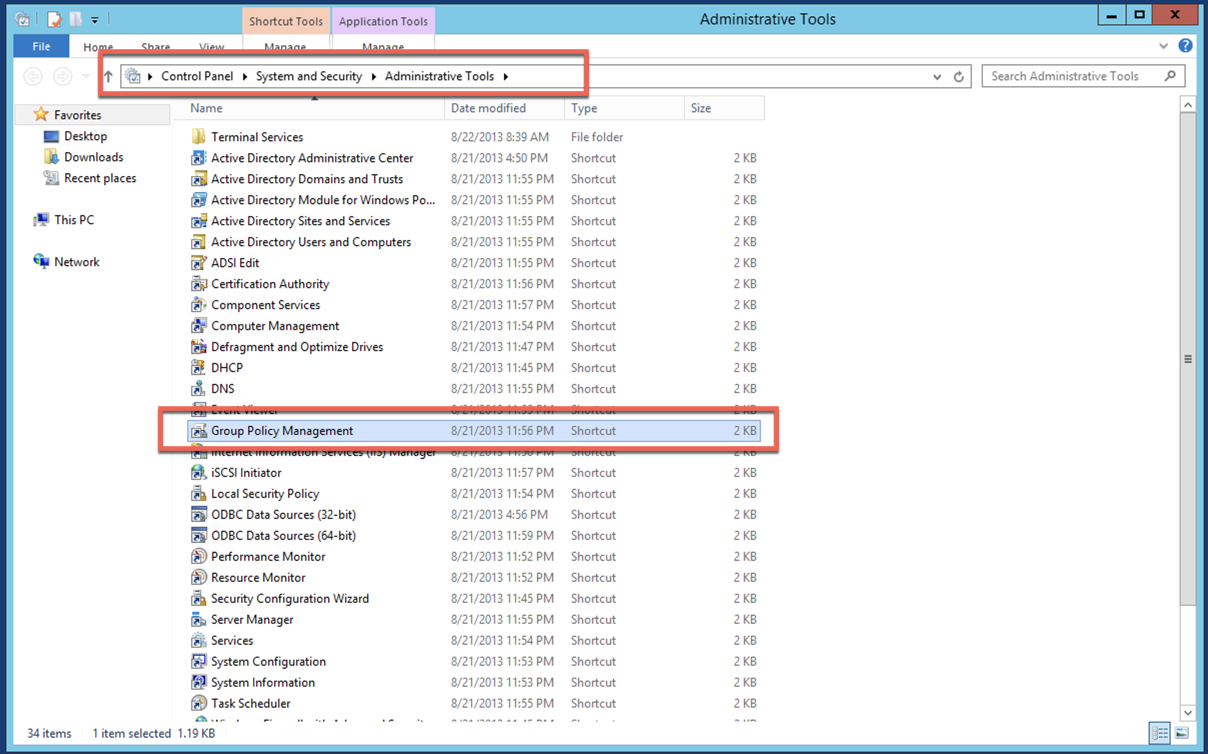
Go to your ‘Administrative Tools’ and Select the ‘Group Policy Management’.
In the console tree, under the top level of the domain, right-click and create a new policy and title it Security Certificates or something that makes sense to you.
Double-click Group Policy Objects in the domain containing the Security Certificate Group Policy object (GPO) that you want to edit.
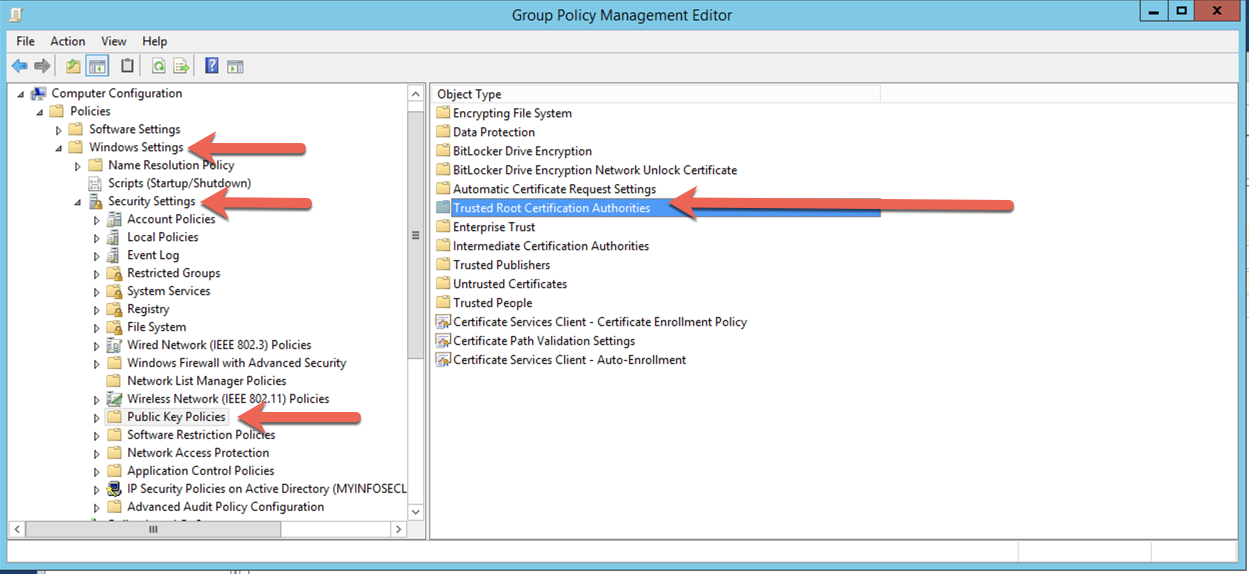
In the Group Policy Management Console (GPMC), go to “Computer Configuration > Windows Settings > Security Settings > Public Key Policies”.
Not sure where I went wrong, but I connected to ‘Group Policy Management Editor’ and was able to pick up…. You need to right-click on the ‘Trusted Certificate Authority’
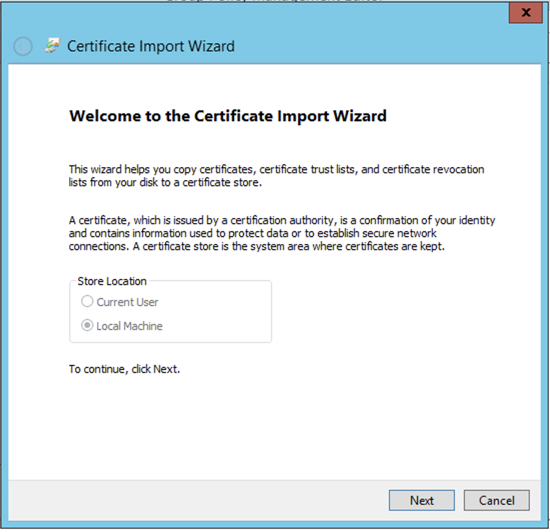
You will get the wizard to import the certificate. Click ‘Next’
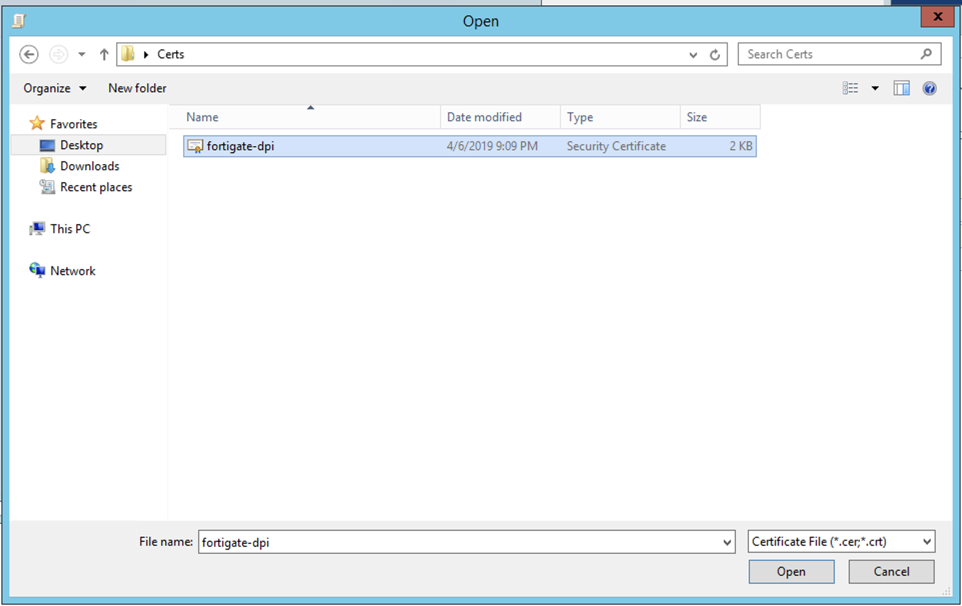
Browse to the location where the cert file is located, and choose it (e.g. fortigate-pdi.cert).

Ensure that you are placing it in the ‘Trusted Root Certificate Authority’ store.
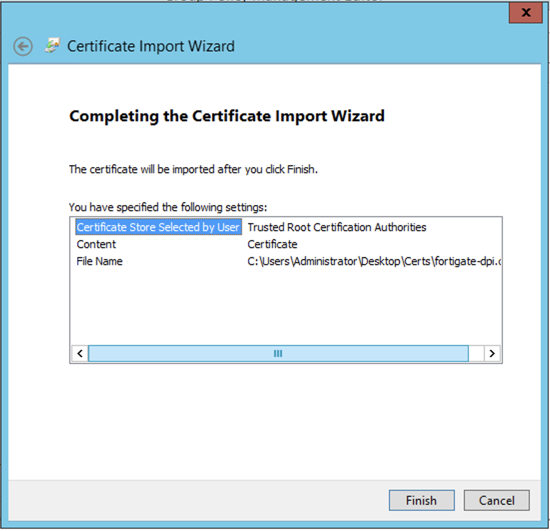
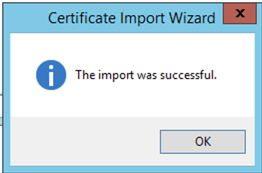
Now hit ‘Finish’. You should get a ….
Ensure that you assign the GPO to the correct group.
Recent posts
-

-

DNS is one of those technologies that quietly underpins... Full Story
-

BGP issues on FortiGate firewalls usually trace back to... Full Story
-

Every time your laptop talks to your router, a... Full Story
-

If you've spent any time configuring NAT on a... Full Story
-

If you have spent any time configuring firewall policies... Full Story
-

High availability on FortiGate is one of those features... Full Story
-

If you've configured SD-WAN on a FortiGate, you've almost... Full Story
-

FortiLink is the management protocol that turns a FortiSwitch... Full Story
-

FortiSwitches are pretty rock solid from Mean Time Between... Full Story
-

This is a quicky tip. Have you ever gone... Full Story
-

DNS is one of those quiet pieces of internet... Full Story
-

This article is an updated version of the previous... Full Story
-

You will add ns2 as a secondary (slave) BIND9... Full Story
-

In the process of deploying my lab, I needed... Full Story
-

RFC 8805, used to be known as Self-Correcting IP... Full Story
-

Years back, I wrote an article about certificate pinning. ... Full Story
-

FortiGates have the ability to send alerts to Microsoft... Full Story
-

In this post, I am going to walk through... Full Story
-

Troubleshooting VoIP on a FortiGate can feel like trying... Full Story
-

Prior to FortiOS 7.0, there were three commands to... Full Story
-

In this post, I am going to go over... Full Story
-

What we are going to do: We are going... Full Story
-

Choosing between FGCP (FortiGate Clustering Protocol) and FGSP (FortiGate... Full Story
-

Creating a VLAN on macOS (The "Pro" Move) A... Full Story
-

This blog post explores the logic behind how macOS... Full Story
-

Pretty Fly for a Wi-Fi Tell My Wi-Fi Love... Full Story
-

Part of my daily gig is creating BoMs (Bill-of-Materials)... Full Story
-

ICMP introduces several security risks, but careful filtering, rate... Full Story
-

The command diag debug application dhcps -1 enables full... Full Story
-

In the world of FortiOS, execute tac report is... Full Story
-

LLDP; What is it The Link Layer Discovery Protocol... Full Story
-

What it actually does When you run diagnose fdsm... Full Story
-

Monkey Bites are bite-sized, high-impact security insights designed for... Full Story
-

I have run macOS in macOS with Parallels but... Full Story
-

Don't be confused with my other FortiNAC posts where... Full Story
-

This is the third session in a multi-part article... Full Story
-

Today I was configuring key-based authentication on a FortiGate... Full Story
-

Netcat, often called the "Swiss Army knife" of networking,... Full Story
-

At its core, IEEE 802.1X is a network layer... Full Story
-

In case you did not see the previous FortiNAC... Full Story
-

This is our 5th session where we are going... Full Story
-

Now that we have Wireshark installed and somewhat configured,... Full Story
-

The Philosophy of Packet Analysis Troubleshooting isn't about looking... Full Story
-

Have you ever wanted to do some testing on... Full Story
-

Ask ten engineers to define "a network" and you... Full Story
-

1. Executive Summary Objective: This guide turns a FortiAuthenticator... Full Story