If you've spent any time configuring user authentication on... Full Story
By Manny Fernandez
June 24, 2026
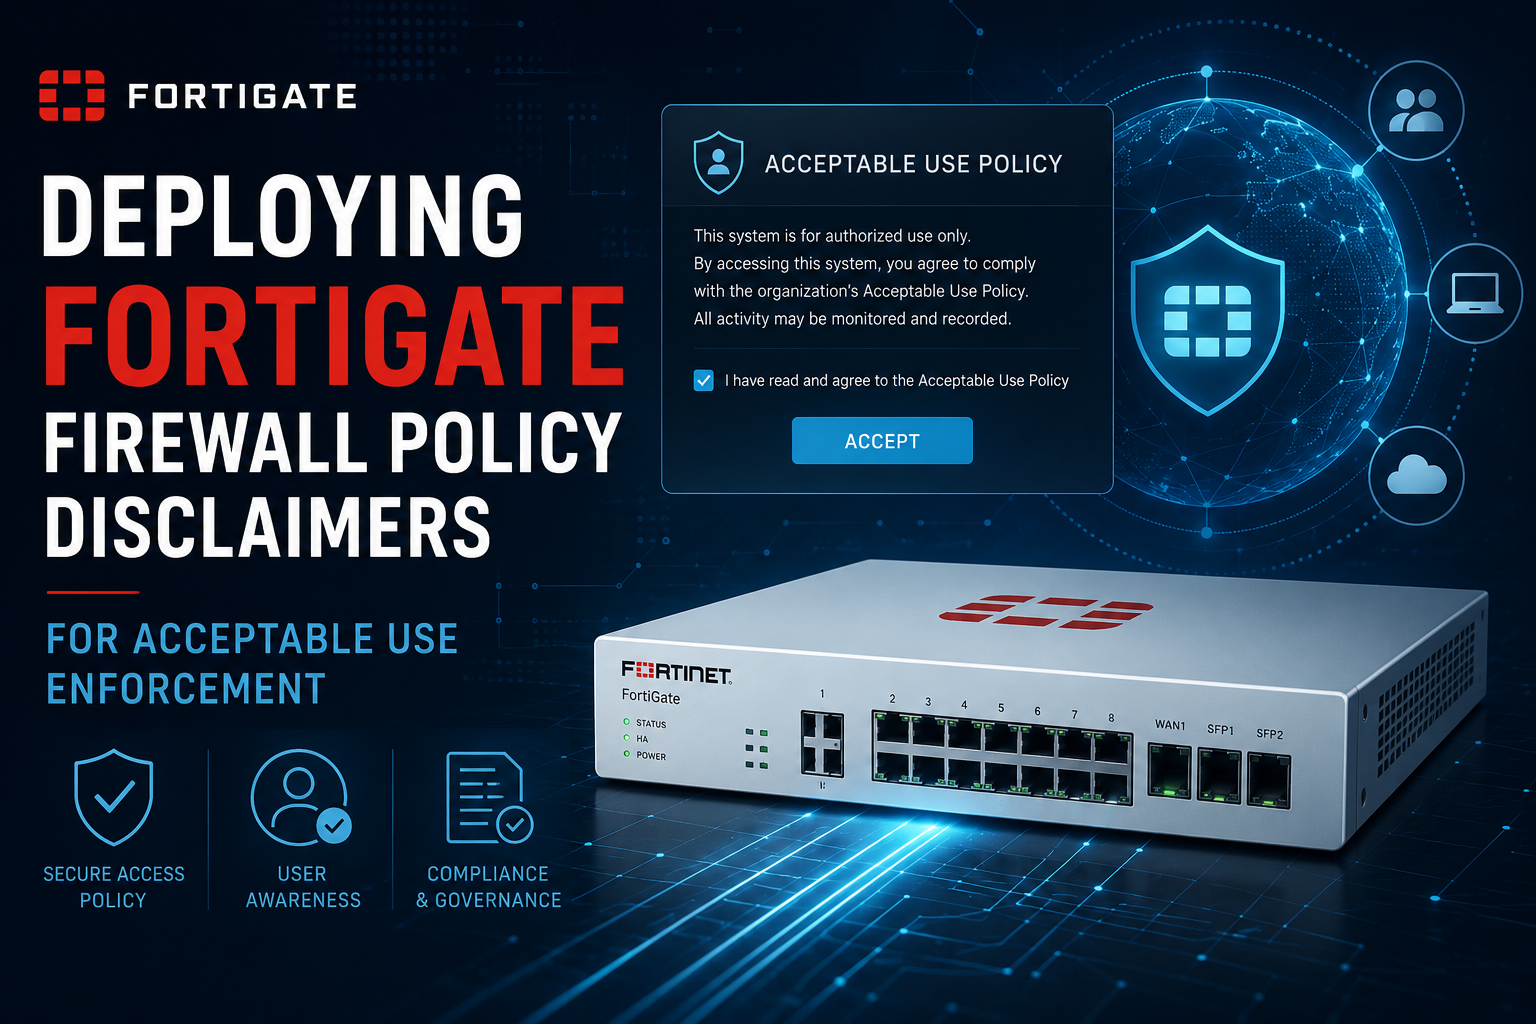
Deploying FortiGate Firewall Policy Disclaimers for Acceptable Use Enforcement
1. Title & Executive Summary
Objective: This guide explains how to deploy and operate the FortiGate firewall policy disclaimer, the interstitial Acceptable Use Policy (AUP) page that FortiOS presents to users before granting traffic through a policy. You will learn how to enable the disclaimer in standalone mode and in combination with authentication and captive portal, how to customize the disclaimer replacement message, and how to validate and troubleshoot the behavior.
Why it matters: Many organizations have a legal or compliance requirement (HR policy, regulatory mandate, guest Wi-Fi terms of service) to obtain explicit user acknowledgment before allowing network access. The FortiGate disclaimer satisfies this at the network edge without a separate captive portal appliance, and the acceptance event is recorded for auditability.
Target Audience: Network Engineers, Firewall Administrators, and Security Engineers responsible for FortiGate edge or guest-access policy. Familiarity with FortiOS firewall policy, interfaces, and the FortiOS CLI is assumed.
2. Prerequisites & Architecture
Assumed Knowledge
You should be comfortable with FortiOS firewall policy structure (source/destination interface, address, service, action), the difference between config firewall policy and config firewall policy6, basic replacement message editing, and how user authentication groups bind to policies. You should also understand that the disclaimer is an HTTP/HTTPS interception feature, which has direct implications for how it behaves with TLS traffic.
Environment / Lab Requirements
| Requirement | Detail |
| FortiGate platform | Any FortiGate or FortiGate VM. Lab on a VM (FGT-VM64) is fine. |
| FortiOS version | Feature exists across 6.4, 7.0, 7.2, 7.4, 7.6, and 8.0. CLI syntax noted per-version where it diverges. |
| License | No add-on license required. Disclaimer is part of base FortiOS. |
| Certificate (for HTTPS) | A CA-signed or trusted device certificate referenced by the auth/portal settings so the redirect page does not throw browser warnings. |
| Test client | A workstation behind the FortiGate whose traffic egresses through the policy being configured. |
| Optional | A user group (local, LDAP, RADIUS, or FSSO) if you combine disclaimer with authentication. |
Component Table
| Component | Role | Example Value |
| FortiGate | Enforcement point, hosts the disclaimer page | 192.168.1.99 (mgmt) |
| Ingress interface | Where client traffic enters | port2 / internal |
| Egress interface | Where traffic exits toward the resource | port1 / wan1 |
| Client subnet | Users receiving the disclaimer | 192.168.10.0/24 |
| Auth portal IP | IP the client is redirected to for the page | Interface IP or auth-ip |
| Replacement message | The HTML body of the disclaimer | auth-disclaimer-page |
| User group (optional) | Binds auth to the policy | Corp-Users |
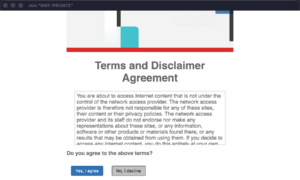
How the disclaimer actually works
When disclaimer is enabled on a policy, the FortiGate intercepts the first HTTP(S) request matching that policy and returns an HTTP redirect to its own authentication daemon. The daemon serves the Disclaimer replacement message, the user clicks Accept, and FortiOS records the acceptance keyed to the client source IP for the duration of the auth timeout. Subsequent sessions from that IP pass without re-prompting until the timer expires.
Because this is an HTTP(S) interception, the user must originate a browser request. A disclaimer will not appear in front of non-HTTP traffic (a raw TCP app, a game client, or an already-pinned HTTPS session) until the browser triggers it. For HTTPS first-hits, the FortiGate must present a certificate for the redirect, which is why the certificate prerequisite matters.
3. Step-by-Step Implementation Workflow
Phase 1: Decide the disclaimer mode
The Goal: Choose how the disclaimer binds to the policy before touching config, because the disclaimer field has different valid values depending on whether you also authenticate.
FortiOS supports three operating shapes:
1. Standalone disclaimer (no auth): Show the AUP, user accepts, traffic flows. No identity is captured. Set disclaimer enable on a policy with no user/group.
2. Disclaimer + authentication: User is challenged for credentials and also must accept the AUP. Used when you want both identity and acknowledgment.
3. Disclaimer + captive portal (on the interface): The interface runs a captive portal and the disclaimer rides along. Common for guest Wi-Fi via FortiAP/FortiSwitch.
Version note: In 6.2 and earlier, disclaimer was a simple enable/disable on the policy. From 6.4 onward the model is consistent across 7.0/7.2/7.4/7.6/8.0: the policy carries disclaimer enable, and whether auth is required is driven by the presence of a groups/users binding plus interface captive-portal settings. Validate the exact field with config firewall policy then set disclaimer ? on your build.
Phase 2: Customize the disclaimer replacement message
The Goal: Replace the default FortiOS disclaimer text with your organization’s AUP language and branding.
The Action: Edit the auth-disclaimer-page replacement message. This is the HTML body shown to users. You can edit it in the GUI or CLI.
The Code/CLI/Config:
config system replacemsg auth "auth-disclaimer-page"
set format html
set buffer "<html>
<head><title>Acceptable Use Policy</title></head>
<body style='font-family:Arial,Helvetica,sans-serif;'>
<h2>Acceptable Use Policy</h2>
<p>Access to <your_org_name> network resources is restricted to
authorized use. By selecting Accept you acknowledge that your
activity may be logged and monitored in accordance with company
policy.</p>
%%QUESTION%%
</body>
</html>"
end
The %%QUESTION%% token renders the Accept/Decline control. Do not remove it, or the user will have no button to proceed. Other valid tokens include %%LOGIN%% (credential fields when auth is combined) and %%LANG%%. Token availability differs slightly by FortiOS branch, so confirm against the GUI editor’s token picker.
GUI Verification: Navigate to System > Replacement Messages, switch to Extended View if needed, expand Authentication, and select Disclaimer page. Edit in the rich editor and Save.
Note on VDOMs: When VDOMs are enabled, replacement messages are per-VDOM. The CLI above must be run inside the target VDOM (config vdom / edit <vdom>), and the policy lives in the same VDOM.
Phase 3a: Enable a standalone disclaimer (no authentication)
The Goal: Force every user matching this policy to accept the AUP, without collecting credentials.
The Action: Enable disclaimer on the existing or new firewall policy. Leave groups/users empty.
The Code/CLI/Config:
config firewall policy
edit <policy_id>
set name "Guest-Internet-AUP"
set srcintf "port2"
set dstintf "port1"
set srcaddr "Guest-Subnet"
set dstaddr "all"
set action accept
set schedule "always"
set service "ALL"
set disclaimer enable
set nat enable
next
end

GUI Verification: Policy & Objects > Firewall Policy, edit the policy, and confirm Disclaimer is toggled on. In some FortiOS versions the toggle only appears after you expand the policy’s advanced section, and it may be hidden until the GUI feature is surfaced via System > Feature Visibility.
Version note (7.4/7.6/8.0): The disclaimer toggle is present in the firewall policy form but can be hidden behind the Disclaimer Options advanced block. If you do not see it, configure via CLI as shown; the CLI field is authoritative across all branches.
Phase 3b: Combine disclaimer with authentication
The Goal: Require both identity (credentials) and AUP acceptance.
The Action: Bind a user group to the policy and enable the disclaimer. The presence of the group triggers the credential prompt; the disclaimer enable adds the AUP step.
The Code/CLI/Config:
config firewall policy
edit <policy_id>
set name "Corp-Auth-AUP"
set srcintf "port2"
set dstintf "port1"
set srcaddr "Corp-Subnet"
set dstaddr "all"
set action accept
set schedule "always"
set service "HTTP" "HTTPS" "DNS"
set groups "Corp-Users"
set disclaimer enable
set nat enable
next
end
Authentication only fires for protocols the FortiGate can intercept and challenge, primarily HTTP/HTTPS. Include DNS and the web services in the policy service list so name resolution and the initial browser hit succeed and the redirect can occur. A policy scoped to HTTP/HTTPS only will not let the client resolve DNS to reach the page.
GUI Verification: Edit the policy under Policy & Objects > Firewall Policy, set Source > User to the group, and enable Disclaimer. The form will show both the user binding and the disclaimer toggle.
Phase 3c: Disclaimer with interface captive portal (guest Wi-Fi pattern)
The Goal: Present the AUP as part of a captive portal on a guest interface or SSID.
The Action: Enable captive portal on the ingress interface (or SSID), then enable the disclaimer on the governing policy. For an interface-based captive portal:
The Code/CLI/Config:
Interface Config
config system interface
edit "guest-vlan"
set security-mode captive-portal
set security-groups "Guest-Users"
# optional: redirect target after accept
set security-redirect-url "https://<your_org_name>.example.com/welcome"
next
end
Firewall Policy
config firewall policy
edit <policy_id>
set srcintf "guest-vlan"
set dstintf "port1"
set srcaddr "all"
set dstaddr "all"
set action accept
set schedule "always"
set service "ALL"
set groups "Guest-Users"
set disclaimer enable
set nat enable
next
end
GUI Verification: Network > Interfaces, edit the guest interface, set Security Mode to Captive Portal, choose the User Groups. Then verify the disclaimer on the associated policy as in Phase 3b.
Phase 4: Tune the acceptance timeout
The Goal: Control how long an accepted disclaimer remains valid before the user is prompted again.
The Action: The disclaimer acceptance is tied to the authentication timeout. Set it globally or per user setting.
The Code/CLI/Config:
config user setting
set auth-timeout 480# minutes of idle/absolute auth validity
set auth-timeout-type idle-timeout# orhard-timeout/new-session
end
idle-timeout resets on activity; hard-timeout expires at a fixed interval regardless of activity; new-session re-evaluates per new session. For an AUP that must be re-acknowledged daily, hard-timeout with a value near 1440 minutes is the common choice.
4. Verification & Validation
What success looks like
A client behind the policy opens a browser, requests any HTTP(S) site, and is redirected to the FortiGate-hosted AUP page. After clicking Accept, the original request completes and subsequent browsing is unobstructed until the timeout expires. If authentication is combined, credentials are requested before or alongside the AUP.
CLI verification
Confirm the policy carries the disclaimer flag:
show firewall policy <policy_id>
# Look for: set disclaimer enable
Watch the authentication/disclaimer state for a client. The disclaimer acceptance is tracked in the firewall auth list:
diagnose firewall auth list
Expected output includes the client source IP, the matched policy ID, and the group/method. An accepted disclaimer-only entry appears with the source IP bound to the policy. Example shape:
192.168.10.50, <user-or-blank>
src_mac: 00:0c:29:aa:bb:cc
type: fw, id: 0, duration: 35, expire: 28765, ...
flag(80): radius
packets: in 12 out 9, bytes: in 1840 out 2210
----- 1 listed, 0 filtered -----
Clear a stuck or test entry to force re-prompt:
diagnose firewall auth clear
# or target one IP:
diagnose firewall auth clear-by-ip 192.168.10.50
Real-time tracing
To watch the redirect happen, run a flow trace while the client makes its first request:
diagnose debug reset
diagnose debug flow filter addr 192.168.10.50
diagnose debug flow show function-name enable
diagnose debug flow trace start 20
diagnose debug enable
You should see the session matched to the policy and handed to the auth/disclaimer process rather than forwarded directly. Stop with diagnose debug disable.
Authentication daemon debug (deeper)
diagnose debug application authd -1
diagnose debug enable
# reproduce the browser request, observe the disclaimer serve and Accept POST
diagnose debug disable
diagnose debug reset
5. Troubleshooting & “Gotchas”
Gotcha 1: The disclaimer never appears for HTTPS sites
Symptom: HTTP sites trigger the page but HTTPS sites time out or fail without showing the AUP.
Cause: The redirect to the FortiGate auth page requires the FortiGate to present a TLS certificate for the intercept. If the client’s first request is HTTPS and the device certificate is untrusted or the auth HTTPS redirect is misconfigured, the browser blocks it. Also, HSTS-pinned and QUIC (UDP/443) sessions cannot be cleanly redirected.
Diagnose:
diagnose debug application authd -1
diagnose debug enable
# look for TLS/redirect errors when the HTTPS request hits
Check the certificate bound to the portal/auth settings:
show user setting # review auth-cert / auth-ports
Resolution: Bind a trusted (CA-signed or internally trusted) certificate to the authentication HTTPS service via config user setting (set auth-cert <cert>), and instruct test users to first browse to a plain HTTP URL (for example http://detectportal.firefox.com or any http:// site) to reliably trigger the page. Disabling QUIC at the browser or via application control can also force the redirect path.
Gotcha 2: Disclaimer toggle is missing in the GUI
Symptom: There is no Disclaimer option on the firewall policy form.
Cause: The feature is not surfaced in the current GUI feature set, or you are in a FortiOS branch where it sits inside an advanced block.
Diagnose / Resolution: Configure it directly in the CLI, which is authoritative on every branch:
config firewall policy
edit <policy_id>
set disclaimer enable
next
end
Optionally enable GUI visibility under System > Feature Visibility, then refresh the policy form.
Gotcha 3: Users are re-prompted constantly, or never prompted again
Symptom (re-prompted): Every new tab or short idle re-shows the AUP. Symptom (never): Users accept once and are never asked again even after policy changes.
Cause: Acceptance is keyed to source IP and the auth-timeout value/type. Aggressive idle timeouts cause frequent re-prompts; long hard timeouts (or a NAT/proxy collapsing many users behind one IP) cause stale or shared acceptance.
Diagnose:
diagnose firewall auth list# see active entries, durations, expirations
show user setting# confirm auth-timeout and auth-timeout-type
Resolution: Set an appropriate timeout in config user setting (see Phase 4). For shared-IP environments (upstream NAT, a single SNAT address) prefer combining the disclaimer with per-user authentication so acceptance is tracked per identity rather than per source IP. To force a clean re-test after changes:
diagnose firewall auth clear
Bonus gotcha: VDOM and replacement message mismatch
If you edited the disclaimer text but users still see the default page, you almost certainly edited the message in the wrong VDOM (or the global context) while the policy lives in a different VDOM. Replacement messages are per-VDOM. Re-enter the correct VDOM, re-edit auth "auth-disclaimer-page", and re-test.
Recent posts
-

-

DNS is one of those technologies that quietly underpins... Full Story
-

BGP issues on FortiGate firewalls usually trace back to... Full Story
-

Every time your laptop talks to your router, a... Full Story
-

If you've spent any time configuring NAT on a... Full Story
-

If you have spent any time configuring firewall policies... Full Story
-

High availability on FortiGate is one of those features... Full Story
-

If you've configured SD-WAN on a FortiGate, you've almost... Full Story
-

FortiLink is the management protocol that turns a FortiSwitch... Full Story
-

FortiSwitches are pretty rock solid from Mean Time Between... Full Story
-

This is a quicky tip. Have you ever gone... Full Story
-

DNS is one of those quiet pieces of internet... Full Story
-

This article is an updated version of the previous... Full Story
-

You will add ns2 as a secondary (slave) BIND9... Full Story
-

In the process of deploying my lab, I needed... Full Story
-

RFC 8805, used to be known as Self-Correcting IP... Full Story
-

Years back, I wrote an article about certificate pinning. ... Full Story
-

FortiGates have the ability to send alerts to Microsoft... Full Story
-

In this post, I am going to walk through... Full Story
-

Troubleshooting VoIP on a FortiGate can feel like trying... Full Story
-

Prior to FortiOS 7.0, there were three commands to... Full Story
-

In this post, I am going to go over... Full Story
-

What we are going to do: We are going... Full Story
-

Choosing between FGCP (FortiGate Clustering Protocol) and FGSP (FortiGate... Full Story
-

Creating a VLAN on macOS (The "Pro" Move) A... Full Story
-

This blog post explores the logic behind how macOS... Full Story
-

Pretty Fly for a Wi-Fi Tell My Wi-Fi Love... Full Story
-

Part of my daily gig is creating BoMs (Bill-of-Materials)... Full Story
-

ICMP introduces several security risks, but careful filtering, rate... Full Story
-

The command diag debug application dhcps -1 enables full... Full Story
-

In the world of FortiOS, execute tac report is... Full Story
-

LLDP; What is it The Link Layer Discovery Protocol... Full Story
-

What it actually does When you run diagnose fdsm... Full Story
-

Monkey Bites are bite-sized, high-impact security insights designed for... Full Story
-

I have run macOS in macOS with Parallels but... Full Story
-

Don't be confused with my other FortiNAC posts where... Full Story
-

This is the third session in a multi-part article... Full Story
-

Today I was configuring key-based authentication on a FortiGate... Full Story
-

Netcat, often called the "Swiss Army knife" of networking,... Full Story
-

At its core, IEEE 802.1X is a network layer... Full Story
-

In case you did not see the previous FortiNAC... Full Story
-

This is our 5th session where we are going... Full Story
-

Now that we have Wireshark installed and somewhat configured,... Full Story
-

The Philosophy of Packet Analysis Troubleshooting isn't about looking... Full Story
-

1. Title & Executive Summary Objective: This guide explains... Full Story
-

1. Title and Executive Summary Title: Power over Ethernet Standards... Full Story
-

1. Executive Summary Objective: This guide documents how to... Full Story