
If you've spent any time configuring user authentication on... Full Story
By Manny Fernandez
September 5, 2026
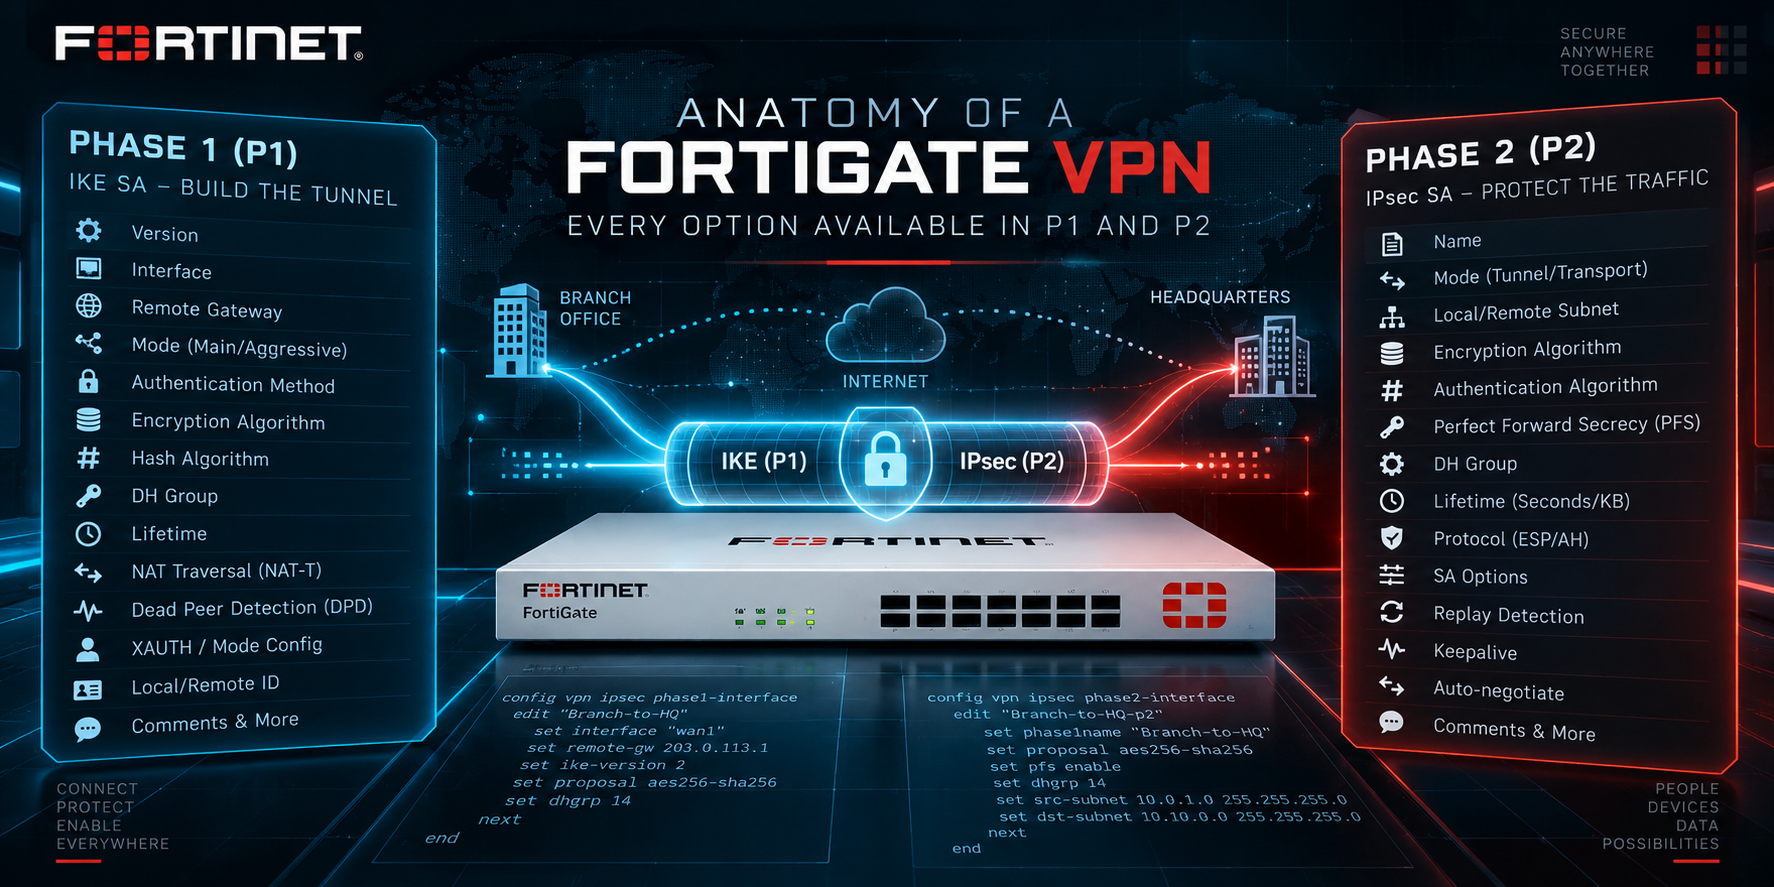
Anatomy of a FortiGate VPN: Every Option available in P1 and P2
Contents
- Phase 1: The IKE Security Association
- Gateway identity and interface binding
- Authentication
- Cryptographic proposal, DH groups, and post-quantum key exchange
- Session lifecycle and rekeying
- Liveness, redundancy, and HA
- Mode-config, NAT traversal, and fragmentation
- Aggregate links, offload, and QoS
- ADVPN auto-discovery
- Overlay encapsulation
- Forward Error Correction
- Management, identity exchange, and misc
- Phase 2: The IPsec (Child) Security Association
- The short version
- Reference: a hardened baseline stanza
If you have ever run set ? inside config vpn ipsec phase1-interface or config vpn ipsec phase2-interface on a FortiGate, you already know the problem: the GUI shows you maybe fifteen fields, and the CLI hands you a wall of sixty-plus options with one-line descriptions that assume you already know what they do. Most of them you will never touch. A handful of them are the difference between a tunnel that stays up during a carrier failover and one that flaps every night at 2 a.m.
This is the full breakdown: every option in a captured Phase 1 and Phase 2 configuration, grouped by function, with what it actually does and where the best-practice line sits. Lab addressing throughout uses 198.18.0.0/15 for the public/transit side and 10.0.0.0/16 for internal LANs.
Phase 1: The IKE Security Association
Phase 1 (config vpn ipsec phase1-interface) builds the authenticated, encrypted management channel between two gateways, the IKE SA. Everything Phase 2 negotiates later rides inside the protection Phase 1 establishes. Get Phase 1 wrong and the tunnel never comes up at all; get it half-right and you get a tunnel that negotiates fine today and fails mysteriously the day a peer reboots, a carrier renumbers, or a rekey collides with a DPD timer.
Gateway identity and interface binding
type
Remote gateway type: static (peer has a fixed IP), dynamic (peer has an unknown/roaming IP, dial-up), or ddns (peer is a dynamic-DNS client you resolve by hostname). This single field decides which other fields even matter. static is what you use for a routed hub-and-spoke or site-to-site design where you control both ends. dynamic is the standard choice for a hub accepting FortiClient or branch spokes with DHCP WAN addressing.
Best practice: don’t default everything to dynamic just because it is more permissive. static with a pinned remote-gw gives IKE fewer degrees of freedom to negotiate against, which is a meaningful reduction in attack surface on an internet-facing interface.
interface
The local physical, aggregate, loopback, or VLAN interface IKE binds to and that the resulting IPsec virtual interface rides on. This is also the interface whose IP appears as the source of IKE packets unless local-gw overrides it.
Best practice: bind to the actual WAN interface, not an SD-WAN zone member directly, when you need deterministic behavior. If you are doing SD-WAN with multiple underlays, that is a system sdwan design question layered on top of this, not a substitute for it.
ip-version
Whether the tunnel negotiates over IPv4 (4) or IPv6 (6) transport. This is the outer, transport-layer IP version, independent of what IP versions the inner traffic (the Phase 2 selectors) actually carries.
Best practice: leave at 4 unless you have a specific IPv6-only underlay. Dual-stack IPsec is still an edge case in most enterprise deployments and adds a second thing to troubleshoot when a tunnel won’t come up.
ike-version
1 or 2. IKEv2 (RFC 7296) is simpler on the wire, has built-in NAT-T and MOBIKE-style resilience, supports EAP and native OS clients more cleanly, and is required for several newer features covered below (childless IKE, PPK, digital signature auth per RFC 7427).
Best practice: use IKEv2 for anything new. IKEv1 still exists mainly for legacy peers (older Cisco ASA, some carrier-managed CPE) that never got upgraded. If you are building a native-OS IKEv2 concentrator or anything post-quantum, IKEv2 is not optional, it is a prerequisite.
local-gw
The IPv4 address of the local gateway’s external interface, used when the interface has multiple IPs (secondary IPs, loopback-sourced IKE) and you need to pin which one IKE uses as its source, rather than letting FortiOS pick the interface’s primary IP.
Best practice: set this explicitly on any interface carrying secondary IPs or when you’re doing loopback-sourced VPNs over ECMP/SD-WAN underlays. Leaving it blank on a multi-IP interface is a classic cause of “the tunnel comes up from the CLI test but the peer sees traffic from the wrong source.”
remote-gw
The IPv4 address of the remote gateway’s external interface. For type static this is mandatory and fixed. For dynamic/ddns peers this is not set (or is resolved dynamically), and remote-gw-match/remotegw-ddns style fields (not present in this capture, GUI-hidden on this build) take over.
Best practice: for static site-to-site, always pin this rather than leaving it wildcard. It is your single strongest anti-spoofing control at Phase 1.
net-device
Whether FortiOS creates a real kernel network device for the tunnel (enable) or handles it as a virtual, policy-routed construct without a dedicated device (disable). A kernel device means the tunnel shows up like a normal interface: you can apply zone membership, run dynamic routing over it, see it in diagnose ip address list, and use net-device interfaces as members of SD-WAN or aggregate-of-VPN designs.
Best practice: enable it for any route-based VPN you plan to run OSPF or BGP across, put behind SD-WAN, or reference by name in firewall policy the normal way. This is effectively the default expectation for modern route-based FortiGate-to-FortiGate deployments; only disable it in very specific, tightly scoped dial-up designs where you are intentionally avoiding a per-tunnel interface (large-scale hub-and-spoke with hundreds of ephemeral dial-up tunnels, for device count reasons).
add-gw-route
Whether FortiOS automatically inserts a route to the remote gateway’s IP via the outbound interface used to reach it. This exists to guarantee IKE packets can always find their way back out even if your routing table doesn’t already have a path.
Best practice: leave disabled on a FortiGate with a sane default route and static/dynamic routing already covering the WAN. Enabling it on a box with complex policy routing or multiple default routes can silently insert a route that fights your intended path selection.
wizard-type
Purely cosmetic/GUI metadata recording which VPN Wizard template built the tunnel (site-to-site, dial-up FortiClient, hub-and-spoke auto-discovery role, and so on). It has no effect on the actual negotiation.
Best practice: ignore it when auditing configs built entirely by CLI or automation; it will often just read custom. Useful only when reverse-engineering what a GUI wizard originally produced.
Authentication
authmethod and authmethod-remote
psk or signature. authmethod is what this FortiGate presents; authmethod-remote lets you require a different method from the peer (for example, you authenticate with a certificate but only require PSK from the far end), which matters mostly in asymmetric-trust or migration scenarios.
Best practice: PSK is fine for point-to-point site-to-site links where you control both ends and rotate the secret on a schedule. Once you’re aggregating more than a handful of spokes, or terminating any kind of remote-access/dial-up tunnel, move to signature (certificates). PSK doesn’t scale to per-peer revocation, and a leaked shared secret compromises every tunnel using it.
peertype
Controls which peer identities Phase 1 will accept: any (accept any peer ID, common for dial-up), one (a specific peerid), dialup (peer ID matched against a dial-up group), peer (a specific certificate via peer), or peergrp (a certificate group).
Best practice: never leave peertype any on a static, single-peer tunnel. Pin it to one with an explicit peerid, or to a certificate/group if you’re on signature auth. any on a static tunnel means anyone who can reach your public IP and guess (or brute force) the PSK can attempt to bring up the SA.
psksecret
The pre-shared secret itself, ASCII or hex (leading 0x). Stored and referenced, never displayed in plaintext by show.
Best practice: generate it, don’t invent it: a long, high-entropy random string (32+ characters), unique per tunnel, rotated on a schedule and immediately on any suspected exposure or personnel change. Never reuse one PSK across a fleet of spokes. There is also psksecret-remote for asymmetric PSK authentication (different secret in each direction), which is worth knowing exists but is rarely used outside specific compliance-driven designs.
localid and localid-type
localid is the string this gateway presents as its IKE identity. localid-type controls its format: auto (FortiOS picks based on context), fqdn, user-fqdn (an email-style identity), keyid (an arbitrary key ID string), address (the local IP), or asn1dn (a certificate’s distinguished name).
Best practice: set an explicit fqdn-style localid (something like hub-atl.example.com) rather than leaving it on auto, especially behind NAT or on multi-homed boxes where the “obvious” identity isn’t always what IKE picks by default. This also makes debug logs (diagnose debug application ike) far easier to read when you’re juggling a dozen tunnels.
Cryptographic proposal, DH groups, and post-quantum key exchange
proposal
The Phase 1 encryption/authentication algorithm set(s), offered as one or more cipher-hash pairs (for example aes256-sha256, or an AEAD suite like aes256gcm-prfsha384). FortiOS will negotiate down to the strongest mutually-supported option in the list.
Best practice: offer AES-GCM combined modes (aes256gcm-prfsha256 or aes256gcm-prfsha384) as your top choice when both ends support IKEv2, they authenticate and encrypt in one pass and outperform separate CBC+HMAC on NPU-accelerated hardware. Never include des-* or 3des-* in a new build; they exist in the option list purely for legacy interop. Match proposal strength on both sides intentionally, don’t just offer “everything” and let it negotiate down to whatever the weakest peer supports.
dhgrp
The Diffie-Hellman group(s) used for the Phase 1 key exchange. FortiOS supports groups 1, 2, 5, 14 through 21, and 27 through 32 (default is 20, a 384-bit ECP group).
Best practice: group 14 (2048-bit MODP) is the realistic minimum for anything internet-facing today; groups 19 to 21 (elliptic curve) give equivalent or better security at lower CPU cost and are the better default on current hardware. Never use groups 1, 2, or 5, they are considered cryptographically weak and are only present for ancient peer interop. You can list multiple groups to support mixed peers during a migration, but trim the list back down once every peer is upgraded.
addke1 through addke7
Additional Diffie-Hellman/Key-Encapsulation groups layered on top of the classical dhgrp exchange, per the IETF multiple-key-exchange draft for IKEv2. This is how FortiOS does hybrid post-quantum key establishment: the classical DH result and the post-quantum KEM result are combined, so the session key stays secure even if one of the two algorithms is later broken. Supported values include ML-KEM (512/768/1024, the NIST-standardized Kyber), the legacy Kyber round-3 identifiers, FrodoKEM, BIKE, and HQC at multiple security levels. You can stack up to seven of these (addke1…addke7) to combine multiple PQC algorithms in a single hybrid exchange.
Best practice: for any tunnel you are building today with harvest-now-decrypt-later risk in mind (which, for internet-facing site-to-site VPN, is most of them), set addke1 to ML-KEM-768 at minimum, paired with dhgrp 20 or 21 classical. Both ends need matching IKEv2, matching addke settings, and current FortiOS (7.4.4+/7.6.x) for this to negotiate; mismatched peers simply fail Phase 1, so roll it out in matched pairs, not as a blanket global change on a mixed-version fleet.
suite-b
Enables Suite B cryptography (suite-b-gcm-128 or suite-b-gcm-256), the NSA-defined interoperable crypto profile for classified and government interop scenarios.
Best practice: leave disable unless you have a specific government/defense interop requirement calling for Suite B by name. For everything else, hand-picking proposal/dhgrp gives you equivalent or better security with more flexibility.
ppk
Enables IKEv2 Postquantum Preshared Key (RFC 8784): disable, allow (negotiate PPK if the peer offers it, fall back if not), or require (refuse the SA without it). PPK mixes a manually-provisioned, out-of-band secret (ppk-secret, keyed by ppk-identity) into the IKEv2 SA_INIT key derivation, giving you a second, independent layer of protection against a future quantum break of the DH exchange, on top of (not instead of) the addke hybrid mechanism above.
Best practice: PPK and addke solve overlapping but distinct problems: addke protects the key exchange itself; PPK adds a pre-shared, out-of-band component that a network-only compromise (or a future quantum computer that breaks the public-key math entirely) still can’t reproduce without physical/administrative access to both ends. For the highest-assurance site-to-site links, run both. Set ppk require only once you have confirmed the peer supports it; a mismatched require on either side is a hard Phase 1 failure, not a graceful fallback.
qkd and qkd-hybrid
Enables use of a Quantum Key Distribution server (qkd) as a key-material source, and whether it’s combined with the classical/PQC math or trusted on its own (qkd-hybrid). Both take disable/allow/require, plus a qkd-profile pointing at the QKD server integration.
Best practice: this is a niche, hardware-dependent option, relevant only if you have an actual QKD link (fiber-based, distance-limited, expensive) between two sites, which in practice means specific government, financial, or research deployments. For the overwhelming majority of readers, addke (software-only, hybrid PQC) delivers the practical post-quantum benefit without the physical infrastructure. Don’t confuse the two when a vendor conversation mixes them.
esn
Extended Sequence Number negotiation (RFC 4304) for the Phase 1 SA, extending the anti-replay sequence counter beyond 32 bits so high-throughput tunnels don’t exhaust it (and force a rekey) too frequently. Options: require, allow, disable.
Best practice: set allow on modern IKEv2 tunnels running meaningful throughput (multi-gigabit aggregate); it negotiates transparently when both ends support it and costs nothing when they don’t. Note this parameter may not exist on every FortiGate model.
Session lifecycle and rekeying
keylife
Time in seconds before the Phase 1 SA expires and must rekey (range 120 to 172800, default 86400, i.e. 24 hours).
Best practice: the default 24-hour value is a reasonable middle ground. Shortening it (say, to 3600 to 8 hours) reduces the window an attacker gets if a key is ever compromised, at the cost of more frequent renegotiation overhead; that trade-off is usually only worth making on a small number of high-value tunnels, not fleet-wide, since aggressive rekey intervals on hundreds of spokes add real CPU load to a hub.
reauth
Enable/disable full re-authentication (not just a rekey) when the IKE SA lifetime expires. Rekey refreshes the keying material; reauth re-runs the entire authentication exchange, which matters if you want expired/revoked credentials to actually be checked periodically instead of an SA quietly living forever on refreshed keys alone.
Best practice: enable for certificate-authenticated tunnels where revocation matters (you want a revoked cert to actually kill the tunnel on the next cycle, not just on next full reconnect). For PSK site-to-site links it adds limited value since the credential doesn’t change without a config push anyway.
rekey
Enable/disable Phase 1 rekeying at all. Disabling it means the SA simply dies at keylife expiration and must renegotiate from scratch rather than seamlessly refreshing keys in place.
Best practice: leave enabled (the default) for essentially every deployment. Disabling rekey causes a guaranteed, visible tunnel drop at every keylife boundary instead of a seamless in-place refresh, there is no scenario where that’s preferable outside very specific compliance testing.
auto-negotiate
Whether this FortiGate proactively initiates the IKE SA (enable) or waits passively for interesting traffic or the peer to initiate (disable).
Best practice: enable on the side you want to be the reliable initiator, typically the hub in hub-and-spoke, or both sides on a critical site-to-site link so either end can re-establish after an outage without waiting on traffic to trigger it.
negotiate-timeout
How long (1 to 300 seconds, default 30) IKE waits for an SA negotiation to complete before giving up and retrying.
Best practice: the default is fine on low-latency links. On high-latency or lossy WAN paths (satellite, some international MPLS, congested broadband uplinks) where negotiation exchanges are getting cut off mid-handshake, a modest increase (45 to 60 seconds) can resolve intermittent Phase 1 failures that look like a peer or crypto mismatch but are actually a timing issue.
idle-timeout and idle-timeoutinterval
Enable/disable an idle timer that tears the tunnel down after a period of no traffic, and how long that period is (5 to 43200 minutes).
Best practice: leave disabled for always-on site-to-site links; you generally want those up permanently, not torn down and rebuilt every time traffic goes quiet overnight. It’s more relevant for dial-up/remote-access scenarios where you actively want idle sessions to expire for licensing or security reasons.
Liveness, redundancy, and HA
dpd
Dead Peer Detection mode: disable, on-idle (probe only when the tunnel has been idle), or on-demand (probe when traffic is sent but no reply comes back, default). This is what actually notices a peer has silently died (reboot, power loss, upstream path failure) versus just waiting for keylife to expire naturally.
Best practice: leave on-demand enabled on essentially everything. It is the single most important mechanism for fast failover to a backup path or SD-WAN member, disabling DPD on a tunnel you care about means a dead peer can go unnoticed for a very long time.
dpd-retrycount and dpd-retryinterval
How many DPD probes go unanswered (1 to 10, default 3) before the tunnel is declared dead, and the interval between them.
Best practice: the defaults work for most links. Tighten both (lower retrycount, shorter interval) on tunnels backing an SD-WAN performance SLA where you need sub-second-to-few-second failover detection; loosen them on flaky, high-latency links where you don’t want transient loss triggering unnecessary teardown/rebuild cycles.
monitor and monitor-min
monitor names one or more other IPsec interfaces this tunnel acts as a backup for. monitor-min sets how many of those monitored links must degrade (0 means all must be down) before this backup interface activates.
Best practice: this is the classic primary/backup VPN redundancy pattern, pointing a secondary tunnel’s monitor at the primary. Set monitor-min deliberately: 0 (wait for total failure of all monitored links) is right for a true last-resort backup; a nonzero value is right when you want to activate the backup as soon as any one of several primaries degrades, which is a different failure model and worth documenting explicitly so the next engineer understands why it’s set that way.
ha-sync-esp-seqno
Enable/disable syncing ESP sequence numbers between HA cluster members, with a jump-ahead margin so a failover doesn’t cause the new active unit to reuse (and thus have rejected as replay) sequence numbers the old active unit already sent.
Best practice: leave enabled (the default) on any HA pair terminating IPsec. Disabling it risks a burst of legitimate post-failover packets being dropped as replay by the remote peer.
fgsp-sync
Enable/disable syncing IPsec tunnel state specifically for FGSP (FortiGate Session Life Support Protocol, active-active session sync between independently-configured units, as opposed to a traditional HA cluster).
Best practice: enable only in genuine FGSP topologies. It’s a distinct mechanism from standard HA sync above and doesn’t apply outside that specific active-active design.
Mode-config, NAT traversal, and fragmentation
mode-cfg
Enable/disable IKE Configuration Method (Mode-Config), where the FortiGate pushes IP addressing, DNS, split-tunnel routes, and similar client parameters to the peer during Phase 1, the same mechanism FortiClient and native OS clients rely on for address assignment.
Best practice: enable for any dial-up/remote-access design where the peer needs an assigned virtual IP (FortiClient, native IKEv2 clients). Leave disabled for a static site-to-site tunnel between two FortiGates where both ends already have their own real addressing and don’t need one pushed to them, enabling it there adds complexity with no benefit.
passive-mode
Enable/disable IPsec passive mode for static tunnels, this FortiGate will never initiate, only respond. Distinct from auto-negotiate: passive mode is a stronger, structural restriction most relevant to specific dual-homed or asymmetric-role designs.
Best practice: rarely needed outside a deliberate design where one side must never be the initiator (for example, sitting behind a NAT/firewall that only permits inbound-initiated-by-the-other-side connections in one direction). Don’t reach for it as a substitute for correctly setting auto-negotiate.
exchange-interface-ip
Enable/disable exchanging this gateway’s IPsec (tunnel) interface IP address with the peer during negotiation, used in some auto-discovery/hub-and-spoke and dynamic-routing-over-IPsec scenarios where the peer needs to learn your tunnel-side address automatically rather than it being statically configured on both ends.
Best practice: enable when building ADVPN or any topology where spoke tunnel-interface addressing is meant to be dynamically learned rather than hand-provisioned per spoke.
nattraversal
enable (negotiate NAT-T automatically if NAT is detected between peers), disable, or forced (always wrap in UDP 4500 encapsulation regardless of detected NAT).
Best practice: enable is correct for the overwhelming majority of deployments, since it only adds NAT-T overhead when NAT is actually detected. Use forced only when you know a middlebox is silently and inconsistently translating in a way FortiOS’s NAT detection doesn’t reliably catch, forcing UDP 4500 sidesteps that class of problem entirely at the cost of a small amount of constant overhead.
keepalive (Phase 1, NAT-T)
The NAT-T keepalive interval in seconds (5 to 900, default 10), how often a keepalive packet is sent to hold open the UDP 4500 NAT binding on any intermediate NAT device.
Best practice: the default of 10 seconds is conservative and safe for typical consumer/SMB NAT/firewall devices whose translation tables age out quickly. You can lengthen it on a link you know sits behind carrier-grade NAT with long binding timeouts, mainly to shave a small amount of background traffic, but there’s rarely a strong reason to change it.
fragmentation and fragmentation-mtu
Enable/disable IKE message fragmentation on retransmission (splitting oversized IKE packets, which happens routinely with certificate chains or large PQC key-exchange payloads, into pieces that fit the path MTU), and the fragment size (500 to 16000, default 1200).
Best practice: leave fragmentation enabled (the default). It exists specifically to prevent IKE negotiation from failing behind paths that block or silently drop IP fragments, a very common real-world condition. If you’re seeing Phase 1 negotiation stall or fail intermittently on links with a known low path MTU (certain VPN-over-VPN or tunneled-underlay designs), lowering fragmentation-mtu below the path’s actual MTU is a targeted, effective fix.
ip-fragmentation
Whether IP packets are fragmented before IPsec encapsulation (pre-encapsulation) or after (post-encapsulation, the RFC-compliant default). This is about the data plane traffic riding the tunnel, distinct from the IKE-message fragmentation above.
Best practice: leave at the default post-encapsulation unless you have a specific documented reason (typically interop with a peer vendor’s non-standard behavior) to change it. Deviating from RFC-compliant behavior here is a compatibility choice, not a performance one.
transport
Sets the IKE transport protocol: udp (standard), auto (default, prefers UDP but can fall back), or tcp (RFC 8229, IKE/IPsec over TCP). TCP transport exists specifically for environments where UDP 500/4500 is blocked or badly mangled by restrictive middleboxes/proxies, letting IKE tunnel over a TCP port instead.
Best practice: leave auto unless you have a concrete, known-hostile-to-UDP path (a client network behind a very restrictive corporate or public proxy, for instance). tcp transport has real performance trade-offs (head-of-line blocking under packet loss, since it’s TCP-over-a-network-that-then-carries-more-TCP) and should be a deliberate fallback, not a default.
auto-transport-threshold
Timeout in seconds (1 to 300, default 15) before FortiOS gives up on the current transport (say, UDP) and falls back to the next one, only meaningful when transport is set to auto.
Best practice: the default is fine for most links. Extend it modestly on high-latency paths where 15 seconds isn’t enough to distinguish “transport is blocked” from “this link is just slow.”
childless-ike
Enable/disable childless IKEv2 SA initiation (RFC 6023), allowing the IKE SA to come up without an immediate Child SA (Phase 2) negotiation bundled in. Useful for specific dial-up/remote-access architectures that want to separate IKE SA establishment from Phase 2 selector negotiation.
Best practice: leave disabled for standard site-to-site designs, where you always want Phase 2 to follow immediately, there’s no benefit to decoupling them. It’s a narrow feature for specific remote-access client behaviors.
Aggregate links, offload, and QoS
aggregate-member
Enable/disable using this Phase 1 interface as a member of an IPsec aggregate (config vpn ipsec aggregate, multiple tunnels bonded for combined bandwidth and/or redundancy, conceptually similar to a LAG but over IPsec).
Best practice: only relevant if you’re building an IPsec aggregate on top of multiple underlay paths for bandwidth aggregation. Don’t enable it speculatively; it changes how the interface participates in routing and monitoring.
packet-redistribution
Enable/disable RPS (packet distribution) across CPU cores for this IPsec interface, relevant on multi-core platforms pushing enough encrypted throughput that single-core IPsec processing becomes the bottleneck.
Best practice: enable on high-throughput tunnels on platforms without dedicated IPsec offload hardware handling it automatically; check diagnose sys top/CPU-per-core stats first to confirm you actually have a single-core bottleneck before flipping this on everywhere.
npu-offload
Enable/disable offloading IPsec encryption/decryption to the NP6/NP7 network processor hardware, where present.
Best practice: leave enabled (the default on NPU-equipped models). This is the single biggest lever for line-rate IPsec throughput on hardware FortiGates; there’s essentially never a reason to disable it outside of specific troubleshooting where you’re isolating whether a problem is in the NPU fast-path versus the CPU software path.
peer-egress-shaping and peer-egress-shaping-value
Enable/disable capping outbound bandwidth toward this specific peer, and the cap itself in kbps (0 to 80,000,000).
Best practice: useful for a hub protecting itself from one aggressive spoke saturating shared uplink capacity at the expense of others, a per-peer bandwidth ceiling independent of the regular firewall traffic-shaper framework. Set it based on the spoke’s actual provisioned circuit size, not an arbitrary round number.
inbound-dscp-copy (Phase 1)
Enable/disable copying the DSCP marking from the outer ESP header into the inner, decapsulated IP header on the receiving side. This preserves QoS markings that were visible on the outer header across the tunnel boundary.
Best practice: enable when your WAN/SD-WAN underlay is actively marking and prioritizing based on outer-header DSCP and you need that same prioritization to carry through to policies and shapers acting on the decrypted inner traffic. Leave disabled if you’d rather trust only the original, sender-marked inner DSCP and not have it silently overwritten by whatever the transport network stamped on the outside.
link-cost
An administrative cost value (0 to 255) for this VPN tunnel’s underlay link, used by SD-WAN and related path-selection logic as a tiebreaker/weighting input, separate from actual measured SLA metrics.
Best practice: use it to express a static preference (this underlay is more expensive per-GB, or is a backup circuit you want deprioritized) that measured latency/jitter/loss alone wouldn’t capture. Document why a given cost value was chosen, since it isn’t self-evidently derived from anything measurable.
ADVPN auto-discovery
auto-discovery-sender, auto-discovery-receiver, auto-discovery-forwarder
The three roles in Fortinet’s ADVPN (Auto-Discovery VPN) shortcut mechanism. sender and receiver let a spoke send/accept auto-discovery messages that trigger dynamic spoke-to-spoke shortcut tunnels instead of always routing through the hub. forwarder lets a hub relay those discovery messages between spokes that don’t have a direct relationship configured.
Best practice: on a hub, enable forwarder (and typically receiver) so it can broker shortcut setup between spokes. On spokes, enable both sender and receiver so they can both request and accept a direct shortcut once traffic volume justifies bypassing the hub. This is the mechanism that turns a plain hub-and-spoke into a self-optimizing mesh, it’s the core of ADVPN 1.0/2.0 and worth understanding in full if you’re doing any Fortinet SD-WAN overlay design.
Overlay encapsulation
encapsulation (Phase 1)
Enable/disable an additional outer encapsulation layer beyond standard IPsec: none, gre, vxlan, or vpn-id-ipip. This is how FortiOS supports carrying Layer 2 or multicast/broadcast-capable overlays (GRE, VXLAN) across an IPsec-protected underlay, rather than plain routed IP-in-IP.
Best practice: leave none for standard routed site-to-site IPsec. Reach for vxlan when you specifically need to extend Layer 2 segments or support EVPN/VXLAN fabrics across a WAN via an IPsec-protected transport; gre is the simpler choice when you just need multicast or a non-IP protocol to ride the tunnel and don’t need full VXLAN’s VNI segmentation.
network-overlay
Enable/disable network overlay mode more broadly, generally paired with network-id to give a tunnel a distinct overlay identifier, relevant to multi-tenant or multi-overlay SD-WAN fabric designs where several logical overlays share physical underlay paths.
Best practice: this is fabric/multi-tenant design territory, leave disabled for a conventional single-overlay deployment. Enable deliberately as part of a broader SD-WAN fabric or multi-tenant overlay architecture, not in isolation.
fortinet-esp
Enable/disable a Fortinet-proprietary ESP encapsulation variant used in specific FortiGate-to-FortiGate optimized paths.
Best practice: only relevant, and only compatible, between FortiGates. Never enable it on a tunnel terminating to a third-party peer (Cisco, Palo Alto, cloud provider VPN gateway, and so on); it will simply fail to interoperate.
Forward Error Correction
fec-egress and fec-ingress
Enable/disable Forward Error Correction for outbound and inbound IPsec traffic respectively, adding redundant packets (Reed-Solomon or XOR, set via fec-codec, with base/redundant packet counts and send/receive timeouts configured alongside) so the receiving end can reconstruct lost packets without a retransmission round-trip.
Best practice: enable on links with meaningful, chronic packet loss where retransmission latency (voice, video, real-time control traffic) is more costly than the bandwidth overhead FEC adds. Don’t enable it on clean, low-loss links, you’d be spending bandwidth for no benefit. Tune fec-base/fec-redundant to the loss rate you’re actually seeing (check diagnose vpn ipsec and SD-WAN SLA history first), not a guess.
Management, identity exchange, and misc
comments
A free-text field (up to 255 characters) attached to the tunnel object. Purely documentation, no functional effect.
Best practice: actually use it. A one-line note (“Site-to-site to Doral DC, PQC-hybrid, backup for Atlanta primary”) saves the next engineer, quite possibly you in six months, a lot of reverse-engineering.
exchange-fgt-device-id
Enable/disable exchanging a FortiGate device identifier with the peer, specifically so FortiManager can correlate VPN monitor data against device identity across a managed fleet.
Best practice: enable in any FortiManager-managed environment where VPN topology visibility in FortiManager matters. No benefit (and no downside) enabling it toward a non-Fortinet peer, it simply won’t be understood.
ems-sn-check
Enable/disable verifying the connecting endpoint’s FortiClient EMS serial number as part of Phase 1, tying tunnel establishment to a specific EMS-enrolled, compliance-checked device rather than just a valid credential.
Best practice: enable wherever you’re running FortiClient EMS device compliance and want VPN access itself gated on EMS enrollment/posture, not just on a certificate or PSK. This is a meaningful Zero Trust control for remote-access designs, not something a site-to-site FortiGate-to-FortiGate tunnel needs.
kms
Points at a Key Management Services server integration for centralized key material handling, rather than keys being generated/stored purely locally on each FortiGate.
Best practice: relevant in environments with a centralized KMS requirement (regulatory, or a broader enterprise key-management standard the security team already mandates). Most SMB and mid-market deployments will never touch this field.
dev-id-notification
Enable/disable sending a device ID (dev-id) notification payload to the peer during negotiation, an identifier string distinct from the FortiGate-specific device ID exchange above, usable in cross-vendor or custom identification schemes.
Best practice: leave disabled unless a specific integration or peer requires it. It’s not something a standard FortiGate-to-FortiGate build needs to worry about.
Phase 2: The IPsec (Child) Security Association
Phase 2 (config vpn ipsec phase2-interface) rides inside the Phase 1 IKE SA and negotiates the actual data-plane protection, the cipher suite for the ESP tunnel, which traffic (proxy IDs / traffic selectors) is allowed to use it, and how long that specific SA lives before it must rekey. A tunnel can have multiple Phase 2 selectors under one Phase 1, which is exactly how policy-based-style, multi-subnet-pair VPNs are built on top of a route-based interface.
Core binding and cryptographic proposal
phase1name
Which Phase 1 (IKE SA) this Phase 2 selector rides on. Mandatory, this is the field that actually attaches a Phase 2 to a specific tunnel.
Best practice: no real decision here beyond correctness, just make sure it points at the intended Phase 1 name, especially in larger configs with many similarly-named tunnels where a copy/paste error is an easy mistake.
proposal (Phase 2)
The ESP cipher/authentication proposal for the data-plane SA. The Phase 2 option list is broader than Phase 1’s, it includes null-* (authentication-only, no encryption) and AEAD ciphers like aes256gcm and chacha20poly1305 without a separate hash suffix, since AEAD modes provide integrity as part of the cipher itself.
Best practice: mirror the Phase 1 guidance, AES-GCM (aes256gcm or aes128gcm) as the preferred choice on modern hardware, avoiding des-*/3des-*, and never using null-* (no encryption at all) outside a very specific, deliberate authenticated-but-unencrypted design (rare, and almost never the right call for anything crossing the public internet).
pfs
Enable/disable Perfect Forward Secrecy: whether Phase 2 performs its own fresh Diffie-Hellman exchange (using the dhgrp below) rather than deriving its keys purely from Phase 1 keying material. With PFS, compromising one Phase 2 SA’s key doesn’t expose past or future SAs; without it, all Phase 2 rekeys under a given Phase 1 SA derive from the same root material.
Best practice: enable (the default) on essentially everything. The CPU cost of PFS on modern hardware is negligible compared to the security benefit; disabling it is a real, meaningful downgrade almost never worth the marginal negotiation-time savings.
dhgrp (Phase 2)
The DH group used specifically for the PFS exchange above, same option list and same guidance as Phase 1’s dhgrp: prefer 19 to 21 (ECP) or 14 (2048-bit MODP) as a floor, avoid groups 1/2/5.
Best practice: it’s common, and fine, to use a different (even stronger) group here than in Phase 1, since Phase 2 rekeys far more frequently and each PFS exchange is independent. Just make sure both ends actually support whatever you pick, a Phase 2 DH mismatch fails cleanly but is an easy thing to overlook when auditing an existing config.
addke1 through addke7 (Phase 2)
The same post-quantum hybrid key-exchange mechanism as Phase 1’s addke fields, applied to the Phase 2 PFS exchange. Same ML-KEM/Kyber/FrodoKEM/BIKE/HQC option set.
Best practice: if you’re doing PQC hybrid key exchange at Phase 1, extend the same posture to Phase 2’s PFS exchange, otherwise you’ve protected the IKE SA against harvest-now-decrypt-later risk but left the actual data-plane rekeys on classical-only DH. Match the algorithm choice to what you set in Phase 1 for consistency and easier troubleshooting.
Traffic selectors (proxy IDs)
src-addr-type and dst-addr-type
The type of the local (src) and remote (dst) proxy ID: subnet, range, ip, or name (a firewall address/group object), plus IPv6 equivalents (subnet6, range6, ip6, name6).
Best practice: use name (a firewall address object) rather than a bare subnet wherever practical. It gives you a single point of change if the subnet is ever renumbered, and it’s self-documenting in a way a bare 10.0.0.0/16 0.0.0.0 pair in a config dump is not.
src-subnet and dst-subnet
The actual local and remote IPv4 subnet/mask pair defining what traffic this Phase 2 selector protects, the classic “interesting traffic” definition inherited from policy-based VPN concepts, still meaningful even on a route-based interface because it constrains what the negotiated SA will actually carry.
Best practice: be as specific as the design allows. 0.0.0.0/0 selectors (“any-any”) are sometimes necessary (typically full-tunnel remote access or certain SD-WAN overlay patterns) but on a site-to-site link between two known networks, scope the selectors to the actual subnets in use, it limits blast radius and makes the config self-documenting.
src-port and dst-port
Quick-mode source/destination port selectors (1 to 65535, or 0 for all).
Best practice: leave at 0 (all ports) for standard site-to-site IP connectivity. Port-scoped selectors are a narrow, specific tool, mostly seen in legacy policy-based VPN designs that were built to mimic a firewall-rule-like port restriction directly in the tunnel definition; on a modern build, do that port restriction in firewall policy instead, where it’s far easier to audit and change.
protocol
Quick-mode protocol selector (1 to 255, or 0 for all), restricting the SA to a specific IP protocol number (6 for TCP, 17 for UDP, 50/51 if you’re doing something unusual like nesting IPsec, and so on).
Best practice: same guidance as ports, leave at 0 and let firewall policy do protocol filtering unless you have a specific legacy requirement to restrict at the tunnel-selector level itself.
initiator-ts-narrow
Enable/disable IKEv2 traffic-selector narrowing on the initiator side (RFC 7296 section 2.9): when the initiator proposes a broad selector and the responder replies with a narrower one, this lets FortiOS accept and install the narrowed result rather than requiring an exact match.
Best practice: enable when peering with strict RFC-compliant IKEv2 implementations (many third-party vendors) that will offer a narrowed selector back, without this, you can get a class of Phase 2 failures that look like a selector mismatch but are really a narrowing negotiation FortiOS wasn’t configured to accept.
Lifecycle
keylifeseconds and keylife-type
keylifeseconds (120 to 172800, default 43200, 12 hours) sets the time-based rekey interval. keylife-type chooses whether the SA rekeys on time (seconds), on traffic volume (kbs, kilobytes, via the separate keylifekbs field), or both (rekeys on whichever threshold hits first).
Best practice: time-based is the standard default and is fine for most links. Volume-based (or both) rekeying is worth adding on very high-throughput tunnels, where a purely time-based interval could mean an enormous amount of traffic gets encrypted under a single key before it ever rotates; capping it by data volume as well puts a hard ceiling on how much ciphertext any one key ever protects.
Reliability and ADVPN
replay
Enable/disable anti-replay detection on the Phase 2 SA (sequence-number checking against a sliding window to reject duplicated/replayed packets).
Best practice: leave enabled (the default) on essentially every tunnel. This is a core IPsec integrity control; disabling it is really only ever done for very specific packet-capture/lab-analysis scenarios, never in production.
keepalive (Phase 2)
Enable/disable Phase 2-level keepalive traffic to keep the SA active. Distinct from the Phase 1 NAT-T keepalive interval covered above.
Best practice: generally left to inherit sensible defaults; adjust deliberately if you have a specific idle-SA-expiry problem on a tunnel that should stay warm despite genuinely quiet traffic patterns.
auto-negotiate (Phase 2)
Enable/disable automatic SA negotiation for this specific Phase 2 selector, mirroring the Phase 1 concept but scoped to this Child SA.
Best practice: enable on selectors backing always-on connectivity you want to self-heal without waiting on triggering traffic, same reasoning as Phase 1.
auto-discovery-sender and auto-discovery-forwarder (Phase 2)
Whether this specific Phase 2 selector participates in ADVPN shortcut sender/forwarder behavior, or simply inherits (phase1, the default) whatever was configured at the Phase 1 level.
Best practice: leave at the phase1 default in the overwhelming majority of designs, so ADVPN behavior is controlled in one place. Only override per-selector if you have a specific reason a particular subnet pair should behave differently from the rest of the tunnel’s shortcut policy.
Encapsulation and QoS
encapsulation (Phase 2)
tunnel-mode (the default, entire original IP packet encapsulated, standard for site-to-site and remote-access VPN) or transport-mode (only the payload is protected, original IP header stays exposed, used almost exclusively for host-to-host protection, like protecting GRE or L2TP payloads that are themselves providing the tunneling).
Best practice: use tunnel-mode for essentially all standard site-to-site and remote-access designs. transport-mode is a specialized tool, most commonly seen paired with l2tp (this Phase 2 config also exposes an l2tp enable/disable flag for exactly that combination) or GRE-over-IPsec designs where the outer routing/encapsulation is already handling addressing.
inbound-dscp-copy (Phase 2)
Same mechanism as the Phase 1 field, copy the outer ESP header’s DSCP marking to the inner decapsulated packet, but scoped per-selector. Defaults to inheriting the Phase 1 (phase1) setting.
Best practice: leave at the phase1 default unless a specific subnet pair riding this tunnel needs different QoS-marking behavior than the rest of the traffic on the same Phase 1.
diffserv and diffservcode
Enable/disable applying a specific DSCP value (diffservcode) to the IPsec tunnel’s outer IP header, the reverse direction of the inbound-dscp-copy concept, this is about marking outbound encrypted traffic for QoS treatment by the transport network, not preserving an existing inner marking.
Best practice: enable and set diffservcode when your WAN/SD-WAN underlay makes QoS decisions based on outer-header DSCP and the inner traffic’s own marking either doesn’t exist or isn’t something you want the transport network reading directly. This is how you get consistent outer-header QoS treatment for tunneled traffic regardless of what’s happening inside.
Misc
comments (Phase 2)
Same free-text documentation field as Phase 1, scoped to this specific selector.
Best practice: same guidance, use it, especially on tunnels with multiple Phase 2 selectors where it’s not obvious at a glance which subnet pair a given entry represents.
The short version
If you only walk away with a handful of defaults to change on your next build: IKEv2 over IKEv1, AES-GCM proposals over separate cipher/HMAC pairs, DH group 19 to 21 (or 14 as a floor) and never groups 1/2/5, PFS always on, DPD on-demand always on, a pinned peertype/peerid instead of any on static tunnels, and, if harvest-now-decrypt-later risk applies to your traffic (it usually does), addke set to ML-KEM-768 on both Phase 1 and Phase 2 as soon as both ends support it. Everything else in this list is a dial you turn for a specific, identifiable reason, not a set of settings you touch by default.
Reference: a hardened baseline stanza
Putting the above defaults into an actual static site-to-site pair, hub side, PSK auth, IKEv2, AES-GCM, DH group 21, ML-KEM-768 hybrid PQC, DPD on-demand:
config vpn ipsec phase1-interface
    edit "to-branch01"
        set type static
        set interface "wan1"
        set ike-version 2
        set local-gw 198.18.10.1
        set remote-gw 198.18.20.1
        set peertype one
        set peerid "branch01.example.com"
        set authmethod psk
        set psksecret ENC <redacted>
        set proposal aes256gcm-prfsha384
        set dhgrp 21
        set addke1 36
        set dpd on-demand
        set dpd-retrycount 3
        set dpd-retryinterval 5
        set nattraversal enable
        set fragmentation enable
        set net-device enable
        set auto-negotiate enable
    next
end
config vpn ipsec phase2-interface
edit "to-branch01"
set phase1name "to-branch01"
set proposal aes256gcm
set pfs enable
set dhgrp 21
set addke1 36
set replay enable
set auto-negotiate enable
set keylifeseconds 43200
set src-subnet 10.10.0.0 255.255.0.0
set dst-subnet 10.20.0.0 255.255.0.0
next
endSwap local-gw/remote-gw, peerid, and the subnet pair for the branch side, and confirm the branch FortiGate is on FortiOS 7.4.4 or later (7.6.x for the fullest ADDKE option set) before turning on addke1, an older peer will simply fail Phase 1 rather than gracefully falling back to classical-only DH.
Recent posts
-

-

DNS is one of those technologies that quietly underpins... Full Story
-

BGP issues on FortiGate firewalls usually trace back to... Full Story
-

Every time your laptop talks to your router, a... Full Story
-

If you've spent any time configuring NAT on a... Full Story
-

If you have spent any time configuring firewall policies... Full Story
-

High availability on FortiGate is one of those features... Full Story
-

If you've configured SD-WAN on a FortiGate, you've almost... Full Story
-

FortiLink is the management protocol that turns a FortiSwitch... Full Story
-

FortiSwitches are pretty rock solid from Mean Time Between... Full Story
-

This is a quicky tip. Have you ever gone... Full Story
-

DNS is one of those quiet pieces of internet... Full Story
-

This article is an updated version of the previous... Full Story
-

You will add ns2 as a secondary (slave) BIND9... Full Story
-

In the process of deploying my lab, I needed... Full Story
-

RFC 8805, used to be known as Self-Correcting IP... Full Story
-

Years back, I wrote an article about certificate pinning. ... Full Story
-

FortiGates have the ability to send alerts to Microsoft... Full Story
-

In this post, I am going to walk through... Full Story
-

Troubleshooting VoIP on a FortiGate can feel like trying... Full Story
-

Prior to FortiOS 7.0, there were three commands to... Full Story
-

In this post, I am going to go over... Full Story
-

What we are going to do: We are going... Full Story
-

Choosing between FGCP (FortiGate Clustering Protocol) and FGSP (FortiGate... Full Story
-

Creating a VLAN on macOS (The "Pro" Move) A... Full Story
-

This blog post explores the logic behind how macOS... Full Story
-

Pretty Fly for a Wi-Fi Tell My Wi-Fi Love... Full Story
-

Part of my daily gig is creating BoMs (Bill-of-Materials)... Full Story
-

ICMP introduces several security risks, but careful filtering, rate... Full Story
-

The command diag debug application dhcps -1 enables full... Full Story
-

In the world of FortiOS, execute tac report is... Full Story
-

LLDP; What is it The Link Layer Discovery Protocol... Full Story
-

What it actually does When you run diagnose fdsm... Full Story
-

Monkey Bites are bite-sized, high-impact security insights designed for... Full Story
-

I have run macOS in macOS with Parallels but... Full Story
-

Don't be confused with my other FortiNAC posts where... Full Story
-

This is the third session in a multi-part article... Full Story
-

Today I was configuring key-based authentication on a FortiGate... Full Story
-

Netcat, often called the "Swiss Army knife" of networking,... Full Story
-

At its core, IEEE 802.1X is a network layer... Full Story
-

In case you did not see the previous FortiNAC... Full Story
-

This is our 5th session where we are going... Full Story
-

Now that we have Wireshark installed and somewhat configured,... Full Story
-

The Philosophy of Packet Analysis Troubleshooting isn't about looking... Full Story
-

Executive Summary Objective: Give a practitioner-level walkthrough of the... Full Story
-

Ran into a scenario where one of my customers... Full Story
-

Contents Phase 1: The IKE Security Association Gateway identity... Full Story