If you've spent any time configuring user authentication on... Full Story
By Manny Fernandez
July 25, 2019

Managing Guest Users in Fortigate Firewalls
Sometime, a company may want to create guest users for wireless or wired connections. Additionally, companies may want to have administrators with limitedv access to ONLY create guest accounts.
Use Case:
Receptionist greets guests of your organization. These guests will require Internet access. The receptionist will collect business cards from the guests and use the information contained therein to create the account.
Steps we will take:
- Define a group
- Define a restricted administrator
- Configure SSID or Wired Captive Portal
Here we go….
Step 1 – Creating the Guest User Group
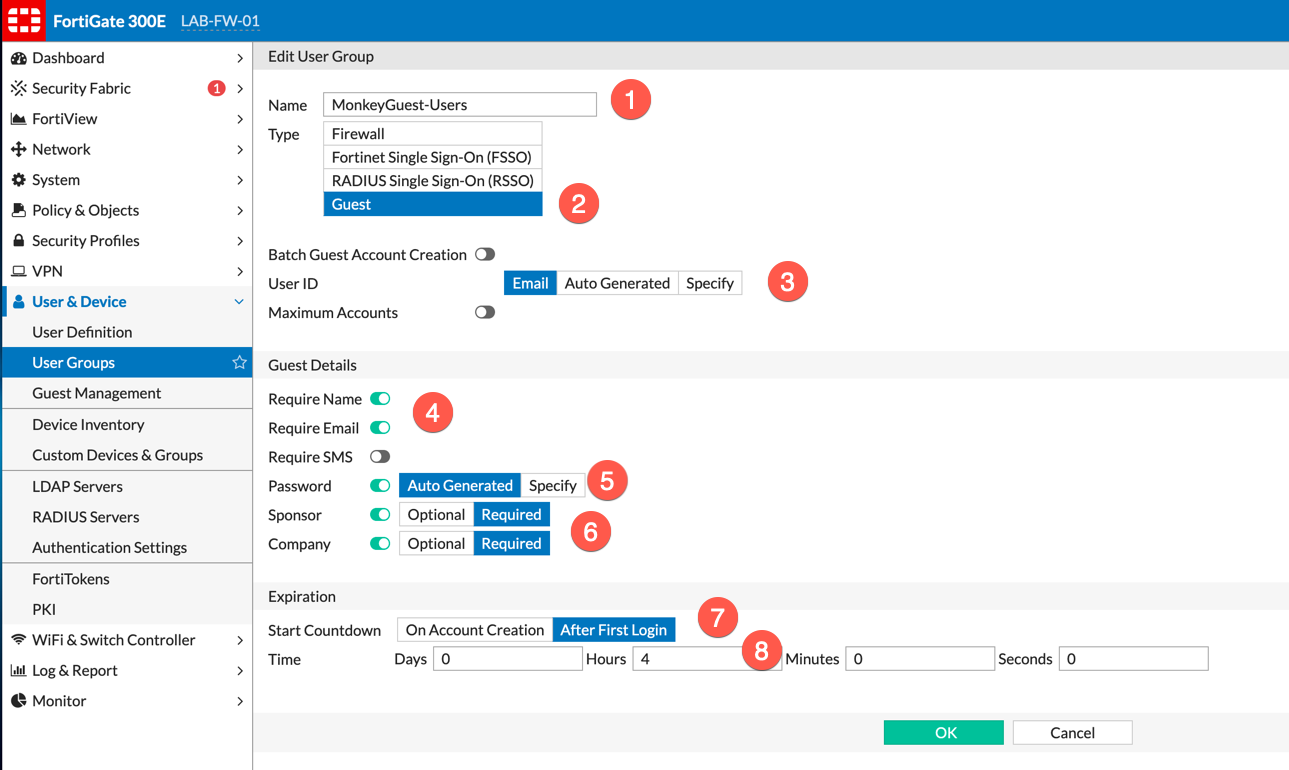
Let’s start by going to User & Device then choose User Group.
- Give the group a descriptive name.
- Choose the pre-defined
Guesttype. - User ID – You can choose
Email Address,Auto GeneratedandSpecify. I have foundemailis the simplest. - Required Fields – You can optionally require the administrators to enter name and email.
- Password – You can either have the Fortigate autogenerate or you can specify. I have found the
Autogeneratedis much easier. - Sponsor Information – You can set the information for
Sponsor NameandCompanyas eitherOptionalorRequired. - Start Countdown – You can start the countdown either after the creation or after the first login.
- Time – This will define what the default will be when they create a user.
Step 2 – Creating the Limited Administrator
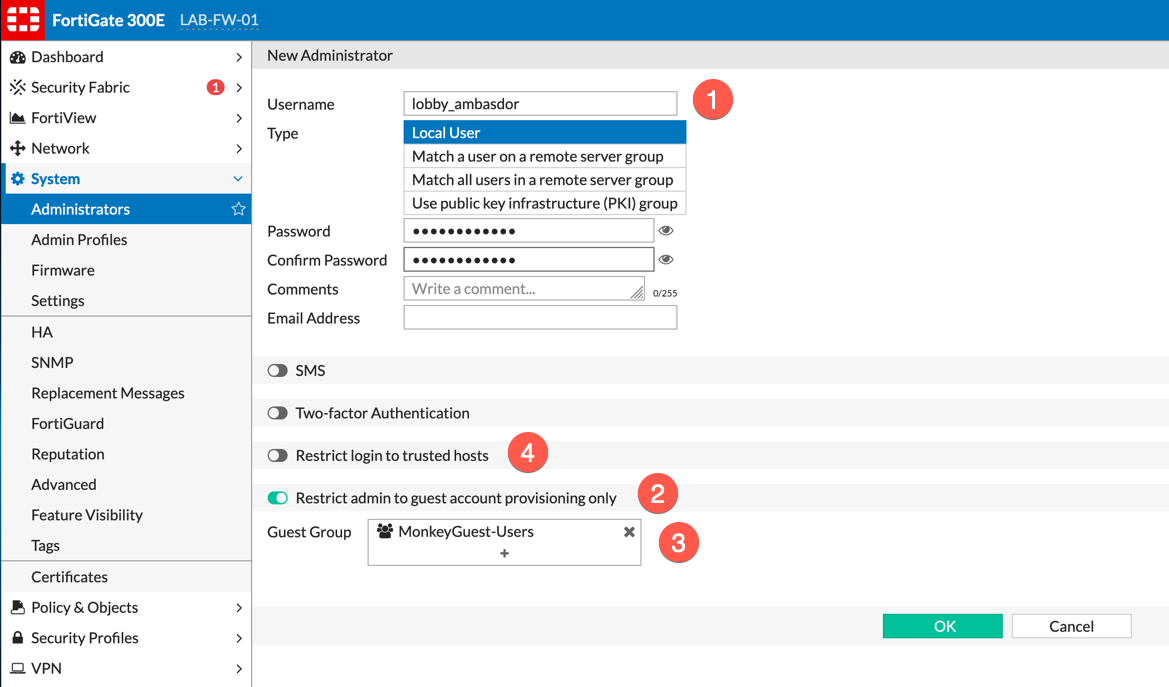
Now we will need to create a restricted administrator that will only be allowed to manage guest accounts.
Go to System then Administrators.
- Provide a name for the administrator
- Choose the
Restrict admin to guest account provisioning onlyradio button. - Choose the
Guest Groupwe create above. - Optionally, you can restrict this user to a
Trusted Host.
Step 3 – Logging in as restricted administrator
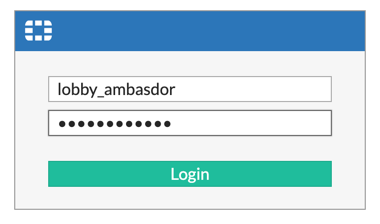
Now we will log into the Fortigate Firewall using the restricted administrator we created in Step 2
Step 4 – Portal View
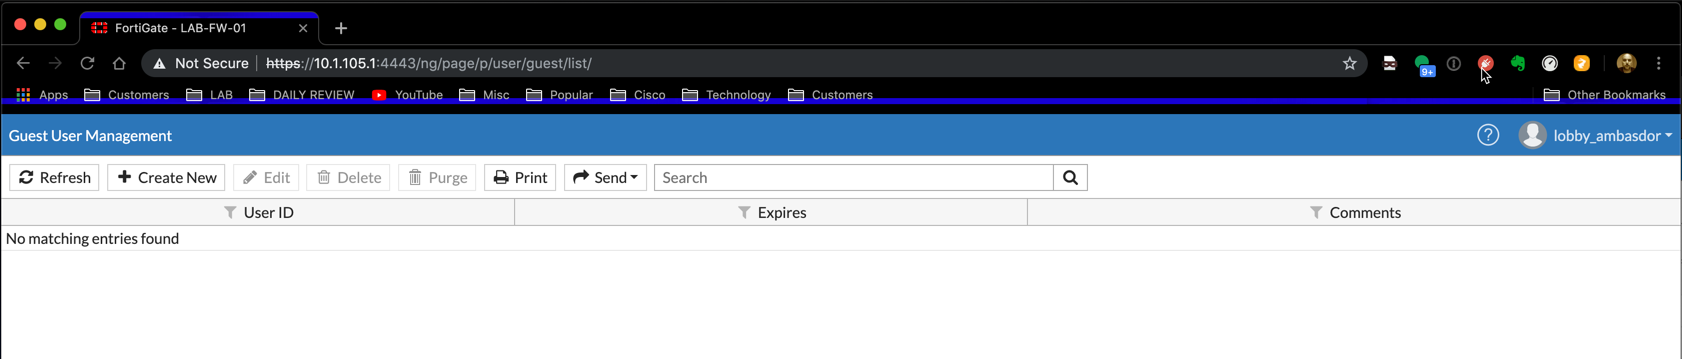
You will notice upon logging in, that there are limited options. Let’s choose Create New to create a new guest account.
Step 5 – Creating the guest user
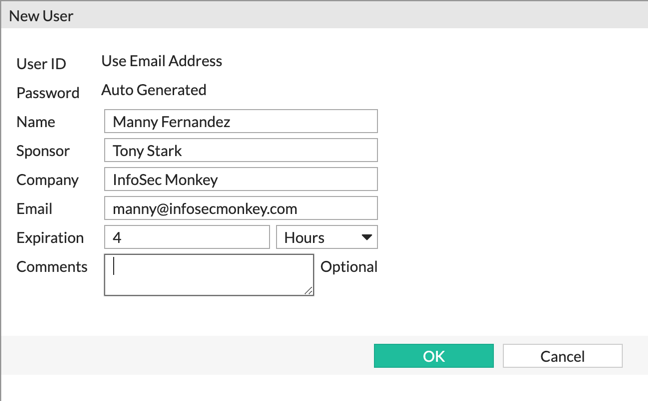
We can see the guest user I am creating. It contains the Name, Sponsor, Company, my eMail, and the default suggested expiration time.
Step 6 – Sending out credentials
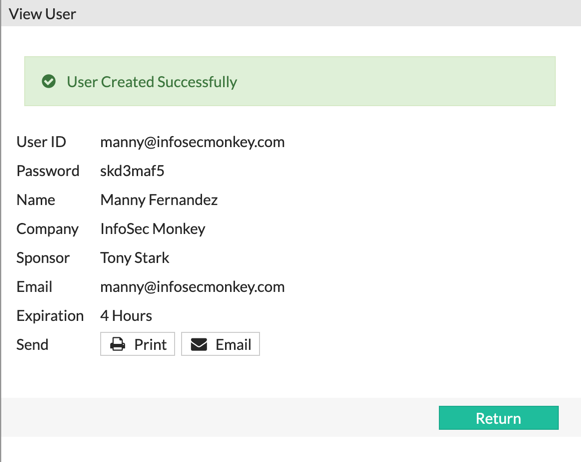
Once you create the user, you will have the option to either Print or Email the user information. I will choose the Email option.
Step 7 – Receiving the email
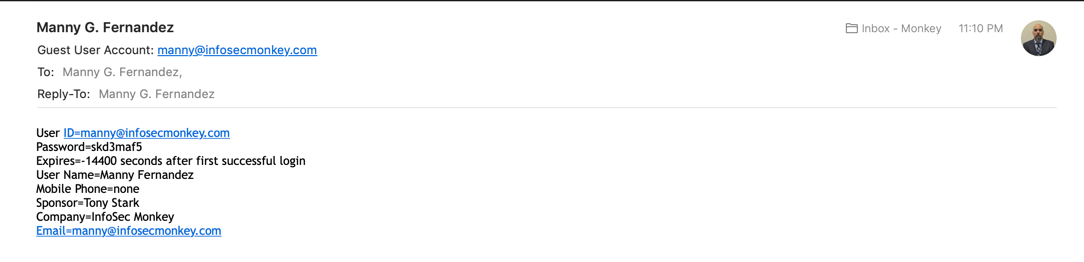
As you can see in the email screenshot, we can see that the following information is provided:
User ID=manny@infosecmonkey.com Password=skd3maf5 Expires=-14400 seconds after first successful login User Name=Manny Fernandez Mobile Phone=none Sponsor=Tony Stark Company=InfoSec Monkey Email=manny@infosecmonkey.com
This is provided to the guest user.
Step 8 – Using what we just created
Step 8 A – Wireless SSID

When you create the SSID, you have the option to change the Security Mode to Captive Portal. Then you can define what User Group can use this SSID.
Step 8 B – Wired Portal
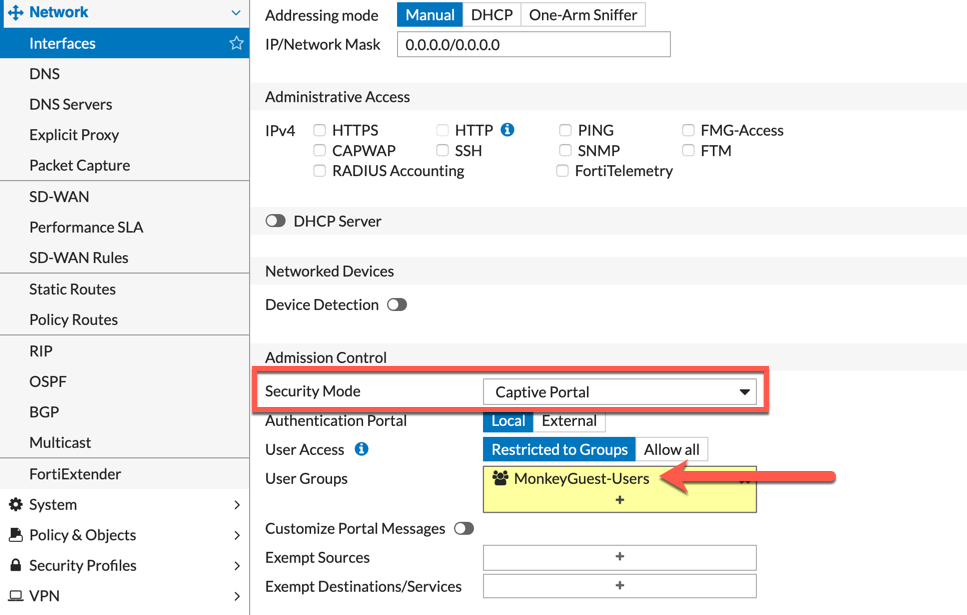
When you modify the interface, you have the option to change the Security Mode to Captive Portal. Then you can define what User Group can use this Authentication.
Hope this helps
Recent posts
-

-

DNS is one of those technologies that quietly underpins... Full Story
-

BGP issues on FortiGate firewalls usually trace back to... Full Story
-

Every time your laptop talks to your router, a... Full Story
-

If you've spent any time configuring NAT on a... Full Story
-

If you have spent any time configuring firewall policies... Full Story
-

High availability on FortiGate is one of those features... Full Story
-

If you've configured SD-WAN on a FortiGate, you've almost... Full Story
-

FortiLink is the management protocol that turns a FortiSwitch... Full Story
-

FortiSwitches are pretty rock solid from Mean Time Between... Full Story
-

This is a quicky tip. Have you ever gone... Full Story
-

DNS is one of those quiet pieces of internet... Full Story
-

This article is an updated version of the previous... Full Story
-

You will add ns2 as a secondary (slave) BIND9... Full Story
-

In the process of deploying my lab, I needed... Full Story
-

RFC 8805, used to be known as Self-Correcting IP... Full Story
-

Years back, I wrote an article about certificate pinning. ... Full Story
-

FortiGates have the ability to send alerts to Microsoft... Full Story
-

In this post, I am going to walk through... Full Story
-

Troubleshooting VoIP on a FortiGate can feel like trying... Full Story
-

Prior to FortiOS 7.0, there were three commands to... Full Story
-

In this post, I am going to go over... Full Story
-

What we are going to do: We are going... Full Story
-

Choosing between FGCP (FortiGate Clustering Protocol) and FGSP (FortiGate... Full Story
-

Creating a VLAN on macOS (The "Pro" Move) A... Full Story
-

This blog post explores the logic behind how macOS... Full Story
-

Pretty Fly for a Wi-Fi Tell My Wi-Fi Love... Full Story
-

Part of my daily gig is creating BoMs (Bill-of-Materials)... Full Story
-

ICMP introduces several security risks, but careful filtering, rate... Full Story
-

The command diag debug application dhcps -1 enables full... Full Story
-

In the world of FortiOS, execute tac report is... Full Story
-

LLDP; What is it The Link Layer Discovery Protocol... Full Story
-

What it actually does When you run diagnose fdsm... Full Story
-

Monkey Bites are bite-sized, high-impact security insights designed for... Full Story
-

I have run macOS in macOS with Parallels but... Full Story
-

Don't be confused with my other FortiNAC posts where... Full Story
-

This is the third session in a multi-part article... Full Story
-

Today I was configuring key-based authentication on a FortiGate... Full Story
-

Netcat, often called the "Swiss Army knife" of networking,... Full Story
-

At its core, IEEE 802.1X is a network layer... Full Story
-

In case you did not see the previous FortiNAC... Full Story
-

This is our 5th session where we are going... Full Story
-

Now that we have Wireshark installed and somewhat configured,... Full Story
-

The Philosophy of Packet Analysis Troubleshooting isn't about looking... Full Story
-

Overview FortiOS 8.0 introduces custom tags as a first-class... Full Story
-

These are two distinct mechanisms on FortiOS, and conflating... Full Story
-

Replacement messages are the pages and text blocks that... Full Story