If you've spent any time configuring user authentication on... Full Story
By Manny Fernandez
November 6, 2019

Running a FortiTest with FortiTester
Earlier, I wrote an article on upgrading the FortiTester. At the time, I did not have any SFPs for 10GB ports on the FortiTester. For the test I need to run, I need copper connections. The customer only has 200Mbps at each location, so the 1GB Copper ports would do the job. I reached out to a friend of mine, Adonis Sardinas and he was able to lend me (2) 1Gb copper SFPs. So here we go.
My Scenario
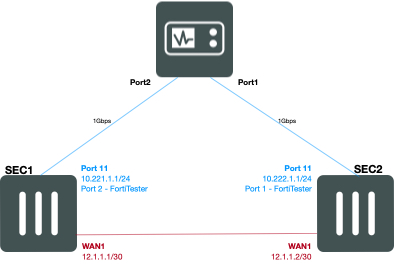
As you can see in Figure 1, My Network has a VPN between WAN1 of SEC1 and WAN1 of SEC2. These are FortiGate 140Es. I have local subnets attached to port11 of both FortiGates. The use case is to see how much data we can get across the VPN before the FortiGates choke.
SEC1
Interface 11 - 10.221.1.1/24 (Connected to FortiTester Port2)
WAN1 - 12.1.1.1/30


SEC2
Interface 11 - 10.222.1.1/24 (Connected to FortiTester Port1)
WAN1 - 12.1.1.2/30
VPN Configuration
In this example, I am creating a standard IPSec (IKEv1) VPN between the two SEC firewalls. For Phase II selectors I used quad 0's or 0.0.0.0/0.
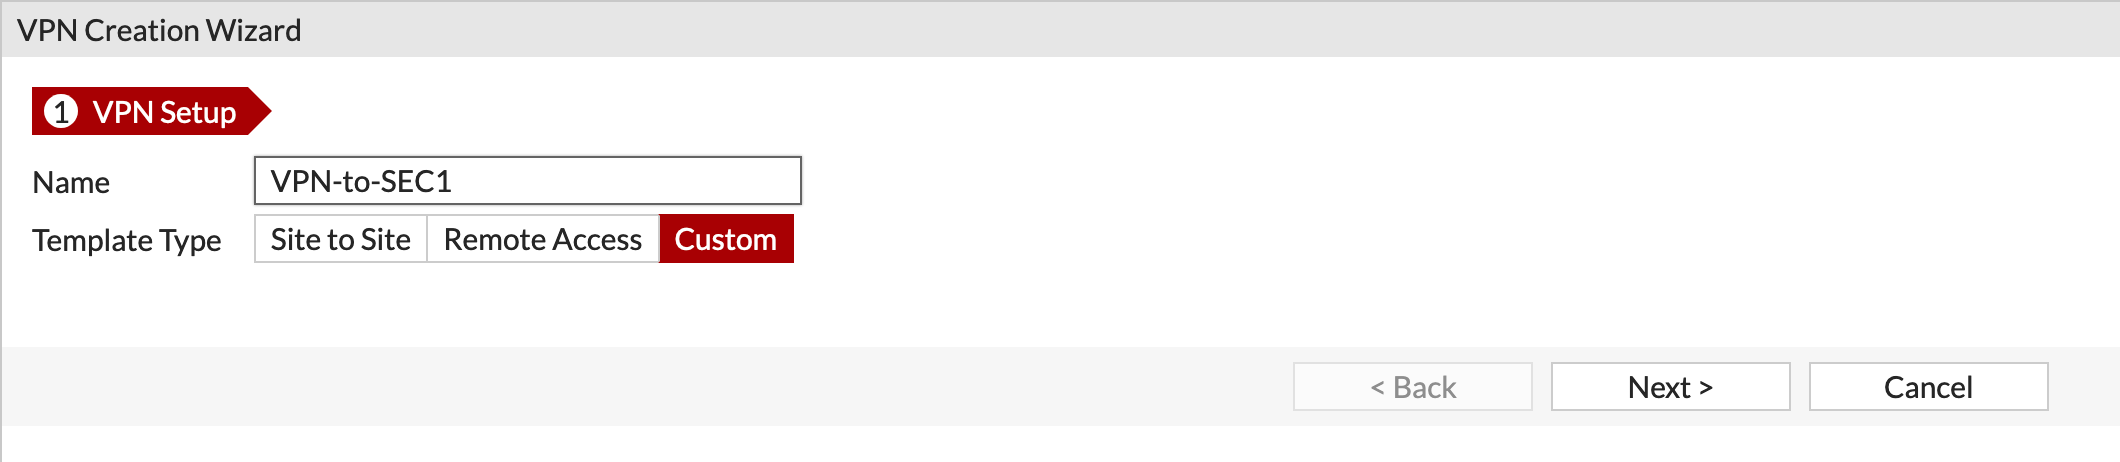
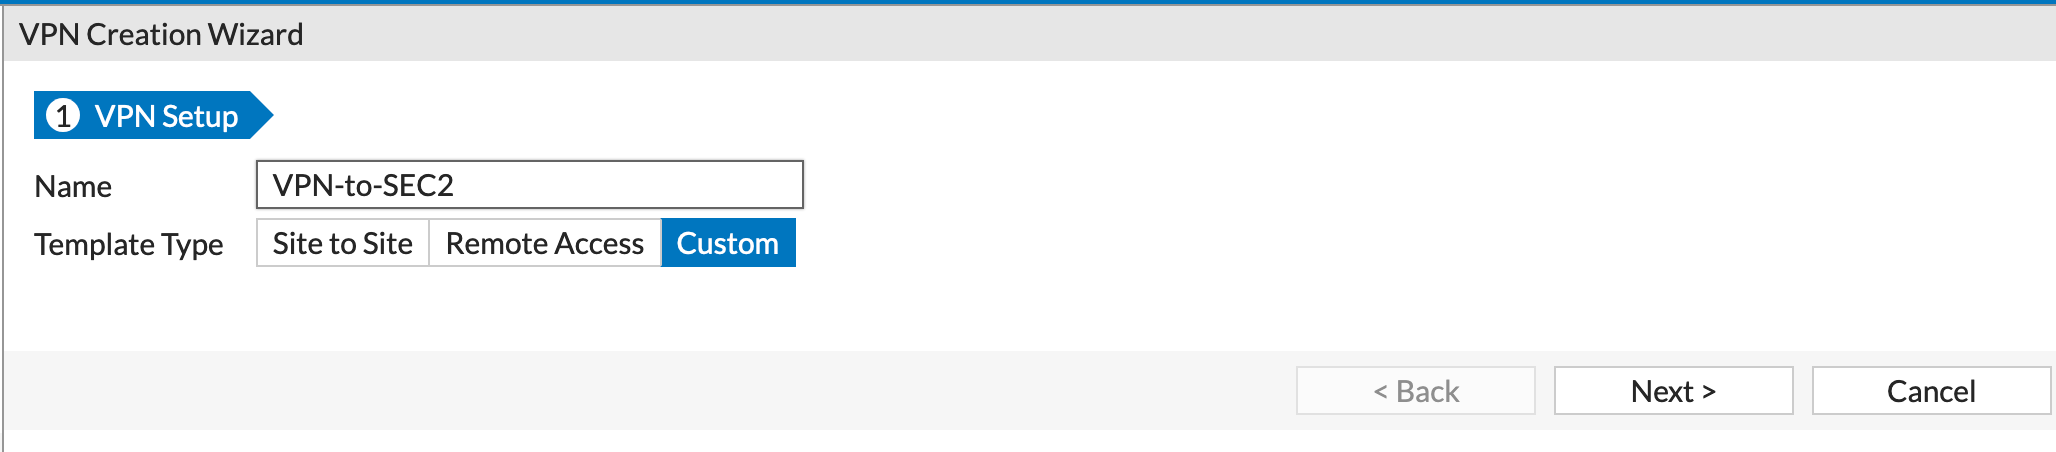
We started off by creating a VPN using the Wizard. As you can see, I like to use the Custom type as it allows me to choose my own options.
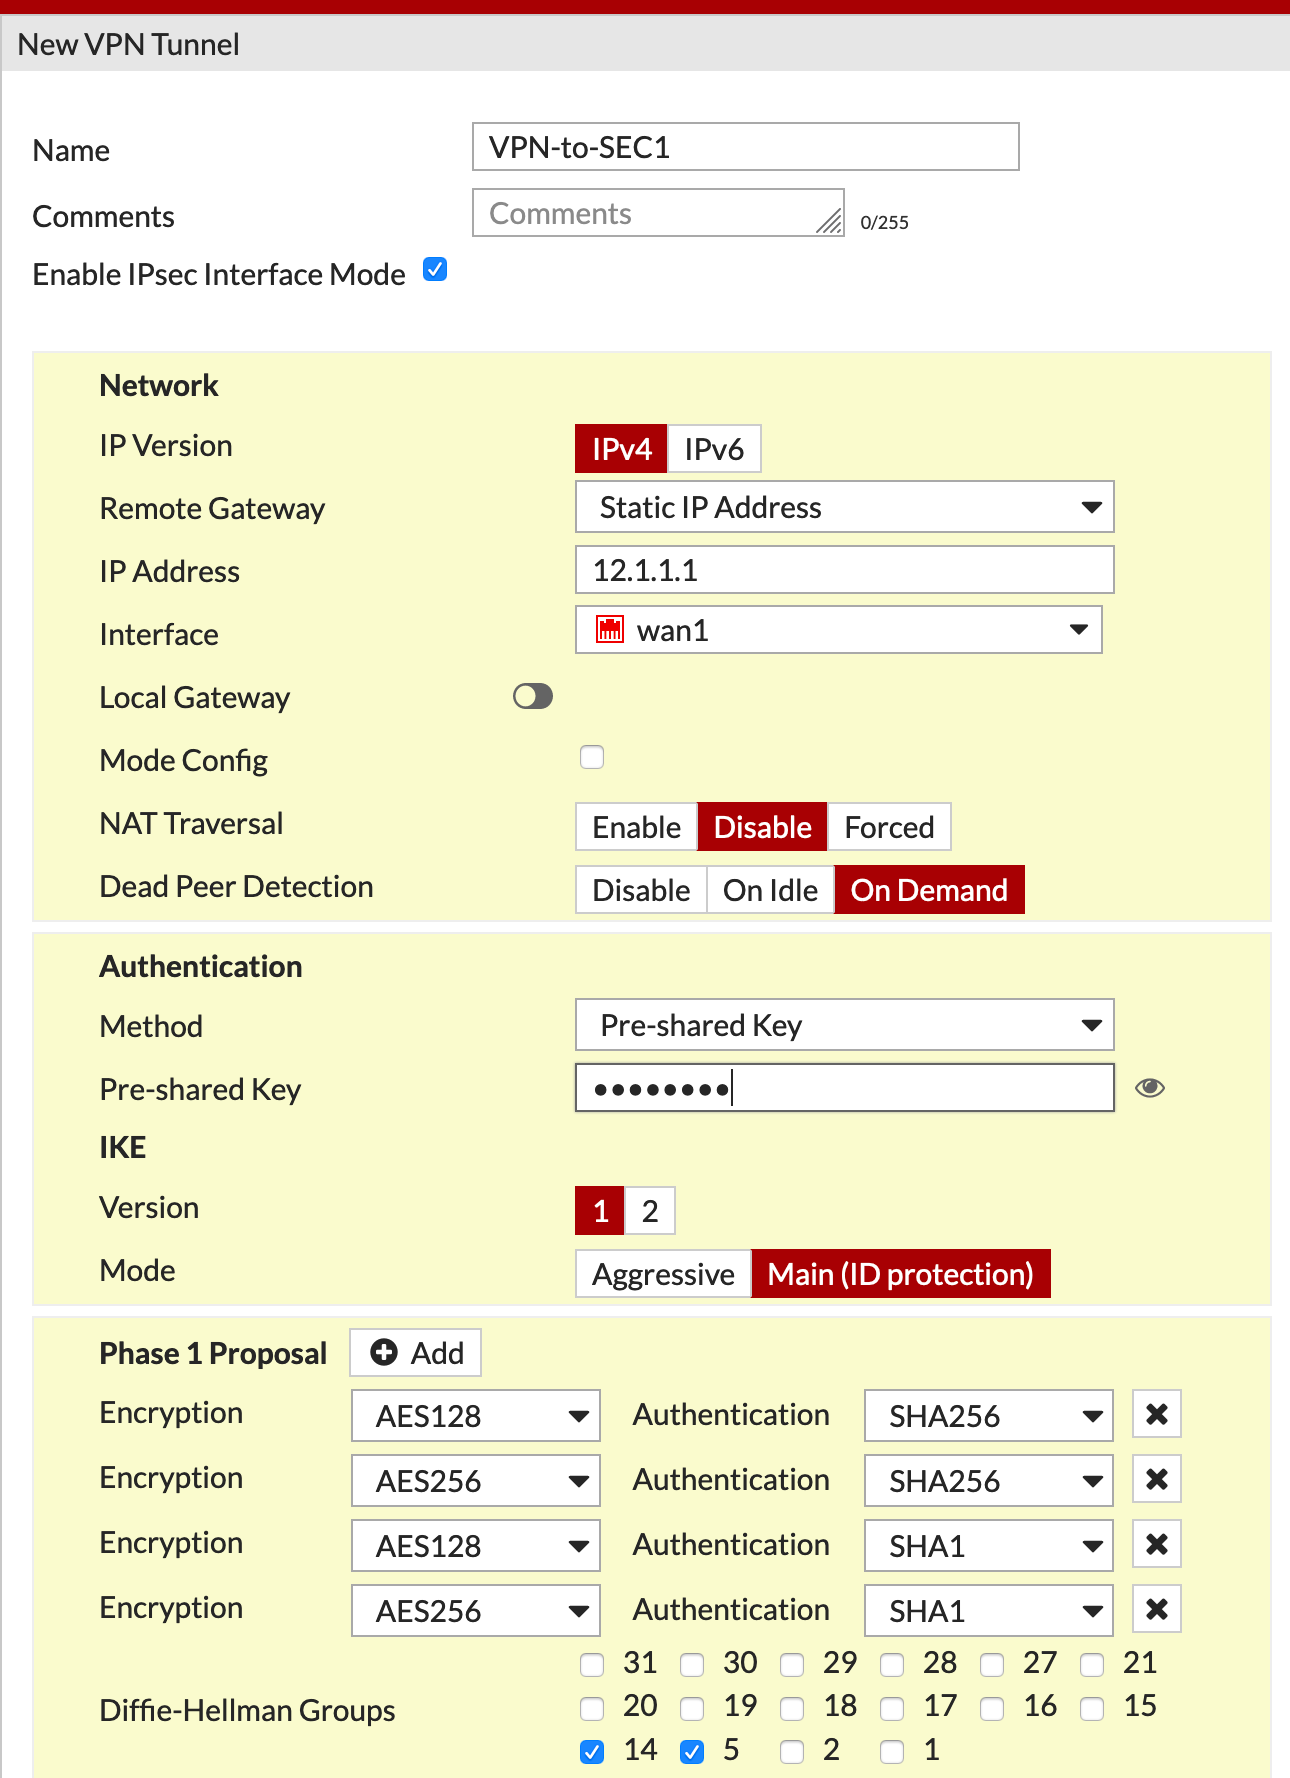
I named the VPN something descriptive VPN-to-SEC1 which is easy to identify. As you can see, I added the remote peer IP 12.1.1.1 in my case and the Interface I am going to use WAN1 in my case. (Yes the interface was down at the time of the screenshot).
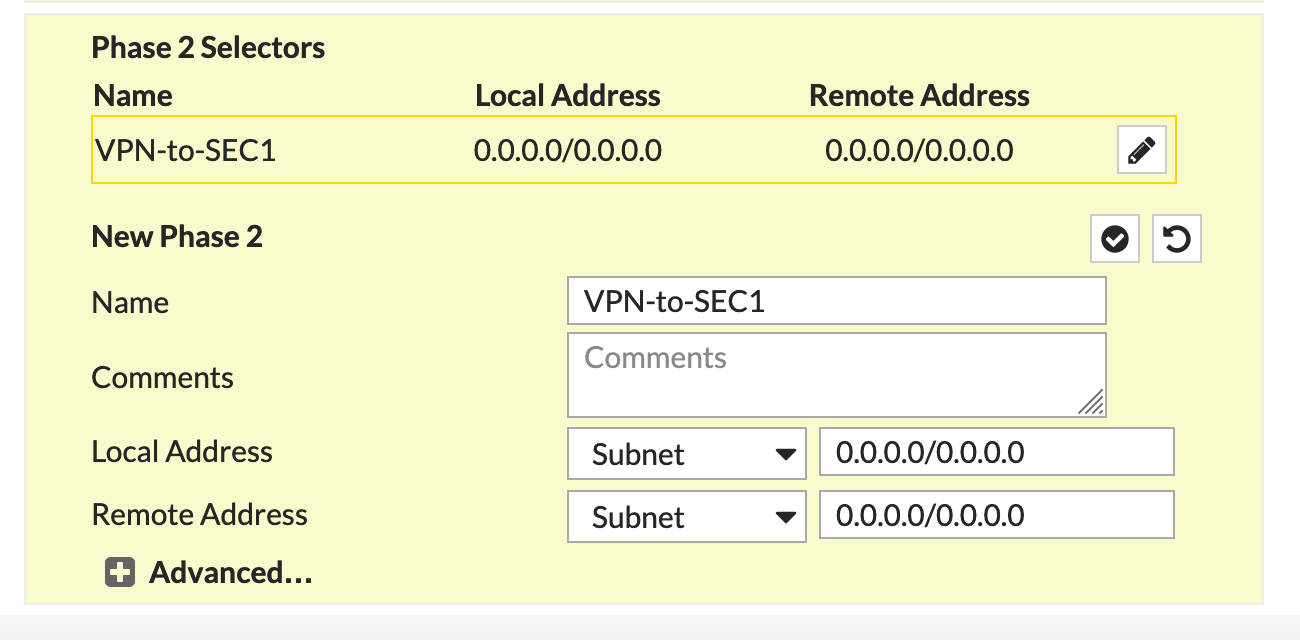
As I mentioned before, the Phase II was all 0.
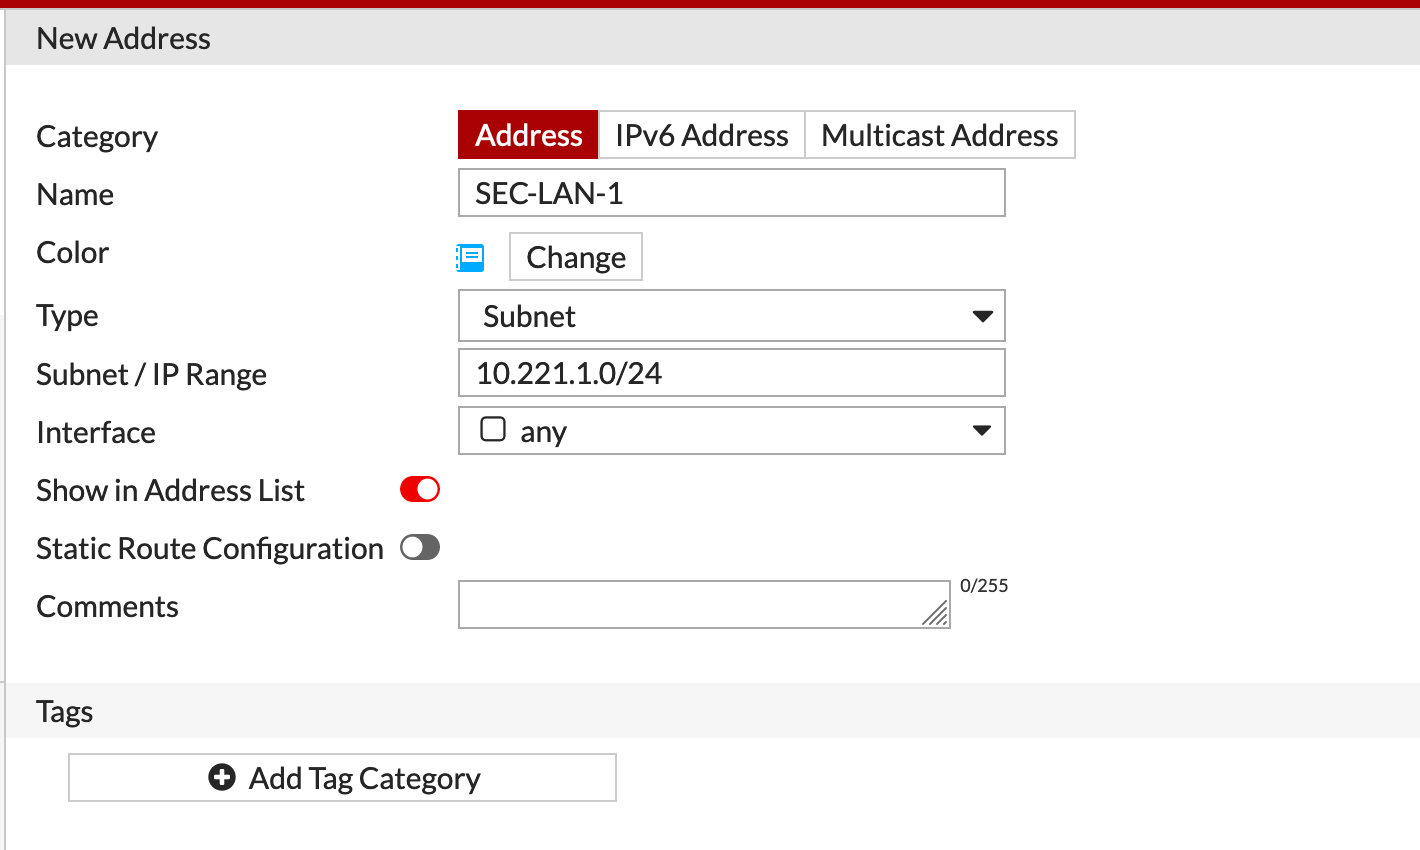
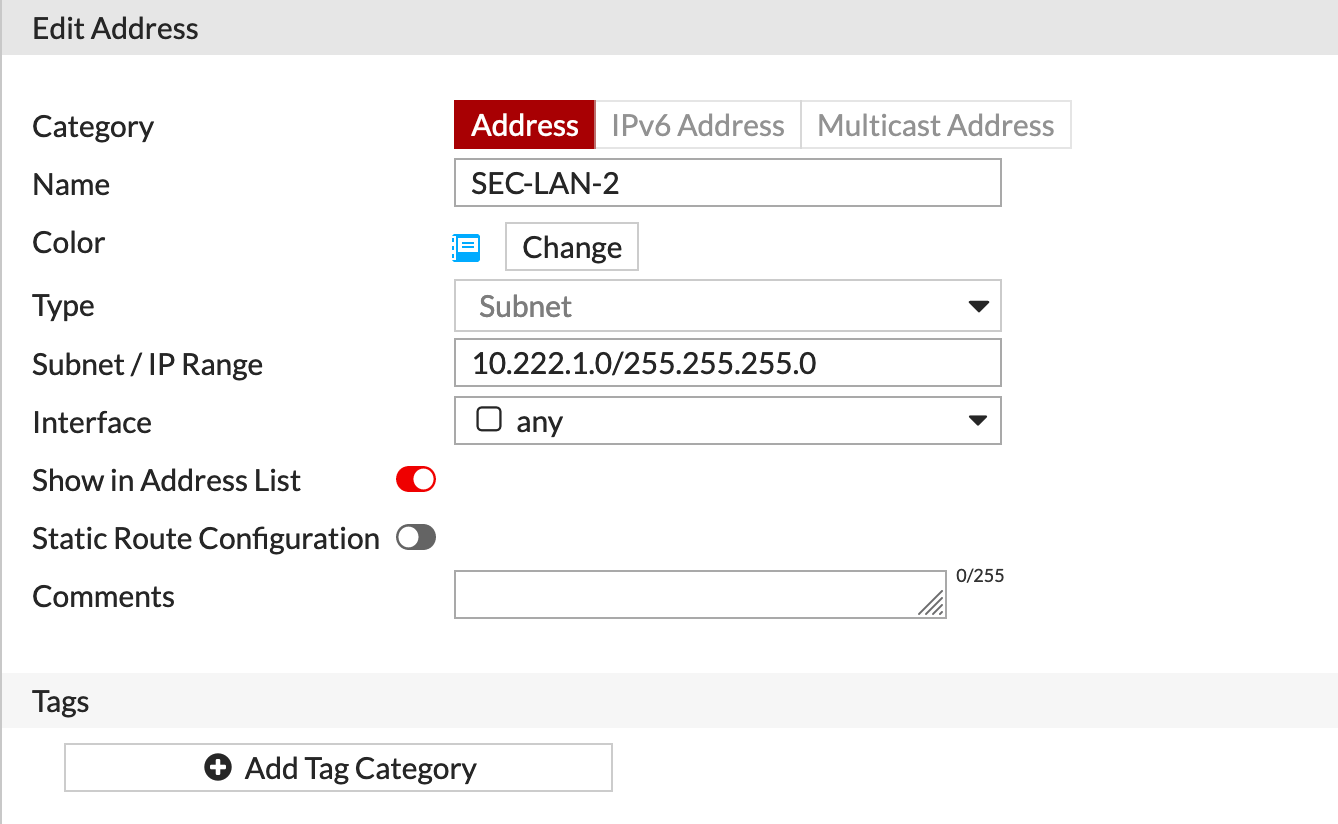
I created a Firewall Address object for SEC-LAN-1 and SEC-LAN-2 which was repeated on both firewalls since I will use both the objects in my IPv4 Policies.
Again, this is the Local side for this particular firewall.
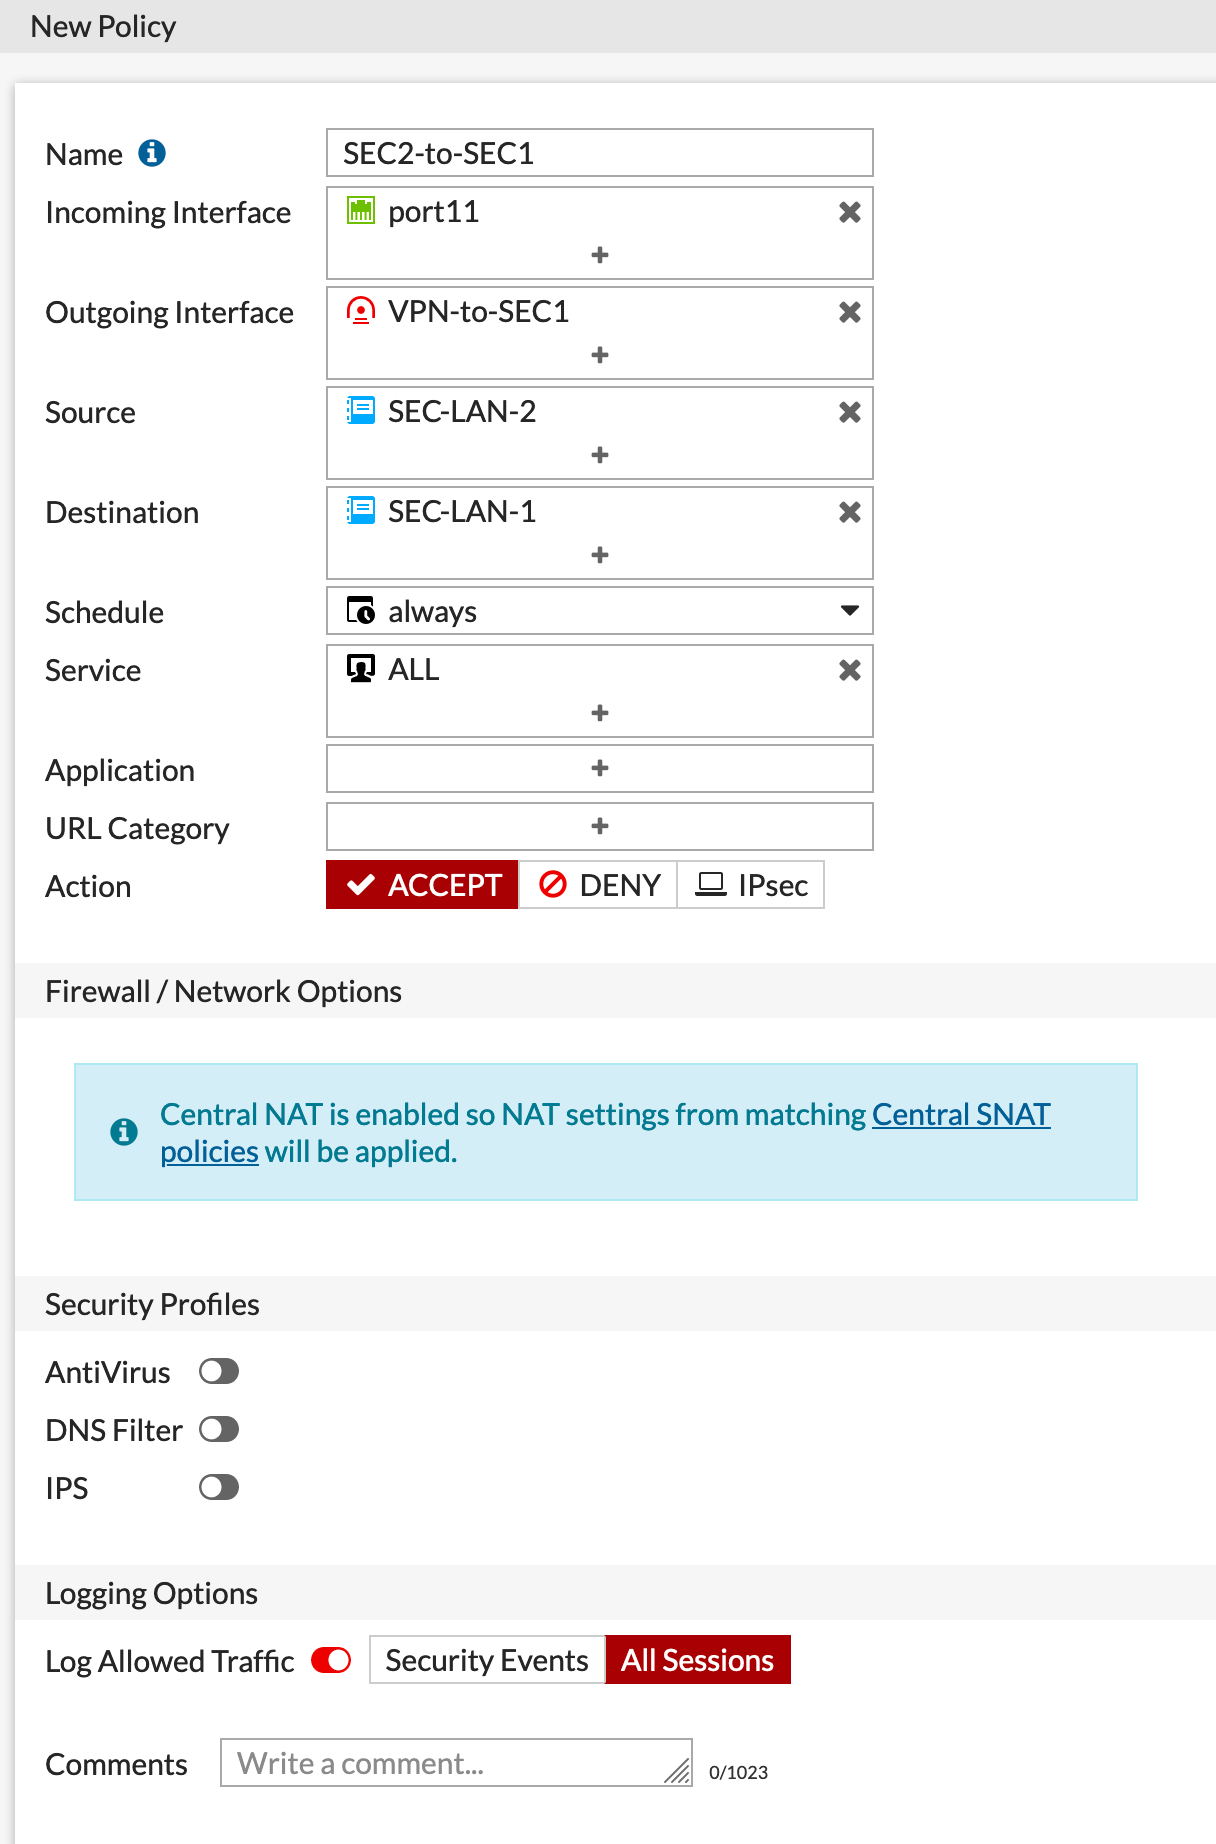
I created an IPv4 Policy sourcing it from interface port11 and destination is the VPN and then we permitted all traffic.
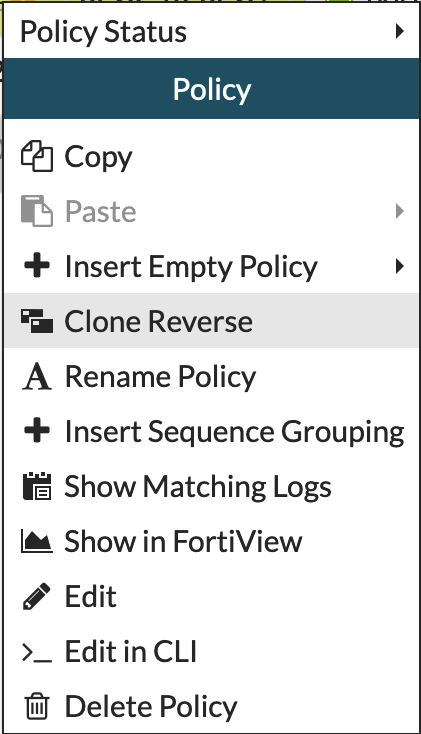
After I created the first IPv4 policy, I right-clicked the policy and chose Clone Reverse which does exactly that.

Now you can see that I have bi-directional policies allowing traffic to and from the two sites.
No for the revers. In this configuration, we are doing everything in revers since it was the remote site in the first example, now that site is the local site.
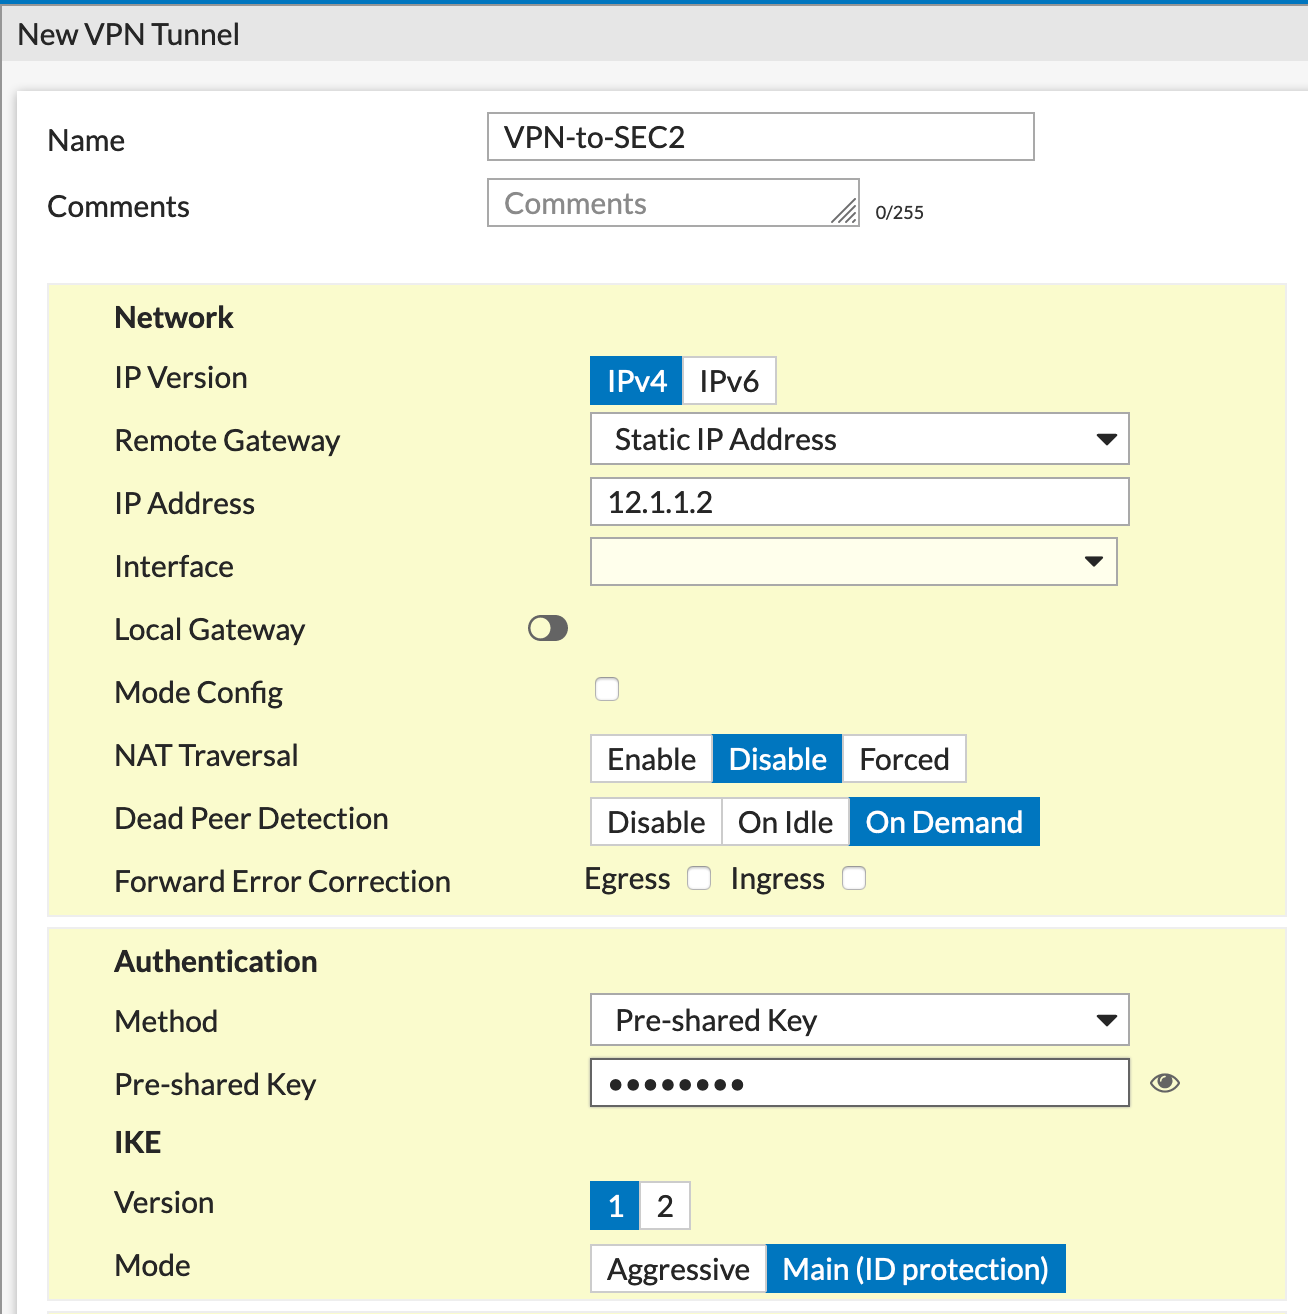
Here we see we are pointing to 12.1.1.2 as the remote peer.

We can see the same bi-directional policies as in the first firewall.
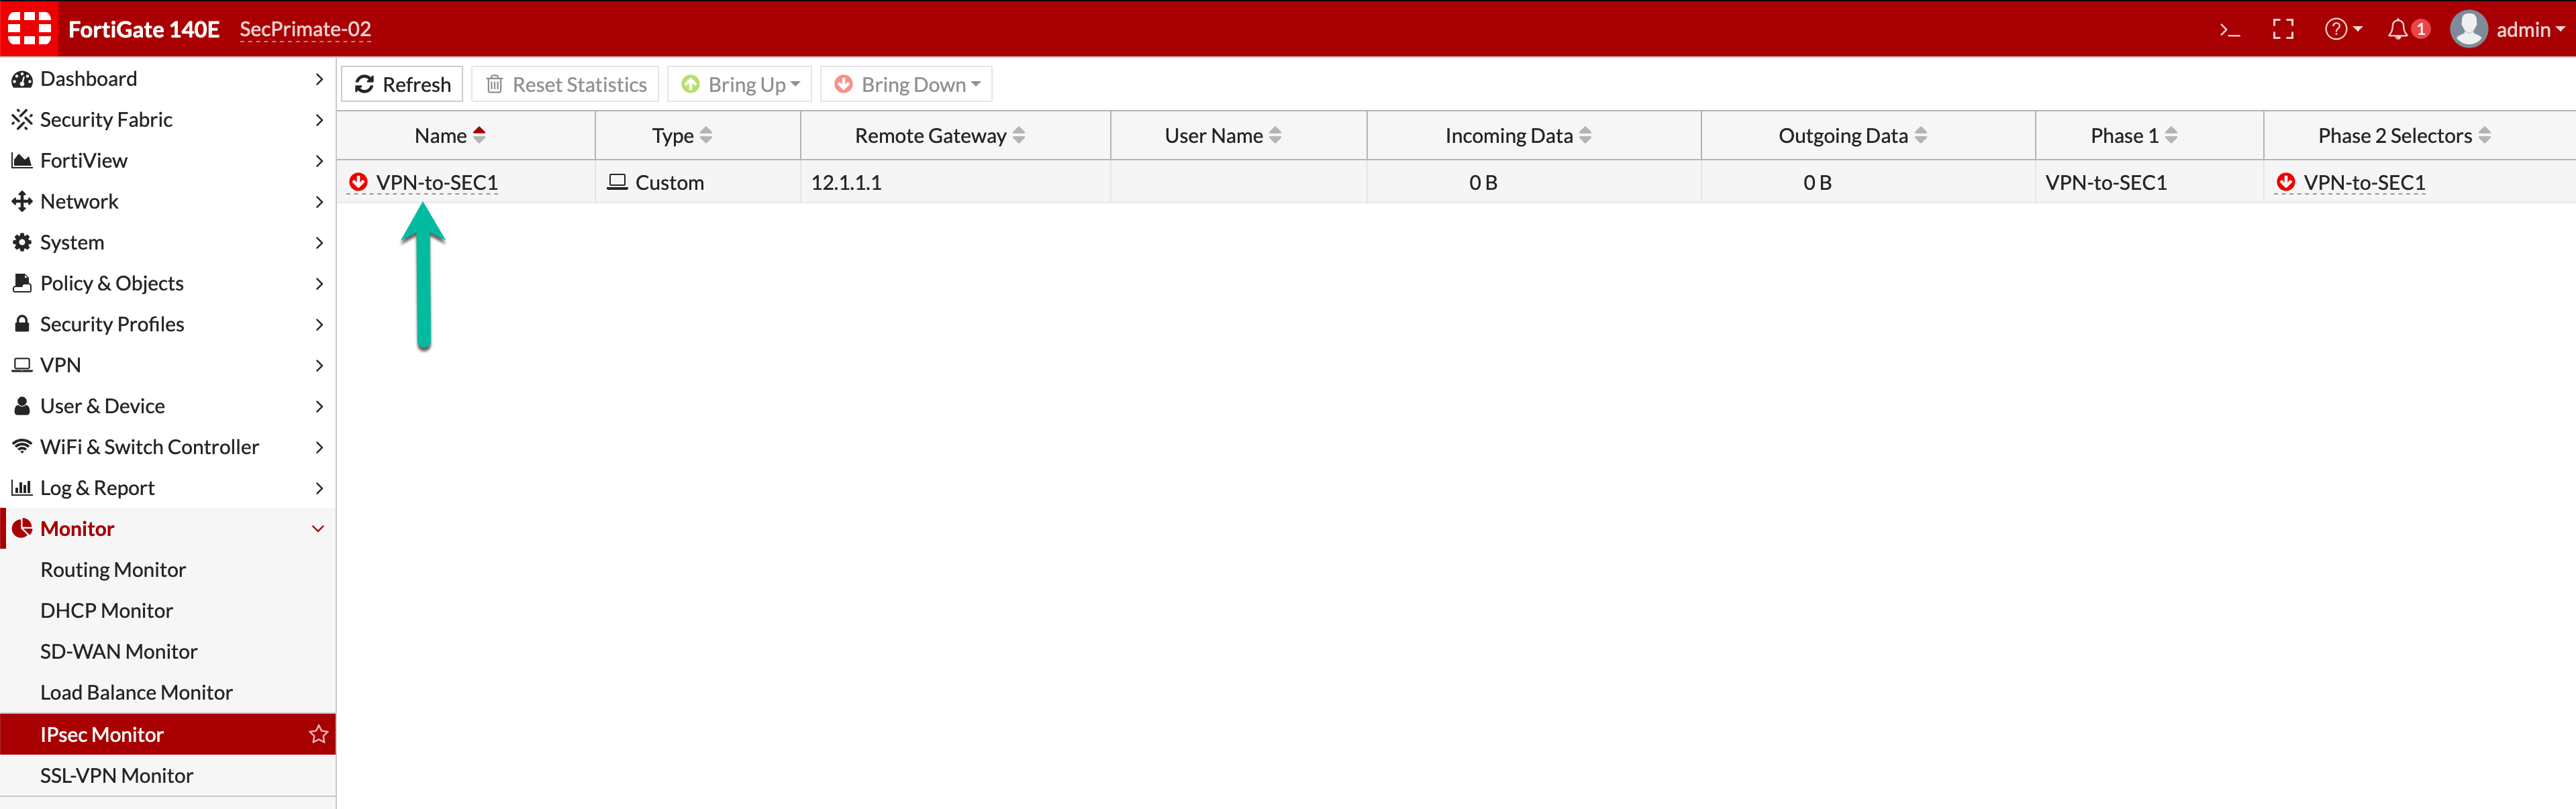
Time to bring the tunnel up. We can see the green arrow pointing to a Red VPN indicator showing the VPN is down. We clicked the Bring Up button on the top and then tunnel came up.
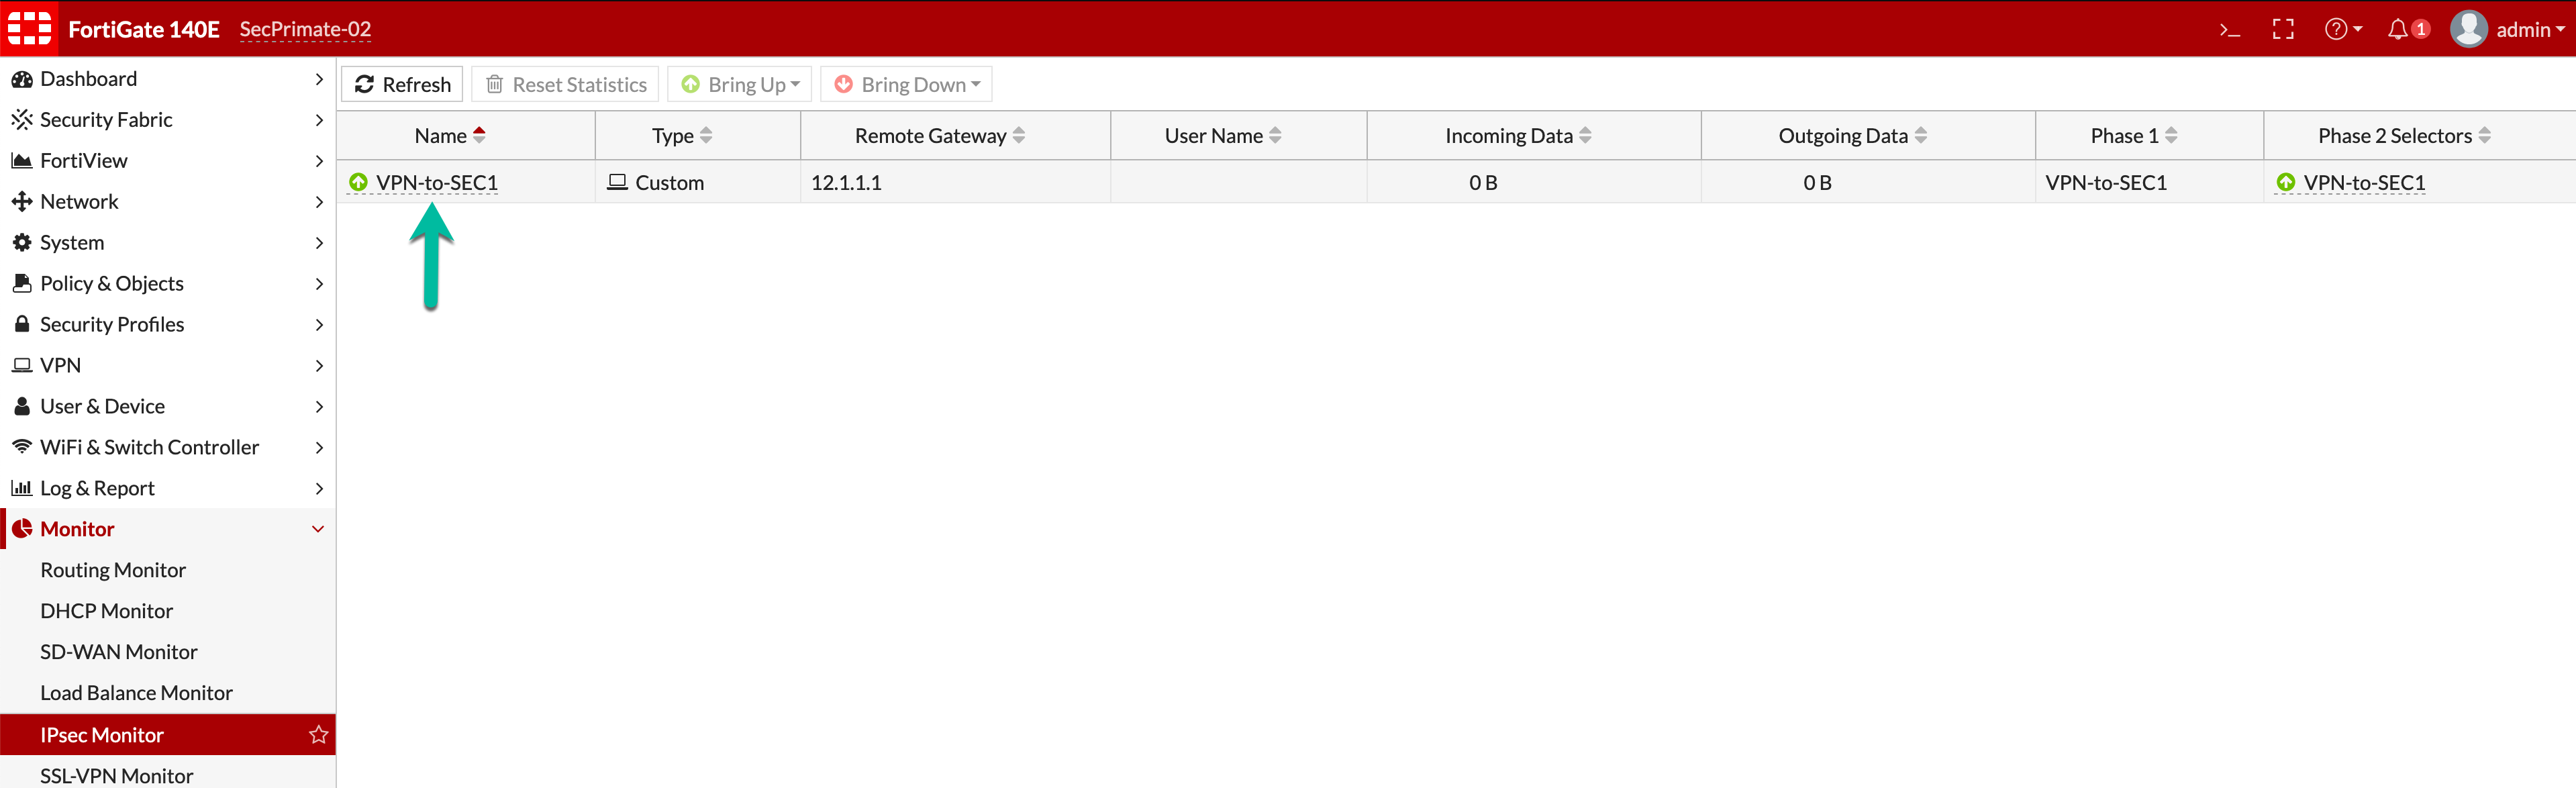
Now we see the Green indicator showing the tunnel is up.
NOTE: Don’t Forget your routes.
FortiTester Configuration
Now that the tunnel is up, we can configure the FortiTester for its test.

The FortiTester has three different types of tests it can run.
Performance Testing – This is self-explanatory. We will push packets through the connections to identify the maximum throughput a device can handle.
Security Testing – DDoS, Attack-Reply and other IPS type tests.
ATT&CK Testing – Simulate the post compromise behavior of a cyber adversary on an enterprise network.
This article will focus on Performance
Creating a Case
The first step is building a Case in FortiTester. This defines the criteria for the test.
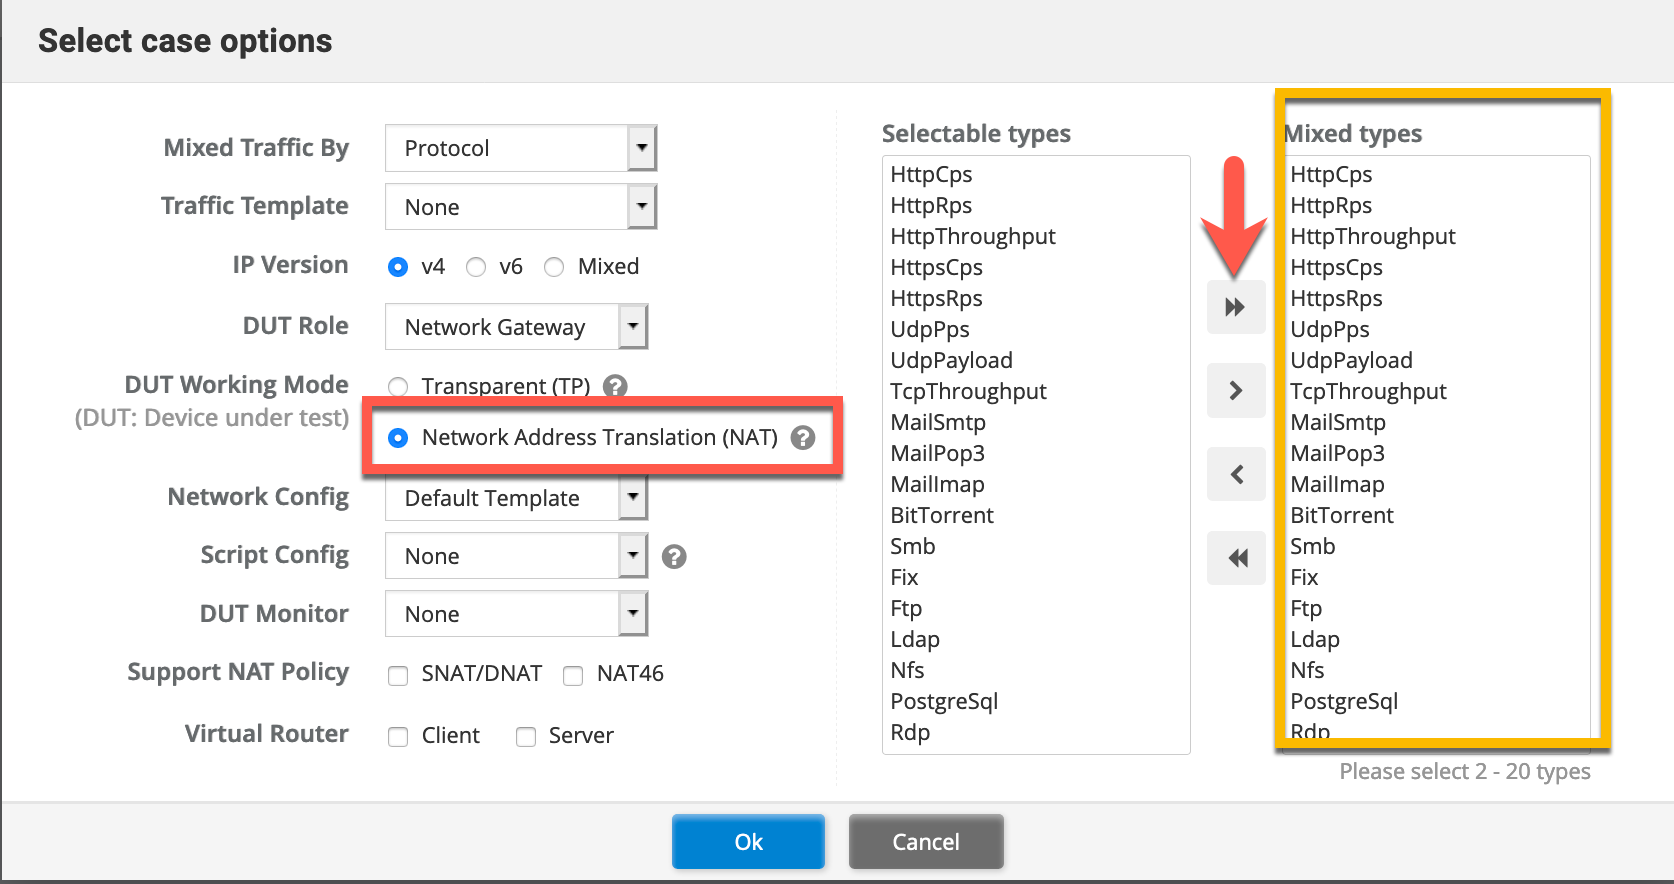
Here we define the DUT Working mode. In my case since I have two separate networks, I am using NAT mode. Additionally, I CAN choose what type of traffic I want to add to this case. In my case, I just added everything.
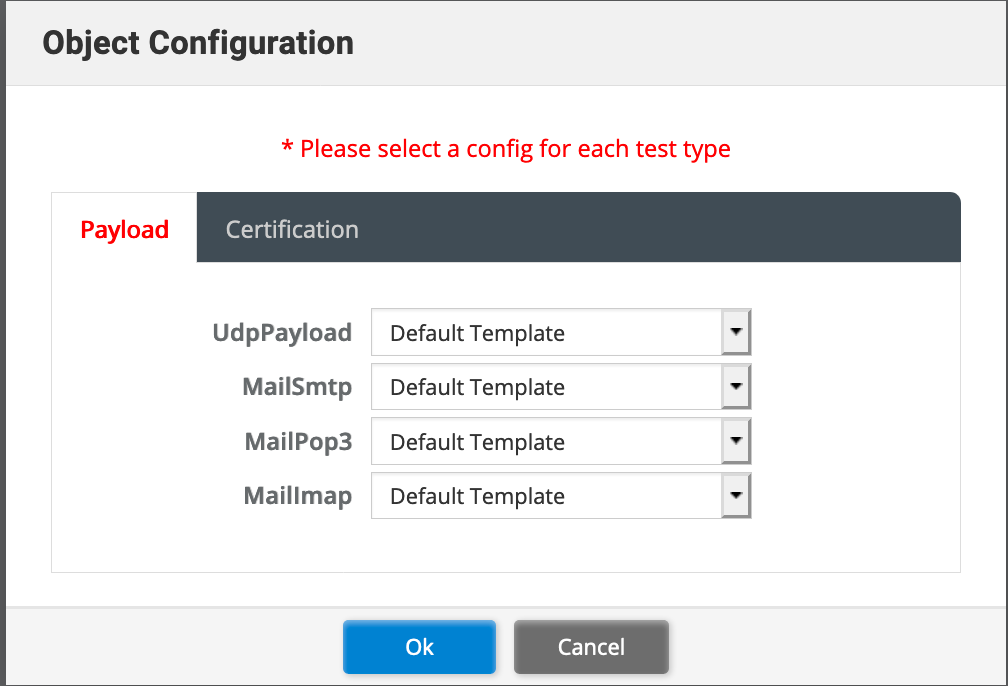
In this phase, you CAN load payloads via PCAPS and Certificates to use during the test. In my case I kept the defaults.
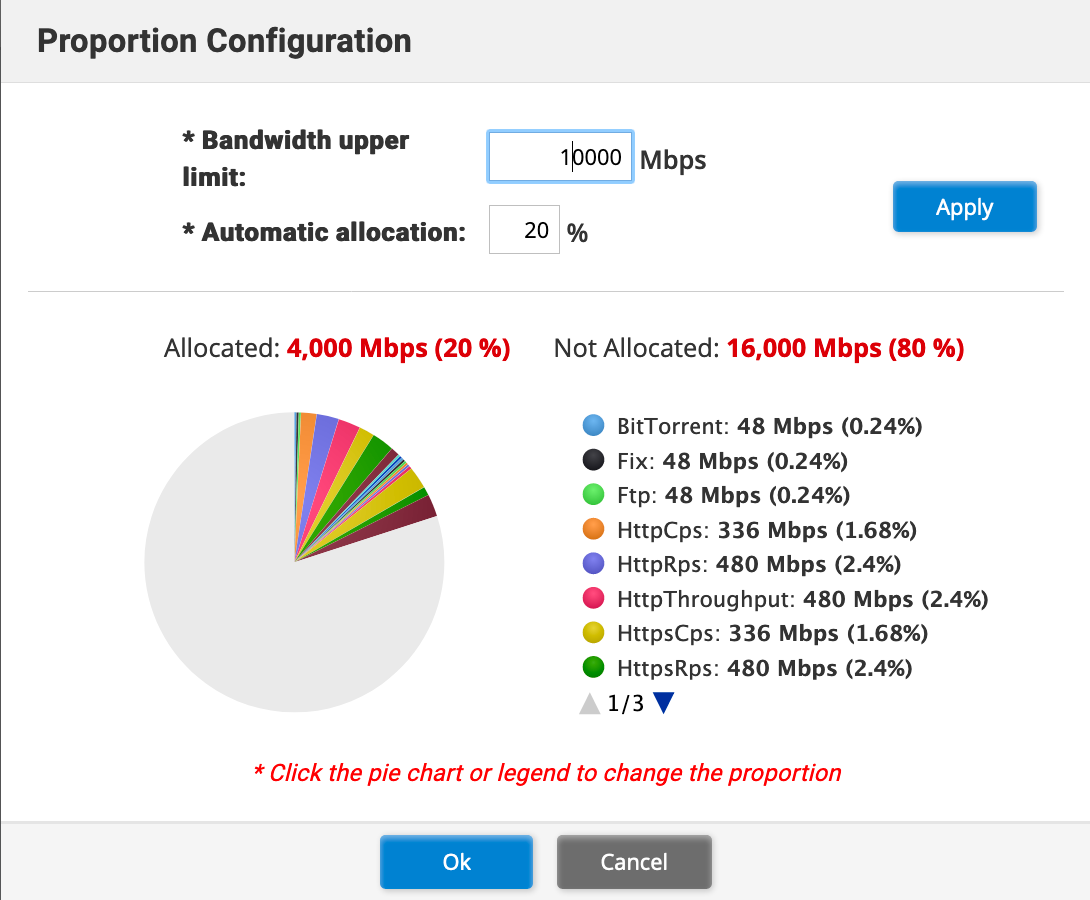
This shows you the % of traffic and the breakdown.

I will go through the options:
- You will need to choose the interface that is connected to the particular host. In my case Port1 of the FortiTester was connected to SEC2 firewall (I know my OCD is killing me right now).
- This defines a range of addresses on the Fortigate that is attached to port1 of the FortiTester.
- The CIDR notation for the subnet.
- The default gateway for the FortiTester to send traffic.
- This is the remote subnet on the other FortiGate
- The IP Range (similar to item 2 but in reverse).
- CIDR
- Gateway for the other side
- And Finally the remote network of the device connected to Port1 of the FortiTester.
Don’t forget to choose the Interface for the remote side, in my case port2
Running the Test
Once you have finished making the configurations from the previous steps, you can hit Start

Results
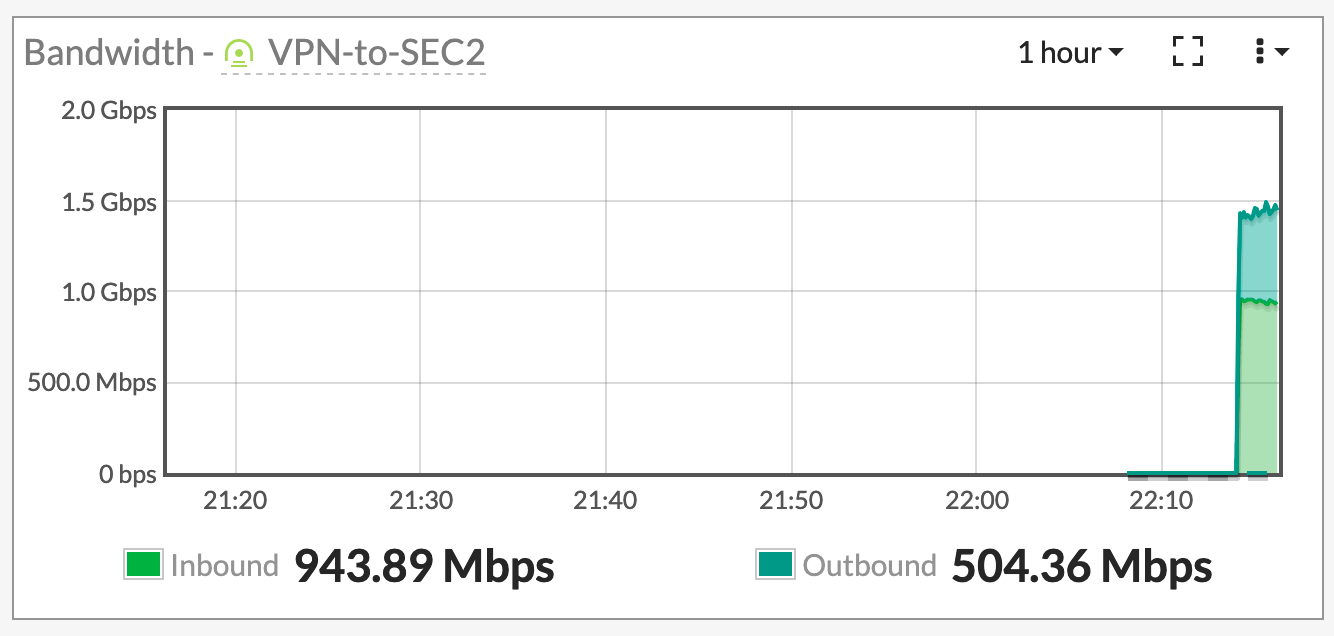
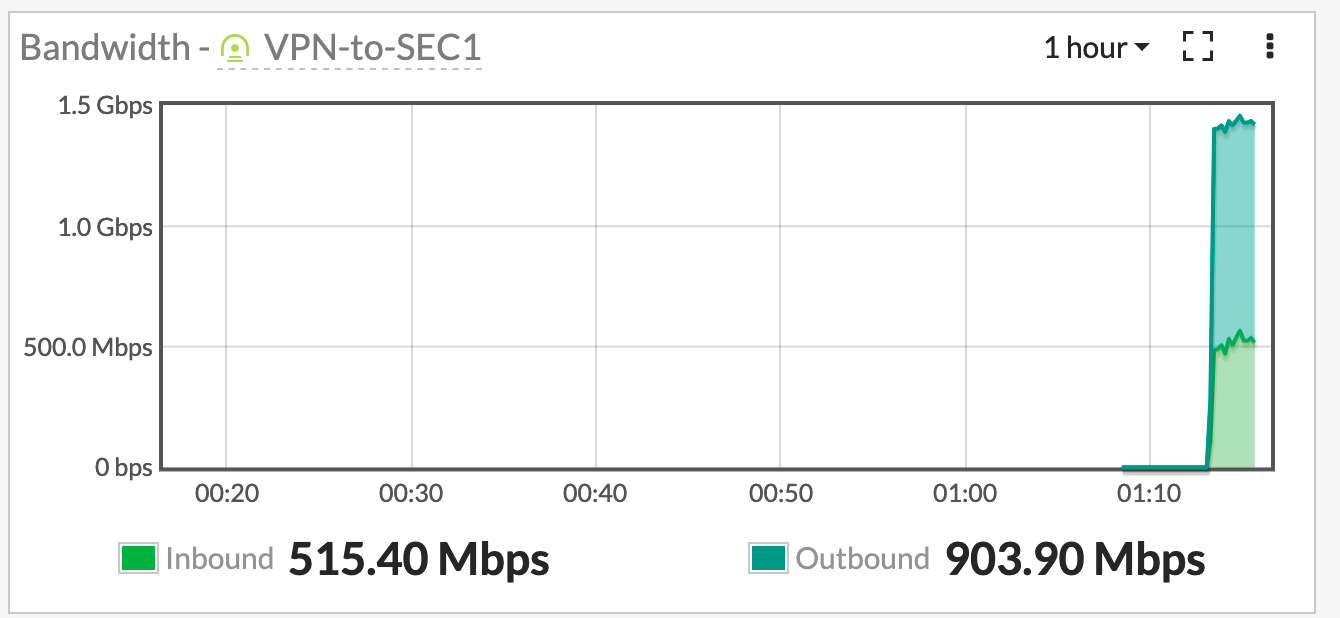
The FortiTester will export a PDF report showing the exact types of traffic and the amount. However for sake of brevity (its over 2K pages), I did not include it. However I will show you screenshots of the traffic I was pushing across the VPN circuit.
Hope this helps
Recent posts
-

-

DNS is one of those technologies that quietly underpins... Full Story
-

BGP issues on FortiGate firewalls usually trace back to... Full Story
-

Every time your laptop talks to your router, a... Full Story
-

If you've spent any time configuring NAT on a... Full Story
-

If you have spent any time configuring firewall policies... Full Story
-

High availability on FortiGate is one of those features... Full Story
-

If you've configured SD-WAN on a FortiGate, you've almost... Full Story
-

FortiLink is the management protocol that turns a FortiSwitch... Full Story
-

FortiSwitches are pretty rock solid from Mean Time Between... Full Story
-

This is a quicky tip. Have you ever gone... Full Story
-

DNS is one of those quiet pieces of internet... Full Story
-

This article is an updated version of the previous... Full Story
-

You will add ns2 as a secondary (slave) BIND9... Full Story
-

In the process of deploying my lab, I needed... Full Story
-

RFC 8805, used to be known as Self-Correcting IP... Full Story
-

Years back, I wrote an article about certificate pinning. ... Full Story
-

FortiGates have the ability to send alerts to Microsoft... Full Story
-

In this post, I am going to walk through... Full Story
-

Troubleshooting VoIP on a FortiGate can feel like trying... Full Story
-

Prior to FortiOS 7.0, there were three commands to... Full Story
-

In this post, I am going to go over... Full Story
-

What we are going to do: We are going... Full Story
-

Choosing between FGCP (FortiGate Clustering Protocol) and FGSP (FortiGate... Full Story
-

Creating a VLAN on macOS (The "Pro" Move) A... Full Story
-

This blog post explores the logic behind how macOS... Full Story
-

Pretty Fly for a Wi-Fi Tell My Wi-Fi Love... Full Story
-

Part of my daily gig is creating BoMs (Bill-of-Materials)... Full Story
-

ICMP introduces several security risks, but careful filtering, rate... Full Story
-

The command diag debug application dhcps -1 enables full... Full Story
-

In the world of FortiOS, execute tac report is... Full Story
-

LLDP; What is it The Link Layer Discovery Protocol... Full Story
-

What it actually does When you run diagnose fdsm... Full Story
-

Monkey Bites are bite-sized, high-impact security insights designed for... Full Story
-

I have run macOS in macOS with Parallels but... Full Story
-

Don't be confused with my other FortiNAC posts where... Full Story
-

This is the third session in a multi-part article... Full Story
-

Today I was configuring key-based authentication on a FortiGate... Full Story
-

Netcat, often called the "Swiss Army knife" of networking,... Full Story
-

At its core, IEEE 802.1X is a network layer... Full Story
-

In case you did not see the previous FortiNAC... Full Story
-

This is our 5th session where we are going... Full Story
-

Now that we have Wireshark installed and somewhat configured,... Full Story
-

The Philosophy of Packet Analysis Troubleshooting isn't about looking... Full Story
-

Overview FortiOS 8.0 introduces custom tags as a first-class... Full Story
-

These are two distinct mechanisms on FortiOS, and conflating... Full Story
-

Replacement messages are the pages and text blocks that... Full Story