
If you've spent any time configuring user authentication on... Full Story
By Manny Fernandez
July 18, 2026
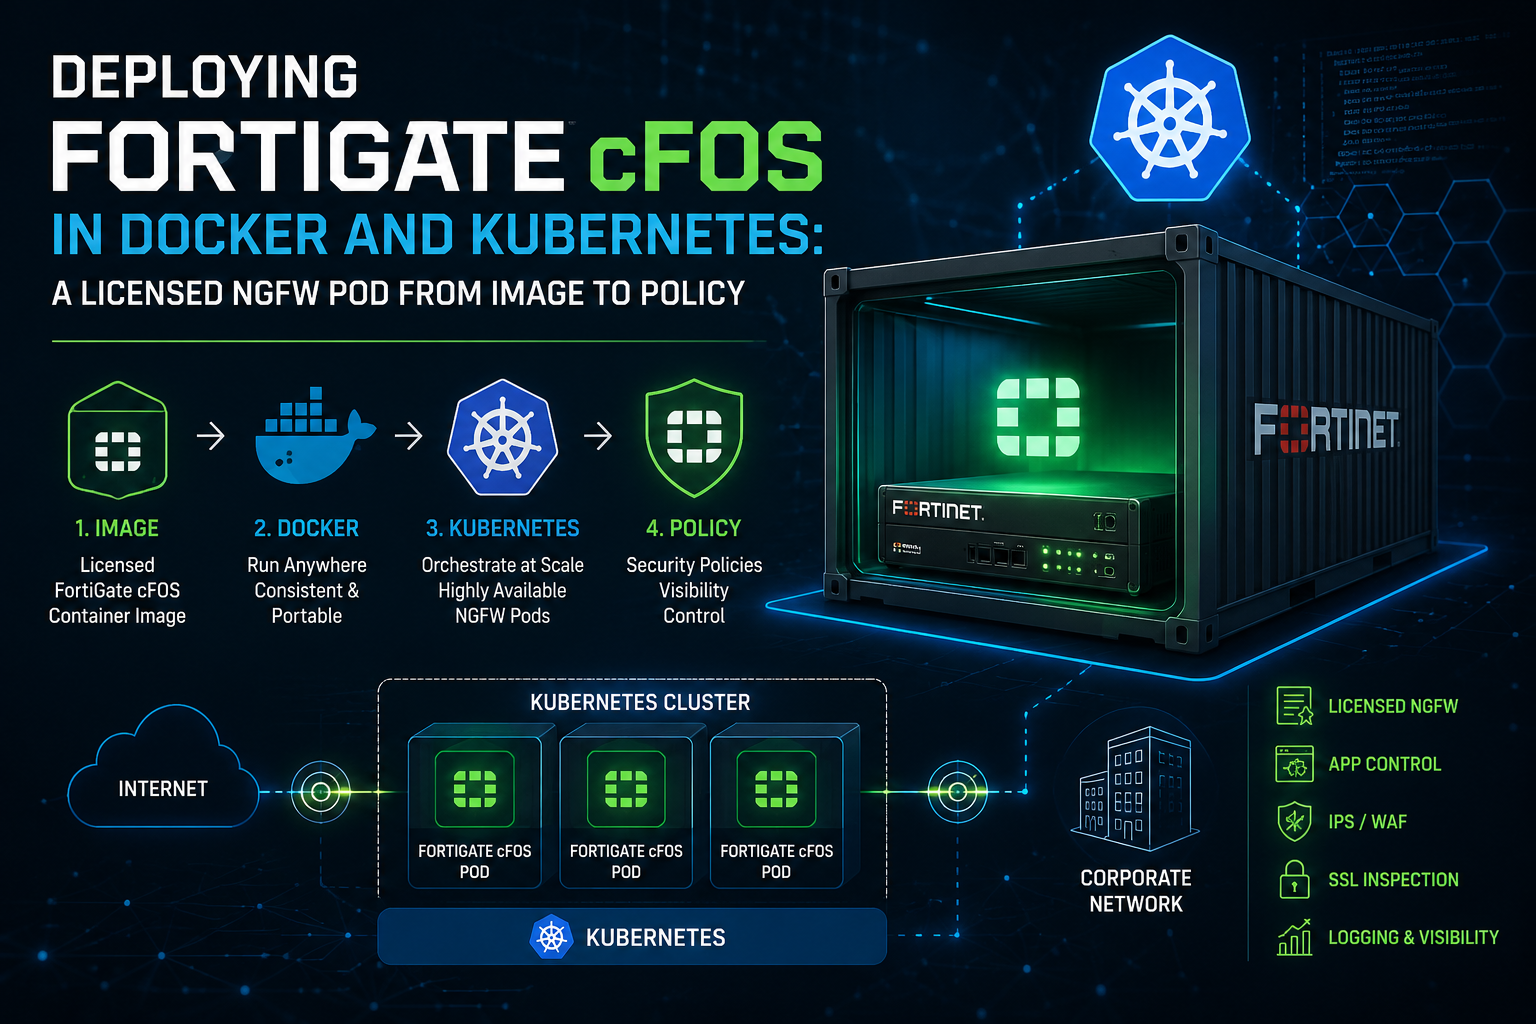
Deploying FortiGate cFOS: From a Docker Image to a Kubernetes Firewall Pod
1. Executive Summary
Objective: This guide takes a Fortinet-supplied Container FortiOS (cFOS) image, validates it standalone in Docker, then promotes it into a Kubernetes cluster as a licensed, policy-driven NGFW pod. We load the image, smoke test it in Docker, push it to a registry, wire up Kubernetes RBAC, deliver the license and firewall policy through ConfigMaps and Secrets, and finish with a working inspection point sitting inline with containerized workloads.
Why it matters: cFOS brings FortiOS-grade inspection (firewall policy, IPS, application control, web filtering, antivirus) into container platforms without a hardware or VM FortiGate. For an SE or platform engineer, it is the way to put real NGFW controls next to container workloads while keeping the whole deployment declarative and repeatable.
Target Audience: Network Security Engineers, Platform and DevOps Engineers, and Kubernetes Administrators who already run containerized workloads and are comfortable with the FortiOS CLI, Docker, and kubectl.
2. Prerequisites & Architecture
Assumed Knowledge
You should already understand:
- FortiOS CLI syntax (
config/edit/set/next/end). cFOS exposes a FortiOS-subset CLI. - Docker fundamentals: images, networks (bridge and MACVLAN), volumes, and Linux capabilities.
- Kubernetes primitives: Deployment, ConfigMap, Secret, and RBAC (ClusterRole and RoleBinding).
- That cFOS is headless. There is no full FortiGate web GUI; you drive it with the CLI, a REST API on port 443, and (in Kubernetes) ConfigMaps and Secrets.
Environment / Lab Requirements
| Requirement | Minimum | Notes |
|---|---|---|
| Docker host | containerd or Docker engine | For loading the image and the standalone smoke test |
| Kubernetes | Working cluster with kubectl |
RBAC enabled; examples use the default namespace |
| Multus CNI | Optional | Only if the pod needs more than one interface (separate WAN and LAN) |
| Container registry | Reachable by all nodes | Create an imagePullSecret if it is private |
| cFOS license | Valid FGT VM license | Purchase, then open a Fortinet TAC ticket; TAC supplies the image and the license |
| Image | cFOS 7.2.2, build 265 | Naming: cFOS_<CPU Arch>_<Container Type>-v<Major>-build<build>-<Company>.tar.gz |
Component Table
| Component | Role | Example Value |
|---|---|---|
| Docker host / K8s node | Runs the container engine | Ubuntu 22.04, containerd |
| cFOS image | Containerized FortiOS NGFW | cFOS_X64_DOCKER-v7-build265-FORTINET.tar.gz |
| Container registry | Stores the image for cluster pulls | registry.example.local:5000/cfos:7.2.2 |
| cFOS Deployment | Runs the firewall pod | fos-deployment (label app: fos) |
| License ConfigMap | Holds the FGT VM license text | fos-license (category: license) |
| Config ConfigMap | Holds FortiOS CLI configuration | foscfg-policy (category: config) |
| Secret | Sensitive values (PSKs, keys) | ipsec-certs |
| WAN network | Untrusted side, cFOS eth0 |
00-cFOS-WAN (macvlan) |
| LAN network | Protected side, cFOS eth1 |
99-cFOS-LAN / 192.168.21.0/24 |
Logical Flow
                         Kubernetes control plane
                                   |
                 license + config via ConfigMaps / Secrets
                        (cFOS watches them, needs RBAC)
                                   |
[ Workload ] --(traffic)--> [ cFOS pod ] --(policy + IPS + AV + NAT)--> [ Internet ]
                          eth1 (LAN)                          eth0 (WAN)
3. Step-by-Step Implementation Workflow
Phase 1: Obtain and Load the cFOS Image (Docker)
The Goal: Get the Fortinet-supplied tarball onto a Docker host and register it as a local image.
The Action: After TAC provides the image, load the tarball and confirm it was imported and tagged. The image naming convention is cFOS_<CPU Arch>_<Container Type>-v<Major>-build<build>-<Company>.tar.gz.
The CLI:
sudo docker load -i cFOS_X64_DOCKER-v7-build265-FORTINET.tar.gz

# Confirm the image is present and note the REPOSITORY:TAG it was given
sudo docker images
Verify: docker images lists the freshly loaded image, commonly tagged fos:latest.
Phase 2: Smoke Test Standalone in Docker
The Goal: Prove the image boots, licenses, and answers on CLI and REST before you invest in cluster plumbing.
The Action: Create MACVLAN WAN and LAN networks, create and start the container with the required capabilities and a persistent /data volume, then connect to the CLI and import the license.
The CLI: MACVLAN gives the container an interface that looks physically attached to your host NIC.
sudo docker network create --driver=macvlan \
  --subnet=10.210.16.0/24 \
  --gateway=10.210.16.1 \
  -o parent=<host_wan_nic> \
  00-cFOS-WAN

sudo docker network create --driver=macvlan \
  --subnet=192.168.254.0/24 \
  --gateway=192.168.254.1 \
  -o parent=<host_lan_nic> \
  99-cFOS-LAN
Create and start the container. cFOS needs the NET_ADMIN and SYS_ADMIN capabilities plus a persistent /data volume. Replace <host_ip> with the host external IP.
sudo docker container create \
  --network 00-cFOS-WAN \
  --ip=10.210.16.254 \
  -p <host_ip>:5443:5443 \
  -p <host_ip>:4022:4022 \
  -p <host_ip>:8080:8080 \
  -p <host_ip>:500:500/udp \
  -p <host_ip>:4500:4500/udp \
  --cap-add=NET_ADMIN \
  --cap-add=SYS_ADMIN \
  --security-opt apparmor:unconfined \
  --name cfos1 \
  -v /srv/cfos/cfos1_data:/data \
  --dns 96.45.45.45 \
  --dns 96.45.46.46 \
  -it fos

# Start and attach
sudo docker container start --attach -i cfos1

# Attach the protected (LAN) network to the running container
sudo docker network connect --ip 192.168.254.254 99-cFOS-LAN cfos1
Connect to the CLI. The initial user is admin with an empty password. Set a password immediately, then paste the license contents.
sudo docker exec -it cfos1 /bin/cli

# Inside the cFOS CLI: set an admin password
config system admin
  edit admin
    set password <your_password>
  next
end

# Paste the FULL contents of your license file between the quotes
exec import-license "<content_of_license_file>"
Verify: Run get system status in the CLI and confirm the license registers as valid. The REST API answers on port 443 (a subset of the FortiOS API):
curl -k "https://<host_ip>/api/v2/cmdb/antivirus/settings?access_token=<api_token>"
Phase 3: Push the Image to a Registry
The Goal: Make the image pullable by every cluster node.
The Action: Tag the loaded image for your registry and push it. Note the resulting <image_URL>, you will drop it into the Deployment in Phase 6.
The CLI:
sudo docker tag fos:latest registry.example.local:5000/cfos:7.2.2
sudo docker push registry.example.local:5000/cfos:7.2.2
Verify: From a cluster node, docker pull (or crictl pull) the tag to confirm reachability. Create an imagePullSecret if the registry is private.
Phase 4: Create the Kubernetes Role Bindings (RBAC)
The Goal: Let the cFOS pod read and watch the ConfigMaps and Secrets that carry its license and configuration. Without this, the license and policy never load.
The Action: Apply role bindings that grant the pod service account get, watch, and list on both resource types. This example binds the default service account; change it to match yours.
The CLI:
# rolebindings.yaml
apiVersion: rbac.authorization.k8s.io/v1
kind: ClusterRole
metadata:
  name: configmap-reader
rules:
  - apiGroups: [""]
    resources: ["configmaps"]
    verbs: ["get", "watch", "list"]
---
apiVersion: rbac.authorization.k8s.io/v1
kind: RoleBinding
metadata:
  name: read-configmaps
  namespace: default
subjects:
  - kind: ServiceAccount
    name: default
    apiGroup: ""
roleRef:
  kind: ClusterRole
  name: configmap-reader
  apiGroup: ""
---
apiVersion: rbac.authorization.k8s.io/v1
kind: ClusterRole
metadata:
  name: secrets-reader
rules:
  - apiGroups: [""]
    resources: ["secrets"]
    verbs: ["get", "watch", "list"]
---
apiVersion: rbac.authorization.k8s.io/v1
kind: RoleBinding
metadata:
  name: read-secrets
  namespace: default
subjects:
  - kind: ServiceAccount
    name: default
    apiGroup: ""
roleRef:
  kind: ClusterRole
  name: secrets-reader
  apiGroup: ""
kubectl apply -f rolebindings.yaml
Verify: kubectl auth can-i watch configmaps --as=system:serviceaccount:default:default returns yes.
Phase 5: Deploy the License via ConfigMap
The Goal: Deliver the license declaratively so any replacement pod re-licenses itself automatically.
The Action: The labels app: fos and category: license are mandatory. Paste the full license between the markers.
The CLI:
# license-configmap.yaml
apiVersion: v1
kind: ConfigMap
metadata:
  name: fos-license
  labels:
    app: fos
    category: license
data:
  license: |
    -----BEGIN FGT VM LICENSE-----
    <paste the full contents of your .lic file here>
    -----END FGT VM LICENSE-----
kubectl apply -f license-configmap.yaml
Phase 6: Deploy the cFOS Container
The Goal: Run cFOS as a pod with the right capability and a data volume. It imports the license ConfigMap on boot.
The Action: Swap <image_URL> for your registry tag. NET_ADMIN is required because cFOS programs iptables rules. Ports 500 and 4500/UDP are exposed for IPsec.
The CLI:
# cfos.yaml
apiVersion: apps/v1
kind: Deployment
metadata:
  name: fos-deployment
  labels:
    app: fos
spec:
  replicas: 1
  selector:
    matchLabels:
      app: fos
  template:
    metadata:
      labels:
        app: fos
    spec:
      containers:
        - name: fos
          image: <image_URL>
          securityContext:
            capabilities:
              add: ["NET_ADMIN"]
          ports:
            - name: isakmp
              containerPort: 500
              protocol: UDP
            - name: ipsec-nat-t
              containerPort: 4500
              protocol: UDP
          volumeMounts:
            - mountPath: /data
              name: data-volume
      volumes:
        - name: data-volume
          emptyDir: {}
kubectl apply -f cfos.yaml
The example uses an emptyDir ramdisk to keep the install simple. On boot, cFOS re-imports configuration from the ConfigMap, so config is not lost when the pod is replaced. For durable logs and state, back /data with a PersistentVolume instead.
Phase 7: Apply Firewall Configuration (ConfigMap + Secrets)
The Goal: Push actual policy into cFOS declaratively. A partial config layers on top of the running config; a full config replaces it entirely.
The Action: The labels app: fos and category: config plus type: partial are required. Interfaces map to eth0 (WAN) and eth1 (LAN).
The CLI:
# policy-configmap.yaml
apiVersion: v1
kind: ConfigMap
metadata:
  name: foscfg-policy
  labels:
    app: fos
    category: config
data:
  type: partial
  config: |-
    config firewall policy
      edit 1
        set name "lan-to-wan"
        set srcintf "eth1"
        set dstintf "eth0"
        set srcaddr "all"
        set dstaddr "all"
        set action accept
        set schedule "always"
        set service "ALL"
        set utm-status enable
        set av-profile "default"
        set ips-sensor "default"
        set nat enable
      next
    end
kubectl apply -f policy-configmap.yaml
For sensitive values such as an IPsec pre-shared key, reference a Secret with the token {{<Secret name>:<Key name>}} instead of writing plaintext into the ConfigMap.
# Create the secret the config will reference
kubectl create secret generic ipsec-certs \
  --from-literal=ipsec-cert-pass=12345678

# ...then in the config data, reference it:
#   set psksecret {{ipsec-certs:ipsec-cert-pass}}
For a full replacement, use type=full and include every dependency the config references (for example, a policy that calls a web filter profile must also include that profile).
kubectl create configmap fos-config \
  --from-file=config=<path_to_config_file> \
  --from-literal=type=full
kubectl label configmap fos-config app=fos
kubectl label configmap fos-config category=config
4. Verification & Validation
Step 1: Confirm the pod is running
kubectl get pods -l app=fos
The pod should show Running, Ready 1/1, and a low restart count.
Step 2: Confirm the license and config applied
kubectl logs --tail=200 -l app=fos
What success looks like: log lines showing the license accepted and the ConfigMap config imported with no errors.
Step 3: Check status and policy from the CLI
kubectl exec -it <pod> -- /bin/cli

# then, inside the cFOS CLI:
get system status
show firewall policy
Version and build 265 appear, the license reports valid, and your lan-to-wan policy is present with UTM enabled. For the underlying Linux shell, the guide documents sysctl sh from inside the cFOS CLI.
Step 4: Confirm the REST API answers
curl -k "https://<pod_ip>/api/v2/cmdb/antivirus/settings?access_token=<token>"
A healthy result is HTTP 200 with a JSON body of AV settings.
5. Troubleshooting & Gotchas
Gotcha 1: Traffic is not being filtered (missing NET_ADMIN)
cFOS programs iptables rules at boot. Without NET_ADMIN (and SYS_ADMIN in standalone Docker) the pod may start but forwards or drops traffic without inspection, and the logs show iptables or permission errors.
Diagnose:
# Diagnose
kubectl logs --tail=200 -l app=fos          # K8s
sudo docker logs cfos1                       # Docker

# Confirm the capability is actually set on the pod
kubectl get pod <pod> -o jsonpath='{.spec.containers[0].securityContext.capabilities.add}'
Resolution: Add NET_ADMIN under securityContext.capabilities.add in the Deployment (Phase 6), and both NET_ADMIN and SYS_ADMIN plus apparmor:unconfined in the Docker run, then recreate the container or roll the Deployment.
Gotcha 2: License or config never applies (RBAC or missing labels)
In Kubernetes, cFOS reads its license and config by watching ConfigMaps and Secrets. Two failure modes look identical from the outside (features stay locked, policy never appears): the service account lacks watch permissions, or the ConfigMap is missing the required labels.
Diagnose:
# Diagnose: RBAC
kubectl logs -l app=fos | grep -i -E "forbidden|watch|configmap|secret"
kubectl auth can-i watch configmaps \
  --as=system:serviceaccount:default:default

# Diagnose: labels (both must be present)
kubectl get configmap fos-license --show-labels
kubectl get configmap foscfg-policy --show-labels
Resolution: Apply rolebindings.yaml and confirm the roleRef service account matches the one the pod runs as. Ensure every license ConfigMap carries app: fos + category: license, and every config ConfigMap carries app: fos + category: config.
Gotcha 3: Full config rejected, or state lost on pod restart
A type: full config that references an object it does not define (a policy calling a web filter profile that is not in the file) is rejected on import. Separately, because the sample Deployment uses an ephemeral emptyDir, logs written to /data vanish when the pod is replaced.
Diagnose:
# Diagnose the rejected import
kubectl logs -l app=fos | grep -i -E "depend|profile|not found|invalid"
Resolution: Make full configs self-contained by including every referenced profile and its dependencies, or prefer layered partial configs. For durable state, replace emptyDir with a PersistentVolumeClaim, and forward logs off-box with config log syslogd setting to a FortiAnalyzer or syslog collector.
Recent posts
-

-

DNS is one of those technologies that quietly underpins... Full Story
-

BGP issues on FortiGate firewalls usually trace back to... Full Story
-

Every time your laptop talks to your router, a... Full Story
-

If you've spent any time configuring NAT on a... Full Story
-

If you have spent any time configuring firewall policies... Full Story
-

High availability on FortiGate is one of those features... Full Story
-

If you've configured SD-WAN on a FortiGate, you've almost... Full Story
-

FortiLink is the management protocol that turns a FortiSwitch... Full Story
-

FortiSwitches are pretty rock solid from Mean Time Between... Full Story
-

This is a quicky tip. Have you ever gone... Full Story
-

DNS is one of those quiet pieces of internet... Full Story
-

This article is an updated version of the previous... Full Story
-

You will add ns2 as a secondary (slave) BIND9... Full Story
-

In the process of deploying my lab, I needed... Full Story
-

RFC 8805, used to be known as Self-Correcting IP... Full Story
-

Years back, I wrote an article about certificate pinning. ... Full Story
-

FortiGates have the ability to send alerts to Microsoft... Full Story
-

In this post, I am going to walk through... Full Story
-

Troubleshooting VoIP on a FortiGate can feel like trying... Full Story
-

Prior to FortiOS 7.0, there were three commands to... Full Story
-

In this post, I am going to go over... Full Story
-

What we are going to do: We are going... Full Story
-

Choosing between FGCP (FortiGate Clustering Protocol) and FGSP (FortiGate... Full Story
-

Creating a VLAN on macOS (The "Pro" Move) A... Full Story
-

This blog post explores the logic behind how macOS... Full Story
-

Pretty Fly for a Wi-Fi Tell My Wi-Fi Love... Full Story
-

Part of my daily gig is creating BoMs (Bill-of-Materials)... Full Story
-

ICMP introduces several security risks, but careful filtering, rate... Full Story
-

The command diag debug application dhcps -1 enables full... Full Story
-

In the world of FortiOS, execute tac report is... Full Story
-

LLDP; What is it The Link Layer Discovery Protocol... Full Story
-

What it actually does When you run diagnose fdsm... Full Story
-

Monkey Bites are bite-sized, high-impact security insights designed for... Full Story
-

I have run macOS in macOS with Parallels but... Full Story
-

Don't be confused with my other FortiNAC posts where... Full Story
-

This is the third session in a multi-part article... Full Story
-

Today I was configuring key-based authentication on a FortiGate... Full Story
-

Netcat, often called the "Swiss Army knife" of networking,... Full Story
-

At its core, IEEE 802.1X is a network layer... Full Story
-

In case you did not see the previous FortiNAC... Full Story
-

This is our 5th session where we are going... Full Story
-

Now that we have Wireshark installed and somewhat configured,... Full Story
-

The Philosophy of Packet Analysis Troubleshooting isn't about looking... Full Story
-

Here is a quick article on running lldp on... Full Story
-

If you have ever stared at a Terminal window... Full Story
-

The Problem This Solves FortiGate matches policies referencing a... Full Story