If you've spent any time configuring user authentication on... Full Story
By Manny Fernandez
May 26, 2020
Deploying SSL VPNs Using Multiple Realms
Realms are a feature on the FortiGate that I have written about in the past, but I never really did a detailed dive into them and how and when to use them.
When a customer tells me they want to assign different policies to different users connecting to the FortiGate via VPN, my first thought is realms. Realms allow you to define different authentication methods, assign different ranges of IP addresses, provide different customized portals (company vs D.B.A.) etc.
The Recipe
- Create two realms; one for Corporate Users and one for Contractors.
- Have two separate ranges of addresses.
- Use Active Directory to authenticate corporate users.
- Use Local Users accounts to authenticate contractors.
- Change the default
fqdn/corporatetocorporate.fqdn - Create policies that limit contractors to certain IP addresses on
sshandpingonly.
The Ingredients
Here are the ingredients for the realm configuration.
Active Directory Configuration
In a previous article, I wrote about using a normal user to bind to AD. I will use that same configuration here.
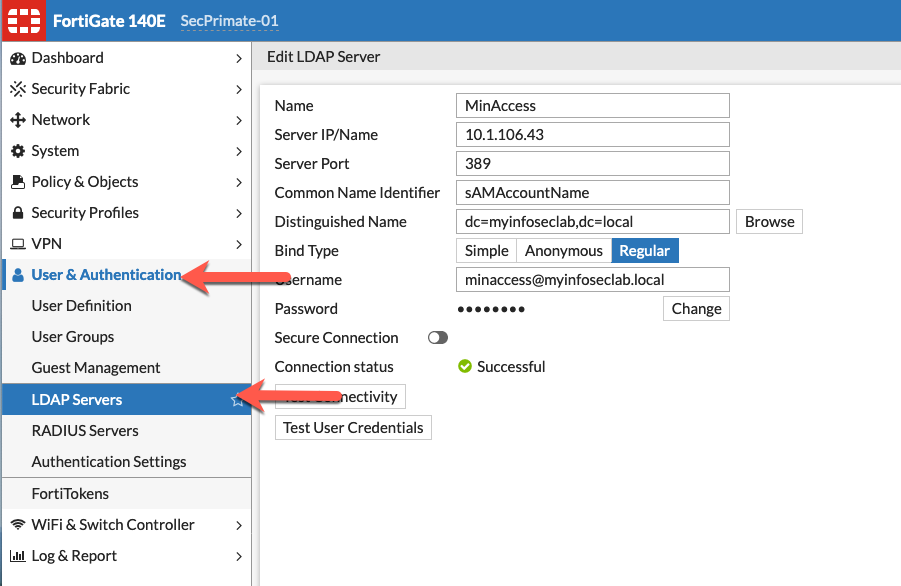
Her we see the basic LDAP configuration.
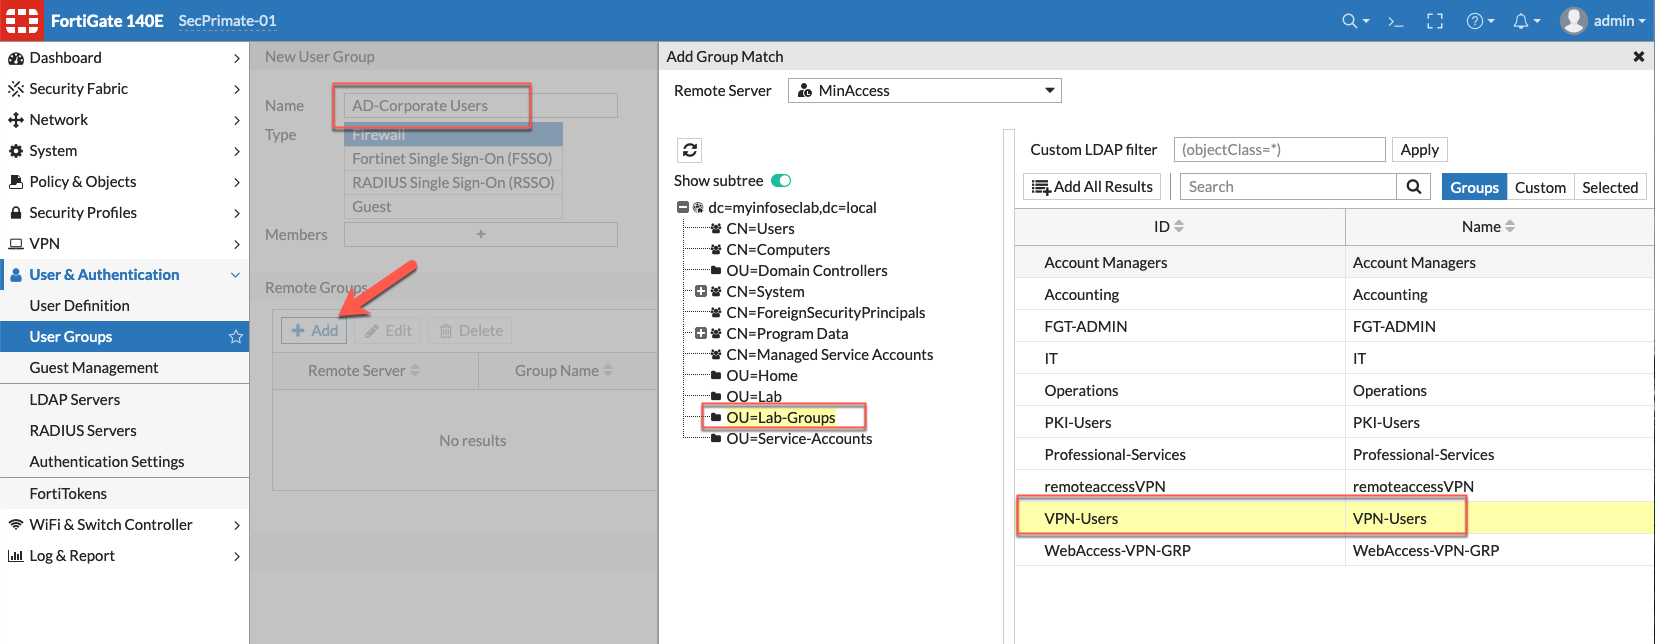
User Groups
Active Directory
Below we can see the User Group we are creating using the Remote Group option and then choosing the VPN-Users Active Directory group.
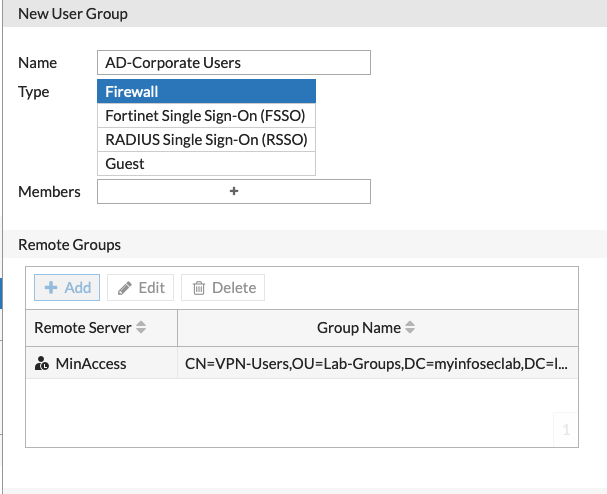
Below we see the completed remote group showing the name and the AD group below.
Local Groups
Now we are going to create a Local-Contractor group that will be, as its name implies, LOCAL to the firewall.
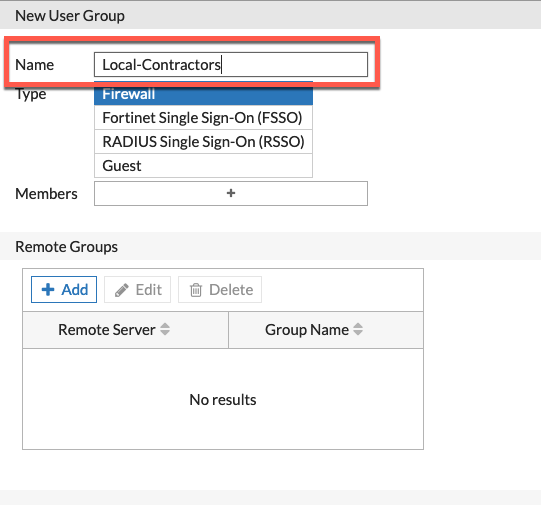
Under User & Device (6.2 and below) or User and Authentication then User Groups, then Create
Creating Local User
Now we are going to create a contractor user.
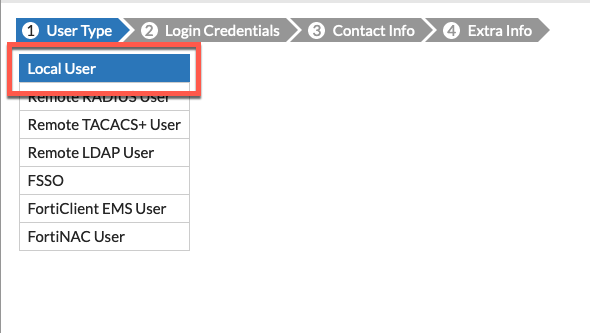
Under User & Device (6.2 and below) or User and Authentication you will see User Definition then Create .
Choose Local User then choose
![]()
Now we need to enter the Username and Password
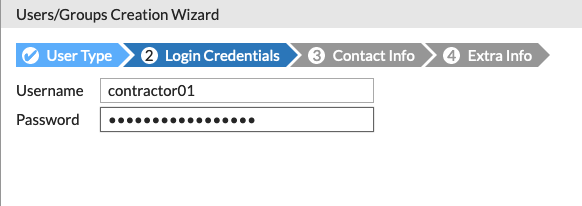
Optionally, you can enter an email.
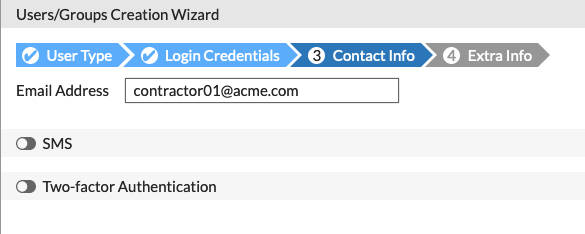
Note: If you are using the email as 2-factor, you will require this email field to be filled out.
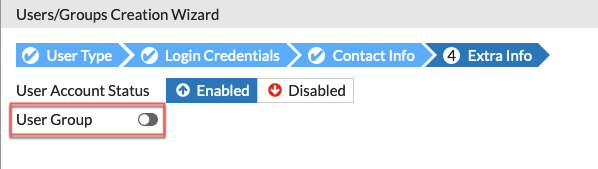
You will need to enable the User Group
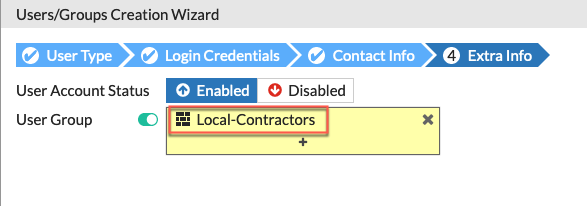
You then need to choose the group (in our case Local-Contractors )
Enabling SSL VPN Realms
Now lets jump over to System then Feature Visibility then enable SSL VPN Realms
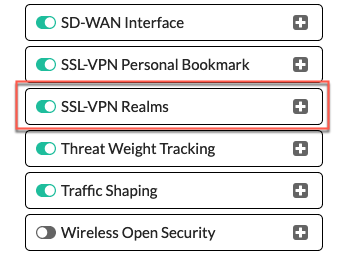
Hit Apply
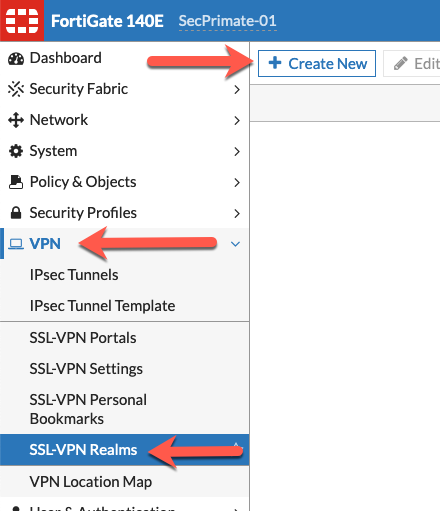
Creating the Realms
Now we can create the realms. Go to VPN then choose SSL-VPN Realms and finally Create New
Lets create the corporate realm
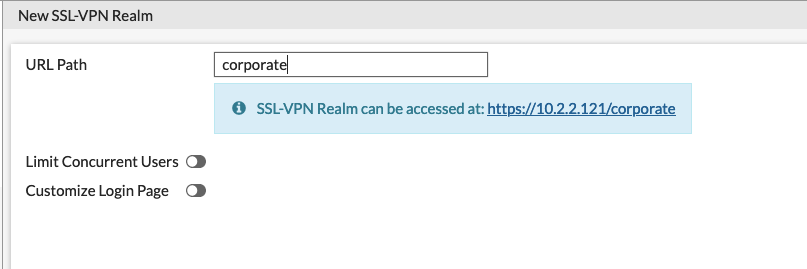
Simply create a new realm and name it. We will modify this later but for now, pay attention to the blue box that shows the https://10.2.2.121/corporate
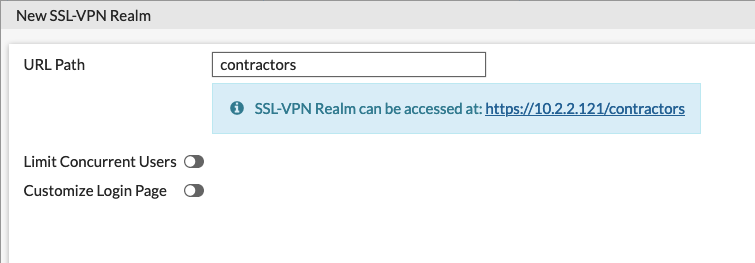
Next we will create the contractor realm.
Address Objects
Now we will create two Firewall Address object
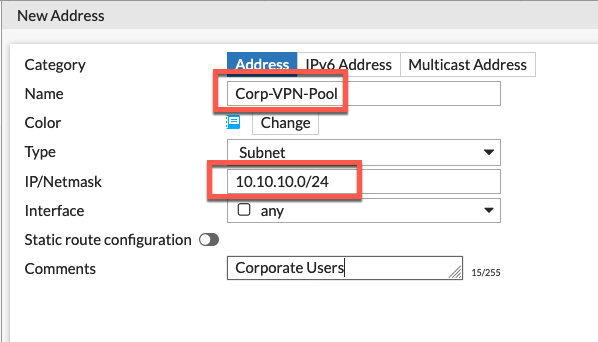
Here we can see that we created a Corp-VPN-Pool with a subnet of 10.10.10.0/24
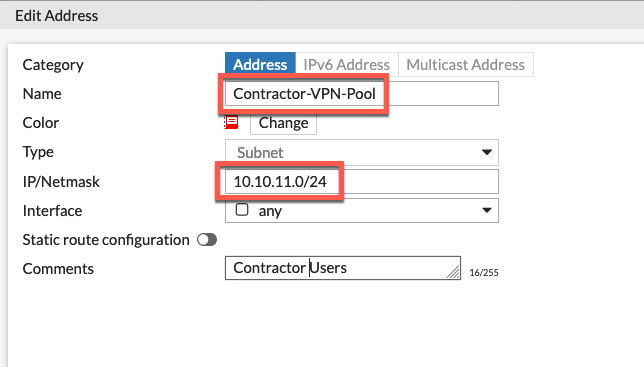
We also created a Contractor-VPN-Pool using a different 10.10.11.0/24
Creating Portal
Lets create the Corporate Portal
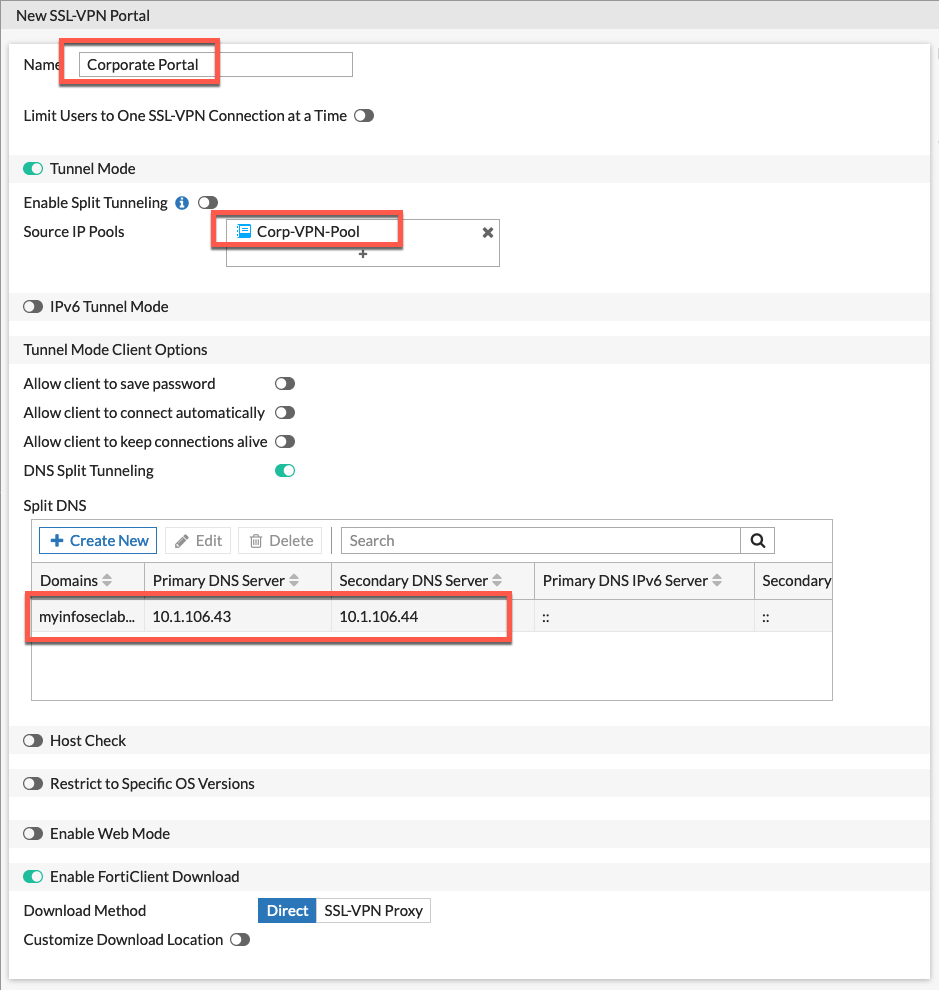
You can see above that we are using the subnet we created named Corp-VPN-Pool and we are also sending all DNS destined for myinfoseclab.local to my internal DNS servers.
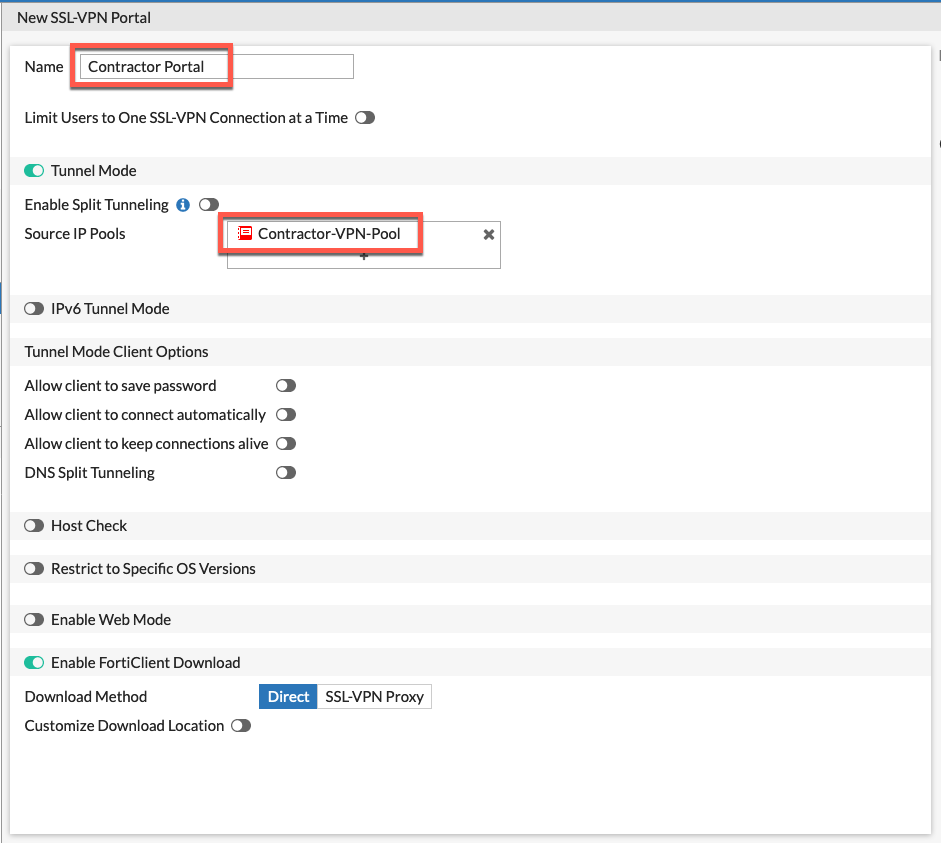
On the Contractor Portal we are using the Contractor-VPN-Pool and we are using the system DNS (In our case, FortiGuard Labs).
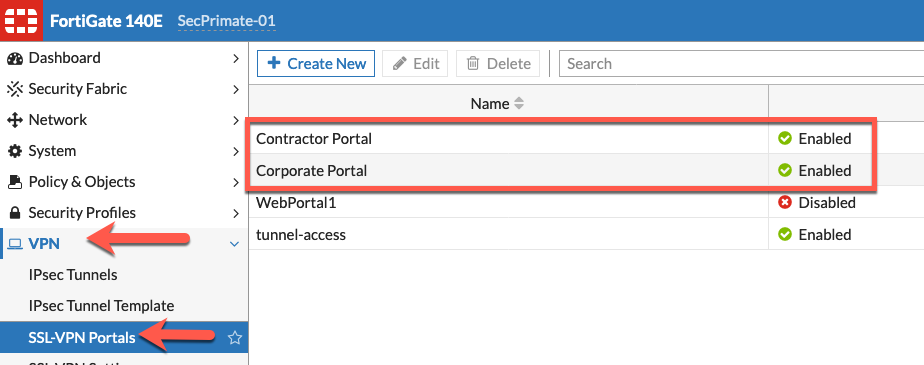
Here we see the two realms we created.
SSL VPN Settings
Now we need to set up the authentication for the different portals in their respective realms. This is under VPN then SSL-VPN Settings.
Her we can see that none of the portals we created are listed.
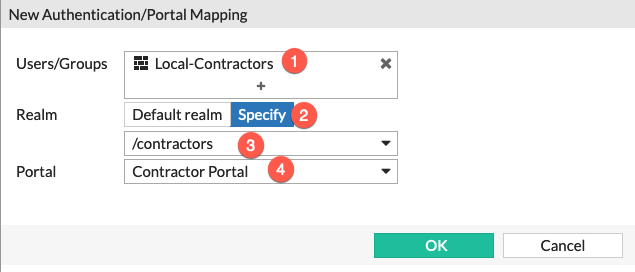
- Choose the
User Groupwe cerated earlier. - Choose the
Specifyunder theRealmsection. - Choose the
realmfrom the drop-down (/contractors) - And finally assign the
Portal. In this caseContractor Portal
Note the we chose the Local-Contractors user group which is the local firewall group with the member contractor01.
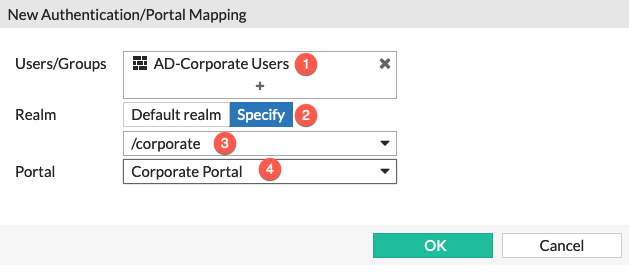
- Choose the
User Groupwe cerated earlier. - Choose the
Specifyunder theRealmsection. - Choose the
realmfrom the drop-down (/corporate) - And finally assign the
Portal. In this caseCorporate Portal
Note that in this Authentication Section, we have used the Active Directory group we added to the AD group we configured earlier.
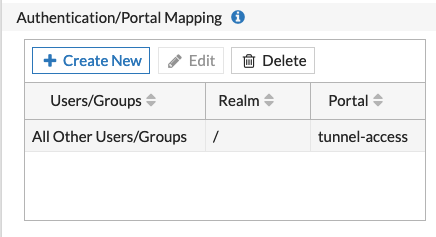
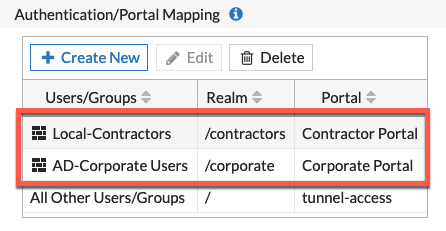
The finished portal mapping
Create Policies
We now need to create the policies to permit the traffic per realm.
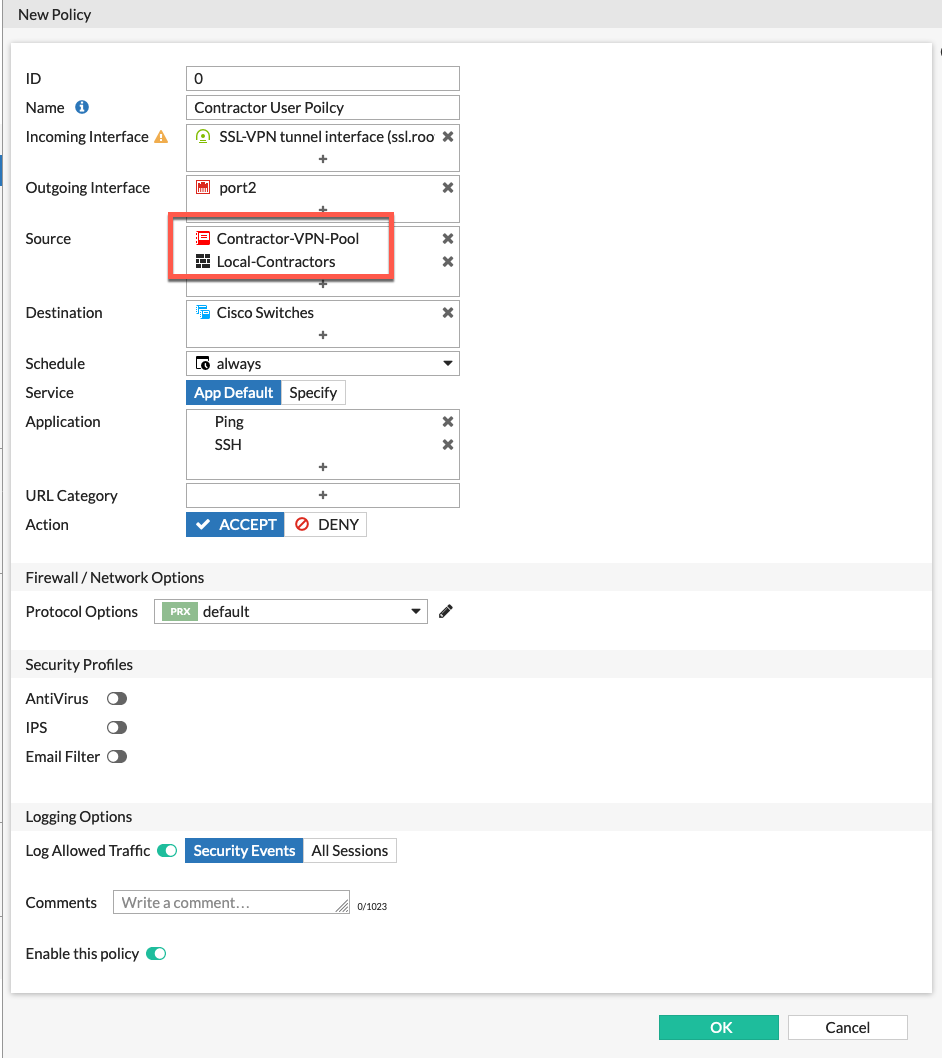
For the contractors, we are allowing them to ping and ssh to the certain IPs we discussed in the Recipe
We can see that it references the Source as Contractor-VPN-Pool and well as the Local-Contractors group.
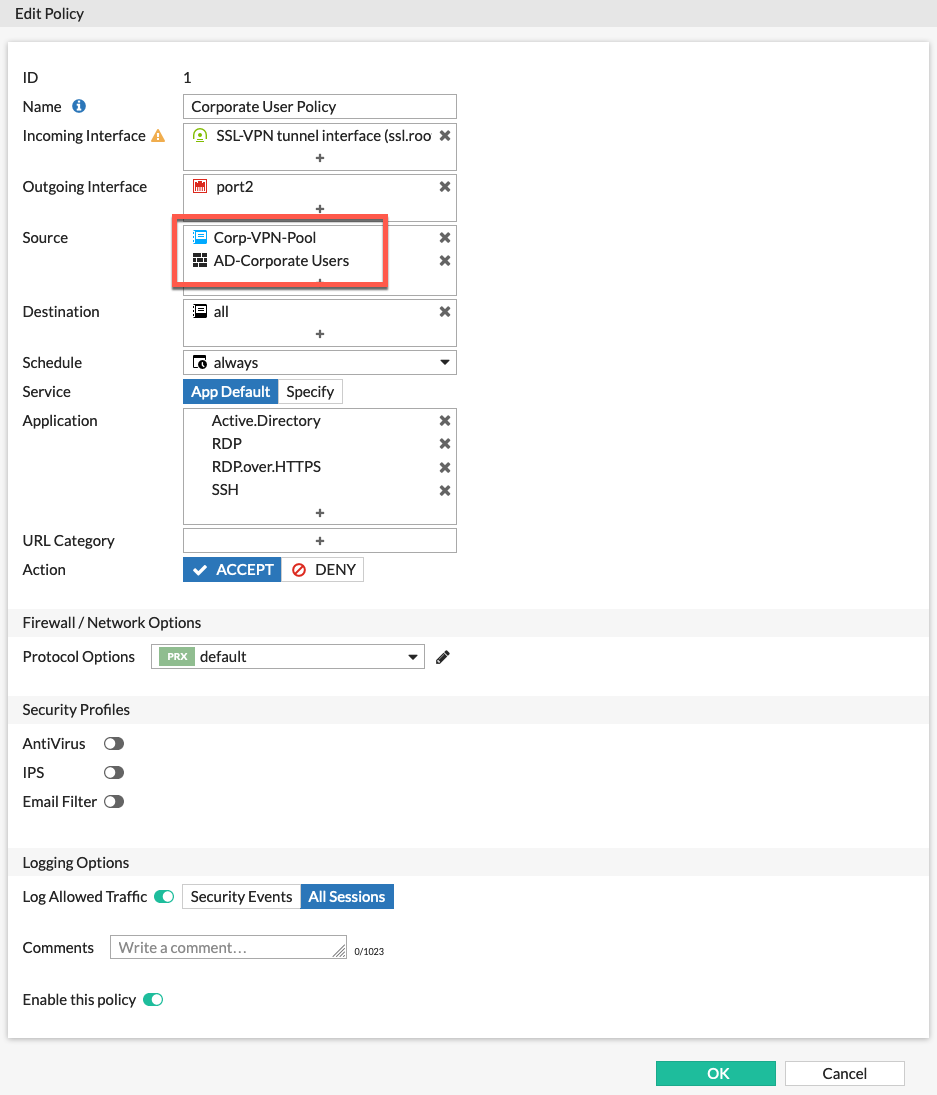
Her we see the Corporate policy. We can see the Corp-VPN-Pool as the source network with the AD-Corporate Users and some additional ports.

Her we see the finished policies for the remote access to internal. Now we will configure an Internet policy.
Finished Policy

Central NAT
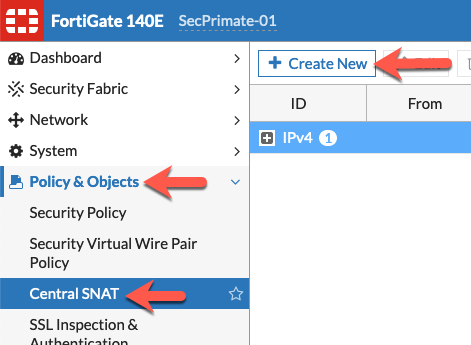
Since I always use Central NAT I need to create a SNAT Policy. You will need to go to your Policy & Objects then Central SNAT and Create New
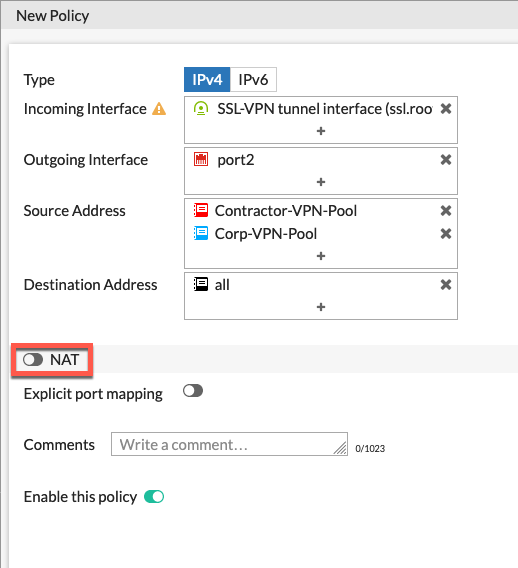
Below we are creating one single policy where there is NO NAT coming from either network address going to all via the Outgoing Interface which is port2.
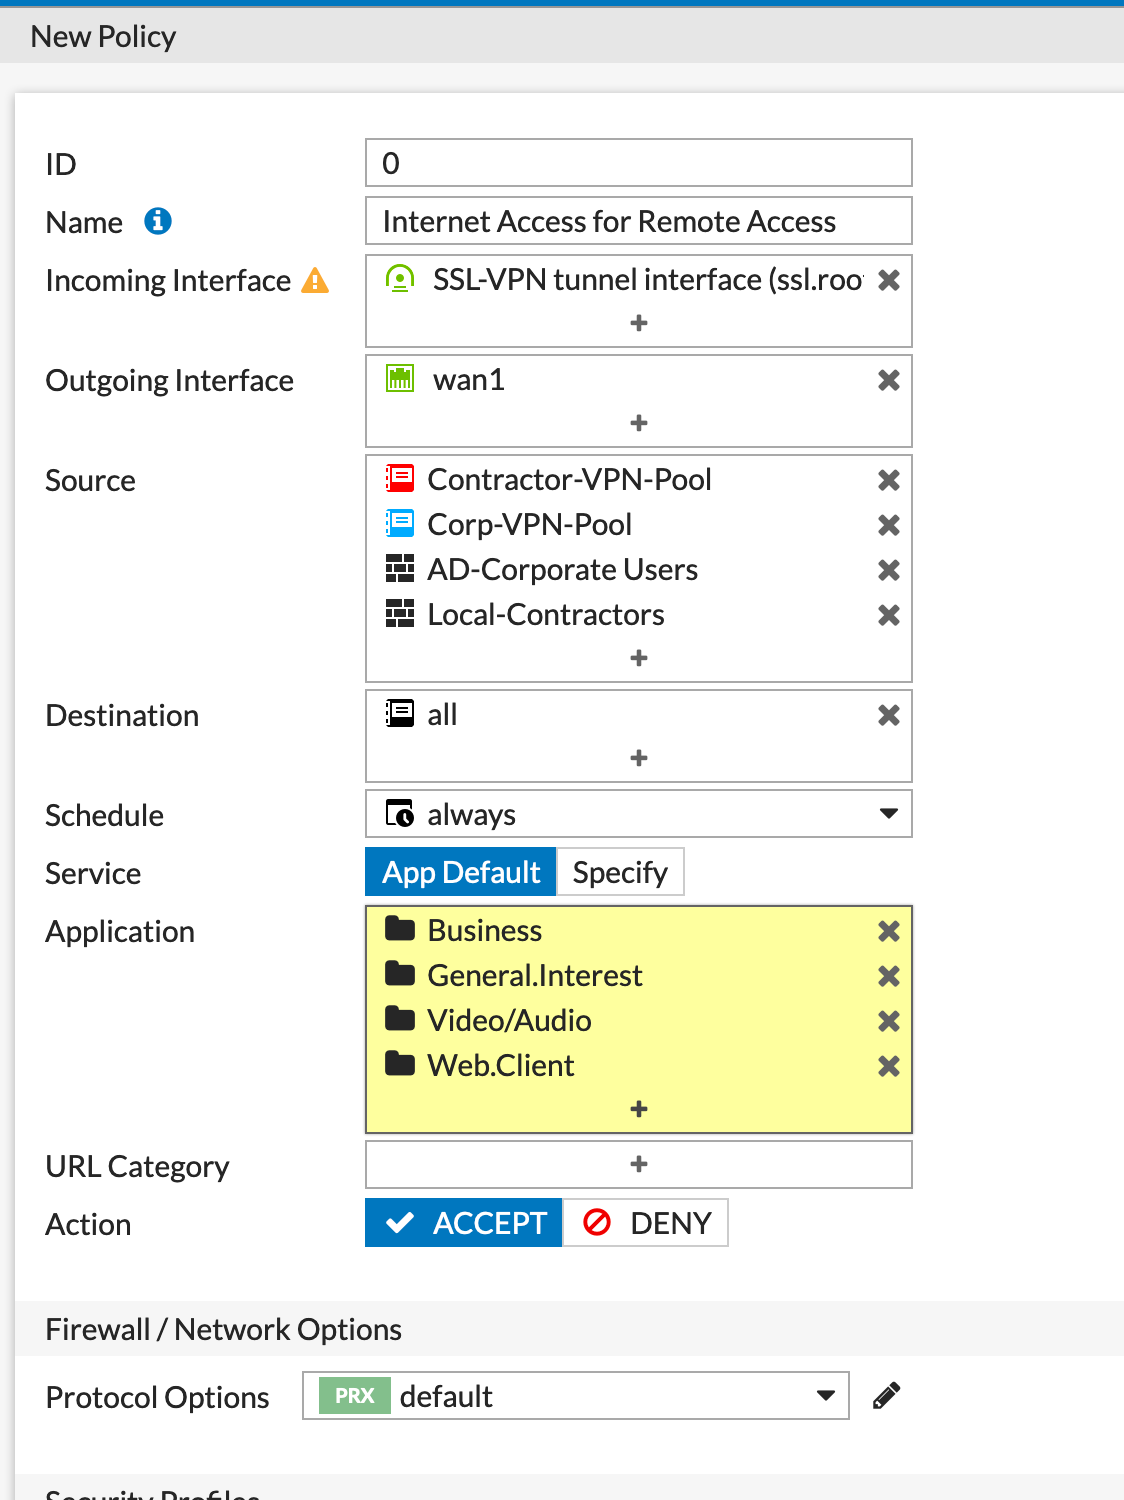
Since we set split tunnel disabled when we created the portal, we need to create a NAT allowing Internet access.
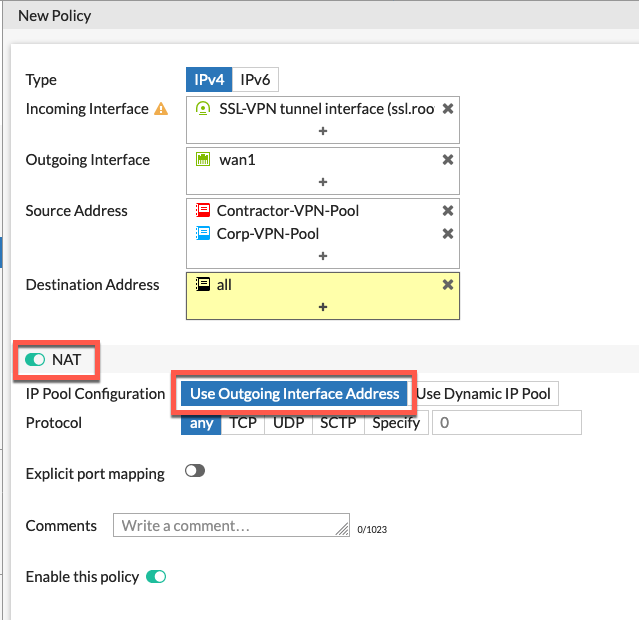
Her we see that we have the NAT enabled and we are using Outgoing Interface Address
Setting Virtual Host
Thanks to my friend Matt Sherif that blogs at UltraViolet Networks, he allowed me to link to his article from InfoSecMonkey we can change the behavior of the realm link. Rather than using:
https://vpn.myinfoseclab.com/corporate to https://corporate.myinfoseclab.com
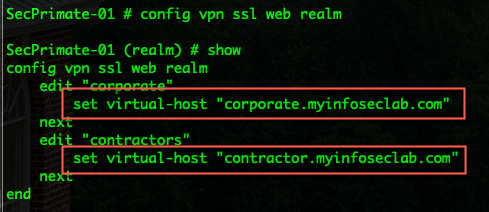
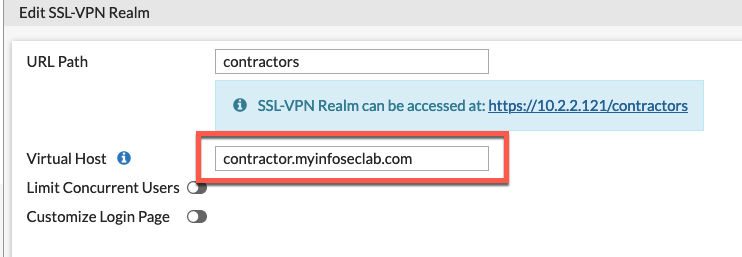
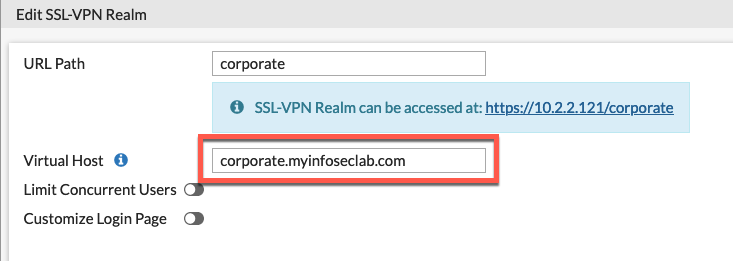
You will obviously need to create an external DNS entry pointing to your new virtual host. Once you edit this in the CLI, you will see it in the GUI allowing you to modify it.
Recent posts
-

-

DNS is one of those technologies that quietly underpins... Full Story
-

BGP issues on FortiGate firewalls usually trace back to... Full Story
-

Every time your laptop talks to your router, a... Full Story
-

If you've spent any time configuring NAT on a... Full Story
-

If you have spent any time configuring firewall policies... Full Story
-

High availability on FortiGate is one of those features... Full Story
-

If you've configured SD-WAN on a FortiGate, you've almost... Full Story
-

FortiLink is the management protocol that turns a FortiSwitch... Full Story
-

FortiSwitches are pretty rock solid from Mean Time Between... Full Story
-

This is a quicky tip. Have you ever gone... Full Story
-

DNS is one of those quiet pieces of internet... Full Story
-

This article is an updated version of the previous... Full Story
-

You will add ns2 as a secondary (slave) BIND9... Full Story
-

In the process of deploying my lab, I needed... Full Story
-

RFC 8805, used to be known as Self-Correcting IP... Full Story
-

Years back, I wrote an article about certificate pinning. ... Full Story
-

FortiGates have the ability to send alerts to Microsoft... Full Story
-

In this post, I am going to walk through... Full Story
-

Troubleshooting VoIP on a FortiGate can feel like trying... Full Story
-

Prior to FortiOS 7.0, there were three commands to... Full Story
-

In this post, I am going to go over... Full Story
-

What we are going to do: We are going... Full Story
-

Choosing between FGCP (FortiGate Clustering Protocol) and FGSP (FortiGate... Full Story
-

Creating a VLAN on macOS (The "Pro" Move) A... Full Story
-

This blog post explores the logic behind how macOS... Full Story
-

Pretty Fly for a Wi-Fi Tell My Wi-Fi Love... Full Story
-

Part of my daily gig is creating BoMs (Bill-of-Materials)... Full Story
-

ICMP introduces several security risks, but careful filtering, rate... Full Story
-

The command diag debug application dhcps -1 enables full... Full Story
-

In the world of FortiOS, execute tac report is... Full Story
-

LLDP; What is it The Link Layer Discovery Protocol... Full Story
-

What it actually does When you run diagnose fdsm... Full Story
-

Monkey Bites are bite-sized, high-impact security insights designed for... Full Story
-

I have run macOS in macOS with Parallels but... Full Story
-

Don't be confused with my other FortiNAC posts where... Full Story
-

This is the third session in a multi-part article... Full Story
-

Today I was configuring key-based authentication on a FortiGate... Full Story
-

Netcat, often called the "Swiss Army knife" of networking,... Full Story
-

At its core, IEEE 802.1X is a network layer... Full Story
-

In case you did not see the previous FortiNAC... Full Story
-

This is our 5th session where we are going... Full Story
-

Now that we have Wireshark installed and somewhat configured,... Full Story
-

The Philosophy of Packet Analysis Troubleshooting isn't about looking... Full Story
-

Do you use Sequence Groups In your Firewall Policies? ... Full Story
-

The other day, I opened my Wireshark for macOS... Full Story
-

1. Executive Summary Objective This guide walks through the... Full Story