If you've spent any time configuring user authentication on... Full Story
By Manny Fernandez
June 9, 2026
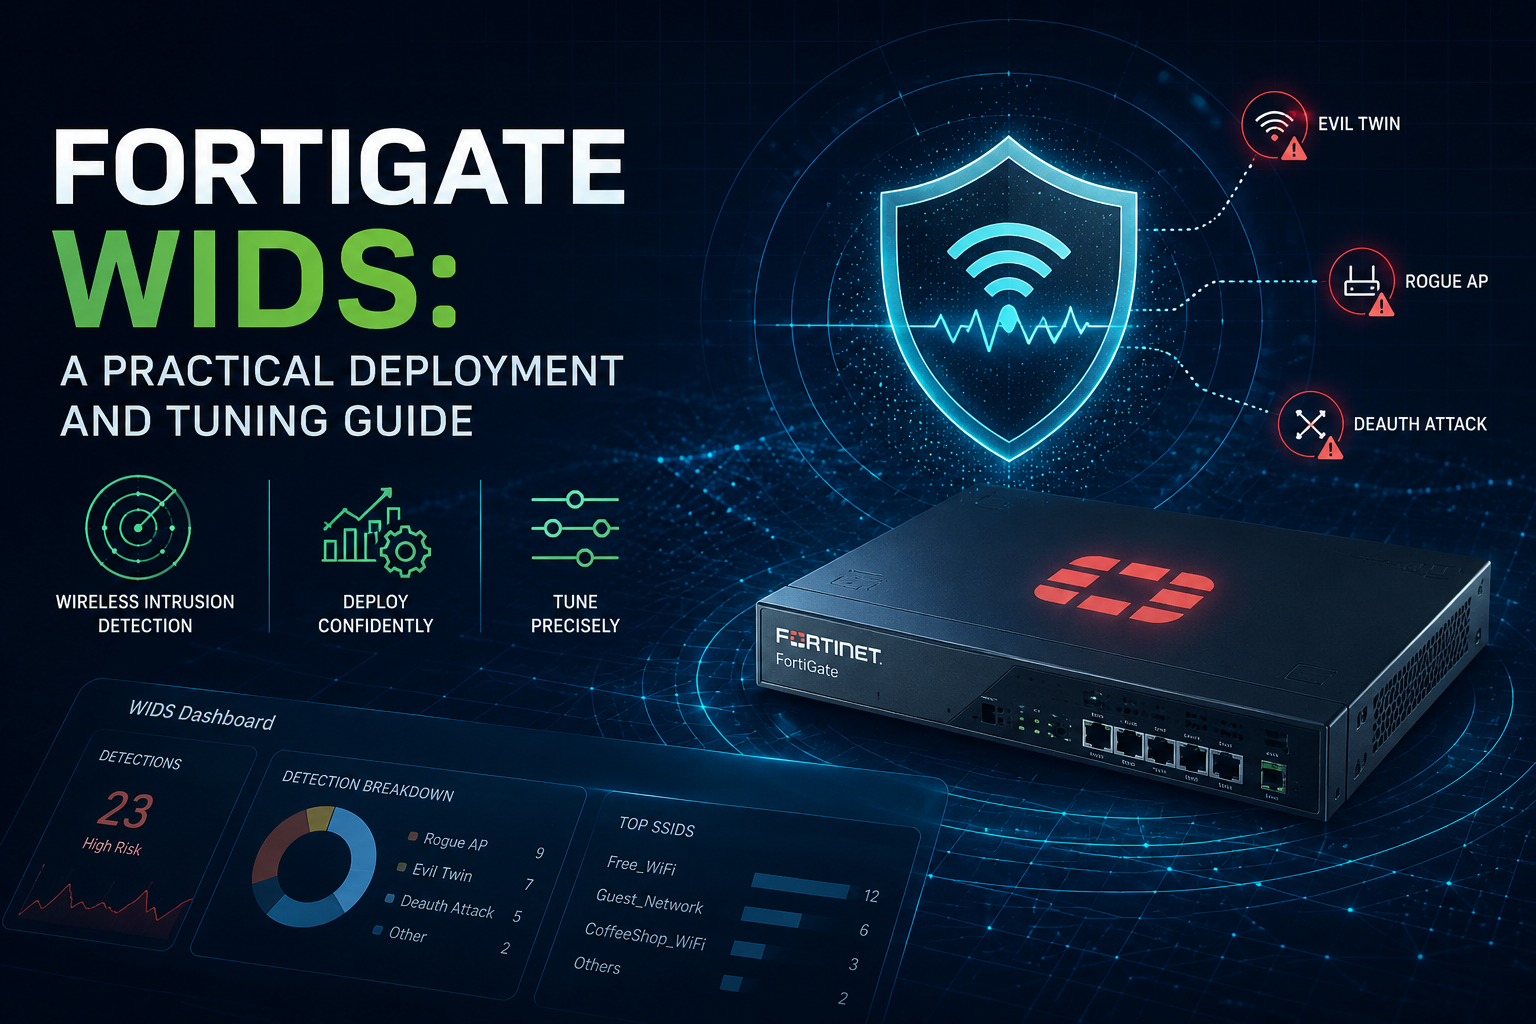
FortiGate WIDS: A Practical Deployment and Tuning Guide
1. High-Level Overview
The FortiGate Wireless Intrusion Detection System (WIDS) is the radio-frequency monitoring engine built into the FortiGate wireless controller. It instructs your FortiAP (Fortinet’s managed access points) to listen to the air around them, identify wireless attacks and rogue devices, and report those events back to the FortiGate for logging and optional mitigation.
In plain terms: your wired firewall inspects packets on the LAN, but WIDS extends that visibility into the 2.4 GHz, 5 GHz, and 6 GHz spectrum where attacks never touch a switch port. It watches for things like rogue APs (unauthorized access points broadcasting on your premises), Evil Twin impersonation (an attacker cloning your SSID to harvest credentials), deauthentication and disassociation floods (denial-of-service attacks that kick clients off the network), management frame floods, weak-IV and ASLEAP attacks against legacy encryption, and ad-hoc networks that bypass your controlled infrastructure.
A WIDS profile is a named container of detection toggles and thresholds. You build the profile once, then bind it to a radio inside a FortiAP profile (the template that defines how a model of AP behaves). Detection is signature and heuristic based: the AP samples frames, the controller compares behavior against the enabled checks, and any match generates a log entry. When paired with rogue AP on-wire detection and auto-suppression, WIDS moves from passive detection (WIDS) toward active prevention (WIPS, a Wireless Intrusion Prevention System), where the FortiGate actively sends countermeasure frames to contain a hostile AP.
The primary value is spectrum-level situational awareness and compliance evidence. For regulated environments (PCI DSS explicitly requires quarterly rogue AP detection), WIDS gives you continuous, logged proof rather than a once-a-quarter walkaround with a spectrum analyzer.
2. Applicability and Guardrails
When to Use
* You operate a FortiAP estate managed by FortiGate. WIDS is a feature of the FortiGate wireless controller. If your APs are FortiGate-managed (or FortiAP-Cloud managed in some topologies), you already own the capability at no extra license cost. This is the baseline prerequisite.
* You have a compliance mandate for rogue detection. PCI DSS requirement 11.2.1 and similar HIPAA, NIST 800-153, and SOC 2 controls expect documented rogue AP monitoring. Continuous WIDS scanning with FortiAnalyzer log retention satisfies the evidence requirement cleanly.
* You face a realistic RF threat surface. Open lobbies, shared office floors, healthcare facilities, retail, and any high-foot-traffic environment where an attacker could plant a rogue AP or run an Evil Twin against your guest or corporate SSID. WIDS earns its keep where physical access to RF space cannot be controlled.
* You want dedicated-sensor monitoring without sacrificing service. If you can spare a radio or deploy a few APs in monitor-only mode, you get near-continuous full-spectrum scanning. This is the ideal posture for high-security zones.
When NOT to Use
* A single-AP SOHO or home deployment with no compliance driver. The detection value is low when there is one AP, no sensitive data, and no realistic adversary running RF attacks. The configuration overhead and log noise are not worth it.
* You need uninterrupted high-throughput service on every radio and cannot tolerate background scan gaps. Background scanning (the foreground/background scan that lets a client-serving radio briefly leave its operating channel to sample other channels) introduces small, periodic service interruptions. On latency-sensitive deployments (voice over WiFi, real-time video, dense high-density venues), aggressive full-channel scanning on serving radios can degrade the user experience. Use dedicated monitor radios instead, or accept reduced scan coverage.
* You expect WIDS alone to stop a determined attacker. WIDS detects and logs. Even with auto-suppression enabled, deauth-based containment is a blunt instrument that can be legally questionable if it touches neighbor networks, and skilled attackers using protected management frames (802.11w) or rapid channel hopping can evade it. Treat WIDS as a detection and compliance layer, not a guarantee of prevention.
3. Detailed Step-by-Step Procedure
This procedure assumes FortiOS 7.x with at least one FortiAP already discovered and authorized by the wireless controller. CLI examples use the wireless-controller command tree; the GUI path is noted where it exists.
Step 1: Confirm the Wireless Controller and FortiAP Baseline
The Action. Verify the controller is running and the AP is authorized before touching WIDS. From the CLI:
get wireless-controller status
diagnose wireless-controller wlac -d wtp
Confirm at least one WTP (Wireless Termination Point, Fortinet’s term for a managed AP) shows a state of `connected` and `authorized`. In the GUI, check `WiFi and Switch Controller > Managed FortiAPs` and confirm the AP shows green/online.
The Explanation (the “Why”). WIDS is enforced by the AP radios, not the FortiGate CPU. If the AP is not connected and authorized, the profile you build later has nothing to run on, and you will burn time debugging a detection problem that is actually a CAPWAP (the control and provisioning tunnel between AP and controller) adoption problem. Establishing the baseline first means every later failure is attributable to WIDS configuration rather than infrastructure. Skip this and you risk chasing phantom issues.
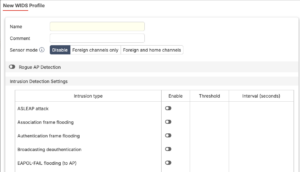
Step 2: Create the WIDS Profile
The Action. Create a named profile. GUI path: WiFi and Switch Controller > WIDS Profiles > Create New.
Via CLI:
config wireless-controller wids-profile
edit "WIDS-Corp-Standard"
set comment "InfoSecMonkey standard WIDS baseline"
next
end
The Explanation (the “Why”). The profile is the unit of policy you will later attach to radios. Naming it descriptively matters at scale: in a 30-plus-site estate you will end up with several profiles (a strict one for high-security floors, a lighter one for general office), and a name like WIDS-Corp-Standard beats wids-1 when you are reading logs at 2 a.m. Creating the empty container first also lets you stage changes incrementally rather than pasting one giant block and hoping it parses.
Step 3: Enable Rogue AP Detection and Scanning
The Action. Turn on the access point scanning that feeds rogue detection. The key knob is `ap-scan`, plus the background-scan timing parameters:
config wireless-controller wids-profile
edit "WIDS-Corp-Standard"
set ap-scan enable
set ap-scan-passive disable
set ap-bgscan-period 600
set ap-bgscan-intv 1
set ap-bgscan-duration 30
set ap-bgscan-idle 0
set ap-fgscan-report-intv 30
next
end
Here ap-bgscan-period is the seconds between full background scan cycles, ap-bgscan-intv is the gap between scanning successive channels, and ap-bgscan-duration is the dwell time per channel in milliseconds. Setting ap-scan-passive disable allows active probing (the AP sends probe requests) for faster, more complete discovery; set it to enable if you must stay radio-silent for regulatory or stealth reasons.
The Explanation (the “Why”). Rogue detection depends entirely on the AP actually hearing other APs, and that requires it to scan channels it is not currently serving on. The background scan is how a client-serving radio briefly hops off-channel to sample the spectrum, then returns. This step must come before mitigation (Step 6) because you cannot suppress a rogue you never detected, and on-wire correlation has nothing to correlate against. Misconfigure the dwell time too short and you will miss APs that beacon infrequently; set the period too aggressive and you start eating into client airtime. The values above are a balanced starting point for an office environment.
Step 4: Enable the Intrusion Detection Signatures
The Action. Turn on the specific attack detections relevant to your threat model. A solid corporate baseline:
config wireless-controller wids-profile
edit "WIDS-Corp-Standard"
set asleap-attack enable
set eapol-logoff-flood enable
set deauth-broadcast enable
set deauth-unknown-src-thresh 10
set ap-impersonation enable
set ap-spoofing enable
set adhoc-network enable
set wireless-bridge enable
set null-ssid-probe-resp enable
set long-duration-attack enable
set invalid-mac-oui enable
next
end
Then enable the flood detections, each of which pairs an enable toggle with a threshold (frames) and a time window (seconds):
config wireless-controller wids-profile
edit "WIDS-Corp-Standard"
set auth-frame-flood enable
set auth-flood-thresh 30
set auth-flood-time 10
set assoc-frame-flood enable
set assoc-flood-thresh 30
set assoc-flood-time 10
set spoofed-deauth enable
set disassoc-broadcast enable
next
end
The Explanation (the “Why”). Each signature targets a distinct attack class. ap-impersonation and ap-spoofing catch Evil Twin attacks. asleap-attack flags exploitation of legacy LEAP authentication. The *-flood family catches management-frame denial-of-service, where an attacker spams auth or association frames to exhaust the AP. The threshold-plus-window model exists so you can tune sensitivity: 30 auth frames in 10 seconds is abnormal for a single client but trivially exceeded by an attacker. This step follows scanning because detection signatures act on the frames the radio is already capturing; enabling signatures without a scanning-capable radio binding (Step 7) means nothing fires. Enable only what maps to your environment, because every enabled check that triggers becomes a log entry you have to triage.
Step 5: Tune Thresholds to Suppress False Positives
The Action. Adjust the flood thresholds and the deauth-rate limiter to match your real traffic baseline. A frequently overlooked knob protects clients during a deauth storm:
config wireless-controller wids-profile
edit "WIDS-Corp-Standard"
set deauth-unknown-src-thresh 10
next
end
After running the profile in detection-only mode for a few days, pull the logs (WiFi and Switch Controller event logs, or FortiAnalyzer) and raise any threshold that fires on legitimate traffic. Lower thresholds only where you have a specific high-sensitivity requirement.
The Explanation (the “Why”). Default thresholds are generic. A busy 200-client floor legitimately generates association and authentication bursts during the 9 a.m. login rush that can look like a flood. If you deploy with defaults and walk away, the security team drowns in false positives and starts ignoring WIDS entirely, which is worse than not running it. The deauth-rate limiter matters specifically because, during an aggressive deauth attack, the FortiGate’s own protective deauthentication of unknown clients can itself starve the airtime that valid clients need. Tuning this in a dedicated step, after detection is live but before you trust the alerts, is what separates a usable WIDS deployment from shelfware.
Step 6: (Optional) Enable Rogue AP On-Wire Detection and Auto-Suppression
The Action. If you want to move from detection toward prevention, enable auto-suppression in the profile and confirm rogue on-wire detection at the controller level:
config wireless-controller wids-profile
edit "WIDS-Corp-Standard"
set ap-auto-suppress enable
next
end
On-wire detection (the controller checking whether a detected rogue’s MAC also appears on your wired LAN, which proves it is plugged into your network rather than a harmless neighbor) is configured under the rogue AP settings and reviewed in WiFi and Switch Controller > Rogue APs. Mark confirmed rogues for suppression there.
The Explanation (the “Why”). Detection tells you a rogue exists; on-wire correlation tells you it is actually a threat to your network rather than the coffee shop next door. This distinction is critical because auto-suppression works by sending deauthentication frames at the rogue, and blindly suppressing every detected AP can disrupt neighboring legitimate networks, which is both operationally rude and potentially a legal liability under FCC rules. This step is explicitly optional and sequenced last because you should only automate countermeasures once detection and tuning are proven. Enabling suppression before tuning means you may automatically attack a false positive.
Step 7: Bind the WIDS Profile to a Radio in the FortiAP Profile
The Action. WIDS does nothing until it is attached to a radio. Edit the FortiAP profile and apply the WIDS profile to the relevant radio:
config wireless-controller wtp-profile
edit "FAP231F-Corp"
config radio-1
set wids-profile "WIDS-Corp-Standard"
end
config radio-2
set wids-profile "WIDS-Corp-Standard"
end
next
end
In the GUI: WiFi and Switch Controller > FortiAP Profiles, edit the profile, and select your WIDS profile under each radio’s settings. For a dedicated sensor, set the radio’s mode to monitor so it scans full-time instead of serving clients.
The Explanation (the “Why”). This is the activation step, and it is deliberately last because everything before it was preparation. The profile, signatures, and thresholds are inert configuration until a physical radio is told to enforce them. Binding to radio-1 (typically 2.4 GHz) and radio-2 (typically 5 GHz) ensures both bands are covered; binding only one leaves a blind spot an attacker can exploit by operating in the unmonitored band. The most common WIDS failure in the field is a perfectly configured profile that was never bound to a radio, so detection silently never happens. If you have spare radios, a monitor-mode binding gives the best coverage because the radio never has to interrupt client service to scan.
Step 8: Validate Detection and Confirm Logging
The Action. Verify the profile is live and generating events. Check radio state and run a controlled test:
diagnose wireless-controller wlac -d wids
Generate a benign test event (for example, stand up a temporary unauthorized SSID on a spare device within range) and confirm it appears in WiFi and Switch Controller rogue/event logs and propagates to FortiAnalyzer if configured. Confirm your log forwarding and retention satisfy the compliance window you are bound to.
The Explanation (the “Why”). A WIDS deployment you have not tested is a WIDS deployment you do not have. The single most common operational gap is detection that works but never reaches a place anyone looks, so the alert dies on the FortiGate’s local memory log and rolls off in hours. Validating end-to-end (radio sees it, controller logs it, FortiAnalyzer retains it, someone is alerted) is what converts configuration into actual security and audit-ready evidence. Doing this as the final step closes the loop: if the test event does not show up, you walk back through Steps 7, 3, and 2 in that order to find the break.
Four Key Takeaways and Best Practices
* Use dedicated monitor radios for serious coverage. Background scanning on client-serving radios is a compromise that trades scan completeness for client airtime. Where security matters most, sacrifice a radio (or deploy a few APs in monitor-only mode) so you get continuous full-spectrum visibility without degrading the production WLAN. This is the single biggest lever on detection quality.
* Run in detection-only mode before enabling suppression, and tune against your real baseline. Deploy the profile, collect a week of logs, raise thresholds that fire on legitimate login rushes, and only then consider auto-suppression. Suppression on top of untuned thresholds means you may automatically launch deauth countermeasures against a false positive or a neighbor, which is a fast path to an outage or a complaint.
* Cover every band, and revisit the profile when you add 6 GHz. A profile bound only to the 2.4 GHz radio leaves 5 GHz and 6 GHz unmonitored, and attackers know to operate where you are not looking. When you introduce WiFi 6E/7 hardware, confirm your scan channel lists include the 6 GHz range so the new spectrum is not a blind spot.
* Always validate end-to-end and centralize your logs. Forward WIDS events to FortiAnalyzer with retention that meets your compliance window (PCI DSS expects at least a year, with 90 days readily available). A detection that only lands in volatile local memory is useless for incident response and worthless as audit evidence. Test with a controlled rogue at least quarterly to prove the pipeline still works.
Recent posts
-

-

DNS is one of those technologies that quietly underpins... Full Story
-

BGP issues on FortiGate firewalls usually trace back to... Full Story
-

Every time your laptop talks to your router, a... Full Story
-

If you've spent any time configuring NAT on a... Full Story
-

If you have spent any time configuring firewall policies... Full Story
-

High availability on FortiGate is one of those features... Full Story
-

If you've configured SD-WAN on a FortiGate, you've almost... Full Story
-

FortiLink is the management protocol that turns a FortiSwitch... Full Story
-

FortiSwitches are pretty rock solid from Mean Time Between... Full Story
-

This is a quicky tip. Have you ever gone... Full Story
-

DNS is one of those quiet pieces of internet... Full Story
-

This article is an updated version of the previous... Full Story
-

You will add ns2 as a secondary (slave) BIND9... Full Story
-

In the process of deploying my lab, I needed... Full Story
-

RFC 8805, used to be known as Self-Correcting IP... Full Story
-

Years back, I wrote an article about certificate pinning. ... Full Story
-

FortiGates have the ability to send alerts to Microsoft... Full Story
-

In this post, I am going to walk through... Full Story
-

Troubleshooting VoIP on a FortiGate can feel like trying... Full Story
-

Prior to FortiOS 7.0, there were three commands to... Full Story
-

In this post, I am going to go over... Full Story
-

What we are going to do: We are going... Full Story
-

Choosing between FGCP (FortiGate Clustering Protocol) and FGSP (FortiGate... Full Story
-

Creating a VLAN on macOS (The "Pro" Move) A... Full Story
-

This blog post explores the logic behind how macOS... Full Story
-

Pretty Fly for a Wi-Fi Tell My Wi-Fi Love... Full Story
-

Part of my daily gig is creating BoMs (Bill-of-Materials)... Full Story
-

ICMP introduces several security risks, but careful filtering, rate... Full Story
-

The command diag debug application dhcps -1 enables full... Full Story
-

In the world of FortiOS, execute tac report is... Full Story
-

LLDP; What is it The Link Layer Discovery Protocol... Full Story
-

What it actually does When you run diagnose fdsm... Full Story
-

Monkey Bites are bite-sized, high-impact security insights designed for... Full Story
-

I have run macOS in macOS with Parallels but... Full Story
-

Don't be confused with my other FortiNAC posts where... Full Story
-

This is the third session in a multi-part article... Full Story
-

Today I was configuring key-based authentication on a FortiGate... Full Story
-

Netcat, often called the "Swiss Army knife" of networking,... Full Story
-

At its core, IEEE 802.1X is a network layer... Full Story
-

In case you did not see the previous FortiNAC... Full Story
-

This is our 5th session where we are going... Full Story
-

Now that we have Wireshark installed and somewhat configured,... Full Story
-

The Philosophy of Packet Analysis Troubleshooting isn't about looking... Full Story
-

Do you use Sequence Groups In your Firewall Policies? ... Full Story
-

The other day, I opened my Wireshark for macOS... Full Story
-

1. Executive Summary Objective This guide walks through the... Full Story