
If you've spent any time configuring user authentication on... Full Story
By Manny Fernandez
September 7, 2026
NAT64 and NAT46 on FortiOS: Building a Production IPv6 Transition Gateway
Executive Summary
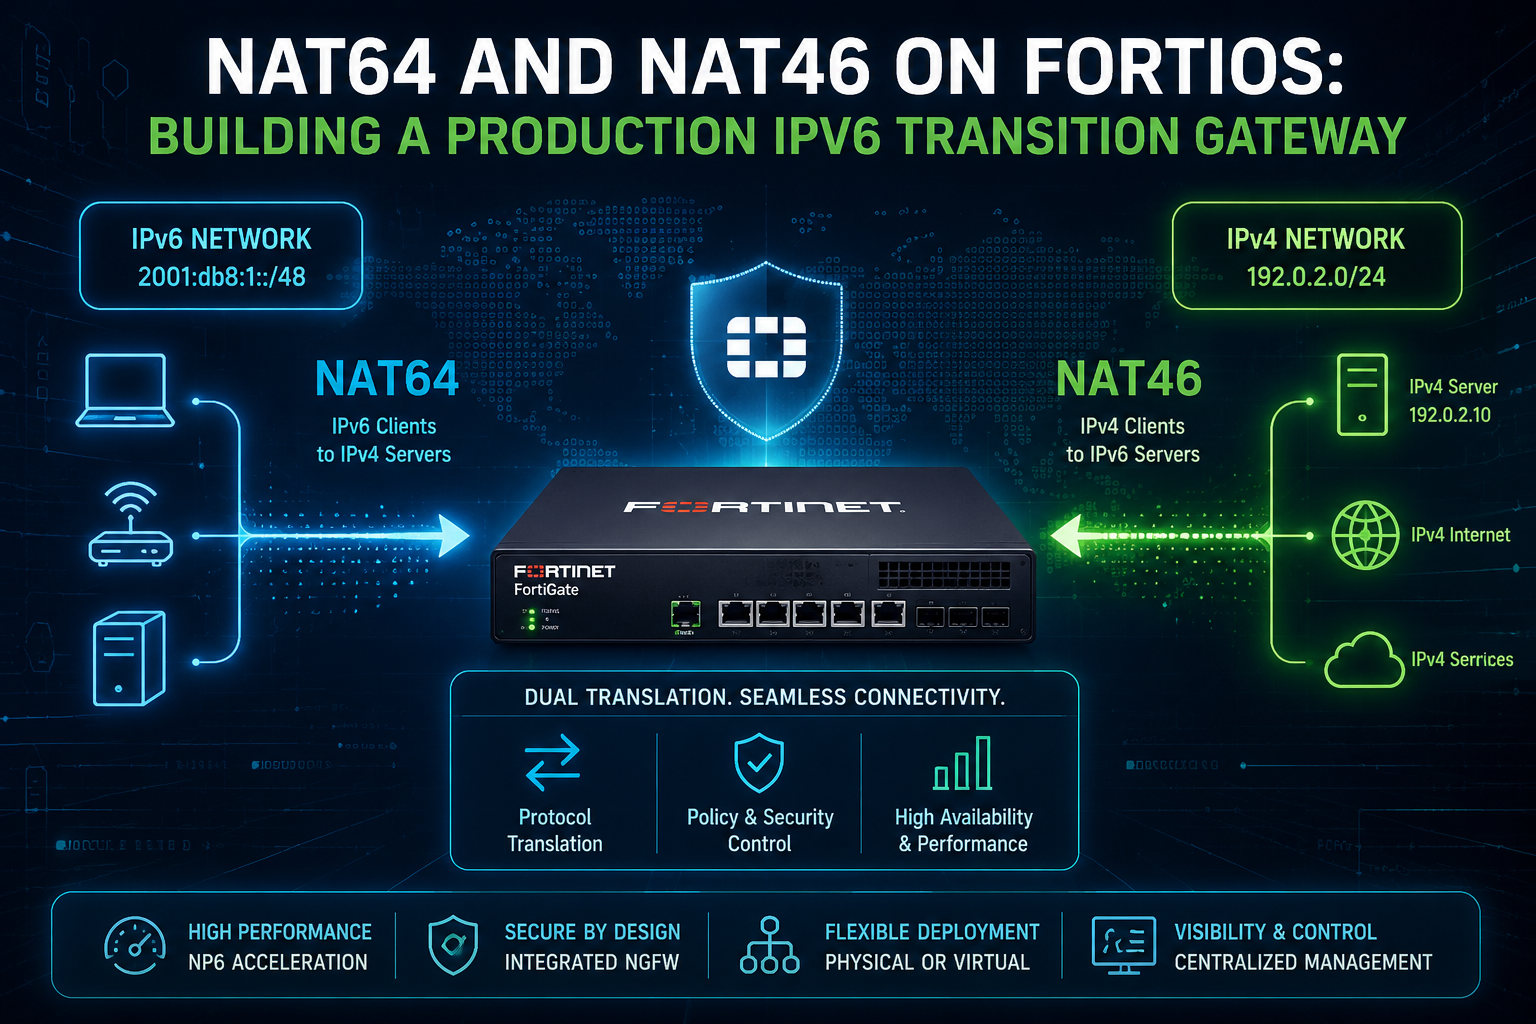
This guide walks through deploying both NAT64 (IPv6 clients reaching IPv4 resources) and NAT46 (IPv4 clients reaching IPv6 resources) on a FortiGate running the current unified translation model introduced in FortiOS 7.0.1. It covers transparent, DNS64 driven outbound NAT64, a static embedded NAT64 VIP for exposing legacy IPv4 hosts, and a NAT46 VIP for exposing a new IPv6 only server to an IPv4 client base, so a FortiGate can act as the translation point during an IPv6 migration instead of forcing a flag day cutover.
Target Audience: Network engineers, security engineers, and Fortinet Systems Engineers planning or executing an IPv6 transition who need FortiGate to bridge IPv4 only and IPv6 only segments during the migration window.
▸ Prerequisites & Architecture
Assumed Knowledge
- IPv4 and IPv6 addressing, subnetting, and prefix notation
- Core FortiOS operation: the CLI console, the GUI, and how
config firewall policyobjects are built - Basic DNS concepts, specifically the difference between an A record and an AAAA record
- General NAT concepts (source NAT, destination NAT, and IP pools)
Environment / Lab Requirements
- A FortiGate (physical or FortiGate VM) running FortiOS 7.0.1 or later. This guide targets the current unified
vip/vip6translation model. If your unit is on 6.4.x or 7.0.0, see Gotcha 1 in the Troubleshooting section before you start; those builds use the oldervip64/vip46/policy64/policy46objects, a different command tree entirely. - At least four logical interfaces (physical ports, VLANs, or a mix), split into an IPv4 side and an IPv6 side, as laid out in the component table below. A lab build in EVE-NG, GNS3, or a pair of FortiGate VMs works fine.
- IPv6 feature visibility enabled (
config system global/set gui-ipv6 enable), since the GUI hides IPv6 fields until this is on. - No special licensing is required. NAT64 and NAT46 are standard FortiOS features on any current firmware.
Component Table
This guide uses 198.18.0.0/15 to represent public or transit IPv4 space, 10.0.0.0/16 for internal IPv4 LAN space, and 2001:db8::/32 (the IETF documentation prefix, RFC 3849) for all illustrative IPv6 space.
| Component | Role | Example Address |
|---|---|---|
| FGT-NAT64-01 | FortiGate performing the translation | mgmt: 10.10.10.1/24 |
| port9 (wan1) | IPv4 facing interface toward the legacy internet | 198.18.0.1/24 |
| port10 (ipv6-lan) | IPv6 only internal client segment | 2001:db8:10::1/64 |
| port11 (ipv4-lan) | Legacy IPv4 only internal client segment | 10.20.0.1/24 |
| port12 (ipv6-dc) | IPv6 only internal server / datacenter segment | 2001:db8:20::1/64 |
| naf.root | Auto created NAT46/64 tunnel interface (per VDOM) | no manual IP; internal use only |
| IPv6 client PC | Test host for outbound NAT64 | 2001:db8:10::100/64 |
| Legacy IPv4 server | Test destination reached through NAT64 | 198.18.100.55 |
| NAT64 SNAT pool | ippool used to translate IPv6 to IPv4 sessions | 198.18.0.50 to 198.18.0.60 |
| DNS64 prefix | Well known NAT64 synthesis prefix (RFC 6052 default) | 64:ff9b::/96 |
| VIP64 embedded prefix | Custom routed prefix for static, DNS64 independent NAT64 access | 2001:db8:6464:: to 2001:db8:6464::ffff:ffff |
| IPv4 client PC | Test host for NAT46 | 10.20.0.50/24 |
| IPv6 only server | Test destination reached through NAT46 | 2001:db8:20::80/64 |
| NAT46 SNAT pool | ippool6 used to translate IPv4 to IPv6 sessions | 2001:db8:20:ffff::10 to 2001:db8:20:ffff::20 |
Architecture Notes
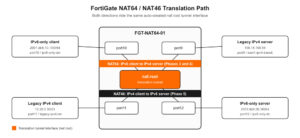
Since FortiOS 7.0.1, NAT64 and NAT46 no longer use their own dedicated vip64 / vip46 / policy64 / policy46 objects. Translation is now built directly into the standard firewall vip, firewall vip6, firewall ippool, firewall ippool6, and firewall policy constructs, and the FortiGate automatically builds a per VDOM virtual tunnel interface named naf.<vdom> (for example naf.root) to carry the translated traffic between the IPv4 and IPv6 sides of a session. You will see this interface appear in sniffer traces and session tables even though you never configure it directly.
- NAT64 (Phases 3 and 4): an IPv6 only client reaches an IPv4 only resource. This is the far more common enterprise case, since it lets you deploy new IPv6 only client segments without cutting them off from the legacy IPv4 internet.
- NAT46 (Phase 5): an IPv4 only client reaches an IPv6 only resource. This is typically used the other direction, when a new server or service has been deployed IPv6 only but a population of legacy IPv4 clients still needs to reach it.
▸ Step by Step Implementation Workflow
Phase 1: Enable IPv6 and Address the Interfaces
The Goal
Expose IPv6 configuration in the GUI and CLI, and bring up the four interfaces that will carry traffic for both translation directions.
The Action: Enable global IPv6 visibility, then assign IPv4 and IPv6 addressing to the relevant interfaces. Only assign the address family each interface actually needs; port10 never needs an IPv4 address in this design, for example.
The Code / CLI / Config
GUI Verification
Go to System > Feature Visibility and confirm IPv6 is toggled on under Core Features. Go to Network > Interfaces, open each of port9, port10, port11, and port12, and confirm the addressing above matches what is displayed.
Phase 2: Configure DNS64
The Goal
Stand up the DNS64 proxy function so that IPv6 only clients on port10 automatically receive a synthesized AAAA record for any legacy destination that only has an A record, without any client side configuration.
The Action: Enable DNS64 and confirm it is using the well known 64:ff9b::/96 prefix from RFC 6052. This step is CLI only; current FortiOS builds do not expose a dedicated DNS64 GUI page.
The Code / CLI / Config
always-synthesize-aaaa-record set to enable means the DNS proxy synthesizes an AAAA record directly from the A record every time, rather than first checking whether a real AAAA already exists. Leave this enabled unless you have dual stack destinations behind this same policy that you want resolved natively over IPv6.
GUI Verification
There is no dedicated GUI page for DNS64 in current builds; confirm the setting from the CLI with
show system dns64.Phase 3: Build the Outbound NAT64 Policy (DNS64 Driven)
The Goal
Let any IPv6 only client on port10 reach any legacy IPv4 destination on the internet, transparently, using the synthesized addresses from Phase 2.
The Action: Create an IPv6 address object matching the DNS64 prefix, create an IPv4 IP pool flagged for NAT64, then build a firewall policy from the IPv6 LAN to the IPv4 WAN with nat64 enabled.
The Code / CLI / Config
add-nat64-route enable on the IP pool tells the FortiGate to automatically generate the static route that points the pool range back at naf.root, so you do not need to hand build routing for the translated IPv4 side.
GUI Verification
Go to Policy & Objects > Firewall Policy, open the new policy, and confirm the Incoming Interface is port10 (ipv6-only-lan), the Outgoing Interface is port9 (wan1-ipv4-transit), and the NAT section shows NAT64 enabled with the IP pool set to nat64-pool.
Phase 4: Build a Static Embedded NAT64 VIP
The Goal
Provide fixed, DNS64 independent IPv6 access to a specific block of legacy IPv4 hosts, useful for monitoring systems, hardcoded integrations, or any client that will not use the DNS proxy.
The Action: Create a vip6 object over the custom prefix 2001:db8:6464::/96 with embedded-ipv4-address enabled, then reference it in a dedicated firewall policy. With this option on, the destination IPv4 address is encoded directly in the lower 32 bits of the IPv6 address, so a single VIP object covers every host in the target IPv4 range.
The Code / CLI / Config
To reach the lab server at 198.18.100.55 through this VIP, an IPv6 client connects to 2001:db8:6464::c612:6437. That last 32 bits is just the IPv4 address in hex: 198 = c6, 18 = 12, 100 = 64, 55 = 37.
GUI Verification
Go to Policy & Objects > Virtual IPs, open VIP64-Embedded-Legacy-Servers, and confirm VIP Type is set to the embedded IPv4 option and the External IP Address/Range matches the /96 range above.
Phase 5: Build the NAT46 Policy
The Goal
Let the legacy IPv4 client segment on port11 reach a specific server that now lives IPv6 only on port12.
The Action: Create an IPv4 vip object with nat46 enabled that maps to the server’s IPv6 address, create an IPv6 IP pool flagged for NAT46, then build a firewall policy from the IPv4 LAN to the IPv6 DC segment with nat46 enabled.
The Code / CLI / Config
From the perspective of the legacy IPv4 client on port11, the server simply lives at 10.20.0.80. FortiOS handles the translation to 2001:db8:20::80 transparently through naf.root.
GUI Verification
Go to Policy & Objects > Virtual IPs, confirm VIP46-IPv6-DC-Server shows Map to IPv6 Address/Range set to 2001:db8:20::80. Go to Policy & Objects > IP Pools, confirm nat46-pool6 shows as an IPv6 Pool type. Go to Policy & Objects > Firewall Policy, confirm the new policy shows NAT46 enabled with IP Pool Configuration set to nat46-pool6.
▸ Verification & Validation
1. Confirm the tunnel interface exists
Look for naf.root in the output, listed with an interface type of tunnel. You do not configure this interface directly; its presence confirms at least one NAT46 or NAT64 enabled policy has been committed.
2. Confirm DNS64 synthesis from an IPv6 only client
A successful synthesis returns an AAAA record inside 64:ff9b::/96, with the last 32 bits matching the legacy server’s real IPv4 address in hex. Compare against dig A legacy-server.example.com @2001:db8:10::1 run from a dual stack host to confirm the two records correspond to the same IPv4 address.
3. Sniff both sides of the translation
From the IPv6 client, ping the synthesized or embedded destination address. Success looks like an ICMPv6 echo request arriving on port10, the same request reappearing on naf.root and then again as a plain ICMP (v4) echo request leaving port9, followed by the reply retracing that path back through naf.root to port10 as ICMPv6.
4. Confirm the paired session tables
A working NAT64 flow shows up as one entry in session6 list (the IPv6 side, hooked to naf.root) and one matching entry in session list (the IPv4 side, also hooked to naf.root), both referencing the same policy ID. NAT46 flows show the same pairing in reverse. Success is seeing both halves of the session present and active, not just one.
5. Confirm the automatic pool routes
With add-nat64-route and add-nat46-route left enabled on the IP pools in Phases 3 and 5, you should see a route for the 198.18.0.50 through 198.18.0.60 pool range (or however your platform summarizes it) pointing at naf.root in the IPv4 table, and a corresponding route for the 2001:db8:20:ffff::/64 pool range pointing at naf.root in the IPv6 table.
▸ Troubleshooting & Gotchas
Recent posts
-

-

DNS is one of those technologies that quietly underpins... Full Story
-

BGP issues on FortiGate firewalls usually trace back to... Full Story
-

Every time your laptop talks to your router, a... Full Story
-

If you've spent any time configuring NAT on a... Full Story
-

If you have spent any time configuring firewall policies... Full Story
-

High availability on FortiGate is one of those features... Full Story
-

If you've configured SD-WAN on a FortiGate, you've almost... Full Story
-

FortiLink is the management protocol that turns a FortiSwitch... Full Story
-

FortiSwitches are pretty rock solid from Mean Time Between... Full Story
-

This is a quicky tip. Have you ever gone... Full Story
-

DNS is one of those quiet pieces of internet... Full Story
-

This article is an updated version of the previous... Full Story
-

You will add ns2 as a secondary (slave) BIND9... Full Story
-

In the process of deploying my lab, I needed... Full Story
-

RFC 8805, used to be known as Self-Correcting IP... Full Story
-

Years back, I wrote an article about certificate pinning. ... Full Story
-

FortiGates have the ability to send alerts to Microsoft... Full Story
-

In this post, I am going to walk through... Full Story
-

Troubleshooting VoIP on a FortiGate can feel like trying... Full Story
-

Prior to FortiOS 7.0, there were three commands to... Full Story
-

In this post, I am going to go over... Full Story
-

What we are going to do: We are going... Full Story
-

Choosing between FGCP (FortiGate Clustering Protocol) and FGSP (FortiGate... Full Story
-

Creating a VLAN on macOS (The "Pro" Move) A... Full Story
-

This blog post explores the logic behind how macOS... Full Story
-

Pretty Fly for a Wi-Fi Tell My Wi-Fi Love... Full Story
-

Part of my daily gig is creating BoMs (Bill-of-Materials)... Full Story
-

ICMP introduces several security risks, but careful filtering, rate... Full Story
-

The command diag debug application dhcps -1 enables full... Full Story
-

In the world of FortiOS, execute tac report is... Full Story
-

LLDP; What is it The Link Layer Discovery Protocol... Full Story
-

What it actually does When you run diagnose fdsm... Full Story
-

Monkey Bites are bite-sized, high-impact security insights designed for... Full Story
-

I have run macOS in macOS with Parallels but... Full Story
-

Don't be confused with my other FortiNAC posts where... Full Story
-

This is the third session in a multi-part article... Full Story
-

Today I was configuring key-based authentication on a FortiGate... Full Story
-

Netcat, often called the "Swiss Army knife" of networking,... Full Story
-

At its core, IEEE 802.1X is a network layer... Full Story
-

In case you did not see the previous FortiNAC... Full Story
-

This is our 5th session where we are going... Full Story
-

Now that we have Wireshark installed and somewhat configured,... Full Story
-

The Philosophy of Packet Analysis Troubleshooting isn't about looking... Full Story
-

Executive Summary Objective: Get you from zero to writing... Full Story
-

NAND cells, the flash translation layer, SLC caching, TRIM,... Full Story
-

Nmap Scripting Engine (NSE): From One-Liners to Your First... Full Story