
If you've spent any time configuring user authentication on... Full Story
By Manny Fernandez
July 25, 2026
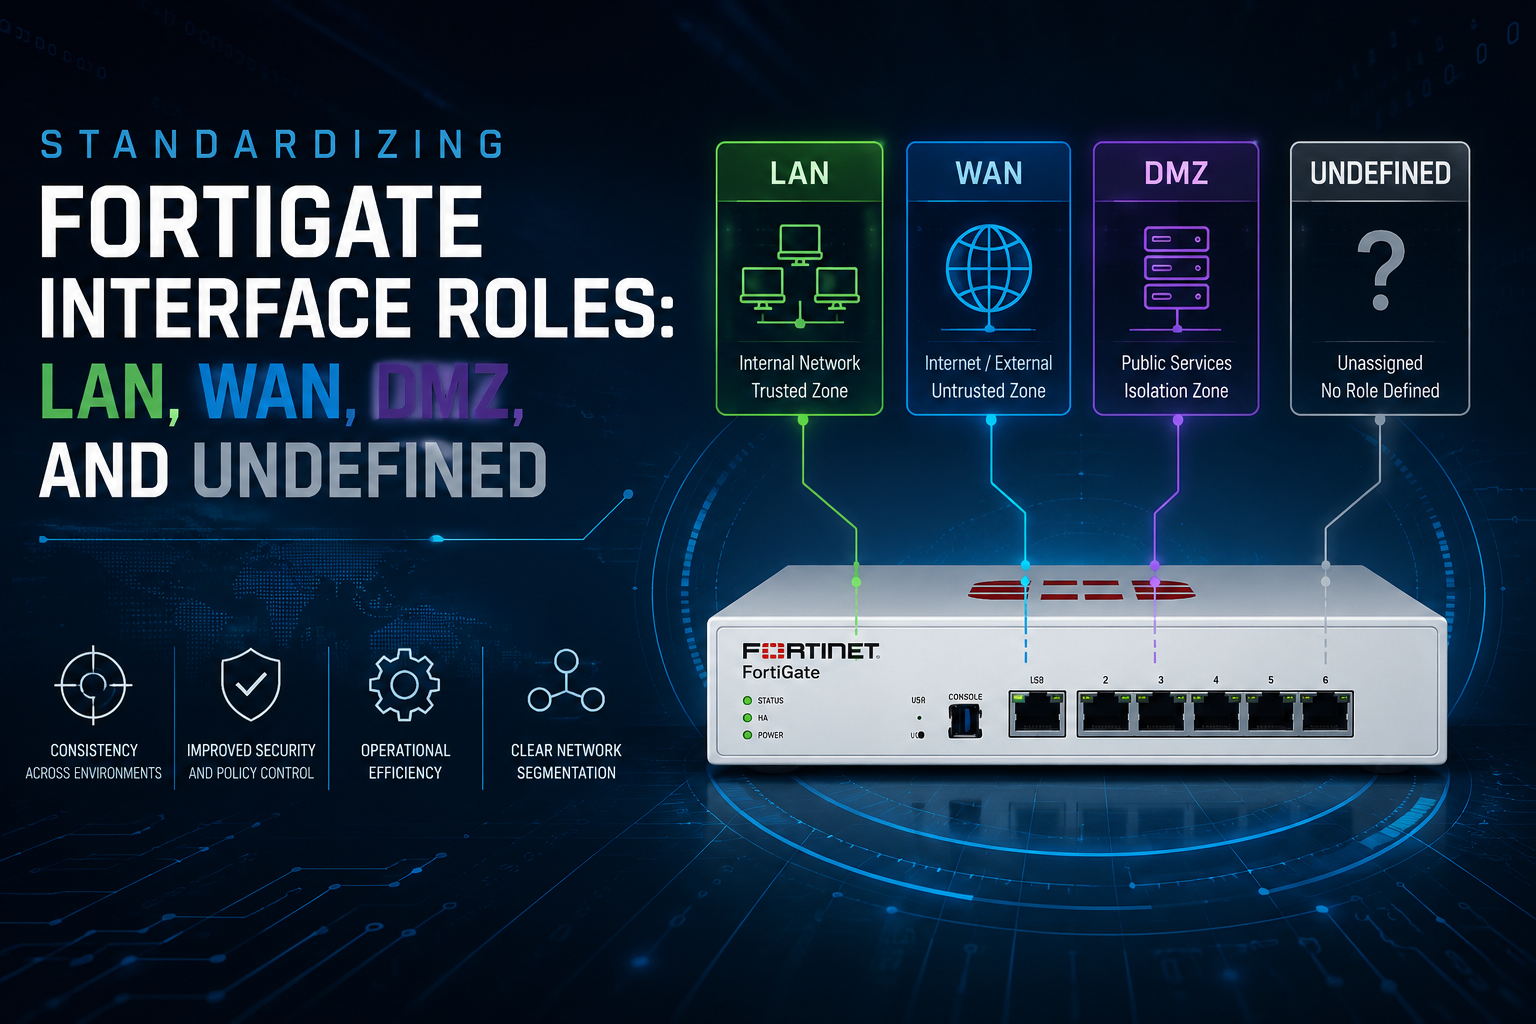
Standardizing FortiGate Interface Roles: LAN, WAN, DMZ, and Undefined
1. Executive Summary
Objective
This guide establishes a deterministic, auditable interface role standard across a FortiGate estate and explains precisely what the Role field does and, more importantly, what it does not do. Interface roles are a GUI presentation control that suppresses irrelevant and dangerous configuration options for a given topology position. They are a misconfiguration guardrail and an operational documentation layer, not a data-plane security control.
By the end of this guide you will have every interface classified, the FortiOS Security Rating Interface Classification check passing, estimated bandwidth populated on WAN members for SD-WAN, and an audit command set you can run on any device to prove compliance.
Target Audience
- Network and security engineers who own FortiGate edge, campus, or branch platforms
- System administrators inheriting an undocumented FortiGate and trying to build a topology map from config
- MSP and NOC teams standardizing hundreds of devices through FortiManager or the REST API
- Anyone chasing a failing Security Rating score and wondering why Interface Classification will not clear
The one-line version: Interface roles change what the GUI shows you. They never change how a packet is forwarded, inspected, or dropped. Every setting hidden by a role remains fully configurable and fully live in the CLI.
2. Prerequisites & Architecture
Assumed Knowledge
- FortiOS CLI navigation:
config,edit,set,next,end - The difference between
showandshow full-configuration - Firewall policy fundamentals: source and destination interface matching, zones
- Interface types: physical, VLAN, aggregate (LACP), hardware and software switch, tunnel, inter-VDOM link
- Basic familiarity with SD-WAN zones and members if you intend to use estimated bandwidth
Environment Requirements
- Platform: Any FortiGate hardware model or FortiGate-VM. Roles were introduced in FortiOS 5.4 and the behavior described here holds through 6.2, 6.4, 7.0, 7.2, 7.4, and 7.6.
- Firmware: FortiOS 7.0 or later is assumed for the CLI and API syntax in this guide. Field visibility details vary slightly between minor releases.
- Access: An administrator account with read-write on Network and System. HTTPS and SSH to the management address.
- Licensing: None. Interface roles are a base FortiOS feature and require no subscription.
- Optional: A REST API token for bulk audits, FortiManager for CLI templates, and a FortiSwitch or FortiAP if you want to observe FortiLink behavior.
- Lab: Reproducible on a single FortiGate-VM in EVE-NG, GNS3, Proxmox, or VMware with four or more vNICs.
Reference Topology
The example estate is a single edge FortiGate with dual internet uplinks, a corporate user segment, a voice VLAN, a public-facing server segment, and a FortiLink-managed access layer.
| Component | Function | Example Address | Target Role |
|---|---|---|---|
port1 / ISP-A-PRIMARY |
Primary internet uplink, SD-WAN member | 203.0.113.2/30 | wan |
port2 / ISP-B-BACKUP |
Secondary internet uplink, SD-WAN member | 198.51.100.2/30 | wan |
port5 / CORP-USERS |
Corporate endpoint segment, DHCP scope | 10.10.10.1/24 | lan |
VLAN110-VOICE |
VLAN subinterface on port5 for handsets | 10.10.110.1/24 | lan |
port6 / DMZ-PUBLIC-SRV |
Internet-reachable servers behind VIPs | 172.16.50.1/24 | dmz |
LAG-CORE |
802.3ad aggregate to core switch stack | 10.10.0.1/29 | lan |
ssl.root |
SSL VPN tunnel interface | Dynamic | lan (by convention) |
fortilink |
FortiSwitch management aggregate | 169.254.1.1/24 | System managed |
3. Step-by-Step Implementation Workflow
Phase 1: Establish What the Role Actually Controls
The Goal: Build an accurate mental model before touching config, so nobody on the team assumes a role change altered traffic behavior.
The Action: FortiOS exposes four role values. Each one hides GUI fields that do not belong in that topology position, and each sets a small number of sensible defaults at creation time. The table below is the authoritative show and hide matrix.
| GUI Element / Default | undefined | wan | lan | dmz |
|---|---|---|---|---|
| Device Identification / detection | Shown | Hidden | Shown | Shown |
| DHCP Server | Shown | Hidden | Shown | Hidden |
| Security Mode / Admission Control (captive portal) | Shown | Hidden | Shown | Hidden |
| Estimated Bandwidth (up / down) | Shown | Shown | Hidden | Hidden |
| One-Arm Sniffer addressing mode | Shown | Hidden | Shown | Shown |
| Auto-Managed by IPAM | Shown | Hidden | Shown | Shown |
| Dedicate to extension device / FortiAP | Shown | Hidden | Shown | Shown |
| Create address object matching subnet | Off | Off | On | On |
| Default addressing mode at creation | Manual | DHCP | Manual | Manual |
| LLDP reception default | VDOM | Enable | VDOM | VDOM |
| LLDP transmission default | VDOM | VDOM | Enable | VDOM |
Read this twice: “Hidden” means hidden from the web GUI form. It does not mean disabled, removed, or blocked. A DHCP server bound to an interface you just reclassified as WAN keeps handing out leases. Device identification you enabled last year keeps running on your internet uplink.
Every option in this table stays fully readable and writable through the CLI and the REST API regardless of role.
The Code: Confirm the role value set on any interface. Note the use of show full-configuration, which is mandatory here because show suppresses values that match the platform default.
FGT-EDGE-01 # show full-configuration system interface port1 | grep -e "set role" -e "set alias"
    set alias "ISP-A-PRIMARY"
    set role wan
GUI Verification: Navigate to Network > Interfaces, select an interface, and click Edit. The Role dropdown sits directly beneath Alias. Toggle it between WAN and Undefined on a lab device and watch the form fields appear and disappear in real time. That is the entire feature.
Phase 2: Audit the Existing Estate
The Goal: Produce a complete inventory of every interface and its current role, including the ones the GUI does not present in the main list.
The Action: SSH to the management address, enter the target VDOM if VDOMs are enabled, and dump the full interface table. Save the output as your pre-change baseline.
# If VDOMs are enabled, scope to the VDOM you are auditing
config vdom
    edit <vdom_name>

# Full inventory: interface name, alias, type, and role
show full-configuration system interface | grep -e "edit " -e "set alias" -e "set type" -e "set role"

# Compact version if you only care about the classification gaps
show full-configuration system interface | grep -e "edit " -e "set role"
Expected output on an unclassified device looks like this. Every set role undefined is a remediation item.
    edit "port1"
        set role undefined
    edit "port2"
        set role undefined
    edit "port5"
        set role lan
    edit "port6"
        set role undefined
    edit "ssl.root"
        set role undefined
    edit "VLAN110-VOICE"
        set role lan
API Alternative: For fleet-wide audits, pull the same data as structured JSON. The format query parameter limits the response to the attributes you care about, which keeps the payload small across hundreds of devices.
curl -sk \
  -H "Authorization: Bearer <api_token>" \
  "https://<management_ip>/api/v2/cmdb/system/interface?vdom=<vdom_name>&format=name|alias|type|role|ip" \
  | jq -r '.results[] | [.name, .alias, .type, .role] | @tsv'
GUI Verification: Go to Network > Interfaces. Depending on your FortiOS version, use the grouping control above the table to group By Role, or right-click the column header and add the Role column. Anything landing in an Undefined group is on your remediation list.
Phase 3: Publish a Role Assignment Standard
The Goal: Remove judgment from the decision. Two engineers looking at the same interface should pick the same role every time, otherwise the classification is worthless as documentation.
The Action: Adopt the following decision table as written policy. The ambiguous cases are the ones that cause estate drift, so they are called out explicitly.
| Interface Description | Assign | Rationale |
|---|---|---|
| Internet uplink, ISP handoff, cellular / FortiExtender WAN | wan | Suppresses DHCP server and device detection, exposes estimated bandwidth for SD-WAN |
| MPLS or private WAN circuit to another site | wan | It is an untrusted transit path and usually an SD-WAN member |
| User, printer, IoT, or wireless client segment | lan | Keeps DHCP server, device detection, and captive portal reachable in the GUI |
| Routed link to a core or distribution switch | lan | Internal trust zone even though no endpoints attach directly |
| Server segment published to the internet through VIPs | dmz | Servers are statically addressed, so hiding DHCP is correct and protective |
| Internal-only server or database segment | dmz | Pick one convention and hold it. Treating all server segments as dmz keeps reporting clean |
| OT / ICS / Purdue Level 2 and below | dmz | Static addressing is the norm and an accidental DHCP server here is an outage |
| Dedicated out-of-band management port (mgmt / mgmt1) | lan | Trusted internal segment. Clears the Security Rating check |
| IPsec phase1 tunnel interface | lan | Traffic inside the tunnel is trusted overlay traffic, not raw internet |
SSL VPN tunnel interface (ssl.root) |
lan | Only settable from the CLI. Required to clear Interface Classification |
| Inter-VDOM link pair | lan | Internal-to-internal. Classify both halves identically |
| FortiLink interface and its member ports | Leave alone | FortiOS manages this. The Role field is hidden in the GUI by design |
| Unused / shut down physical port | lan | Classify it, set status down, and alias it UNUSED |
Phase 4: Classify the WAN Interfaces
The Goal: Apply the WAN role to internet-facing interfaces, populate estimated bandwidth for SD-WAN, and explicitly clean up any LAN-only features that were previously enabled and are now about to be hidden.
The Action: Set the role, alias, and bandwidth values in one commit. Critically, disable device identification in the same block, because after the role change the GUI will no longer show you that it is running.
Units matter: estimated-upstream-bandwidth and estimated-downstream-bandwidth are expressed in kbps. A 1 Gbps downstream is 1000000, not 1000. These are declarative values you assert. FortiOS does not measure the circuit and does not shape traffic to them. They feed SD-WAN bandwidth-based rules and GUI utilization widgets, so a wrong number produces wrong path selection.
config system interface
    edit "port1"
        set alias "ISP-A-PRIMARY"
        set role wan
        set mode static
        set ip 203.0.113.2 255.255.255.252
        set allowaccess ping
        set estimated-upstream-bandwidth 200000
        set estimated-downstream-bandwidth 1000000
        set device-identification disable
        set lldp-reception enable
        set lldp-transmission vdom
    next
    edit "port2"
        set alias "ISP-B-BACKUP"
        set role wan
        set mode static
        set ip 198.51.100.2 255.255.255.252
        set allowaccess ping
        set estimated-upstream-bandwidth 50000
        set estimated-downstream-bandwidth 200000
        set device-identification disable
        set lldp-reception enable
        set lldp-transmission vdom
    next
end
Administrative access on WAN: The role does nothing to allowaccess. If https or ssh was open on that port before you set the role, it is still open afterwards. Reclassification is the right moment to audit and strip it back to ping or nothing at all.
GUI Verification: Network > Interfaces > port1 > Edit. The Role field reads WAN, an Estimated Bandwidth section is now present with upstream and downstream fields in Mbps, and the DHCP Server and Device Detection sections have disappeared from the form entirely.
Phase 5: Classify the LAN Interfaces
The Goal: Apply the LAN role to internal segments so DHCP, device detection, and admission control stay one click away for the operations team.
The Action: Set role and alias on the parent interface, then configure the associated DHCP scope. The DHCP server object is a separate table, so it survives independently of anything you do to the interface role.
config system interface
    edit "port5"
        set alias "CORP-USERS"
        set role lan
        set mode static
        set ip 10.10.10.1 255.255.255.0
        set allowaccess ping https ssh fabric
        set device-identification enable
        set lldp-transmission enable
    next
end

config system dhcp server
    edit 1
        set interface "port5"
        set default-gateway 10.10.10.1
        set netmask 255.255.255.0
        set dns-service default
        set lease-time 28800
        config ip-range
            edit 1
                set start-ip 10.10.10.100
                set end-ip 10.10.10.200
            next
        end
    next
end
GUI Verification: Network > Interfaces > port5 > Edit. You should see the DHCP Server toggle with your address range, a Device Detection toggle under Networked Devices, an Admission Control section, and the Estimated Bandwidth fields absent.
Phase 6: Classify the DMZ and Server Segments
The Goal: Mark server segments so that DHCP and captive portal are removed from the GUI, which is exactly the guardrail you want on a statically addressed segment.
The Action: Before setting the DMZ role, confirm no DHCP server object is currently bound to the interface. Once the role is applied, the GUI will not show it to you and it will keep running silently.
# STEP 1: check for an existing DHCP server on this interface FIRST
show system dhcp server | grep -e "edit " -e "set interface"

# STEP 2: if one exists on port6 and it is not wanted, remove it explicitly
config system dhcp server
    delete <dhcp_server_id>
end

# STEP 3: now classify the interface
config system interface
    edit "port6"
        set alias "DMZ-PUBLIC-SRV"
        set role dmz
        set mode static
        set ip 172.16.50.1 255.255.255.0
        set allowaccess ping
        set device-identification disable
        set lldp-reception vdom
        set lldp-transmission vdom
    next
end
GUI Verification: Network > Interfaces > port6 > Edit. Role reads DMZ, and both the DHCP Server and Admission Control sections are gone. The Create address object matching subnet option is present and enabled, which auto-generates a port6 address firewall object for your VIP and policy work.
Phase 7: Handle Logical, Virtual, and Aggregate Interfaces
The Goal: Close the classification gaps that live outside the physical port list. This is where almost every incomplete rollout fails.
The Action: Work through each logical interface class in turn. Note the inheritance rules, which are the most commonly misunderstood part of the feature.
| Interface Class | Behavior You Must Know |
|---|---|
| VLAN subinterface | Does not inherit the parent interface role. Each VLAN carries its own role and must be set individually. A LAN-role parent can host a DMZ-role VLAN and that is often correct. |
| Aggregate (LACP / 802.3ad) | Set the role on the aggregate object. Member ports surrender their Layer 3 identity and their individual roles become irrelevant. |
| Hardware / software switch | Set the role on the switch interface itself (for example internal or lan), not on the member ports. |
| Zone | Zones have no role attribute at all. The role lives on the member interfaces. Do not go looking for it. |
| SD-WAN zone and members | The SD-WAN zone has no role. Classify the underlying member interfaces as wan before adding them to SD-WAN so estimated bandwidth is already populated. |
| IPsec tunnel interface | Settable, usually via CLI. Classify overlays consistently across every hub and spoke or your reporting fragments. |
SSL VPN (ssl.root) |
CLI only. This is the single most common reason the Security Rating check will not clear. |
| Inter-VDOM link | Two halves, each in a different VDOM. Classify both. You must be in the correct VDOM context to edit each one. |
| FortiLink | Managed by FortiOS. The Role field is deliberately hidden in the GUI and attempts to override it are not supported. |
config system interface

    # VLAN subinterface: role is set on the VLAN, never inherited from port5
    edit "VLAN110-VOICE"
        set vdom "root"
        set type vlan
        set interface "port5"
        set vlanid 110
        set alias "VOICE"
        set role lan
        set ip 10.10.110.1 255.255.255.0
        set allowaccess ping
    next

    # Aggregate: role goes on the LAG object, not on port11 / port12
    edit "LAG-CORE"
        set vdom "root"
        set type aggregate
        set member "port11" "port12"
        set alias "CORE-SWITCH-LAG"
        set role lan
        set lacp-mode active
        set ip 10.10.0.1 255.255.255.248
        set allowaccess ping
    next

    # SSL VPN tunnel interface: CLI only, no GUI equivalent
    edit "ssl.root"
        set role lan
    next

    # Unused port: classify it, alias it, shut it
    edit "port8"
        set alias "UNUSED"
        set role lan
        set status down
    next

end
GUI Verification: Network > Interfaces. Expand each physical port to reveal its child VLANs and confirm each child shows an explicit role. The ssl.root interface will not appear in this list, which is precisely why the CLI step above is required.
Phase 8: Scale the Standard Across the Estate
The Goal: Push the classification to every device and make drift detectable rather than relying on somebody remembering.
The Action: Pick the delivery mechanism that matches your management model. All three below are idempotent and safe to re-run.
Option A: FortiManager CLI template. Attach to a device group so new devices inherit the standard on provisioning.
%if $(wan_primary)
config system interface
    edit "$(wan_primary)"
        set role wan
        set estimated-upstream-bandwidth $(wan_primary_up_kbps)
        set estimated-downstream-bandwidth $(wan_primary_down_kbps)
        set device-identification disable
    next
end
%endif

%if $(lan_core)
config system interface
    edit "$(lan_core)"
        set role lan
        set device-identification enable
    next
end
%endif
Option B: REST API. A single PUT per interface, easy to drive from a CSV in a CI pipeline.
curl -sk -X PUT \
  -H "Authorization: Bearer <api_token>" \
  -H "Content-Type: application/json" \
  -d '{
        "role": "wan",
        "alias": "ISP-A-PRIMARY",
        "estimated-upstream-bandwidth": 200000,
        "estimated-downstream-bandwidth": 1000000,
        "device-identification": "disable"
      }' \
  "https://<management_ip>/api/v2/cmdb/system/interface/port1?vdom=<vdom_name>"
Option C: Ansible. Useful when interface roles are one small part of a larger device build.
- name: Classify FortiGate interface roles
  fortinet.fortios.fortios_system_interface:
    vdom: "{{ vdom }}"
    state: present
    system_interface:
      name: "{{ item.name }}"
      alias: "{{ item.alias }}"
      role: "{{ item.role }}"
  loop:
    - { name: "port1", alias: "ISP-A-PRIMARY", role: "wan" }
    - { name: "port2", alias: "ISP-B-BACKUP",  role: "wan" }
    - { name: "port5", alias: "CORP-USERS",    role: "lan" }
    - { name: "port6", alias: "DMZ-PUBLIC-SRV", role: "dmz" }
4. Verification & Validation
Validation has two halves. First, prove the classification is complete. Second, and just as important, prove that nothing about traffic handling changed. A role rollout that alters a single flow means something else was modified in the same change window.
Test 1: Completeness Audit
show full-configuration system interface | grep -e "edit " -e "set role"Success looks like: every edit line is followed by set role lan, set role wan, or set role dmz. The only permissible undefined entries are system-managed interfaces such as FortiLink, npu0_vlink pairs, and modem interfaces.
Test 2: Estimated Bandwidth Landed on WAN Members
show full-configuration system interface port1 | grep estimated

# If these interfaces are SD-WAN members, confirm the service view agrees
diagnose sys sdwan member
diagnose sys sdwan service
Success looks like: non-zero upstream and downstream values in kbps, and SD-WAN members reporting a state of alive with the expected sequence numbers.
Test 3: Security Rating Interface Classification
Navigate to Security Fabric > Security Rating and run an on-demand rating. Expand the Security Best Practices section and locate Interface Classification.
Success looks like: the check moves from Failed to Passed with zero affected objects. If it still lists objects, expand the finding to see exactly which interfaces are unclassified. That list is your remaining work.
Test 4: Prove the Data Plane Is Unchanged
This is the test people skip and then regret. Run the same policy lookup before and after the change window and compare the matched policy ID.
# Policy lookup: does a LAN client still match the same egress policy?
# Syntax: diagnose firewall iprope lookup <src_ip> <src_port> <dst_ip> <dst_port> <protocol> <src_interface>
diagnose firewall iprope lookup 10.10.10.50 33333 8.8.8.8 443 6 port5

# Session table sanity check for a known flow
diagnose sys session filter dst 8.8.8.8
diagnose sys session list

# Route table unchanged
get router info routing-table all

# Interface operational state unchanged
diagnose netlink interface list port1
get system interface physical
Success looks like: identical matched policy IDs, identical route table, identical interface link state and speed, and zero new deny entries in the traffic log. If any of these shift, the role change was not the cause and you need to review everything else committed in that window.
Test 5: LLDP Neighbor Discovery
Because the WAN and LAN roles set different LLDP defaults, correct classification improves neighbor discovery and the Security Fabric topology view.
get system lldp neighbors

# Confirm the per-interface LLDP settings the role applied
show full-configuration system interface port1 | grep lldp
show full-configuration system interface port5 | grep lldp
Success looks like: LAN-role interfaces transmitting LLDP and showing the connected switch as a neighbor, and WAN-role interfaces receiving LLDP without necessarily advertising the FortiGate to the ISP.
5. Troubleshooting & Gotchas
Gotcha 1: Treating the Role as a Security Control
Symptom: An engineer sets a port to WAN and assumes inbound traffic is now restricted, or sets a port to LAN and assumes it is trusted. Traffic that should be blocked is permitted, or a change ticket is closed on the basis that “the interface is classified as WAN so it is protected.”
Root cause: The role has zero effect on packet forwarding, policy evaluation, NAT, inspection, or session handling. It is metadata that drives GUI form rendering. Firewall policies, and only firewall policies, control traffic.
Diagnosis:
# What actually permits this flow?
diagnose firewall iprope lookup <src_ip> <src_port> <dst_ip> <dst_port> <protocol> <src_interface>

# Which policies reference this interface at all?
show firewall policy | grep -f <interface_name>

# Live flow trace to see the policy decision
diagnose debug reset
diagnose debug flow filter addr <test_ip>
diagnose debug flow show function-name enable
diagnose debug flow trace start 20
diagnose debug enable
# ... generate traffic ...
diagnose debug disable
diagnose debug flow trace stop
Resolution: Enforce segmentation with firewall policies and zones. Use the role purely as documentation. Add a line to your change template that reads “interface role is cosmetic, confirm the policy” so it never gets conflated again.
Gotcha 2: Hidden but Live Settings After a Role Change
Symptom: An interface is reclassified from Undefined or LAN to WAN or DMZ. The DHCP Server section vanishes from the GUI, so the team assumes it was removed. Weeks later a rogue DHCP server is discovered handing out leases on the internet-facing segment, or device identification is found consuming resources on a WAN port.
Root cause: The DHCP server lives in a separate config table (config system dhcp server) that is merely referenced by the interface. Changing the interface role removes the GUI editor, not the object. The same applies to device-identification, captive portal, and admission control settings.
Diagnosis:
# Every DHCP server object and the interface it is bound to
show system dhcp server | grep -e "edit " -e "set interface" -e "set status"

# Is it actually issuing leases right now?
execute dhcp lease-list <interface_name>

# Is device identification still running on the WAN port?
show full-configuration system interface <interface_name> | grep -e device-identification -e security-mode

# What has the FortiGate learned via device detection?
diagnose user device list
Resolution: Explicitly remove or disable the unwanted feature from the CLI. Never rely on a role change to clean up after you.
config system dhcp server
    delete <dhcp_server_id>
end

config system interface
    edit <interface_name>
        set device-identification disable
    next
end
If you need the GUI editor back temporarily, flip the role to undefined, make the change, then set it back. Nothing about the traffic path is disturbed by doing so.
Gotcha 3: Security Rating Interface Classification Will Not Pass
Symptom: Every interface visible in Network > Interfaces has a role, but the Security Rating check still reports failures. In some builds this cascades and drags down related checks such as the unsecured protocol tests.
Root cause: The check evaluates interfaces the GUI list does not display: ssl.root, IPsec tunnel interfaces, inter-VDOM link halves in other VDOMs, and in some versions the FortiLink interface whose Role field is intentionally hidden.
Diagnosis:
# Enumerate EVERY interface object, including the invisible ones
show full-configuration system interface | grep -e "edit " -e "set type" -e "set role"

# Repeat inside every VDOM, including the management VDOM
config global
    show system vdom
end

# Then per VDOM
config vdom
    edit <vdom_name>
        show full-configuration system interface | grep -e "edit " -e "set role"
    next
end
Resolution: Set roles from the CLI on every object the GUI hides, starting with ssl.root and your inter-VDOM links. If the FortiLink interface is the last remaining finding, accept it: FortiOS owns that object and forcing a role on it is not supported. Document the exception in your compliance notes rather than fighting the platform.
Gotcha 4: The Audit Silently Misses Interfaces
Symptom: A show system interface | grep role audit reports full compliance, yet the Security Rating still fails and a config diff later reveals unclassified ports.
Root cause: Plain show omits any attribute still set to its platform default. Because undefined is the default on many interface types, unclassified interfaces produce no set role line at all. Grepping for the string returns only the interfaces you already fixed, which reads as a clean bill of health.
Diagnosis and Resolution: Always audit with show full-configuration, which emits every attribute regardless of default status. Compare the count of edit lines against the count of set role lines. They must be equal.
# WRONG: silently under-reports
show system interface | grep "set role"

# RIGHT: emits defaults, so nothing hides
show full-configuration system interface | grep -e "edit " -e "set role"

# Offline verification if you have the config file on a workstation
grep -c '^    edit ' fgt-config.conf
grep -c 'set role' fgt-config.conf
Gotcha 5: Estimated Bandwidth Is Missing or SD-WAN Steers Wrongly
Symptom: The Estimated Bandwidth fields cannot be found in the GUI, or an SD-WAN rule using a bandwidth-based strategy consistently picks the wrong member, or the utilization widgets show meaningless percentages.
Root cause: Three separate causes tend to be conflated. First, the fields are only rendered in the GUI when the role is wan or undefined. Second, the CLI takes kbps while the GUI presents Mbps, so a value entered in the wrong unit is off by three orders of magnitude. Third, these are values you declare, not values FortiOS measures, so an inaccurate figure produces confidently wrong path selection.
Diagnosis:
show full-configuration system interface <interface_name> | grep -e role -e estimated

diagnose sys sdwan member
diagnose sys sdwan health-check
diagnose sys sdwan service

# Compare declared bandwidth against real throughput
diagnose netlink interface list <interface_name>
Resolution: Set the values from the CLI in kbps, where they are available on any interface regardless of role.
config system interface
    edit <interface_name>
        set estimated-upstream-bandwidth 200000     # 200 Mbps
        set estimated-downstream-bandwidth 1000000  # 1 Gbps
    next
end
Quick-Fire Gotchas
- Creating an interface through the GUI wizard may preselect a role for you. Verify what was written rather than assuming it matched your intent.
- Roles are per-VDOM. When you move an interface between VDOMs, re-verify the classification in the destination VDOM context.
- Role has no effect on FortiManager policy packages or normalized interface mappings. Those match on interface name and per-device mapping, not role.
- In an HA cluster the role is part of the synchronized config. Make the change on the primary and let it replicate. Do not edit the secondary directly.
- Changing a role does not bounce the link, flush sessions, or reset counters. It is a config-only change with no traffic impact, which is why it is safe to do in-hours if your change process permits.
- The Create address object matching subnet behavior on LAN and DMZ roles generates firewall address objects automatically. Know this before you reclassify twenty interfaces and wonder where the new objects came from.
Closing Notes
Interface roles are one of the cheapest wins in a FortiGate estate. They cost nothing, carry no licensing, cannot break traffic, and they buy you three concrete things: a GUI that refuses to offer you a DHCP server on an internet uplink, a Security Rating check that passes cleanly, and a config file that documents its own topology to the next engineer who inherits it.
The failure mode is always the same: someone mistakes a presentation-layer hint for an enforcement mechanism. Classify everything, audit with show full-configuration, and keep the policy table as the only thing you trust to control traffic.
References
- Fortinet Community, Technical Tip: Behaviour on the GUI of the Interface Role introduced in v5.4
- FortiOS Administration Guide, Interface settings (7.4 and 7.6 branches)
- FortiOS Administrator Study Guide, System and Network Settings
- Fortinet Community, Security Rating Interface Classification troubleshooting articles
Recent posts
-

-

DNS is one of those technologies that quietly underpins... Full Story
-

BGP issues on FortiGate firewalls usually trace back to... Full Story
-

Every time your laptop talks to your router, a... Full Story
-

If you've spent any time configuring NAT on a... Full Story
-

If you have spent any time configuring firewall policies... Full Story
-

High availability on FortiGate is one of those features... Full Story
-

If you've configured SD-WAN on a FortiGate, you've almost... Full Story
-

FortiLink is the management protocol that turns a FortiSwitch... Full Story
-

FortiSwitches are pretty rock solid from Mean Time Between... Full Story
-

This is a quicky tip. Have you ever gone... Full Story
-

DNS is one of those quiet pieces of internet... Full Story
-

This article is an updated version of the previous... Full Story
-

You will add ns2 as a secondary (slave) BIND9... Full Story
-

In the process of deploying my lab, I needed... Full Story
-

RFC 8805, used to be known as Self-Correcting IP... Full Story
-

Years back, I wrote an article about certificate pinning. ... Full Story
-

FortiGates have the ability to send alerts to Microsoft... Full Story
-

In this post, I am going to walk through... Full Story
-

Troubleshooting VoIP on a FortiGate can feel like trying... Full Story
-

Prior to FortiOS 7.0, there were three commands to... Full Story
-

In this post, I am going to go over... Full Story
-

What we are going to do: We are going... Full Story
-

Choosing between FGCP (FortiGate Clustering Protocol) and FGSP (FortiGate... Full Story
-

Creating a VLAN on macOS (The "Pro" Move) A... Full Story
-

This blog post explores the logic behind how macOS... Full Story
-

Pretty Fly for a Wi-Fi Tell My Wi-Fi Love... Full Story
-

Part of my daily gig is creating BoMs (Bill-of-Materials)... Full Story
-

ICMP introduces several security risks, but careful filtering, rate... Full Story
-

The command diag debug application dhcps -1 enables full... Full Story
-

In the world of FortiOS, execute tac report is... Full Story
-

LLDP; What is it The Link Layer Discovery Protocol... Full Story
-

What it actually does When you run diagnose fdsm... Full Story
-

Monkey Bites are bite-sized, high-impact security insights designed for... Full Story
-

I have run macOS in macOS with Parallels but... Full Story
-

Don't be confused with my other FortiNAC posts where... Full Story
-

This is the third session in a multi-part article... Full Story
-

Today I was configuring key-based authentication on a FortiGate... Full Story
-

Netcat, often called the "Swiss Army knife" of networking,... Full Story
-

At its core, IEEE 802.1X is a network layer... Full Story
-

In case you did not see the previous FortiNAC... Full Story
-

This is our 5th session where we are going... Full Story
-

Now that we have Wireshark installed and somewhat configured,... Full Story
-

The Philosophy of Packet Analysis Troubleshooting isn't about looking... Full Story
-

Here is a quick article on running lldp on... Full Story
-

If you have ever stared at a Terminal window... Full Story
-

The Problem This Solves FortiGate matches policies referencing a... Full Story