
If you've spent any time configuring user authentication on... Full Story
By Manny Fernandez
September 1, 2026
Deploying OpenSpeedTest on Ubuntu 24.04 LTS for Internal Network Speed Testing
Executive Summary
Objective: This guide walks through deploying OpenSpeedTest, a free and open source, self-hosted HTML5 network speed test, on an Ubuntu 24.04 LTS Server virtual machine running on your internal network. When you are done, you will have a Dockerized OpenSpeedTest instance that only trusted internal subnets can reach, giving your team a repeatable, known-good destination for measuring LAN, Wi-Fi, and internal WAN throughput instead of relying on public internet speed test sites.
Target Audience: Network engineers, systems administrators, and IT support staff who need an internal throughput benchmarking tool for troubleshooting LAN or Wi-Fi performance, validating site-to-site or VPN link speed, or giving remote and branch users a trusted internal target to test against.
Prerequisites & Architecture
Assumed Knowledge
- Comfortable with basic Linux CLI (apt, systemctl, ssh, editing files)
- Basic Docker concepts (images, containers, Compose files, restart policies)
- Basic networking (subnetting, static IP assignment, firewall rule logic)
- Access to a hypervisor console or GUI (ESXi, Proxmox VE, Hyper-V, or KVM)
Environment / Lab Requirements
- A hypervisor capable of assigning a paravirtualized NIC to the guest (VMXNET3 on ESXi, VirtIO on Proxmox/KVM)
- Ubuntu Server 24.04 LTS ISO
- Minimum VM specs: 2 vCPU, 2 GB RAM, 20 GB disk. OpenSpeedTest’s own footprint is tiny, the Docker image is roughly 100 MB. These specs exist so the VM itself does not become the bottleneck during a test
- An internal VLAN or port group with routed access to the client subnets that need to reach the tool
- Outbound internet access from the VM during the build only, to pull apt packages and the Docker image. Not required after deployment
- SSH or console access to the VM
- Optional: an internal DNS zone if you want a friendly hostname instead of an IP
Component Table
| Component | Role | Example Value |
|---|---|---|
| Ubuntu 24.04 LTS VM | Docker host running the OpenSpeedTest container | 10.0.30.10/24 |
| Default Gateway | Routes traffic for the speed test VLAN | 10.0.30.1 |
openspeedtest/latest container |
Serves the HTML5 speed test UI, handles download/upload/ping via XHR | TCP 3000 (HTTP), TCP 3001 (HTTPS) |
| Internal DNS record (optional) | Friendly hostname for the speed test host | speedtest.lab.internal -> 10.0.30.10 |
| Permitted client subnet(s) | Devices allowed to reach the tool | 10.0.0.0/16 |
Step-by-Step Implementation Workflow
Phase 1: Provision the Ubuntu 24.04 LTS Server VM
Goal: Stand up a minimal Ubuntu Server 24.04 LTS VM on the internal network with a paravirtualized NIC, so the virtual hardware is not the limiting factor once you start measuring throughput.
Action: Create a new VM on your hypervisor, attach its network adapter to the internal VLAN or port group, boot from the Ubuntu Server 24.04 LTS ISO, and complete the base installation. Selecting the OpenSSH server option during install saves a step later.
Code/CLI/Config: Nothing to configure from inside the guest yet. Confirm the adapter type at the hypervisor level before first boot.
GUI Verification:
- ESXi: Edit Settings > Network Adapter > Adapter Type = VMXNET3
- Proxmox VE: Hardware > Network Device > Model = VirtIO (paravirtualized)
- Hyper-V: Use a Generation 2 VM with a Synthetic Network Adapter
Phase 2: Base OS Configuration
Goal: Set a static internal IP, a meaningful hostname, and patch the OS before installing anything else.
Action: Log in to the VM (console or SSH), identify the interface name, then edit netplan to assign a static address instead of DHCP.
Code/CLI/Config:
ip a
# Identify your interface name, e.g. ens160
# /etc/netplan/50-cloud-init.yaml
network:
version: 2
ethernets:
ens160:
dhcp4: no
addresses:
- 10.0.30.10/24
routes:
- to: default
via: 10.0.30.1
nameservers:
addresses: [10.0.0.10, 10.0.0.11]sudo netplan apply
sudo hostnamectl set-hostname speedtest01
sudo apt update && sudo apt full-upgrade -y
sudo rebootGUI Verification: N/A. Confirm with ip a and hostnamectl after reboot.
Phase 3: Install Docker Engine
Goal: Install current Docker Engine and the Compose plugin from Docker’s official apt repository, not the older docker.io package Ubuntu ships.
Action: Remove any conflicting packages, add Docker’s GPG key and repository, then install.
Code/CLI/Config:
for pkg in docker.io docker-doc docker-compose podman-docker containerd runc; do
  sudo apt-get remove -y $pkg 2>/dev/null
done

sudo apt-get update
sudo apt-get install -y ca-certificates curl

sudo install -m 0755 -d /etc/apt/keyrings
sudo curl -fsSL https://download.docker.com/linux/ubuntu/gpg -o /etc/apt/keyrings/docker.asc
sudo chmod a+r /etc/apt/keyrings/docker.asc

echo \
  "deb [arch=$(dpkg --print-architecture) signed-by=/etc/apt/keyrings/docker.asc] https://download.docker.com/linux/ubuntu \
  $(. /etc/os-release && echo "$VERSION_CODENAME") stable" | \
  sudo tee /etc/apt/sources.list.d/docker.list > /dev/null

sudo apt-get update
sudo apt-get install -y docker-ce docker-ce-cli containerd.io docker-buildx-plugin docker-compose-plugin

sudo usermod -aG docker $USER
newgrp docker
GUI Verification: N/A.
Phase 4: Deploy the OpenSpeedTest Container
Goal: Pull and run openspeedtest/latest with a persistent restart policy, bound to the VM’s internal IP only.
Action: Create a project directory and a Compose file, then bring the stack up.
Code/CLI/Config:
sudo mkdir -p /opt/openspeedtest
cd /opt/openspeedtest
# /opt/openspeedtest/docker-compose.yml
services:
speedtest:
image: openspeedtest/latest
container_name: openspeedtest
restart: unless-stopped
ports:
- "10.0.30.10:3000:3000"
- "10.0.30.10:3001:3001"
environment:
- SET_SERVER_NAME=HQ-LAN-SpeedTestsudo docker compose up -dBinding each port to 10.0.30.10 instead of leaving it unbound (0.0.0.0) matters. It keeps the service off every other interface the VM might have, and it is what makes host-firewall scoping in the next phase actually reliable. See Troubleshooting item 1.
GUI Verification: From a browser on the internal network, open http://10.0.30.10:3000. You should see the OpenSpeedTest interface with a Start button.
Phase 5: Restrict Access with UFW
Goal: Add host firewall rules as defense-in-depth, limiting which source subnets can reach the speed test ports and SSH.
Action: Set default-deny inbound, then explicitly allow SSH and the OpenSpeedTest ports from your permitted client subnet.
Code/CLI/Config:
sudo ufw default deny incoming
sudo ufw default allow outgoing
sudo ufw allow from 10.0.0.0/16 to any port 22 proto tcp comment 'SSH mgmt'
sudo ufw allow from 10.0.0.0/16 to any port 3000 proto tcp comment 'OpenSpeedTest HTTP'
sudo ufw allow from 10.0.0.0/16 to any port 3001 proto tcp comment 'OpenSpeedTest HTTPS'
sudo ufw enable
sudo ufw status verbose
GUI Verification: N/A.
Phase 6 (Optional): Internal DNS Record and Custom TLS Certificate
Goal: Give the tool a friendly hostname and replace the container’s default self-signed certificate with one your internal CA issued, so port 3001 does not throw a browser warning on trusted devices.
Action: Create an internal DNS A record, then mount your certificate and key into the container as nginx.crt and nginx.key.
Code/CLI/Config:
sudo mkdir -p /opt/openspeedtest/certs
sudo cp speedtest.lab.internal.crt /opt/openspeedtest/certs/nginx.crt
sudo cp speedtest.lab.internal.key /opt/openspeedtest/certs/nginx.key
# add under the speedtest service in /opt/openspeedtest/docker-compose.yml
volumes:
- ./certs:/etc/ssl/sudo docker compose up -d --force-recreateGUI Verification: Browse to https://speedtest.lab.internal:3001 from a device that trusts your internal CA and confirm no certificate warning appears.
Phase 7: Confirm Boot Persistence
Goal: Make sure both the Docker service and the container come back automatically after a host reboot.
Action: Enable Docker at boot, then test with an actual reboot.
Code/CLI/Config:
sudo systemctl enable docker
sudo systemctl is-enabled docker
sudo reboot
# after reconnecting
docker psGUI Verification: N/A. docker ps should show openspeedtest with a fresh uptime and status Up.
Phase 8 (Optional): Kiosk and Scripted Auto-Run
Goal: Support unattended use cases such as a NOC wall display or a scheduled health check, using OpenSpeedTest’s built-in URL parameters instead of any extra tooling.
Action: Point a kiosk browser or a scheduled headless-browser job at a URL with the appropriate parameter.
Code/CLI/Config:
# Auto-run a test 5 seconds after page load
http://10.0.30.10:3000?Run=5

# Continuous stress test for a fixed duration
# (Low/Medium/High/VeryHigh/Extreme, or a raw number of seconds)
http://10.0.30.10:3000?Stress=Low
GUI Verification: Load the URL in a browser and confirm the test starts automatically without clicking Start.
Verification & Validation
Run through these checks in order.
docker compose psExpect openspeedtest with STATUS Up and PORTS showing 10.0.30.10:3000->3000/tcp and 10.0.30.10:3001->3001/tcp.
docker logs openspeedtest --tail 50Expect nginx entrypoint startup messages and no emerg or error lines.
ss -tlnp | grep -E '3000|3001'Expect both ports listed against 10.0.30.10 only, not 0.0.0.0.
curl -I http://10.0.30.10:3000Expect HTTP/1.1 200 OK and a Server: nginx header.
From a device on an allowed subnet, browse to http://10.0.30.10:3000, click Start, and let the test run. Success looks like Download and Upload figures that track close to your known LAN or Wi-Fi link speed, along with a Ping and Jitter reading in milliseconds.
From a device on a subnet you did not allow in UFW, attempt the same connection. It should time out or be refused, confirming the scoping actually works.
sudo ufw status verboseExpect Status: active, Default: deny (incoming), and your three allow rules listed.
sudo reboot
# after reconnecting
systemctl status docker
docker ps
Expect Docker active (running) and the openspeedtest container back up automatically with no manual intervention.
Troubleshooting & Gotchas
1. UFW rules are silently ignored for the container’s published ports
Symptom: You have a UFW rule that should block a subnet, but devices on that subnet can still reach the speed test. This happens because Docker manages iptables directly and inserts its own ACCEPT rules ahead of UFW’s chain when a container publishes a port on 0.0.0.0.
Diagnostic:
sudo iptables -L DOCKER-USER -n -v --line-numbers
sudo iptables -t nat -L DOCKER -n -v
sudo ufw status verbose
Resolution: The cleanest fix, already used in this guide, is binding each published port to the VM’s specific internal IP (-p 10.0.30.10:3000:3000) instead of leaving it unbound. Docker never opens that port on other interfaces, and UFW’s per-interface behavior applies as expected. If you must publish on all interfaces, add explicit rules to the DOCKER-USER chain instead, since Docker guarantees that chain is evaluated first and UFW does not manage it. The community ufw-docker helper script automates this pattern if you would rather not hand-manage DOCKER-USER rules.
sudo iptables -I DOCKER-USER -s 10.0.0.0/16 -p tcp --dport 3000 -j ACCEPT
sudo iptables -I DOCKER-USER -p tcp --dport 3000 -j DROP
2. Speed test results are capped well below the actual link speed
Symptom: Download and upload numbers plateau far below the known physical link rate, and this happens consistently regardless of which client device runs the test.
Diagnostic:
ethtool -i ens160
docker stats openspeedtest
mpstat -P ALL 1
Resolution: Switch the VM’s NIC to a paravirtualized adapter (VMXNET3 on ESXi, virtio-net on Proxmox or KVM) and confirm ethtool -i reports that driver, not a generic emulated one. Allocate at least 2 vCPUs so the guest OS is not starved while OpenSpeedTest’s parallel XHR connections run. If throughput is still capped after that, check the physical switch port for a speed/duplex mismatch and review the hypervisor’s own virtual switch uplink policy next.
3. Uploads fail or truncate once a reverse proxy is placed in front of the container
Symptom: Direct access works fine, but after fronting OpenSpeedTest with a reverse proxy (Nginx Proxy Manager, Traefik, a FortiGate VIP, or similar), upload results read near zero, or the browser console shows a 413 error.
Diagnostic:
# check the reverse proxy access/error logs for:
# 413 Request Entity Too Large
# and for connections resetting under a 60s timeout
Resolution: Per OpenSpeedTest’s own server requirements, any reverse proxy in front of it needs a body size limit of at least 35 MB and a timeout greater than 60 seconds. Size these generously above the minimum if you are testing links faster than a few hundred Mbps.
client_max_body_size 35m;
proxy_read_timeout 60s;
proxy_send_timeout 60s;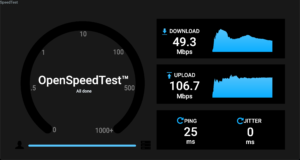
Recent posts
-

-

DNS is one of those technologies that quietly underpins... Full Story
-

BGP issues on FortiGate firewalls usually trace back to... Full Story
-

Every time your laptop talks to your router, a... Full Story
-

If you've spent any time configuring NAT on a... Full Story
-

If you have spent any time configuring firewall policies... Full Story
-

High availability on FortiGate is one of those features... Full Story
-

If you've configured SD-WAN on a FortiGate, you've almost... Full Story
-

FortiLink is the management protocol that turns a FortiSwitch... Full Story
-

FortiSwitches are pretty rock solid from Mean Time Between... Full Story
-

This is a quicky tip. Have you ever gone... Full Story
-

DNS is one of those quiet pieces of internet... Full Story
-

This article is an updated version of the previous... Full Story
-

You will add ns2 as a secondary (slave) BIND9... Full Story
-

In the process of deploying my lab, I needed... Full Story
-

RFC 8805, used to be known as Self-Correcting IP... Full Story
-

Years back, I wrote an article about certificate pinning. ... Full Story
-

FortiGates have the ability to send alerts to Microsoft... Full Story
-

In this post, I am going to walk through... Full Story
-

Troubleshooting VoIP on a FortiGate can feel like trying... Full Story
-

Prior to FortiOS 7.0, there were three commands to... Full Story
-

In this post, I am going to go over... Full Story
-

What we are going to do: We are going... Full Story
-

Choosing between FGCP (FortiGate Clustering Protocol) and FGSP (FortiGate... Full Story
-

Creating a VLAN on macOS (The "Pro" Move) A... Full Story
-

This blog post explores the logic behind how macOS... Full Story
-

Pretty Fly for a Wi-Fi Tell My Wi-Fi Love... Full Story
-

Part of my daily gig is creating BoMs (Bill-of-Materials)... Full Story
-

ICMP introduces several security risks, but careful filtering, rate... Full Story
-

The command diag debug application dhcps -1 enables full... Full Story
-

In the world of FortiOS, execute tac report is... Full Story
-

LLDP; What is it The Link Layer Discovery Protocol... Full Story
-

What it actually does When you run diagnose fdsm... Full Story
-

Monkey Bites are bite-sized, high-impact security insights designed for... Full Story
-

I have run macOS in macOS with Parallels but... Full Story
-

Don't be confused with my other FortiNAC posts where... Full Story
-

This is the third session in a multi-part article... Full Story
-

Today I was configuring key-based authentication on a FortiGate... Full Story
-

Netcat, often called the "Swiss Army knife" of networking,... Full Story
-

At its core, IEEE 802.1X is a network layer... Full Story
-

In case you did not see the previous FortiNAC... Full Story
-

This is our 5th session where we are going... Full Story
-

Now that we have Wireshark installed and somewhat configured,... Full Story
-

The Philosophy of Packet Analysis Troubleshooting isn't about looking... Full Story
-

Nmap Scripting Engine (NSE): From One-Liners to Your First... Full Story
-

Stand up TRex on Ubuntu, wire it through a... Full Story
-

1. Executive Summary Objective: Get a working, persistent nftables... Full Story