
If you've spent any time configuring user authentication on... Full Story
By Manny Fernandez
October 5, 2026
Ghidra Zero to Hero: A Practitioner’s Guide to the NSA’s Reverse Engineering Framework
Objective: Get Ghidra installed correctly, analyze your first stripped binary end to end, and automate the boring parts with the headless analyzer and PyGhidra.
Target audience: Network and security engineers, SOC analysts, and blue teamers who can read a little C and want a working reverse engineering workflow without paying for a commercial disassembler.
What Ghidra is and why defenders should care
Ghidra is a free, open source software reverse engineering (SRE) framework built by the NSA’s Research Directorate. It was used internally for well over a decade before its public release in March 2019 under the Apache 2.0 license. The current stable release at the time of writing is Ghidra 12.1.4 (September 2026).
Out of the box you get a multi-architecture disassembler, a decompiler that produces C-like pseudocode, a function graph, a data type manager, a scripting engine (Java and Python 3), a headless analyzer for batch work, a debugger (WinDbg, GDB, and LLDB backends), BSim for finding structurally similar functions, Version Tracking for patch diffing, and an optional multi-user Ghidra Server.
For defenders, that means you can triage a suspicious ELF pulled from a compromised Linux box, confirm what a PSIRT-patched function actually changed between two firmware builds, or pull IOCs (hardcoded C2 domains, keys, mutex names) out of a sample without executing it.
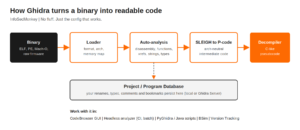
| Component | What it does | When you reach for it |
|---|---|---|
| CodeBrowser | Main analysis tool: Listing, Decompiler, Symbol Tree, Data Types | Every session |
| Decompiler | Lifts P-code to C-like pseudocode | Understanding logic fast |
| Function Graph | Basic-block control flow view | Branch-heavy checks, obfuscation |
| Script Manager | Runs Java and PyGhidra scripts | Repetitive tasks, IOC extraction |
| analyzeHeadless | CLI import, analyze, and script execution | Batch triage, CI pipelines |
| Version Tracking | Correlates functions across two program versions | Patch diffing firmware or DLLs |
| BSim | Similarity search across a function database | Spotting reused code across samples |
| Debugger | Dynamic analysis via GDB, LLDB, or WinDbg | Confirming runtime behavior |
| Ghidra Server | Shared, versioned projects | Team RE work |
Prerequisites and lab architecture
Assumed knowledge: basic Linux CLI, what a function call and a stack are, and enough C to read an if statement. Assembly fluency helps but is not required to get value from the decompiler.
| Requirement | Detail |
|---|---|
| Operating system | Ubuntu 24.04 LTS (used here), Windows 10/11 x64, or macOS |
| Java | JDK 21 minimum (Ghidra 12.1 will not launch on older JDKs) |
| Python | Python 3.9 to 3.14, required for PyGhidra and the Debugger |
| RAM | 8 GB workable, 16 GB or more for large firmware images |
| Disk | About 1.5 GB for the install, plus project storage |
| Isolation | Dedicated VM with no host shares for anything you did not build yourself |
Lab safety
Static analysis in Ghidra does not execute the binary, but you are still handling live samples. Keep malware in a snapshot-backed VM, store samples in password-protected archives (the industry convention is the password infected), and never enable the Debugger against a real sample outside an isolated network.
Step-by-step implementation: install on Ubuntu 24.04
Step 1: Install JDK 21 and tooling
Goal: Satisfy Ghidra’s Java requirement with a supported JDK.
Action: Install OpenJDK 21 from the Ubuntu repositories along with unzip and Python.
sudo apt update
sudo apt install -y openjdk-21-jdk unzip python3 python3-venv python3-pip
java -version
Verification: the java -version output must report version 21 or later. If you have several JDKs installed, select 21 with sudo update-alternatives --config java.
Step 2: Download and verify the release
Goal: Pull the official build from the NSA GitHub release page and confirm integrity before extracting.
Action: Copy the exact zip file name and SHA-256 hash from the Ghidra 12.1.4 release page on github.com/NationalSecurityAgency/ghidra/releases, then download and verify.
GHIDRA_VER=12.1.4
GHIDRA_ZIP=ghidra_${GHIDRA_VER}_PUBLIC_<YYYYMMDD>.zip   # exact name from the release page
cd ~/Downloads
wget https://github.com/NationalSecurityAgency/ghidra/releases/download/Ghidra_${GHIDRA_VER}_build/${GHIDRA_ZIP}
echo "<SHA256_FROM_RELEASE_PAGE>  ${GHIDRA_ZIP}" | sha256sum -c -
Verification: sha256sum -c prints OK. Anything else means the download is corrupt or not what you think it is. Do not extract it.
Step 3: Extract to /opt with a version-neutral symlink
Goal: Keep versions side by side so upgrades and rollbacks are a symlink change.
Action: Unzip into /opt and point /opt/ghidra at the active version.
sudo unzip -q ${GHIDRA_ZIP} -d /opt
sudo ln -sfn /opt/ghidra_${GHIDRA_VER}_PUBLIC /opt/ghidra
ls /opt/ghidra
Verification: you should see ghidraRun, support/, Ghidra/, docs/, and Extensions/ in the listing.
Step 4: Tune the JVM heap
Goal: Stop large binaries from crawling or crashing with out-of-memory errors.
Action: Edit support/launch.properties and set MAXMEM. A good rule is half of the VM’s RAM.
sudo sed -i 's/^#\?MAXMEM=.*/MAXMEM=8G/' /opt/ghidra/support/launch.properties
grep ^MAXMEM /opt/ghidra/support/launch.properties
Verification: the grep returns MAXMEM=8G. On HiDPI displays you can also uncomment the VMARG_LIST=-Dsun.java2d.uiScale=2 line in the same file to fix tiny fonts.
Step 5: Launch Ghidra (with PyGhidra)
Goal: Start Ghidra with native CPython 3 scripting enabled.
Action: Use pyghidraRun instead of ghidraRun. On first launch it offers to install the bundled pyghidra module. Running it inside a virtual environment keeps your system Python clean.
python3 -m venv ~/venvs/ghidra
source ~/venvs/ghidra/bin/activate
/opt/ghidra/support/pyghidraRun
GUI verification: accept the user agreement, and the Project Manager window opens. Help > About Ghidra should show 12.1.4.
macOS notes
Install a JDK 21 build (for example Eclipse Temurin 21), then extract the same zip anywhere you like. If the decompiler pane stays empty or macOS blocks the native decompile binary, clear the quarantine attribute on the install directory:
xattr -dr com.apple.quarantine ~/Applications/ghidra_12.1.4_PUBLICYour first analysis: a stripped crackme you build yourself
Practicing on a binary you compiled yourself is legal, safe, and lets you check Ghidra’s output against the source. Build a tiny license checker and strip its symbols so Ghidra has to work for it.
Step 6: Build the lab target
Goal: Produce a realistic stripped ELF with a hardcoded secret.
Action: Save the source, compile it without optimization, and strip it.
mkdir -p ~/re-lab && cd ~/re-lab
cat > crackme.c << 'EOF'
#include <stdio.h>
#include <string.h>

static int check_key(const char *k) {
    const char *secret = "MONKEY-2026-SRE";
    if (strlen(k) != strlen(secret)) return 0;
    return strcmp(k, secret) == 0;
}

int main(int argc, char **argv) {
    if (argc != 2) { puts("usage: crackme <key>"); return 1; }
    if (check_key(argv[1])) puts("Access granted");
    else puts("Access denied");
    return 0;
}
EOF
gcc -O0 -o crackme crackme.c && strip crackme
file crackme
Verification: file reports ELF 64-bit LSB pie executable ... stripped.
Step 7: Create a project and import
Goal: Get the binary into a Ghidra project database.
Action: In the Project Manager choose File > New Project > Non-Shared Project, name it re-lab, then File > Import File and select crackme. Ghidra detects ELF and x86:LE:64 automatically.
GUI verification: the Import Results Summary lists the format, language ID x86:LE:64:default, and the number of blocks and symbols loaded.
Step 8: Run auto-analysis
Goal: Let Ghidra discover functions, references, strings, and types.
Action: Double-click crackme to open it in CodeBrowser and click Yes when asked to analyze. The defaults are fine for this target. For large firmware, consider disabling expensive analyzers like Aggressive Instruction Finder on the first pass.
GUI verification: the progress bar in the lower right finishes, and the Symbol Tree’s Functions folder fills with entries named FUN_00101169 and similar, because the binary is stripped.
Step 9: Pivot from a string to the logic
Goal: Find the interesting function without reading every function.
Action: Open Window > Defined Strings, filter for granted, double-click the hit, then right-click the address in the Listing and choose References > Show References to Address (Ctrl+Shift+F). Double-click the reference to land inside main.
The Decompiler pane now shows main. You will see a call to an unnamed function whose return value decides between Access granted and Access denied. Double-click that callee.
Step 10: Clean up the decompiler output
Goal: Turn FUN_ and param_1 noise into readable code.
Action: In the Decompiler pane, click the function name and press L to rename it check_key. Click param_1, press Ctrl+L, and retype it as char *. Rename it to key with L. Press ; in the Listing to add a comment.
Before cleanup, the pseudocode looks roughly like this:
undefined8 FUN_00101169(char *param_1)
{
  size_t sVar1;
  size_t sVar2;
  int iVar3;

  sVar1 = strlen(param_1);
  sVar2 = strlen("MONKEY-2026-SRE");
  if (sVar1 == sVar2) {
    iVar3 = strcmp(param_1,"MONKEY-2026-SRE");
    return (ulong)(iVar3 == 0);
  }
  return 0;
}
Verification: run ./crackme MONKEY-2026-SRE and confirm Access granted. You recovered the key purely from static analysis. Your renames and types are saved to the project database, so they survive closing Ghidra.
Keyboard shortcuts worth memorizing
| Shortcut | Action |
|---|---|
| G | Go to address, label, or function |
| L | Rename label, function, or variable |
| Ctrl+L | Retype a variable (Decompiler) |
| ; | Set an end-of-line comment |
| Ctrl+Shift+F | Show references to the current address |
| D | Disassemble at the cursor |
| C | Clear code bytes at the cursor |
| Ctrl+Shift+E | Search program text |
| Alt+Left | Navigate back |
Automating: the headless analyzer
analyzeHeadless imports, analyzes, and runs scripts with no GUI. It is how you triage a directory of samples overnight or bolt Ghidra onto a CI job. Start with a small Java GhidraScript that dumps every function and its entry point.
mkdir -p ~/ghidra_scripts
cat > ~/ghidra_scripts/ListFunctions.java << 'EOF'
import ghidra.app.script.GhidraScript;
import ghidra.program.model.listing.Function;
import ghidra.program.model.listing.FunctionIterator;

public class ListFunctions extends GhidraScript {
    @Override
    public void run() throws Exception {
        FunctionIterator it = currentProgram.getFunctionManager().getFunctions(true);
        while (it.hasNext() && !monitor.isCancelled()) {
            Function f = it.next();
            println(f.getEntryPoint() + "  " + f.getName());
        }
    }
}
EOF
mkdir -p ~/ghidra-projects
/opt/ghidra/support/analyzeHeadless ~/ghidra-projects HeadlessTriage \
-import ~/re-lab/crackme \
-scriptPath ~/ghidra_scripts \
-postScript ListFunctions.java \
-deleteProjectVerification: the console ends with lines like ListFunctions.java> 00101169 FUN_00101169 and an ANALYZING all memory and code summary. -deleteProject throws the temporary project away; drop it if you want to open the results in the GUI later. Point -import at a directory to process every file in it.
Automating: PyGhidra from plain Python
PyGhidra lets you drive Ghidra from ordinary CPython 3, which means you can combine it with requests, pefile, YARA, or anything else in your toolkit.
source ~/venvs/ghidra/bin/activate
pip install pyghidra
export GHIDRA_INSTALL_DIR=/opt/ghidra
# strings_near_calls.py : list functions that reference a given string
import sys
import pyghidra
pyghidra.start()
target = sys.argv[1]
needle = sys.argv[2]
with pyghidra.open_program(target, analyze=True) as flat_api:
program = flat_api.getCurrentProgram()
listing = program.getListing()
refman = program.getReferenceManager()
fm = program.getFunctionManager()
for data in listing.getDefinedData(True):
value = data.getValue()
if isinstance(value, str) and needle in value:
for ref in refman.getReferencesTo(data.getAddress()):
func = fm.getFunctionContaining(ref.getFromAddress())
name = func.getName() if func else "<no function>"
print(f"{data.getAddress()} {value!r} <- {name} @ {ref.getFromAddress()}")python strings_near_calls.py ~/re-lab/crackme MONKEYVerification: output shows the MONKEY-2026-SRE string address and the function that references it. The first run is slow because analysis happens; that is expected.
Beyond the basics
- Version Tracking (patch diffing): import two builds of the same binary, open Tools > Version Tracking, and run the correlators. Functions that match but changed are exactly where a vendor fixed the bug. This is the fastest way to understand what a security advisory actually patched.
- BSim: build a signature database from known samples, then query new samples to find reused functions. Great for clustering malware families.
- Debugger: launch the target under GDB (Linux), LLDB (macOS), or WinDbg (Windows) directly from Ghidra, with the static listing and the live registers side by side.
- Ghidra Server: run
server/svrInstallon a shared host so a team can check programs in and out with version history. - Jython scripts: Jython is no longer enabled by default in 12.x. Install the bundled Jython extension from File > Install Extensions, or port the script to PyGhidra or Java.
Verification and validation checklist
| Test | Command or location | Expected success output |
|---|---|---|
| Java version | java -version |
Version 21 or later |
| Download integrity | sha256sum -c - |
OK |
| Ghidra version | Help > About Ghidra | 12.1.4 |
| Decompiler working | Decompiler pane on main |
C-like pseudocode, no error banner |
| Headless analyzer | analyzeHeadless ... -postScript ListFunctions.java |
Function list printed to console |
| PyGhidra | python -c "import pyghidra" |
No ImportError |
Troubleshooting and gotchas
Ghidra refuses to start or asks for a JDK path
Cause: no JDK 21 on the path, or a JRE instead of a full JDK. Fix: confirm with java -version and javac -version, then run in the foreground to see the real error:
/opt/ghidra/support/launch.sh fg jdk Ghidra "" "" ghidra.GhidraRunIf Ghidra cached a bad JDK path, delete ~/.config/ghidra/ghidra_12.1.4_PUBLIC/java_home.save and relaunch so it prompts again.
Decompiler pane is empty or shows an exception
Cause: the native decompile binary cannot execute. On macOS this is almost always Gatekeeper quarantine; on Linux it can be a noexec mount. Fix: clear quarantine with xattr -dr com.apple.quarantine on macOS, or check mount | grep noexec on Linux and install Ghidra somewhere executable.
Analysis crawls or dies with OutOfMemoryError
Cause: the default heap is too small for the image. Fix: raise MAXMEM in support/launch.properties, and on huge firmware run a first pass with only the essential analyzers enabled, then add more with Analysis > One Shot.
Old Python scripts fail with syntax errors
Cause: they were written for Jython (Python 2.7). Fix: install the Jython extension, or port them. For PyGhidra scripts inside the GUI, add # @runtime PyGhidra near the top of the file.
Legal and ethical scope
Reverse engineering rules vary by jurisdiction and license. Analyzing malware for defense and binaries you built yourself is standard practice. Before you open commercial software or vendor firmware, read the EULA and check with counsel if the work is for anything beyond your own security assessment. Report vulnerabilities you find through the vendor’s PSIRT process.
Wrap-up
Ghidra gives you a professional-grade SRE stack for free: install JDK 21, verify the download, give the JVM enough heap, and launch through pyghidraRun. From there, the string-to-xref-to-decompiler pivot solves a surprising number of real triage questions, and the headless analyzer plus PyGhidra turn one-off analysis into repeatable tooling.
Recent posts
-

-

DNS is one of those technologies that quietly underpins... Full Story
-

BGP issues on FortiGate firewalls usually trace back to... Full Story
-

Every time your laptop talks to your router, a... Full Story
-

If you've spent any time configuring NAT on a... Full Story
-

If you have spent any time configuring firewall policies... Full Story
-

High availability on FortiGate is one of those features... Full Story
-

If you've configured SD-WAN on a FortiGate, you've almost... Full Story
-

FortiLink is the management protocol that turns a FortiSwitch... Full Story
-

FortiSwitches are pretty rock solid from Mean Time Between... Full Story
-

This is a quicky tip. Have you ever gone... Full Story
-

DNS is one of those quiet pieces of internet... Full Story
-

This article is an updated version of the previous... Full Story
-

You will add ns2 as a secondary (slave) BIND9... Full Story
-

In the process of deploying my lab, I needed... Full Story
-

RFC 8805, used to be known as Self-Correcting IP... Full Story
-

Years back, I wrote an article about certificate pinning. ... Full Story
-

FortiGates have the ability to send alerts to Microsoft... Full Story
-

In this post, I am going to walk through... Full Story
-

Troubleshooting VoIP on a FortiGate can feel like trying... Full Story
-

Prior to FortiOS 7.0, there were three commands to... Full Story
-

In this post, I am going to go over... Full Story
-

What we are going to do: We are going... Full Story
-

Choosing between FGCP (FortiGate Clustering Protocol) and FGSP (FortiGate... Full Story
-

Creating a VLAN on macOS (The "Pro" Move) A... Full Story
-

This blog post explores the logic behind how macOS... Full Story
-

Pretty Fly for a Wi-Fi Tell My Wi-Fi Love... Full Story
-

Part of my daily gig is creating BoMs (Bill-of-Materials)... Full Story
-

ICMP introduces several security risks, but careful filtering, rate... Full Story
-

The command diag debug application dhcps -1 enables full... Full Story
-

In the world of FortiOS, execute tac report is... Full Story
-

LLDP; What is it The Link Layer Discovery Protocol... Full Story
-

What it actually does When you run diagnose fdsm... Full Story
-

Monkey Bites are bite-sized, high-impact security insights designed for... Full Story
-

I have run macOS in macOS with Parallels but... Full Story
-

Don't be confused with my other FortiNAC posts where... Full Story
-

This is the third session in a multi-part article... Full Story
-

Today I was configuring key-based authentication on a FortiGate... Full Story
-

Netcat, often called the "Swiss Army knife" of networking,... Full Story
-

At its core, IEEE 802.1X is a network layer... Full Story
-

In case you did not see the previous FortiNAC... Full Story
-

This is our 5th session where we are going... Full Story
-

Now that we have Wireshark installed and somewhat configured,... Full Story
-

The Philosophy of Packet Analysis Troubleshooting isn't about looking... Full Story
-

InfoSecMonkey Threat Response October 24, 2026 | No fluff.... Full Story
-

InfoSecMonkey Threat Response October 24, 2026 | No fluff.... Full Story
-

Plus what you actually get with FortiCare Essential, Premium... Full Story