
If you've spent any time configuring user authentication on... Full Story
By Manny Fernandez
August 24, 2026
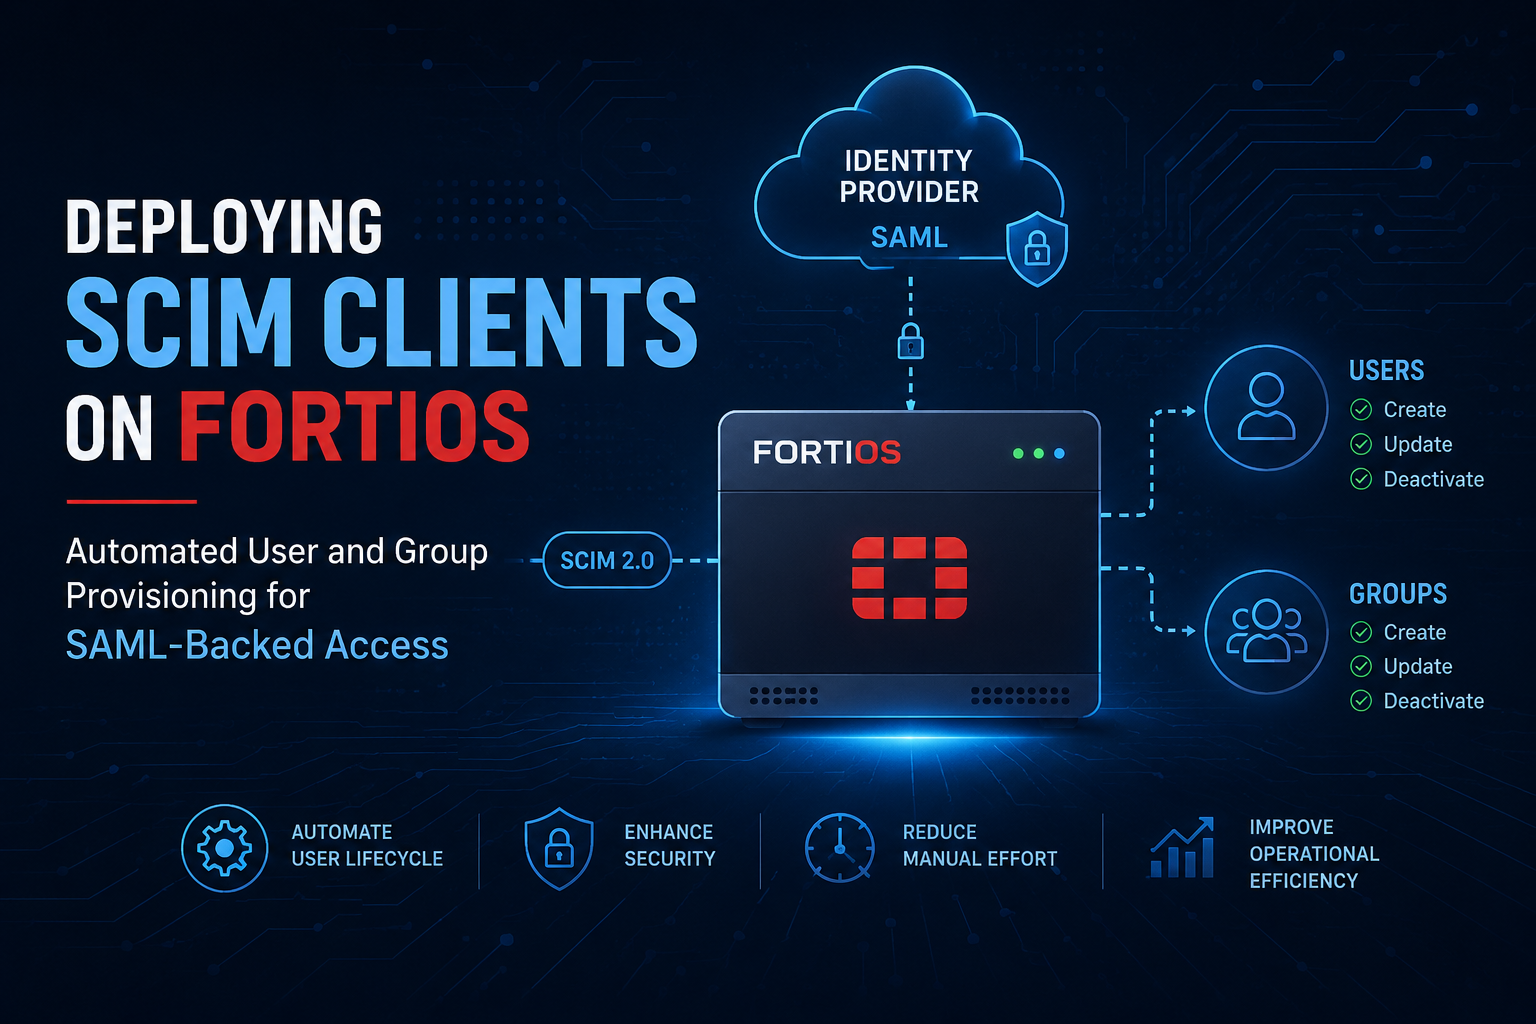
Deploying SCIM Clients on FortiOS: Automated User and Group Provisioning for SAML-Backed Access
Objective: This guide shows you how to turn a FortiGate into a SCIM 2.0 service endpoint so that an external identity provider can push users and groups into FortiOS before anyone ever logs in, then bind that provisioned directory to a SAML single sign-on object so firewall policies, SSL VPN portals, and proxy policies can match on real group membership. The result is an identity-aware edge that knows who exists, who belongs to what, and who was just terminated, without a single LDAP bind or FSSO collector agent.
Target Audience: Network Security Engineers, Identity and Access Management engineers, Systems Engineers, and anyone responsible for FortiGate authentication design in an enterprise or MSSP environment.
1. Executive Summary
SAML solved authentication on the FortiGate. It did not solve identity. With SAML alone, the FortiGate learns nothing about a user until that user authenticates, and it learns only what the assertion happens to carry at that moment. You cannot build a firewall policy around a group that the FortiGate has never heard of, you cannot see a user in the Firewall Users monitor before their first login, and when HR disables an account on Tuesday afternoon, the FortiGate has no idea anything changed.
SCIM, the System for Cross-domain Identity Management defined in RFC 7643 and RFC 7644, closes that gap. It is a REST and JSON protocol for pushing identity lifecycle events, create, update, and delete, from an identity source to a downstream application. FortiOS 7.6.0 added SCIM server support, and 7.6.1 added the GUI for managing SCIM client entries. The feature carries forward into FortiOS 8.0.
The naming trips people up on day one, so get it straight before you touch a CLI prompt:
| Term | Who plays it | What it does |
|---|---|---|
| SCIM server (service provider) | The FortiGate | Listens on an HTTP or HTTPS port, exposes the /scim/v2 resource tree, and stores the users and groups it is handed. |
| SCIM client (identity source) | FortiAuthenticator, Entra ID, Okta | Authenticates to the FortiGate and issues POST, PATCH, PUT, and DELETE calls to keep the directory in sync. |
config user scim |
FortiOS CLI table | One entry per identity source that is allowed to provision into this VDOM. This is the object the GUI calls a SCIM Client. |
Read that table twice. The object you create on the FortiGate is called a SCIM Client, but the FortiGate itself is the SCIM server. You are defining who is allowed to talk to you, not where you go to fetch data. Nothing in this feature polls anything. It is entirely push-driven.
2. Prerequisites & Architecture
2.1 Assumed Knowledge
- Comfortable in the FortiOS CLI, including
configtree navigation,show full-configuration, anddiagnosecommands. - Working understanding of SAML 2.0 roles: identity provider, service provider, assertion, and attribute statements.
- FortiOS certificate handling, specifically the difference between
config certificate local,config certificate ca, andconfig certificate remote. - Basic REST concepts. You will not write any code, but knowing what a 401 versus a 403 versus a 409 means will save you an hour.
- Familiarity with firewall user groups and the difference between a local group, a Fortinet Single Sign-On group, and a remote-server group match.
2.2 Environment and Lab Requirements
- FortiGate running FortiOS 7.6.1 or later. 7.6.0 has the underlying SCIM server but no GUI. 7.6.2 renamed two CLI attributes, which matters if you automate. Anything built on 7.6.3 or 8.0 is on the cleanest syntax.
- An identity source that speaks SCIM 2.0. This guide uses FortiAuthenticator 6.6 or later as the reference client because it is the documented Fortinet-to-Fortinet path. Entra ID and Okta enterprise applications work with the same FortiGate-side configuration.
- A server certificate on the FortiGate whose subject or SAN matches the name the SCIM client will connect to. Self-signed works in a lab. In production, use a certificate the client will actually trust.
- Working NTP on both ends. SCIM itself is time-tolerant, but the SAML binding you build in Phase 5 is not.
- Lab platform: anything that runs FortiGate-VM and FortiAuthenticator-VM. EVE-NG, Proxmox, VMware ESXi, or KVM are all fine. Two vCPU and 2 GB RAM per VM is enough for a functional test.
2.3 Component Table
| Component | Role | Address / FQDN |
|---|---|---|
| FGT-EDGE-01 | FortiGate. SCIM server, SAML service provider, policy enforcement point. | port1 (WAN) 198.18.10.10/24 port2 (LAN) 10.0.10.1/24 loopback lo-scim 10.0.99.1/32 |
| FAC-IDP-01 | FortiAuthenticator. SCIM client (provisioning source) and SAML identity provider. | 10.0.20.10/24 idp.infosecmonkey.lab |
| SCIM published endpoint | Optional VIP used only when the SCIM client is a cloud IdP that must reach the FortiGate from the internet. | 198.18.10.20 (VIP) scim.infosecmonkey.lab |
| DC-01 | Active Directory. Authoritative user store that feeds FortiAuthenticator. | 10.0.30.10/24 |
| NTP-01 | Time source for all identity components. | 10.0.30.5/24 |
| Test client | Workstation used to validate SAML login and policy matching. | 10.0.50.0/24 |
2.4 Logical Flow
  PROVISIONING PLANE (push, out of band, continuous)
  ---------------------------------------------------
   AD / HR source          FortiAuthenticator            FortiGate
   10.0.30.10        --->  10.0.20.10 (SCIM client) ---> 10.0.99.1 (SCIM server)
                           POST   /scim/v2/Users
                           POST   /scim/v2/Groups
                           PATCH  /scim/v2/Groups/{id}
                           DELETE /scim/v2/Users/{id}

  AUTHENTICATION PLANE (pull, on demand, per user)
  ---------------------------------------------------
   Test client  --->  FortiGate SAML SP  --->  FAC SAML IdP  --->  assertion
   10.0.50.0/24       user saml "SCIM-SAML"                        back to SP
                        |
                        +-- set scim-client "SCIM-SRV-FAC"   <-- the join | v user group "grp-saml-it" --> firewall policy / SSL VPN portal
The two planes are independent. Provisioning keeps running whether or not anyone logs in, and authentication still works if provisioning stalls, it just falls back to whatever the assertion carries. The set scim-client line inside the SAML object is the single point where they meet.
3. Step-by-Step Implementation Workflow
Phase 1: Prepare the FortiGate
The Goal: Confirm you are on a build that has the feature, lock down time sync, and stage the certificates before anything else. Ninety percent of SCIM failures in the field are certificate or clock problems wearing a costume.
The Action: Verify firmware, verify the CLI tree exists in your VDOM, set NTP, and import the certificate material.
# Confirm the running build
get system status | grep -i version

# Confirm the SCIM table exists in this VDOM
config vdom
    edit <your_vdom>
        config user scim
            end
    next
end

# Lock time to a reliable source
config system ntp
    set ntpsync enable
    set type custom
    set syncinterval 60
    config ntpserver
        edit 1
            set server "10.0.30.5"
        next
    end
end

# Verify the clock actually moved
execute time
execute date
diagnose sys ntp status
Now stage the certificates. You need two distinct things, and people routinely conflate them:
| What | FortiOS store | Why you need it |
|---|---|---|
| FortiGate server certificate | certificate local |
Presented to the SCIM client during the TLS handshake. The CN or SAN must match the hostname in the base URL. |
| SCIM client certificate | certificate remote |
Referenced by the SCIM client entry so the FortiGate can validate the identity of the thing provisioning into it. |
| Issuing CA chain | certificate ca |
Required if either certificate above is issued by a private CA. |
GUI Verification: Navigate to System > Certificates. Confirm your server certificate appears under Local Certificates with a valid date range, and that any private CA appears under Remote CA Certificates or External CA Certificates. If System > Certificates is not visible, enable it under System > Feature Visibility.
Phase 2: Enable the SCIM Service Listener
The Goal: Stand up the SCIM listener, pin it to a certificate, and expose it on exactly one interface, no more.
The Action: The listener has two halves. Global settings define the ports and the certificate. Interface administrative access defines where the daemon will actually accept a socket. Both are required. Setting only one produces a listener nobody can reach, or a reachable port with no service behind it.
# --- Global SCIM service settings ---
config system global
    set scim-https-port <scim_https_port>
    set scim-http-port  <scim_http_port>
    set scim-server-cert "<your_local_cert>"
end

# Example values used throughout this guide:
#   scim-https-port  8443
#   scim-http-port   8080   (do not expose this; see note below)
#   scim-server-cert "SCIM-Server-Cert"
Do not assume the default ports. They have shifted between maintenance releases and they collide with other FortiOS services depending on what else you have enabled. Set both values explicitly, write them into your build standard, and keep the HTTP port on a value you never permit through any interface. Bearer tokens and Basic credentials cross this channel. Plaintext SCIM is a credential disclosure waiting for a packet capture.
Next, expose the service. The cleanest pattern is a dedicated loopback so the listener is not bound to a physical interface whose addressing or role may change later.
# --- Dedicated loopback for the SCIM listener ---
config system interface
    edit "lo-scim"
        set vdom "<your_vdom>"
        set ip 10.0.99.1 255.255.255.255
        set allowaccess scim
        set type loopback
        set role lan
        set description "SCIM provisioning endpoint - do not repurpose"
    next
end

# --- Or, if you are binding to an existing data interface ---
# WARNING: allowaccess REPLACES the list. Re-state every service you still need.
config system interface
    edit "port2"
        set allowaccess ping https ssh fgfm scim
    next
end
Because the SCIM listener is local-in traffic, an allowaccess entry is a wide-open door on that interface. Constrain it by source with a local-in policy so only the provisioning host can knock.
config firewall address
    edit "ADDR-SCIM-CLIENT-FAC"
        set subnet 10.0.20.10 255.255.255.255
        set comment "FortiAuthenticator SCIM provisioning source"
    next
end

config firewall service custom
    edit "SVC-SCIM-HTTPS"
        set tcp-portrange <scim_https_port>
    next
end

config firewall local-in-policy
    edit 10
        set intf "lo-scim"
        set srcaddr "ADDR-SCIM-CLIENT-FAC"
        set dstaddr "all"
        set service "SVC-SCIM-HTTPS"
        set schedule "always"
        set action accept
        set comments "Permit SCIM provisioning from FAC only"
    next
    edit 11
        set intf "lo-scim"
        set srcaddr "all"
        set dstaddr "all"
        set service "ALL"
        set schedule "always"
        set action deny
        set comments "Deny all other SCIM endpoint access"
    next
end
GUI Verification: Two places. First, System > Settings, scroll to the SCIM Settings section and confirm the HTTP port, HTTPS port, and Server certificate reflect what you set, then click Apply. Second, Network > Interfaces, edit the interface, and confirm SCIM is ticked under Administrative Access. If the SCIM checkbox is missing entirely, you are on a build without the feature or in a VDOM where it is not applicable.
Phase 3: Create the SCIM Client Entry
The Goal: Define the one identity source permitted to provision into this VDOM, along with how it authenticates and whether its certificate identity is enforced.
The Action: Create the entry under config user scim. Note that the attribute names changed at 7.6.2, so pick the block that matches your firmware.
FortiOS 7.6.2 and later (including 7.6.3 and 8.0)
config user scim
    edit "SCIM-SRV-FAC"
        set status enable
        set base-url "https://<scim_fqdn>:<scim_https_port>/scim/v2"
        set auth-method base
        set secret "<shared_secret_or_password>"
        set certificate "<remote_cert_name>"
        set client-identity-check enable
    next
end
FortiOS 7.6.0 and 7.6.1 (legacy attribute names)
config user scim
    edit "SCIM-SRV-FAC"
        set status enable
        set base-url "https://<scim_fqdn>:<scim_https_port>/scim/v2"
        set client-authentication-method base
        set client-secret-token "<shared_secret_or_password>"
        set certificate "<remote_cert_name>"
        set client-identity-check enable
    next
end
Attribute reference
| Attribute | Values | What it actually controls |
|---|---|---|
status |
enable / disable | Administrative on-off for this client relationship. Disabling stops new provisioning but does not automatically purge what was already provisioned. |
base-url |
string | The SCIM 2.0 base URL for this relationship. This is the exact value you paste into the identity provider as the Tenant URL or SCIM endpoint. Include the port if you moved off 443, and make sure the hostname matches the server certificate. |
auth-method(7.6.0/7.6.1: client-authentication-method) |
token / base | token expects an HTTP Authorization: Bearer header. This is what Entra ID and Okta use. base is HTTP Basic authentication and is the typical FortiAuthenticator pairing. |
secret(7.6.0/7.6.1: client-secret-token) |
password string | The bearer token or the Basic credential, depending on the method above. Masked in show output. Treat it as a privileged credential with a rotation schedule. |
certificate |
remote cert name | The client certificate the FortiGate expects this SCIM client to present. Pulled from the certificate remote store. |
client-identity-check |
enable / disable | Enforces validation of the client certificate identity on top of the bearer or Basic credential. Leave it enabled anywhere the provisioning path crosses untrusted ground. Disable it only while you are isolating a TLS problem, and turn it back on. |
id |
integer | Internal identifier surfaced by the diagnostic commands. Normally auto-assigned. You will see it in diagnose test scim list-clients output. |
GUI Verification: Go to User & Authentication > SCIM Clients and click Create New. Set Status to Enabled, enter a Name, then fill in the base URL, authentication method, secret, and certificate options. The list view should show your entry with a green enabled indicator. If the SCIM Clients menu item is absent on 7.6.1 or later, check System > Feature Visibility.
Phase 4: Configure the Provisioning Source
The Goal: Point the identity provider at the FortiGate and trigger the first full synchronization.
Option A: FortiAuthenticator (the documented Fortinet-to-Fortinet path)
The Action: On FortiAuthenticator, log in with an administrative account and navigate to Authentication > SCIM > Service Provider. Click Create New and configure:
- Name: a label that will show up in FortiAuthenticator logs. Use the FortiGate hostname, for example
FGT-EDGE-01-SCIM. - SCIM base URL: exactly the string from
set base-urlin Phase 3. Character for character. Trailing slashes matter. - Authentication method: match what you set on the FortiGate. Basic pairs with
auth-method base, bearer token pairs withauth-method token. - Credential: the same value you configured as
secret. - Scope: select the groups you intend to provision. Do not select everything. Provisioning your entire directory into a firewall is an operational and privacy decision, not a convenience one.
Save the entry. Then double-click the newly created entry to open its settings pane and click Sync. This is the step people miss. Saving the service provider definition establishes the relationship; it does not push anything. The Sync action performs the initial bulk load of existing users and groups. From that point forward, FortiAuthenticator sends incremental changes as they happen.
Option B: Entra ID or Okta
The Action: The FortiGate-side configuration is identical. In the IdP, create an enterprise application, enable automatic provisioning, and supply:
| IdP field | FortiGate value |
|---|---|
| Tenant URL / SCIM connector base URL | The base-url string |
| Secret token | The secret value, with auth-method token on the FortiGate |
| Test Connection | Must succeed before you assign users. This performs a live authenticated request against the endpoint. |
Cloud IdP reachability. A SaaS identity provider cannot reach 10.0.99.1. You will need a VIP that publishes the SCIM port on a routable address (198.18.10.20 in the component table), a firewall policy permitting it, and either an allow-list of the IdP publishing IP ranges or an equivalent control. Publish the smallest possible surface. This endpoint accepts writes to your identity store.
Phase 5: Bind SCIM to the SAML Object
The Goal: Connect the provisioned directory to the authentication path so that a SAML login resolves against known users and known groups instead of raw assertion attributes.
The Action: This is a one-line change to an existing SAML user object, and it is the entire point of the exercise. Without it, you have a nicely populated directory that nothing consults.
config user saml
    edit "SCIM-SAML"
        set cert "<fgt_saml_signing_cert>"
        set entity-id "https://<fgt_fqdn>/saml/metadata"
        set single-sign-on-url "https://<fgt_fqdn>/saml/login"
        set single-logout-url "https://<fgt_fqdn>/saml/logout"
        set idp-entity-id "https://<idp_fqdn>/saml-idp/<portal>/metadata/"
        set idp-single-sign-on-url "https://<idp_fqdn>/saml-idp/<portal>/login/"
        set idp-single-logout-url "https://<idp_fqdn>/saml-idp/<portal>/logout/"
        set idp-cert "<idp_signing_cert>"
        set user-name "username"
        set group-name "group"

        # --- The join. This is the whole guide in one line. ---
        set scim-client "SCIM-SRV-FAC"
    next
end
GUI Verification: Navigate to User & Authentication > Single Sign-On. Edit your existing SAML entry, or click Create New. Expand the Additional SAML Attributes section, toggle SCIM client on, and select your client from the dropdown. If the dropdown is empty, your SCIM client entry in Phase 3 is either disabled or in a different VDOM.
Phase 6: Consume Provisioned Groups in Policy
The Goal: Turn provisioned group membership into enforceable policy. You have two patterns, and the choice is a security decision.
Pattern 1: Permit everyone the IdP authenticates
Reference the SAML object directly as a group member. Every SCIM group the client provisioned is in scope and every authenticated user passes. Fast to build, blunt to operate, and rarely what an auditor wants to see.
config user group
    edit "grp-saml-all"
        set member "SCIM-SAML"
    next
end
Pattern 2: Restrict to specific provisioned groups (recommended)
Use a config match block to bind the group to a named remote group. This is where SCIM earns its keep: the group name below exists on the FortiGate because SCIM put it there, not because someone typed it and hoped.
config user group
    edit "grp-saml-it"
        set member "SCIM-SAML"
        config match
            edit 1
                set server-name "SCIM-SAML"
                set group-name "IT"
            next
        end
    next
end

config user group
    edit "grp-saml-contractors"
        set member "SCIM-SAML"
        config match
            edit 1
                set server-name "SCIM-SAML"
                set group-name "Contractors"
            next
        end
    next
end
Now reference those groups anywhere FortiOS accepts a user group: a firewall policy, an SSL VPN portal mapping, a proxy policy, or a ZTNA rule.
config firewall policy
    edit 0
        set name "IT-Admin-Access-to-DC"
        set srcintf "ssl.root"
        set dstintf "port2"
        set srcaddr "all"
        set dstaddr "ADDR-DATACENTER"
        set action accept
        set schedule "always"
        set service "ALL"
        set groups "grp-saml-it"
        set logtraffic all
        set nat disable
    next
end
GUI Verification: Go to User & Authentication > User Groups and click Create New. Leave Type as Firewall, name the group, and in the Remote Groups section click Add. Set Remote Server to your SAML object (SCIM-SAML), set Groups to Specify, and pick the provisioned group from the list. If that list is populated, SCIM is working. If it is empty, stop and go to Section 4 before configuring anything else.
4. Verification & Validation
FortiOS ships three purpose-built diagnostics for this feature. Run them in order. Each one answers a different question, and a failure at one level makes everything below it meaningless.
4.1 Is the client relationship registered?
FGT-EDGE-01 # diagnose test scim list-clients

There are 1 clients in vdom.
id:1 name:SCIM-SRV-FAC
Success looks like: a non-zero client count and your entry name. Note the phrase in vdom. This command is VDOM-scoped. If you get zero clients on a multi-VDOM box, you are almost certainly in the wrong VDOM, not missing a configuration.
4.2 Did groups arrive?
FGT-EDGE-01 # diagnose test scim list-groups

SCIM-SRV-FAC
IT
Contractors
total:2
Success looks like: the client name followed by every group in scope and a total. Copy these strings exactly. Whatever appears here is what set group-name must contain in Phase 6. Not the AD display name, not the distinguished name, this string.
4.3 Did users arrive?
FGT-EDGE-01 # diagnose test scim list-users

SCIM-SRV-FAC
jdoe
asmith
mrivera
contractor01
Success looks like: the usernames you scoped in Phase 4. Now go disable one of those accounts in the identity source, wait for the sync interval, and run the command again. If the user disappears, your de-provisioning path is proven. That single test is worth more to an auditor than the entire rest of this build.
4.4 Transport and end-to-end validation
# Are the provisioning packets even arriving? Run this, then hit Sync on the IdP.
diagnose sniffer packet any "host 10.0.20.10 and tcp port <scim_https_port>" 4 0 l

# Is the local-in path permitting them?
diagnose debug flow filter addr 10.0.20.10
diagnose debug flow filter port <scim_https_port>
diagnose debug flow trace start 20
diagnose debug enable
# ... reproduce, then always:
diagnose debug disable
diagnose debug reset

# Which debug applications exist on your build? Names vary by release.
diagnose debug application ?

# After a test login, confirm the user landed in the right group
diagnose firewall auth list
execute log filter category 1
execute log filter field subtype "user"
execute log display
GUI Verification: After a successful SAML login, open Dashboard > Assets & Identities > Firewall Users. The authenticated user should appear with the correct group name in the Group column, and the method should show as the SAML server. Cross-check Log & Report > Events > User Events for the authentication and group-assignment entries.
5. Troubleshooting & “Gotchas”
Gotcha 1: The 7.6.2 attribute rename silently breaks your automation
Symptom: A FortiManager script, Ansible playbook, or Terraform plan that provisioned SCIM clients perfectly on 7.6.1 starts throwing Unknown action 0 or command parse error after an upgrade. Or worse, the entry gets created with a blank credential and fails authentication with no obvious cause.
Cause: Between 7.6.0/7.6.1 and 7.6.2, client-authentication-method became auth-method and client-secret-token became secret. The values and semantics did not change. Only the keys did.
Resolution: Never guess at the schema. Ask the box.
config user scim
    edit "SCIM-SRV-FAC"
        get              # shows the live attribute names on THIS build
        set ?            # enumerates every valid key
    next
end

# Then confirm what actually persisted
show full-configuration user scim
Add a firmware-version conditional to your automation, or pin the SCIM client configuration to a single tested release train. Because secret is a masked field, a partially applied template will not visually differ from a correct one. Always follow an automated push with diagnose test scim list-clients and a live sync, not just a config diff.
Gotcha 2: Everything is configured, nothing is listening
Symptom: The IdP’s Test Connection times out or returns a connection-refused error. diagnose test scim list-clients shows your client, but list-groups and list-users come back empty forever.
Cause: Three independent failures produce identical symptoms, which is why this one eats afternoons:
scimwas never added toallowaccesson the interface that owns the destination address.- It was added, but the operator wrote
set allowaccess scimon a production interface and wiped outhttpsandsshin the process. That attribute replaces, it does not append. If you just locked yourself out of a remote FortiGate, this is why. - The client is connecting to a port that does not match
scim-https-port, usually because the port lives inconfig system globalbut the URL lives inconfig user scimand only one of them got updated.
Resolution: Prove each layer separately rather than staring at the config.
# 1. What ports and cert are actually in effect?
show system global | grep -i scim

# 2. Which interfaces admit SCIM right now?
show system interface | grep -B10 scim

# 3. Is anything bound to the port?
diagnose sys tcpsock | grep <scim_https_port>

# 4. Does the URL agree with global settings?
show full-configuration user scim | grep base-url

# 5. Are packets arriving at all?
diagnose sniffer packet any "tcp port <scim_https_port>" 4 0 l
Standing rule: before you ever touch allowaccess on a remote device, run show system interface <name>, copy the existing list, and re-state it in full with your addition appended. Better still, put SCIM on its own loopback and never edit a production interface for this at all.
Gotcha 3: TLS handshake fails when client-identity-check is enabled
Symptom: Packets arrive, you see the TCP handshake complete in the sniffer, and then the connection tears down immediately. The IdP reports a certificate or SSL error rather than an authentication error. Setting client-identity-check disable makes the problem vanish.
Cause: Almost always one of these four, in descending order of frequency:
- The client certificate was imported into
certificate cainstead ofcertificate remote, soset certificateis referencing the wrong object or nothing at all. - The issuing CA chain is incomplete. Intermediates are missing from
certificate ca. - The hostname in
base-urldoes not appear in the FortiGate server certificate’s CN or SAN, so the client rejects the server before authentication is ever attempted. Connecting by IP against a certificate issued for an FQDN is the classic version of this. - Clock skew. A certificate that is not yet valid or is thirty minutes expired fails validation with an error message that mentions neither time nor certificates.
Resolution:
# Confirm the remote store actually contains the client cert
show certificate remote | grep -i name

# Confirm the CA chain is present
show certificate ca | grep -i name

# Confirm clocks agree on BOTH ends before blaming certificates
execute date
execute time
diagnose sys ntp status

# From the client side (FAC shell or any Linux host), inspect what
# the FortiGate is actually presenting:
#   openssl s_client -connect <scim_fqdn>:<scim_https_port> -servername <scim_fqdn>
Disabling client-identity-check is a valid isolation step to prove the fault is certificate-related. It is not a fix. Once you have identified the real cause, re-enable it. You are protecting a write-capable endpoint into your identity store, and a bearer token alone is a single factor sitting in someone’s configuration backup.
Gotcha 4: Groups provision successfully but policy never matches
Symptom: diagnose test scim list-groups returns exactly what you expect. Users authenticate through SAML without error. But the firewall policy keyed to grp-saml-it never matches, and traffic falls through to the implicit deny.
Cause: The string in set group-name does not byte-for-byte equal what SCIM provisioned. Common variants: someone typed the AD sAMAccountName instead of the SCIM display name, the group has a space in it and got truncated, case differs, or the group was renamed on the IdP after the FortiGate policy was written. A rename on the IdP side does not update the string in your config match block. It orphans it, silently.
Resolution: Treat diagnose test scim list-groups as the authoritative source and copy from it directly.
# 1. Get the authoritative strings
diagnose test scim list-groups

# 2. Compare against what policy is looking for
show full-configuration user group | grep -A6 "config match"

# 3. Quote any group name containing spaces or punctuation
config user group
    edit "grp-saml-fieldops"
        config match
            edit 1
                set server-name "SCIM-SAML"
                set group-name "Field Operations"
            next
        end
    next
end

# 4. After a test login, confirm the resolved group on the session
diagnose firewall auth list

# 5. If a stale session is masking the fix, clear and retest
diagnose firewall auth clear
Build a change-control dependency for this. Group renames in the identity source are a FortiGate change, whether or not anyone on the identity team believes that. If you run more than a handful of these, script a weekly comparison of list-groups output against every group-name referenced in your configuration and alert on orphans.
Gotcha 5: De-provisioning does not evict live sessions
Symptom: A user is disabled in the identity source. diagnose test scim list-users confirms they are gone from the FortiGate. And they are still moving traffic through a policy that requires their group.
Cause: SCIM manages the directory. It does not manage the session table. An authenticated firewall user entry, an SSL VPN tunnel, and an established session all persist independently of the identity record that created them, until an idle timeout, a hard timeout, or an administrative action ends them. This is not a defect; it is a separation of concerns. But if your offboarding runbook stops at “disabled in the IdP,” you have a control gap with a measurable duration.
Resolution: Shorten the window with timeouts, and close it immediately with an eviction step.
# Shorten the exposure window
config system global
    set auth-session-limit block-new
end

config user setting
    set auth-timeout 30              # minutes of idle before re-auth
    set auth-timeout-type idle-timeout
end

# See who is currently authenticated
diagnose firewall auth list

# Immediate eviction, all authenticated users
diagnose firewall auth clear

# SSL VPN specific
execute vpn sslvpn list
execute vpn sslvpn del-tunnel <index>

# Verify the directory really did drop them
diagnose test scim list-users
Automate it. A FortiGate automation stitch triggered on the relevant user event, with an action that clears the authenticated session, converts a manual runbook step into an enforced control. Build it, then test it by actually disabling a real test account and timing how long the session survives. Document that number. It is the honest answer to “how fast can you revoke access,” and it is almost never what people assume.
6. Deployment Checklist
| # | Item | Proof |
|---|---|---|
| 1 | Firmware is 7.6.1 or later and CLI attribute names confirmed on the box | get system status, set ? |
| 2 | NTP synchronized on FortiGate and identity provider | diagnose sys ntp status |
| 3 | Server cert CN or SAN matches the hostname in base-url |
openssl s_client from the client side |
| 4 | SCIM ports set explicitly, HTTP port not exposed on any interface | show system global | grep scim |
| 5 | Listener on a dedicated loopback, constrained by local-in policy | show firewall local-in-policy |
| 6 | client-identity-check enabled in the final state |
show full-configuration user scim |
| 7 | Initial sync executed and users plus groups landed | diagnose test scim list-users / list-groups |
| 8 | SAML object bound with set scim-client |
show user saml |
| 9 | Group names in config match copied verbatim from diagnostics |
Successful test login with correct group in diagnose firewall auth list |
| 10 | De-provisioning tested end to end, revocation time documented | Disable a test account, time the session teardown |
7. Closing Notes
SCIM on FortiOS is a small feature with an outsized effect on how identity-aware policy actually behaves in production. It removes the two worst properties of assertion-only SAML: you can no longer write a policy against a group that does not exist, and you no longer depend on someone remembering to tell the network team that a group got renamed.
Two things are worth internalizing before you roll this out at scale. First, the FortiGate is the SCIM server even though the configuration object is called a client, and every troubleshooting instinct you have will be backwards until that lands. Second, this endpoint accepts authenticated writes into the identity store that gates your firewall policy. Treat the credential, the certificate, and the exposed port with the same rigor you would apply to an administrative interface, because functionally that is what it is.
Verify the CLI attribute names against your specific build before you commit anything to a template. The schema moved once already between 7.6.1 and 7.6.2, and set ? costs you three seconds.
InfoSecMonkey — No fluff. Just the config that works.
Tested against FortiOS 7.6.x. All addresses use RFC 2544 documentation space (198.18.0.0/15) for public ranges and RFC 1918 space (10.0.0.0/16) for internal ranges. Replace every <placeholder> with values from your own environment.
Recent posts
-

-

DNS is one of those technologies that quietly underpins... Full Story
-

BGP issues on FortiGate firewalls usually trace back to... Full Story
-

Every time your laptop talks to your router, a... Full Story
-

If you've spent any time configuring NAT on a... Full Story
-

If you have spent any time configuring firewall policies... Full Story
-

High availability on FortiGate is one of those features... Full Story
-

If you've configured SD-WAN on a FortiGate, you've almost... Full Story
-

FortiLink is the management protocol that turns a FortiSwitch... Full Story
-

FortiSwitches are pretty rock solid from Mean Time Between... Full Story
-

This is a quicky tip. Have you ever gone... Full Story
-

DNS is one of those quiet pieces of internet... Full Story
-

This article is an updated version of the previous... Full Story
-

You will add ns2 as a secondary (slave) BIND9... Full Story
-

In the process of deploying my lab, I needed... Full Story
-

RFC 8805, used to be known as Self-Correcting IP... Full Story
-

Years back, I wrote an article about certificate pinning. ... Full Story
-

FortiGates have the ability to send alerts to Microsoft... Full Story
-

In this post, I am going to walk through... Full Story
-

Troubleshooting VoIP on a FortiGate can feel like trying... Full Story
-

Prior to FortiOS 7.0, there were three commands to... Full Story
-

In this post, I am going to go over... Full Story
-

What we are going to do: We are going... Full Story
-

Choosing between FGCP (FortiGate Clustering Protocol) and FGSP (FortiGate... Full Story
-

Creating a VLAN on macOS (The "Pro" Move) A... Full Story
-

This blog post explores the logic behind how macOS... Full Story
-

Pretty Fly for a Wi-Fi Tell My Wi-Fi Love... Full Story
-

Part of my daily gig is creating BoMs (Bill-of-Materials)... Full Story
-

ICMP introduces several security risks, but careful filtering, rate... Full Story
-

The command diag debug application dhcps -1 enables full... Full Story
-

In the world of FortiOS, execute tac report is... Full Story
-

LLDP; What is it The Link Layer Discovery Protocol... Full Story
-

What it actually does When you run diagnose fdsm... Full Story
-

Monkey Bites are bite-sized, high-impact security insights designed for... Full Story
-

I have run macOS in macOS with Parallels but... Full Story
-

Don't be confused with my other FortiNAC posts where... Full Story
-

This is the third session in a multi-part article... Full Story
-

Today I was configuring key-based authentication on a FortiGate... Full Story
-

Netcat, often called the "Swiss Army knife" of networking,... Full Story
-

At its core, IEEE 802.1X is a network layer... Full Story
-

In case you did not see the previous FortiNAC... Full Story
-

This is our 5th session where we are going... Full Story
-

Now that we have Wireshark installed and somewhat configured,... Full Story
-

The Philosophy of Packet Analysis Troubleshooting isn't about looking... Full Story
-

InfoSecMonkey Threat Response October 24, 2026 | No fluff.... Full Story
-

InfoSecMonkey Threat Response October 24, 2026 | No fluff.... Full Story
-

Plus what you actually get with FortiCare Essential, Premium... Full Story