
If you've spent any time configuring user authentication on... Full Story
By Manny Fernandez
July 12, 2026
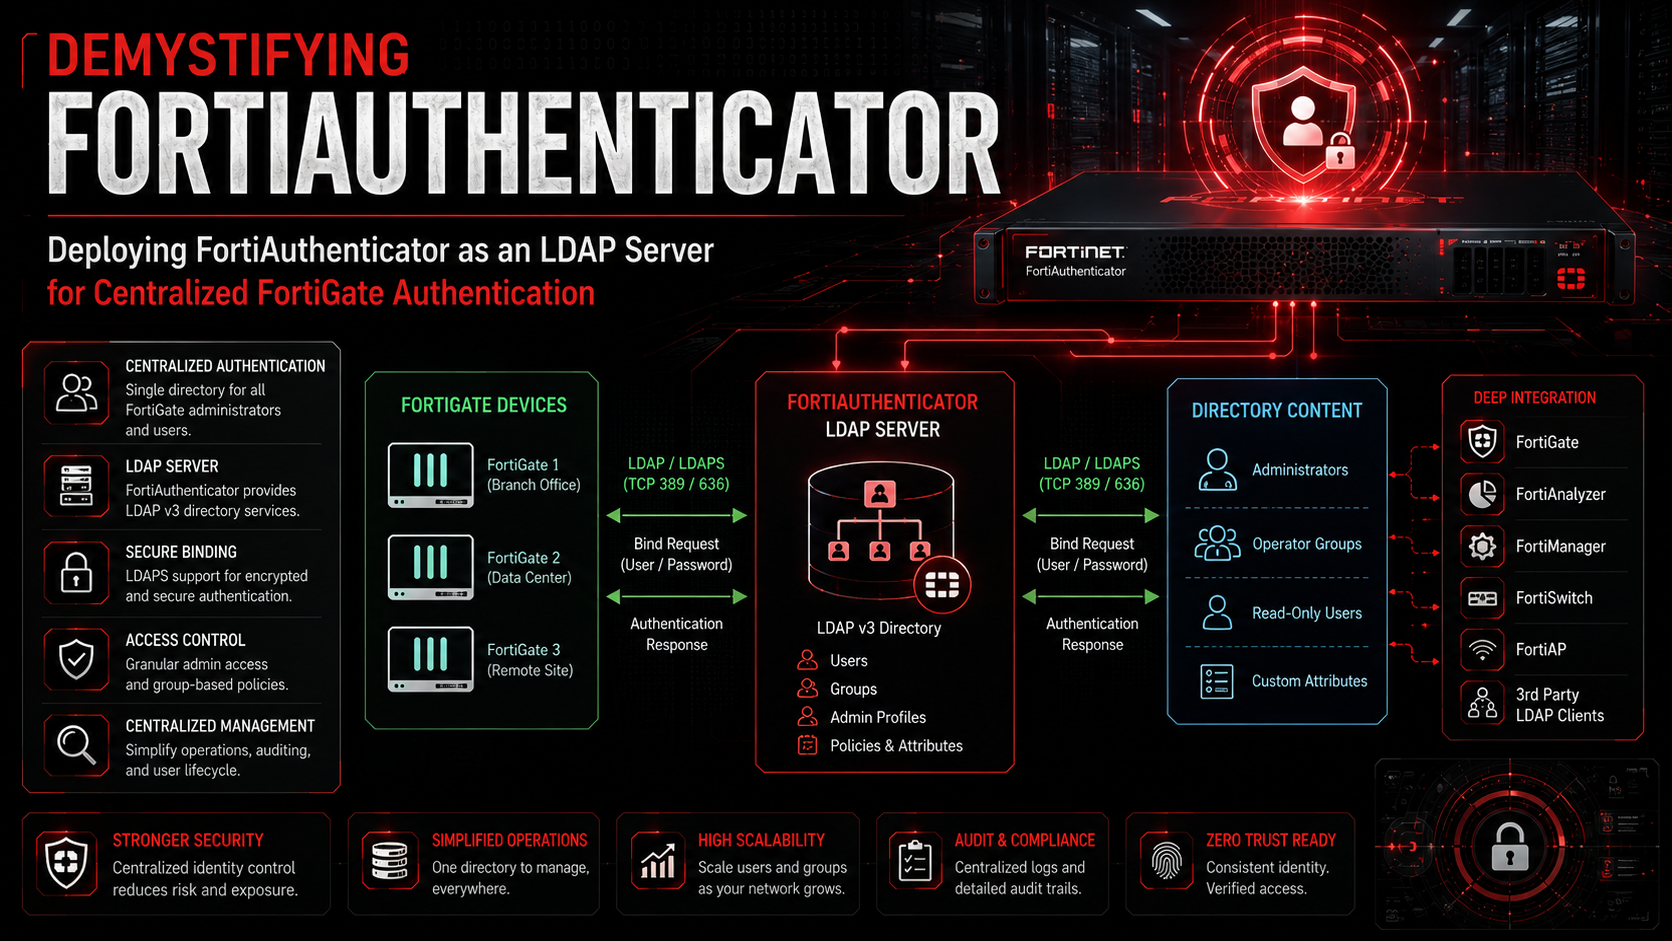
Demystifying FortiAuthenticator: Deploying FortiAuthenticator as an LDAP Server for Centralized FortiGate Authentication
1. Executive Summary
Objective: This guide turns a FortiAuthenticator (FAC) appliance or VM into a standalone LDAP directory that other devices, starting with a FortiGate, can bind to and query for user authentication. Instead of pointing every firewall, VPN, and Wi-Fi controller at a sprawling Active Directory forest, you publish a clean, purpose-built LDAP tree on the FAC and centralize account lifecycle in one place. This matters when you need a lightweight directory for network gear, a lab or PoC directory that does not touch production AD, or a segmented OT and guest identity store that stays inside your security zone.
Target Audience: Network Security Engineers, Systems Engineers, and Identity and Access Management administrators who already run FortiGate and want FortiAuthenticator to act as the authoritative LDAP source for network authentication (SSL VPN, IPsec dial-up, admin login, captive portal, and 802.1X back ends that speak LDAP).
2. Prerequisites and Architecture
Assumed Knowledge
You should already be comfortable with the following:
– LDAP fundamentals: what a Distinguished Name (DN) is, and the difference between a base DN, an Organizational Unit (OU), a Common Name (CN), and a User ID (UID).
– The concept of a bind operation, where a client authenticates to the LDAP server before it is allowed to search the tree.
– Basic FortiGate administration: creating LDAP server objects, user groups, and identity-based firewall or VPN policies.
– FortiAuthenticator navigation: the difference between “Remote Auth. Servers” (FAC acting as an LDAP client to AD) and “LDAP Service” (FAC acting as the LDAP server itself). This guide is about the second one.
Environment and Lab Requirements
| Requirement | Detail |
| FortiAuthenticator | Hardware appliance or FortiAuthenticator-VM. This guide targets FortiAuthenticator 8.0.x. Menu paths are stable back to 6.x. |
| FAC license | The LDAP Service is a base feature. User count is bound by your user license (SKU or evaluation entitlement). No add-on SKU is needed for LDAP server functionality. |
| FortiGate | Any supported FortiOS 7.x or 8.x build, used here as the first LDAP client. |
| Network reachability | The FortiGate must reach the FAC interface IP on TCP/389 (LDAP) or TCP/636 (LDAPS). |
| Certificate (LDAPS only) | A server certificate on the FAC whose CN or SAN matches the hostname or IP the client will use, plus the issuing CA chain to import as a trusted CA on the FortiGate. |
| Lab platform (optional) | EVE-NG, Proxmox, VMware ESXi, or a public cloud VPC will all host FortiAuthenticator-VM and FortiGate-VM for a self-contained build. |
Component Table
| Component | Role | Example IP / FQDN | Example DN |
| FortiAuthenticator-VM | LDAP server (directory host) | 10.10.10.10
auth.infosecmonkey.lab |
n/a |
| FortiGate | LDAP client (relying device) | 10.10.10.1
fw.infosecmonkey.lab |
n/a |
| Base DN (root) | Top of the published tree | n/a | dc=infosecmonkey,dc=lab |
| Organizational Unit | Container for accounts | n/a | ou=People,dc=infosecmonkey,dc=lab |
| Service bind account | Account FortiGate uses to bind and search | n/a | uid=svc-ldap,ou=People,dc=infosecmonkey,dc=lab |
| Test user | End user who authenticates | n/a | uid=bwayne,ou=People,dc=infosecmonkey,dc=lab |
| User group | Group returned for policy matching | n/a | cn=VPN-Users,ou=People,dc=infosecmonkey,dc=lab |
Logical flow: Client (SSL VPN user) --> FortiGate (LDAP client) --> bind + search --> FortiAuthenticator LDAP Service (directory tree)
3. Step-by-Step Implementation Workflow
The build has two halves. Phases 1 through 5 happen on the FortiAuthenticator (create the identities, publish the tree, open the service). Phase 6 happens on the FortiGate (consume the directory). Phase 7 wires the group into policy.
Phase 1: Create the local users
The Goal: Populate the FortiAuthenticator user database with the accounts you intend to publish. LDAP tree nodes reference users that must already exist here.
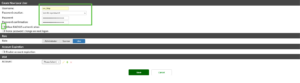
The Action: Go to Authentication > User Management > Local Users and select Create New. Create the service bind account (for example svc-ldap) and at least one end user (for example bwayne). Set a password for each and set Role to User. If these accounts are only for LDAP, clear Allow RADIUS authentication to keep them scoped.
GUI Verification: After saving each user, re-open it. You must see and enable Allow LDAP browsing. This is the single most common miss in the entire build. Without it, the account is invisible to LDAP binds and searches even though it exists in the database.
Phase 2: Create the user groups
The Goal: Create the group object that the FortiGate will match against in policy. Group membership is what your firewall or VPN policy actually keys on.
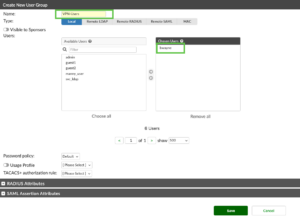
The Action: Go to Authentication > User Management > User Groups and select Create New. Create a group such as VPN-Users. Set the type to Local and add bwayne (and any other end users) as members. Optionally create a second group such as LDAP-Admins that contains only the svc-ldap bind account, which keeps the service identity cleanly separated.
GUI Verification: The new group appears under User Groups with the correct member count. Confirm bwayne is listed as a member of VPN-Users.
Phase 3: Build the LDAP directory tree
The Goal: Define the hierarchical structure that the FAC will publish over LDAP, then bind your existing users and groups into it. This is the step that transforms flat user records into a browsable directory.
The Action: Go to Authentication > LDAP Service > Directory Tree.
1. Select the default root entry dc=example,dc=com to edit it, and set the Distinguished Name (DN) to your own base, for example dc=infosecmonkey,dc=lab. If your domain has more parts (for example corp.infosecmonkey.lab), enter each part as its own DC component: dc=corp,dc=infosecmonkey,dc=lab.

2. Select the green plus icon next to the root DN to add a node. In the Class field choose Organizational Unit (ou) and create ou=People.
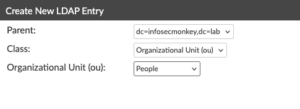
3. Select the green plus next to ou=People and add the users. Choose the User ID (uid) class and select the existing svc-ldap and bwayne accounts from the dropdown. Each becomes a uid= node.
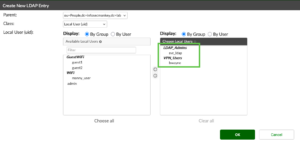
4. Add the group as a node as well: select the plus next to ou=People, choose the Common Name (cn) or group class, and bind the VPN-Users group. This publishes cn=VPN-Users so group filters resolve.
5. Select Save to commit the tree.
GUI Verification: Use Expand All in the Directory Tree view. Hover over bwayne and confirm the full DN reads uid=bwayne,ou=People,dc=infosecmonkey,dc=lab. Both the bind account and the end users must appear as objects below the base DN, or the FortiGate bind will fail later.
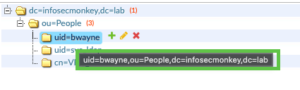
Gotcha in advance: The service bind account (svc-ldap) must itself be a node in the tree. A bind account that exists in the user database but is not placed in the directory tree cannot bind.
Phase 4: Open the LDAP service on the interface
The Goal: Allow inbound LDAP connections to reach the FortiAuthenticator. By default the network interface does not accept LDAP, so the tree you just built is not yet reachable.
The Action: Go to Network > Interfaces, edit the interface that faces the FortiGate (for example port1), and under Admin Access or Access Rights > Services enable the service:
– LDAP for cleartext on TCP/389, or
– Secure LDAP (LDAPS) for TLS on TCP/636 (recommended for anything crossing an untrusted segment).
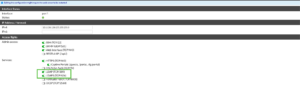
Save the interface.
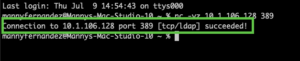
GUI Verification: From a workstation on the same segment, a quick nc -vz 10.1.106.128 389 (or 636) should report the port open. A refused or timed-out connection here means the service is not bound to the interface.
Phase 5 (Optional but recommended): Enable LDAPS and set authentication behavior
The Goal: Encrypt the bind and search traffic, and confirm which factor the LDAP service verifies.
The Action:
1. Import or generate a server certificate under Certificate Management > End Entities > Local Services (or System > Certificates, depending on build) whose subject matches auth.infosecmonkey.lab or the interface IP the FortiGate targets.
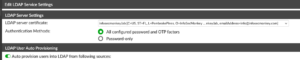
2. Go to Authentication > LDAP Service > General. Bind the server certificate used for LDAPS. On 8.0.2 and later, the Authentication Methods option lets you choose which authentication factor the LDAP service checks during a bind (for example password only, or password plus token). Set this to match your policy.
3. Export the issuing CA certificate. You will import it as a trusted CA on the FortiGate in Phase 6 so it trusts the FAC certificate.
GUI Verification: The LDAP Service > General page shows the bound certificate and your chosen authentication method. The interface from Phase 4 shows Secure LDAP enabled.
Phase 6: Configure the FortiGate as an LDAP client
The Goal: Point the FortiGate at the FortiAuthenticator directory, bind with the service account, and confirm the tree resolves.
The Action (GUI): On the FortiGate, go to User & Authentication > LDAP Servers and select Create New:
– Name: LDAP-FAC
– Server IP/Name: 10.1.106.128
– Server Port: 389 (or 636 for LDAPS)
– Common Name Identifier: uid (this must match the class you used for user nodes in Phase 3)
– Distinguished Name: dc=infosecmonkey,dc=lab
– Bind Type: Regular
– Username (bind DN): uid=svc-ldap,ou=People,dc=infosecmonkey,dc=lab
– Password: the svc-ldap password
For LDAPS, enable Secure Connection, set Protocol to LDAPS, and select the trusted CA you imported.
Select Fetch DN (or Browse) to confirm the tree loads. A successful fetch returns the dc=infosecmonkey,dc=lab hierarchy.
The Config (FortiGate CLI):
config user ldap
edit "LDAP-FAC"
set server "10.1.106.128"
set cnid "uid"
set dn "dc=infosecmonkey,dc=lab"
set type regular
set username "uid=svc_ldap,ou=People,dc=infosecmonkey,dc=lab"
set password <svc_ldap_password>
# LDAPS:
set secure ldaps
set port 636
set ca-cert "Monkey-CA"
next
end
GUI Verification: On the FortiGate LDAP object, the Test Connectivity button returns success (bind worked) and Test User Credentials with bwayne and the correct password returns success (search plus authentication worked).
Phase 7: Bind the directory to a user group and policy
The Goal: Make the LDAP identity usable in a real access decision.
The Action: On the FortiGate, go to User & Authentication > User Groups > Create New. Add a Remote Group entry, select LDAP-FAC as the remote server, and match the VPN-Users group (or match all users under the base DN). Then reference this user group in the target policy, for example an SSL VPN portal mapping or a firewall authentication rule.
The Config (FortiGate CLI):
config user group
edit "FAC-VPN-Users"
set member "LDAP-FAC"
config match
edit 1
set server-name "LDAP-FAC"
set group-name "cn=VPN-Users,ou=People,dc=infosecmonkey,dc=lab"
next
end
next
end
GUI Verification: The user group shows LDAP-FAC as a remote server with the matched group. The group is now selectable as Source User(s) in an SSL VPN or firewall policy.
4. Verification and Validation
Validate from three vantage points: the FortiGate, an independent LDAP client, and the FortiAuthenticator itself.
1. FortiGate authentication test (the definitive check). From the FortiGate CLI, run a live bind and authenticate as an end user:
diagnose test authserver ldap LDAP-FAC bwayne <bwayne_password>
Success looks like authenticate bwayne against LDAP-FAC succeeded! along with the group memberships returned for bwayne. Seeing cn=VPN-Users in the returned groups confirms both authentication and group resolution.
2. Independent LDAP query (proves the directory is correct, not just the FortiGate). From any Linux host with ldap-utils:
# Cleartext bind and search
ldapsearch -x -H ldap://10.10.10.10 \
-D "uid=svc_ldap,ou=People,dc=infosecmonkey,dc=lab" -W \
-b "dc=infosecmonkey,dc=lab" "(uid=bwayne)"
# LDAPS variant
ldapsearch -x -H ldaps://auth.infosecmonkey.lab \
-D "uid=svc_ldap,ou=People,dc=infosecmonkey,dc=lab" -W \
-b "dc=infosecmonkey,dc=lab" "(uid=bwayne)"
Success returns the bwayne entry with its attributes and result: 0 Success. An empty result set with a success code usually means the account exists but Allow LDAP browsing is disabled (see Troubleshooting).
3. FortiAuthenticator-side confirmation. In the FAC GUI go to Logging > Log Access > Logs and filter for the svc_ldap bind and the bwayne authentication events. For a live packet-level view, browse to https://<fac_mgmt_ip>/debug, choose Other > LDAP, and run the FortiGate test again while watching the trace.

What success looks like end to end: The FortiGate reports the bind and user credential tests as successful, diagnose test authserver ldap returns success with cn=VPN-Users in the group list, an independent ldapsearch returns the user object with result: 0, and the FAC logs show a matching bind and authentication pair.
5. Troubleshooting and Gotchas
Gotcha 1: “Allow LDAP browsing” is disabled on the account
Symptom: Test Connectivity succeeds (the bind works), but Test User Credentials fails, or ldapsearch returns result: 0 Success with zero entries. The account clearly exists but is invisible to searches.
Diagnose: Run the independent ldapsearch from Section 4. A success code with an empty result set is the fingerprint of this issue. On the FAC, open the user under Authentication > User Management > Local Users.
Resolve: Enable Allow LDAP browsing on every account that must be bindable or searchable, including the svc-ldap bind account and each end user. This is per-account and is off by default.
Gotcha 2: LDAP service not enabled on the interface
Symptom: The FortiGate Test Connectivity times out or is refused. diagnose test authserver ldap returns a connection error rather than an authentication result.
Diagnose: From a host on the same segment, run nc -vz <fac_ip> 389 (or 636). A closed or filtered port confirms the service is not bound to the interface.
Resolve: Go to Network > Interfaces, edit the FortiGate-facing interface, and enable LDAP (and/or Secure LDAP) under Access Rights > Services. Confirm no upstream ACL or FortiGate policy is dropping TCP/389 or TCP/636 between the two devices.
Gotcha 3: Common Name Identifier mismatch (uid vs cn)
Symptom: Connectivity and bind succeed, but user authentication fails with “user not found” even though the DN is correct. Group matching also comes back empty.
Diagnose: Compare the class you used for user nodes in the FAC directory tree (Phase 3) against the Common Name Identifier on the FortiGate LDAP object (Phase 6). If the tree publishes users as uid=bwayne but the FortiGate is configured with cn as the identifier, the search filter never matches.
Resolve: Set the FortiGate Common Name Identifier to uid so it matches the tree. As a rule, use uid on both sides for FortiAuthenticator-hosted directories, since uid is the value users actually type at logon.
Gotcha 4 (LDAPS): Certificate chain not trusted
Symptom: LDAPS binds fail with a TLS or certificate verification error (for example SSL routines::certificate verify failed / unable to get local issuer certificate), while cleartext LDAP on 389 works fine.
Diagnose: Temporarily test on port 389 to isolate the fault to TLS. Then verify the FortiGate trusts the full issuing chain and that the FAC server certificate CN or SAN matches the exact hostname or IP the FortiGate targets.
Resolve: Import the complete CA chain (root plus any intermediates) into the FortiGate trusted CA store, and select it on the LDAP object. Ensure the FAC LDAPS certificate subject matches the Server IP/Name value used by the client. A CN of auth.infosecmonkey.lab will not validate if the FortiGate connects to 10.10.10.10.
Gotcha 5 (bonus): Bind account absent from the directory tree
Symptom: Bind fails outright with invalid credentials even though the svc-ldap password is correct and the account exists in the local user database.
Diagnose: In Authentication > LDAP Service > Directory Tree, expand the tree and look for a uid=svc-ldap node under ou=People.
Resolve: Add the bind account as a node in the directory tree. An account present only in the user database, but not placed in the published tree, is not a valid bind target.
Recent posts
-

-

DNS is one of those technologies that quietly underpins... Full Story
-

BGP issues on FortiGate firewalls usually trace back to... Full Story
-

Every time your laptop talks to your router, a... Full Story
-

If you've spent any time configuring NAT on a... Full Story
-

If you have spent any time configuring firewall policies... Full Story
-

High availability on FortiGate is one of those features... Full Story
-

If you've configured SD-WAN on a FortiGate, you've almost... Full Story
-

FortiLink is the management protocol that turns a FortiSwitch... Full Story
-

FortiSwitches are pretty rock solid from Mean Time Between... Full Story
-

This is a quicky tip. Have you ever gone... Full Story
-

DNS is one of those quiet pieces of internet... Full Story
-

This article is an updated version of the previous... Full Story
-

You will add ns2 as a secondary (slave) BIND9... Full Story
-

In the process of deploying my lab, I needed... Full Story
-

RFC 8805, used to be known as Self-Correcting IP... Full Story
-

Years back, I wrote an article about certificate pinning. ... Full Story
-

FortiGates have the ability to send alerts to Microsoft... Full Story
-

In this post, I am going to walk through... Full Story
-

Troubleshooting VoIP on a FortiGate can feel like trying... Full Story
-

Prior to FortiOS 7.0, there were three commands to... Full Story
-

In this post, I am going to go over... Full Story
-

What we are going to do: We are going... Full Story
-

Choosing between FGCP (FortiGate Clustering Protocol) and FGSP (FortiGate... Full Story
-

Creating a VLAN on macOS (The "Pro" Move) A... Full Story
-

This blog post explores the logic behind how macOS... Full Story
-

Pretty Fly for a Wi-Fi Tell My Wi-Fi Love... Full Story
-

Part of my daily gig is creating BoMs (Bill-of-Materials)... Full Story
-

ICMP introduces several security risks, but careful filtering, rate... Full Story
-

The command diag debug application dhcps -1 enables full... Full Story
-

In the world of FortiOS, execute tac report is... Full Story
-

LLDP; What is it The Link Layer Discovery Protocol... Full Story
-

What it actually does When you run diagnose fdsm... Full Story
-

Monkey Bites are bite-sized, high-impact security insights designed for... Full Story
-

I have run macOS in macOS with Parallels but... Full Story
-

Don't be confused with my other FortiNAC posts where... Full Story
-

This is the third session in a multi-part article... Full Story
-

Today I was configuring key-based authentication on a FortiGate... Full Story
-

Netcat, often called the "Swiss Army knife" of networking,... Full Story
-

At its core, IEEE 802.1X is a network layer... Full Story
-

In case you did not see the previous FortiNAC... Full Story
-

This is our 5th session where we are going... Full Story
-

Now that we have Wireshark installed and somewhat configured,... Full Story
-

The Philosophy of Packet Analysis Troubleshooting isn't about looking... Full Story
-

InfoSecMonkey Threat Response October 24, 2026 | No fluff.... Full Story
-

InfoSecMonkey Threat Response October 24, 2026 | No fluff.... Full Story
-

Plus what you actually get with FortiCare Essential, Premium... Full Story